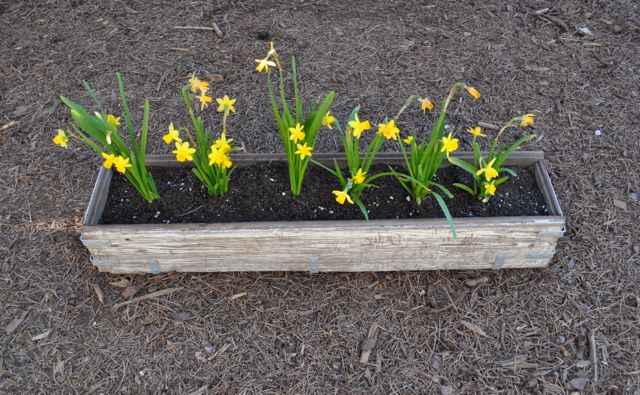
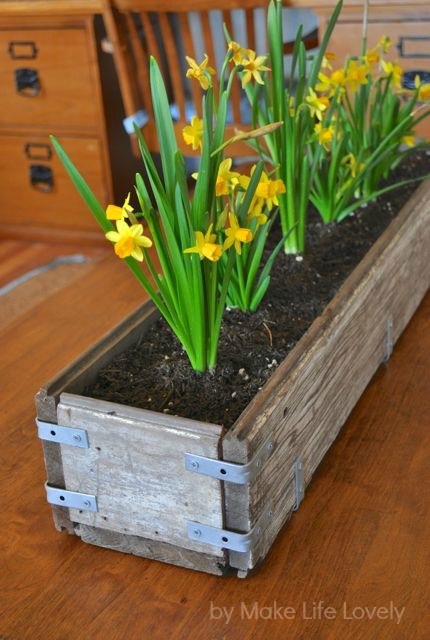
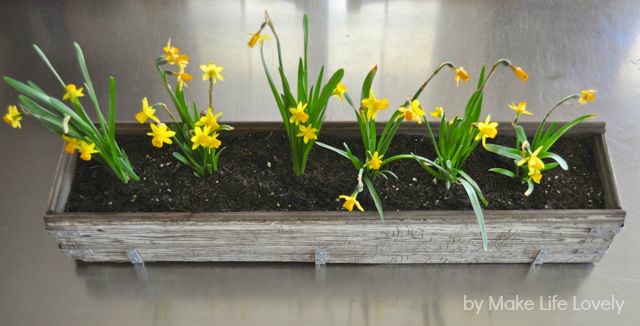
I am so excited to share this easy and beautiful project! It is probably one of my very favorite projects I’ve shared with you. My husband and I both came up with the idea, and he helped me build it.

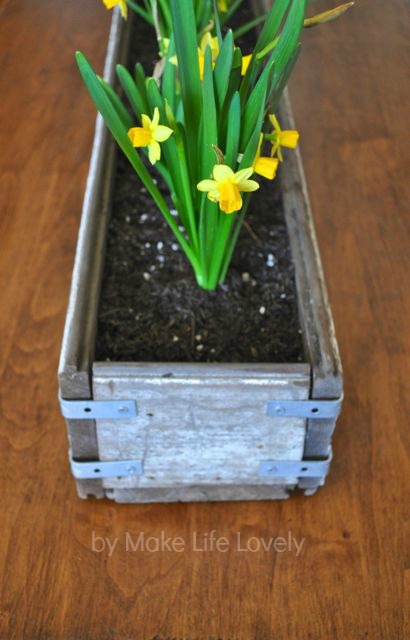
It is a lovely distressed planter box that is made out of some old wood that we had that was just waiting to be used! We used some of this wood on our Baby Food Jar Wood Vase & Candleholder, and we had just enough left to make this planter box. The wood was already old and distressed, so I was lucky that we didn’t have to do anything extra to it.
If you don’t have any old wood lying around, don’t be discouraged, you can still make this! You can use new wood, and it will look great as is. You can distress it by sanding, or adding some stain or brown paint over the top of some watered down white paint. There are many tutorials out there to distress wood that you could follow.
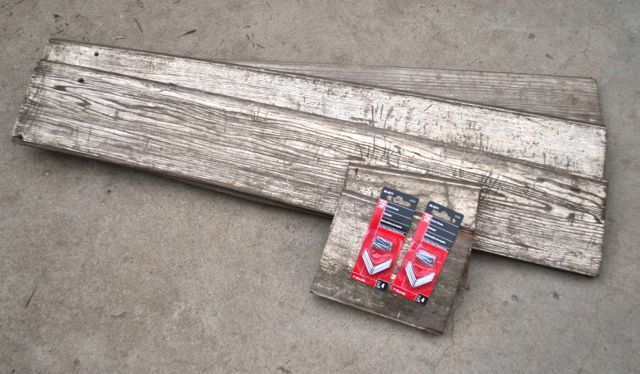
- Wood- We used three long pieces that were about 2 feet long (one for each side and one for the base), and then two shorter pieces (for the ends).
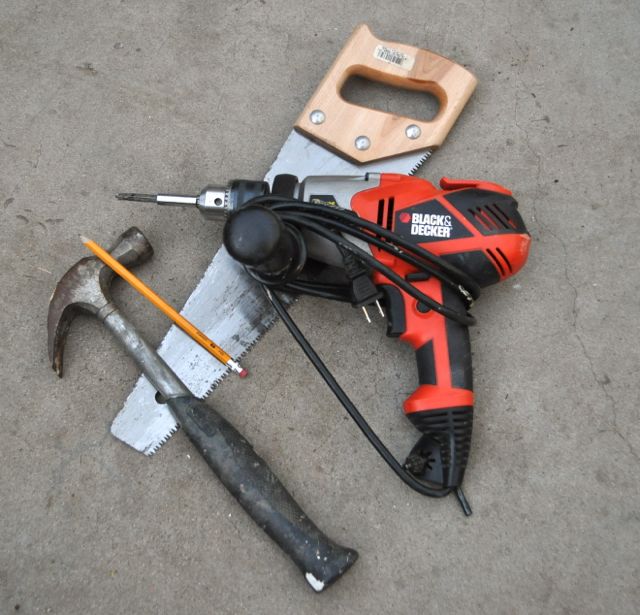
- L brackets and screws
- Drill
- Saw
- Hammer
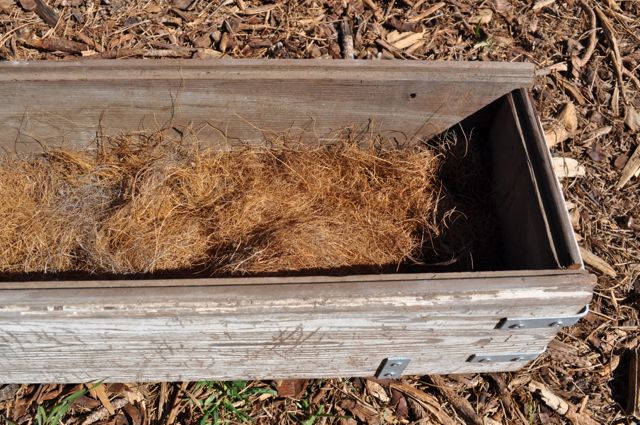
- Dried coconut husks (Walmart- comes in a bowl shape in the garden section)
- Soil
- Flowers or plants


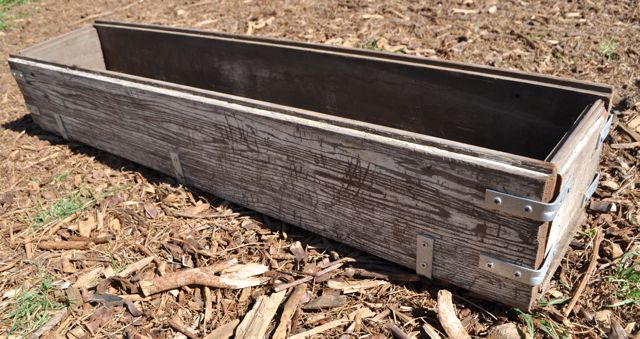
The great thing about using old, distressed wood, is that your measurements don’t have to be too exact or perfect. The imperfections of the wood make this project very forgiving!
Screw in the L brackets to hold the wood together with your drill. We used 14 brackets for this planter box, but ours is very long (about 2 feet long), so you may not need that many.


XO, Laura
Linking Up Here: Lil Luna, Someday Crafts, House of Hepworths, Somewhat Simple, The 36th Avenue, Whipperberry,Tatertots and Jello, Lily White Designs, At Home with Bobi, Skip To My Lou, Craft-O-Maniac, Sugar Bee Crafts
MrsB at The Bees Times Three says
This is so pretty! I love the versatility, and the pretty pop of yellow is perfect for spring! Visiting from Lil Luna :o)
Falon
thebeestimesthree.blogspot.com
Laura @ Make Life Lovely says
Thank you! I love those yellow daffodils, too, such a beautiful color!
Michelle@Somedaycrafts says
Love this! I am featuring this at somedaycrafts.blogspot.com.
Laura @ Make Life Lovely says
Thank you so much Michelle! Twice in one week, I’m honored!!
Mandy Jean says
So cute!!!! I love it!!
Take Care,
Mandy Jean
http://www.mandyjeanchic.com
Laura @ Make Life Lovely says
Thanks Mandy Jean!
Julie @ Being Home says
Love this! I may try and make one. 🙂 Thanks for sharing.
Laura @ Make Life Lovely says
You should give it a try! It’s pretty easy to make, and looks so pretty with bright flowers inside. Good luck!
Shannon says
I literally don’t think I could love this anymore than I already do. SO beautiful! This is making me anxious for spring!!
Shannon
ikneadtobake.blogspot.com
Laura @ Make Life Lovely says
Thank you so much Shannon! Just checked out your blog and I LOVE it!
Deborah says
Great design. I’ve always love the look of old wood and these highlight it beautifully. If you don’t mind, the one thing (in my own little opinion) that would add to this would be if the “L” brackets were toned down a bit as in rusty in appearance… but again, that’s just me.
Laura @ Make Life Lovely says
Thanks for your comment, Deborah. I actually thought about aging the metal, but I ended up liking the contrast between the bright silver hardware against the old aged wood. Thanks for reading!
Pieced Pastimes says
Hi Laura – This box turned out so lovely. I like the mix of the old wood with the brackets. It gives it a vintage industrial look. The daffodils are such a nice way to bring some sunshine into your home.
Thanks for sharing,
Suzanne
Pieced Pastimes
Laura @ Make Life Lovely says
Thanks Suzanne, I appreciate the compliment! Yes, I love the vintage industrial look, and am happy with how this turned out. Thanks for reading!
Beckie @ Infarrantly Creative says
This is amazing ! I love those daffodils – very lovely! Such a great idea Laura! Thank you for this wonderful spring inspiration you shared!
Laura @ Make Life Lovely says
You’re welcome, Beckie! So excited to see a comment from you! 🙂
Virginia says
Great idea! This is so pretty!
Laura @ Make Life Lovely says
Thanks Virginia! It was a lot of fun to make.
Lisa Huff @ Snappy Gourmet says
This is great! I think I need to find some old wood!
Laura @ Make Life Lovely says
You definitely should give it a shot! If you can’t find old wood, you can always use new wood, or distress new wood to look like this. Good luck!
Laura @ Make Life Lovely says
Definitely get your hands on some old wood! So many fun things to make with it. Good luck!
Michelle Lunt says
Wow Laura, I really like this project & the way it turned out. And your tutorial gives me hope that I can do it. Great job.
Warmly, Michelle
Faith, Trust & Pixie Dust
Laura @ Make Life Lovely says
Thanks Michelle, you can definitely do this! This box and the flowers have made my house look so bright and springy!
LilyWhite says
Ah! I absolutely love this project! Would you pretty please link it up to our blog hop? I think that our readers would really enjoy it! Thanks!!
Ps. I’m your new follower!
xoxo, Jordan
https://www.lilywhite-designs.com
Laura @ Make Life Lovely says
Thanks for following Jordan! I just linked my project up to your blog hop, thanks so much for the invitation! Cute blog 🙂
Liz Fourez says
Love this idea! Thanks for sharing!
Liz
Laura @ Make Life Lovely says
Thanks Liz!
Sara says
So cute! Great idea!
Laura @ Make Life Lovely says
I appreciate it Sara! We had a lot of fun making this.
Amy @ A Blossoming Life says
I love this and it seems pretty simple! Such a great centerpiece for spring!
Laura @ Make Life Lovely says
Thanks Amy, it was pretty simple. You should give it a try!
Carrie from Carrie This Home says
This is really cute–especially with the daffodils! Stopping by from Frugal Crafty Home Blog Hop–thanks for linking up 🙂
Laura @ Make Life Lovely says
It was my pleasure, thanks for stopping by! Glad you liked it.
Jennie Larsen says
Love it! I have seen some planter boxes, but yours is my fav. Love the hardware you chose. Hugs, jen
Laura @ Make Life Lovely says
Wow, thanks so much Jen! I really appreciate that 🙂
Mandy Beyeler says
Thanks for linking to Take-A-Look Tuesday over at Sugar Bee Crafts – you were featured today!!
–Mandy, http://www.SugarBeeCrafts.com
Laura @ Make Life Lovely says
Yay, thanks so much Mandy!! What a nice surprise 🙂
Sieb says
I was just walking by a container filled with old wood, wondering whether I should take some for a fun project… but to make what!? Now I know 🙂 It looks lovely, thanks for the inspiration!!
Laura @ Make Life Lovely says
You’re welcome, Sieb! Good luck, I hope you give it a try!!
April says
This is so lovely! I love daffodils too.
Laura @ Make Life Lovely says
They are so pretty and cheery, aren’t they.
Krista says
Love this! I pinned it and want to make it… great idea and tutorial, thanks for sharing it!
Krista @thehappyhousie.com
Laura @ Make Life Lovely says
Thanks Krista, and thanks for pinning! We had a lot of fun making this one.
Marvin Hansen says
Great article. I really enjoyed the photos and the step by step instructions.
Laura @ Make Life Lovely says
Thanks Marvin!
Wanessa Moore says
Your post was featured on truecharismacrafts.blogspot.com
Check it out!
Laura @ Make Life Lovely says
Cool, thanks Wanessa!! Going to check it out now…
Chelsea says
This is awesome!
Laura @ Make Life Lovely says
Thanks Chelsea!!
vandna says
This is wonderful. I would like to make it myself.
Laura @ Make Life Lovely says
Give it a try! I love how it turned out, and it’s fun to change the flowers with the different seasons.
Julia @ FaveCrafts says
Hi Laura,
What a cute project! I love it so much that I decided to feature it in our roundup of rustic fall crafts! Check it out here: https://www.favecraftsblog.com/rustic-fall-crafts/
Have a great day!
Christine says
Very attractive! Good job.