I have always had a hard time throwing away glass baby food jars.

After four kids, I have gone through plenty of them!
They are so cute and sturdy, and there are so many different ways that they can be reused.
Check out my favorite 13 baby food jar crafts for some amazing ideas on reusing these!
When Earth 911 asked if I could come up with some ideas for upcycling baby food jars, I was excited and got to work right away.
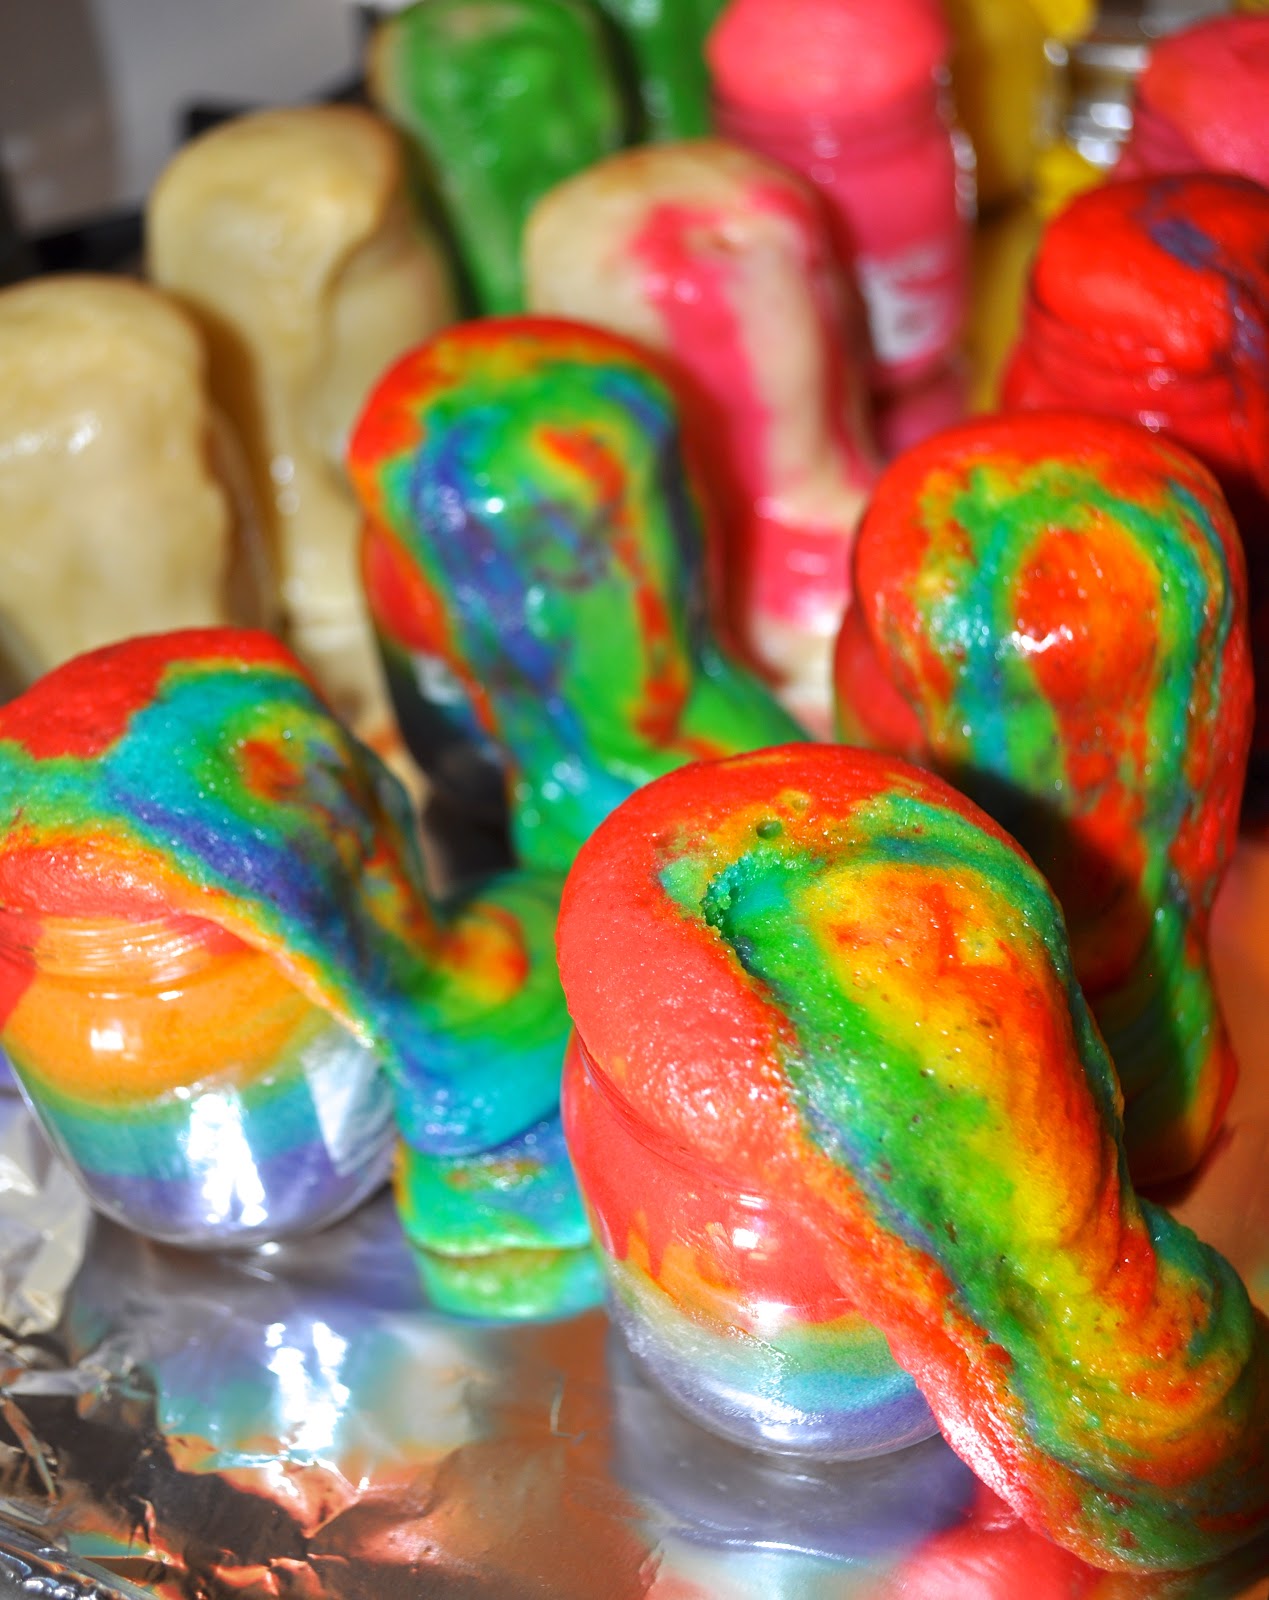
Baby Food Jar Mini Cakes
Today I’m thrilled to share with you a fun (and delicious) way to epicycle your baby food jars… bake a cake in them!

Who can resist a piece of colorful cake that is baked up and served in a cute little jar?!?
Not me.
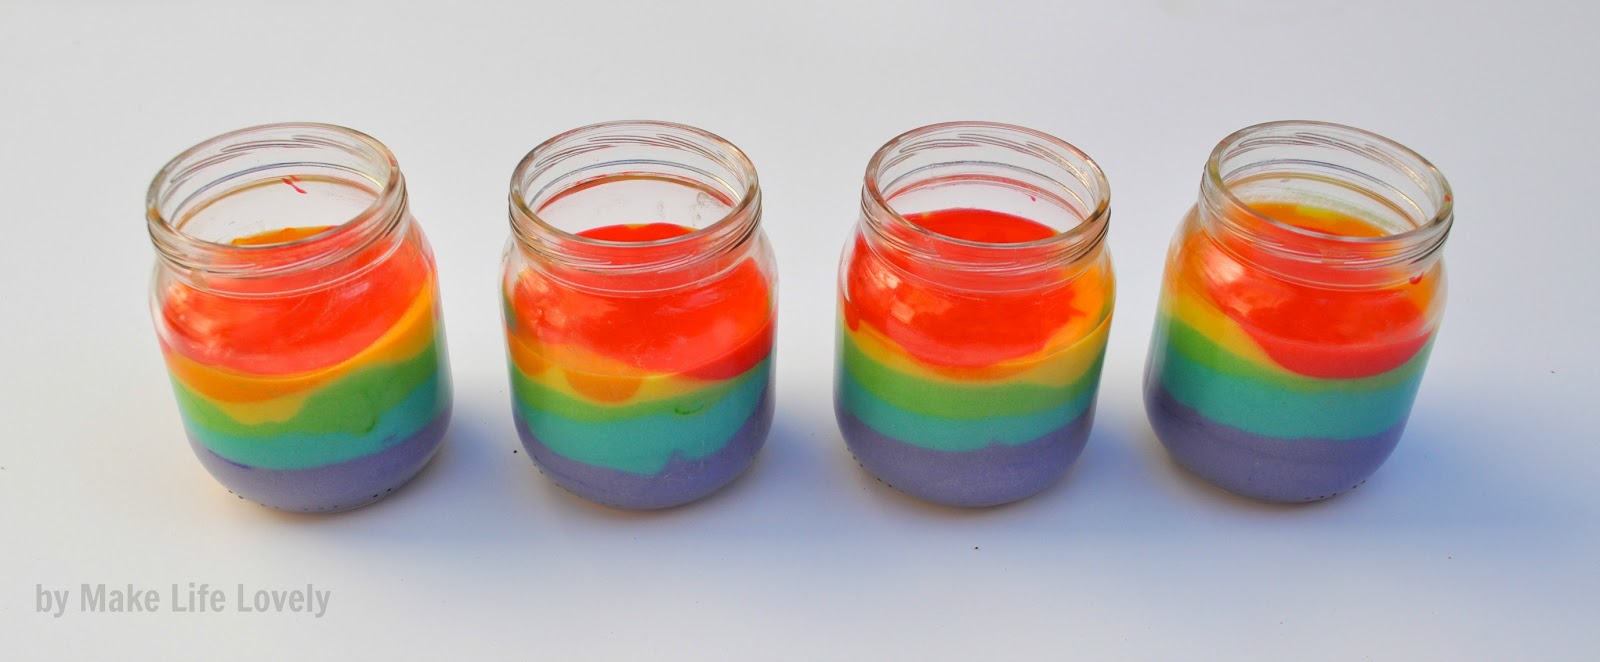
Cakes Baked in Baby Food Jars
The cake colors can be customized to fit the occasion, party colors, favorite colors, etc.
Mini cakes are a great way to regulate the amount of cake a child eats.
One jar per kid.
Ingredients and Supplies
- Cake mix (I used 2 boxes of Betty Crocker vanilla)
- Food coloring (I used the gel colors, since they come out brighter than liquid coloring)
- Baby food jars
Making and Coloring the Cake Batter


Now that your cakes are all made, you can leave the jars as is, or you can decorate them if they are for a special occasion.
I piped some white frosting on each cake, then added rainbow sprinkles over the top.

Aren’t they cute?
I’ll be making these for my son’s second birthday party later this year, because I love the portion size.
Here are the other baby food jar ideas I came up with…


You might also like these DIY serving dishes I created from dollar store items!

I used the same rainbow cake concept for my daughter’s Under the Sea party cake using different colors of blues.


You can check out the entire under the party or tons of ideas that you can use for an ocean or mermaid party, too!

You can also use tape to decorate inexpensively! See how I did it for my daughter’s Minnie Mouse birthday party.
![]()
Aarean Jergensen says
LOOOOOOOOVE THIS idea!!!!!
Laura @ Make Life Lovely says
Thanks Aarean!! The only problem is that these little cakes are SO hard to resist eating when they are such bright fun colors and in such cute little jars! 😉
taifa says
What size baby jars did you use??
Jessica @ My World - Made By Hand says
I’ve made these before in mason jars but when I made them without water in the bottom of the pan the cake appeared discolored/brown on the edges. Wonder what I did wrong? Or perhaps its because the mason jars are bigger? Hmmm…?!? Now when I make them, I put them in a 9×13 cake pan and put about an inch of water in the bottom of the pan.
Jessica
myworldmadebyhand.blogspot.com
Laura @ Make Life Lovely says
I didn’t use any water at all, and I only had one turn a little brown around the edges- it was one I made with white cake mix. I think you don’t need the water because these jars are a lot smaller, so the cake cooks faster and all the way through. One less step to mess with when you cook them in baby food jars!
Hope you give them a try!
Mandy Beyeler says
Thanks for linking to Take-A-Look Tuesday over Sugar Bee Crafts – you were featured today! – – Mandy, Sugar Bee Crafts
Laura @ Make Life Lovely says
Thank you so much for featuring my rainbow cakes, Mandy! 🙂
Brooke says
These are the cutest thing ever! I love the baby food jar size. A lot of the other cakes in jars are way too big. Thanks so much for sharing. Have a great day!
Laura @ Make Life Lovely says
Thanks Brooke! I agree, I love the cakes baked in mason jars, but I don’t want to eat that much cake, and I sure don’t want my kids eating that much too- although I’m sure they’d love to 🙂
Cynthia says
Just avoided a birthday catastrophe- my oven died during my daughter’s birthday slumber party for a friend. All her friend wanted was a rainbow cake- Yay! but my oven decided that was a good night to die. Boo! Had all the batter colored and in greased cake pans ready to go…when the oven wouldn’t heat. So, I buttered some pint mason jars and spooned in the batter just like you did here. With no oven I had to improvise. I microwaved them. a minute and a half. 1:30. That was all it took and they came out Great! Felt a little like a mommy-rock-star. The babyfood jars would probably be done in a little under a minute. I filled my jars 3/4 full and they extruded out the top like yours did- so your No more than half way full of batter rule is 100% right. Although the magic through the microwave door was pretty spectacular. Just thought I’d share- great job on your posts!! I’ll stick to baking in the oven but it’s good to know that the microwave can work in a pinch with fantastic results! Happy Spring!
Laura @ Make Life Lovely says
Wow, way to save the day!! I had no idea you could microwave cake in a mason jar! So smart of you. Ha, yes, don’t fill it more than halfway. I was the guinea pig for everyone, so don’t make my same mistake 😉
Thanks so much for sharing your experience! I’m impressed.
gina says
man! I need some baby food jars!! Awesome idea!
Laura @ Make Life Lovely says
Thank you Gina! Hope you can get your hands on some baby food jars and make these 🙂
Bobi Jensen says
So cute! Love the “no more than halfway” tip :)I have a weekend Link party if you’d care to join.
Laura @ Make Life Lovely says
Thanks Bobi! I linked up a project, thanks for the invitation!
Suzanne says
What a wonderful idea for a baby shower!
Laura @ Make Life Lovely says
These would be adorable for a baby shower! You caould make the cakes to match the color of the party.
Rebecca Bockstanz says
Having a 7th birthday party for my son this year with an Army theme. Can’t wait to try this with camo colors and dark green frosting on top. Maybe even throw some plastic army guys on there. Thanks for the ideas!
Laura @ Make Life Lovely says
Oooooh, LOVE that idea! This would work perfectly with the camo colors, with an army guy on top. LOVE it!
Rachel Culver says
How many baby food jars did two cake mixes make? Did you use the 6 ounce jars? I am making these for our Teacher Appreciation Luncheon on Friday! Our theme is “We are Lucky to Have Our Teachers!” Love this idea! Thanks for all the ways to use all the baby food jars! My hubby will be thrilled to have them gone! 🙂
Laura @ Make Life Lovely says
Ha, my husband was happy to say adios to a lot of my jars, too! Good questions- I used the 4 oz. jars, but I’m sure it would work with the 6 oz. jars, too. I’d recommend the 4 oz. though if you have them, just because the cake cooked so perfectly and evenly in this size, and I haven’t tried the other size yet. Because it is a little bigger, just make sure that it is all the way cooked through the middle before you take them out of the oven. If you try that size, be sure to come back and let me know how it worked for you!
I’m trying to remember how many cakes 2 boxes of cake mix made…. at least 25! My kids were eating them up as I went, and I added way too much cake to mine (as you could see from the pics), so if you only filled each jar to the halfway point, you will definitely get more than that! Good luck! As a former elementary school teacher, I can say that I would LOVE to get one of these cute little cakes for Teacher Appreciation Day 🙂 Sorry for the novel of a comment, hope it helped!
Rachel Culver says
I didn’t have any of the 4 oz jars (I ‘m not sure where they disappeared to…) but the 6 oz jars worked great. I made them last night and they look so cute. I can’t wait to add the icing and sprinkles! I think we made 22, filling them halfway. (Two boxes was plenty.) They cooked very nicely and taste great! (We HAD to sample 1 or 2 to make sure they turned okay! 🙂 ) I am excited to see the teachers’ reactions tomorrow. Thank you, again, for the great ideas!
Laura @ Make Life Lovely says
Well of course you had to sample one or two! I love that you made this for the teachers, I’m sure they loved it. Good to hear that this worked well for the 6 oz. jars, thanks for sharing your experience!!
Anonymous says
So cute i can’t wait yo do this for my daughters 3rd birthday in a month!
Laura @ Make Life Lovely says
Yay, good luck! It’s much easier than cutting cake during the party, especially if you have a big group of toddlers at the party! Have fun!
homeofthehandful says
How hard is it to clean out the babyfood jars once the cake is gone?
Laura @ Make Life Lovely says
Not hard at all. I just added a little dish soap in each jar, added hot water, and let them soak for a bit. Then I just used a bottle brush to wipe out the crumbs. Easy and quick! Thanks for reading!
Anonymous says
So cute. I might just use this idea for my daughters birthday party and some other parties.
Laura @ Make Life Lovely says
You should give it a try! They really are quite easy and delicious.
Lyn says
The jars wont break from the heat, right? Lol. Is there any precautions to take to ensure or will they be fine? Im just worried with my luck that id have an explosion :-p. I wanna make some…fill a lil less than half so i can put a lol icing on before the lid…and then freeze so i can have a small piece of cake whenever i have the hankering :-p. Love your other projects too….esp them as lil flower vases on a board….pretty sure i HAVE to have my husband make me one for on our porch…lol
Laura @ Make Life Lovely says
No, the jars won;t break from the heat. They should be just fine! Yes, definitely fill less than half!! This is key to the cake not overflowing! I didn’t try freezing mine, because I don’t think you’re supposed to put glass in the freezer? I’d check first just to make sure. Thanks for reading, and good luck!
Alison says
These are truly adorable! And what a great idea for portioning birthday cake and not having to worry about the cake-cutting when you can just enjoy the party and guest of honor! I have a bunch of baby food jars saved so I may have to try this :-).
Laura @ Make Life Lovely says
Yes, I hope you try this with all your baby food jars. It’s so easy, and a great way to control portion size, too!
Anonymous says
Im making these in a few days for my daughters.4th birthday. Im excited to see how they turn out. Im going to do princess theme. The.girls will get primcess colors boys are getting prince colors
Laura @ Make Life Lovely says
Those sound so cute! Good luck! Just fill them a little less than halfway full and you’ll be fine 😉 I’d love to hear how it went!
Anonymous says
All baby food jars can be put in oven? Would it explode ot burst?
Laura @ Make Life Lovely says
All glass baby food jars can go in the oven from my experience. I have made these many times and have never had a problem. And no explosions or bursts 🙂 Good luck with these, they’re really fun to make!
Anonymous says
This is such a cute idea! I can’t wait to try it! What utensil do you use to eat it? Does a fork or spoon work, or do I need to use something smaller? Also, I’m doing a sunshine theme party for my daughter’s birthday. If I use yellow for the bottom layer, will it discolor or turn brown or do you suggest I use a darker color at the bottom to “mask” any browning that may occur? Thanks!
Laura @ Make Life Lovely says
A fork or spoon works just fine! Yellow would probably be okay… maybe try baking one just to be sure? I would go for a brighter, more vibrant yellow, because it will have less of a likelihood of browning. Good luck with your daughter’ party!
Anonymous says
I can’t wait to try this for my daughter’s next birthday I love this idea!!
Laura @ Make Life Lovely says
Thanks!
Kendra says
Cute Cute Cute! Love it! I hate throwing away baby food jars too! I always think, “i could use these for something…” I just never know what! Now I have some good ideas! Thanks!
Laura @ Make Life Lovely says
I know, right? I was the same way! Now you have the perfect little serving dishes 🙂
Anonymous says
You could scoop out a little cake in the middle and fill the space with icing. Then, use a caulk gun to decorate the lid with fake icing. I saw both of these ideas on pinterest,so I can only take credit for combining the two ideas. 🙂
Laura @ Make Life Lovely says
Excellent idea to combine the two! I have that caulking lid idea pinned too, and it would look great with these cakes!!
Anonymous says
I love this im going to make for my daughters, 1st birthday green and ping starwberry shortcake colors.. Now a qquestion i have a small counter top convection oven, will that work??? I dont want a armagedon in my kitchen. Thanks for the amazing ideas keep them coming
Laura @ Make Life Lovely says
I assume it would. I’ve never owned one of the countertop ovens, but it should work just fine. Come back and let me know how it goes!
Anonymous says
What Did You Use To Put The Batter In The Jars? I was Planning on Doing THis For My Sons First Birthday And Did A Trial Run Last Night And The Colors Ran Together And SOme Didn’t Meet The Edge Of The Jar. I’m Totally Not Creative But Was Hoping I Could Pull This Idea Off. Thanks For Your Help!
Laura @ Make Life Lovely says
Oh no! I just used a regular spoon to spoon a small bit at a time into the jars, which worked really well. I think as long as you don’t pour a lot in at once, the colors should stay separate like mine did. Good luck!
Anonymous says
Do u need to grease and flour these?
Laura @ Make Life Lovely says
Nope, just pour the batter right in! 🙂
Caroline says
for some reason my purple came out really dull…almost like a gray. I too am also wondering what you used to scoop/pour the batter into the jars. I did a trial and had a very difficult time making them look presentable. I used half pint jars instead of the small babyfood jars. I thought perhaps the smaller jars were too small…anyone else use larger jars?
Laura @ Make Life Lovely says
What knid of food coloring did you use? The gel colors are all I’ve used, and every time I’ve made these they have looked great. Maybe if you try using the gel colors, and use more coloring next time? I used a spoon to put a spoonful of batter in at a time, so that the layers would stay intact and it wouldn’t make a mess in the jar. I’ve never tried using the bigger jars, because I was afraid of it not cooking all the way through in the middle. I’d be curious to know if anyone has had success with larger jars, too!?
Joeanna Jarrett says
These will be perfect for my Children’s Church Class!
Laura @ Make Life Lovely says
Yes! You’ll win best teacher award if you bring the kids these 😉
Anonymous says
I read somewhere you can make carrot cake with baby food carrots. That would be cool to use them and still keep the wrapping on the jar. Sounds so good.
Laura @ Make Life Lovely says
Yes, I’m sure that would work, great idea! Then you won’t waste the food if you don’t have jars on hand. However, I wouldn’t keep the paper label on the jar to put in the oven, because it could start a fire in the oven if the paper starts to burn. You could also buy strawberry banana or a similar fruit flavored baby food and blend it in a smoothie with other fresh fruit, and I bet no one would know the difference! 😉
Rosalind Dobson says
I could imagine setting out the jars on a tiered cake stand, and even having the top layer with the candles in them.
Laura @ Make Life Lovely says
Yes, that’s a great way to serve these. Love the candles idea for the top layer!
Brandi Watson says
Did you have to spray each little jar with Pam or something so they didn’t stick??
Laura @ Make Life Lovely says
No, I didn’t. It worked perfectly without any Pam. The cake seems to naturally pull away from the glass a little bit as it cooks. Good luck!
Anonymous says
Hi I absolutely love this idea I love baking and it’s my 12th bday in a months time, how long do I need to keep them in the oven and what temperature? Thank you ;p
Anonymous says
What kind of frosting did you use for this and if it was a homemade frosting could you please post the ingredients?.
Maricel Galecio Mendoza says
Is it safe to bake cakes in any jar? Is it only possible to use mason jars?
Sarah says
All my colours seen to pool in the middle. Any tips on how to evenly layer? Such a cute idea x