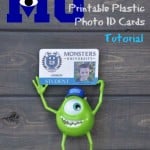
Learn how to make a real Monsters University ID card and be on your way to becoming a true scarer!
I am sooo excited to share this fun tutorial with you today.

It was inspired by one of my kids’ favorite movies… Disney’s Monsters University!
We saw it as a family in the theater the day that it came out, and we all LOVED it, so I made a fun surprise for my kids.
They each got their very own plastic Monsters University ID cards, complete with their own photos on them!
Now they can be official students at Monsters University!
When I showed my kids their surprise, they couldn’t believe that I had put their pictures onto plastic and that they had their own ID cards!
SO cool.

Monsters University ID Card
Can I let you in on a little secret?
These were so easy to make!
If you have kids, nieces, nephews, or grandkids, I’m sure that they would love their own plastic ID cards, too!
You can keep the cards plain and use as a fun Monsters University ID card for your child to keep, or you can put a hole in the corner and use as a backpack pull, a charm on a bracelet or necklace, attach to a jacket zipper, etc.
The possibilities are endless!

Disney Monsters University Plastic Card
Here are the super easy directions to make your own plastic Monsters University photo ID cards.
You’ll be using printable shrink plastic,
This is a special paper that you can print on, put in the oven to bake, and watch in amazement as the paper twists and curls and shrinks down to a hard piece of plastic.
All this magic happens in about 2-3 minutes!
Watching the “magic” never gets old, trust me!
ID Card Supplies
- Printable shrinkable plastic sheets (I used Printable Shrinky Dinks)
- Scissors
- Hole punch
- Ribbon, string, chain, or keyring (optional)
- Inkjet printer (do NOT use a laser printer)
Making the ID Card


Sizing the Card

Setting the Opacity

Printing the Monsters University ID Cards

Baking the Shrinky Dink IDs

Aren’t they neat?!
Your child (or you) now have a hard, plastic official Monsters University ID Card, perfect for keeping in their wallets, hanging on a backpack, wearing around their necks on a chain, or as a charm on a bracelet.
The great thing about this project is that you can customize it however you would like!
Hole, no hole, and you can pick whatever size you would like the finished ID card to be.

My kids are so excited to wear theirs on their backpacks and around their necks- they are well on their way to becoming official scarers now!

For a fun “EYE”-Spy Mike Wazowski Bag tutorial, be sure to check out my tutorial I made a few months ago.
They love searching to find all of the Monsters University characters!
