Hi everyone! Today I’m excited to be the part of a Sizzix Blog Hop to celebrate The 50’s, a groovy new collection of Sizzix dies created by the talented Jen Long!
Grab a soda pop, put on your blue suede shoes, and get ready to rock and roll with this fun project!

I love all of these 50’s dies SO much, and I was having a really hard time deciding which ones to use…

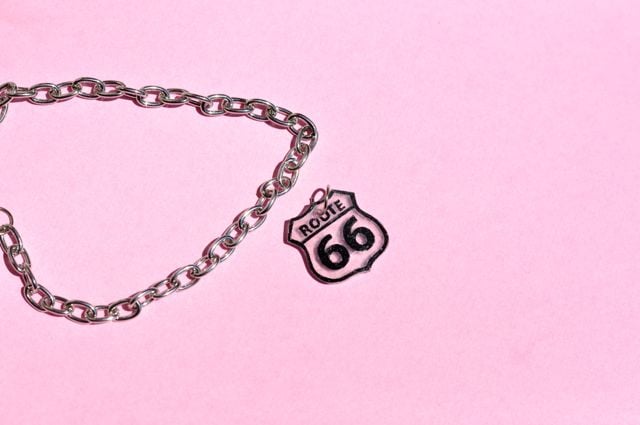
So I decided to use a LOT of them to make a cute Shrinky Dinks Charms Bracelet! Did you know that you can use your Sizzix dies on shrink plastic? The size of the cut dies were just perfect for shrinking and turning into cute little plastic charms. This is a craft project that is great for adults and kids alike.
I’m not going to lie, it’s pretty magical watching those thin paper dies twist and turn in the oven, only to end up perfectly flat when completely baked. Keep reading for the simple directions!

1950’s Shrinky Dinks Charms Bracelet
Supplies:
- Various The 50’s Sizzix dies by Jen Long. I used the retro sunglasses, electric guitar, camera, saddle shoes, vintage car & radio, and rock n’ roll sundae sets.
- Sizzix Big Shot, Vagabond, Big Kick, or Big Shot Pro die cut machine
- Shrink plastic (available at most craft stores)
- Permanent markers (I used Sharpies)
- Hole punch
- Clear sealer
- Chain (for the bracelet)
- Jump rings
- Jewelery clasps
- Pliers
Directions:
Die cut your desired shapes out of the shrink plastic using your 1950’s dies and your die cut machine.

Once you have your shapes, use the Sharpies to color them in. Just remember that the colors will get darker once they are baked! Punch a hole in the top of the dies, so that you will have a hole for your jump ring to attach to the bracelet.
Preheat the oven. Bake your 50’s die cuts according to the directions on the back of the package. I only baked two or three charms at once. While the charms are baking, you might freak out when they start to twist and turn. I know I did my first few times! It’s okay, I promise it will look good at the end.
Bake for the recommended baking time, and carefully remove from the oven. Use a spatula to press down on the top of the charms and make sure that they are perfectly flat. Let cool.

Spray or brush on a clear sealer to protect the color of the charms.
Using pliers, open some jump rings by pulling them apart sideways. Use the jump rings to attach the 50’s charms to the charm bracelet. If you don’t have a charm bracelet already, it’s easy to make one! Just buy some silver chain (from the craft store), and add a jump ring with a clasp at the end. If I can do it, so can you!

Isn’t this bracelet fun? I love how easy it was to make with these amazing dies! I have a fun 50’s sock hop party that I’ll be going to this week, and I can’t wait to show off my new 1950’s Shrinky Dink charm bracelet!
Now my girls are begging me for one… 😉
If you liked this project, I would love for you to follow me on Facebook, Pinterest, Instagram, and Bloglovin’. Thanks for following!
![]()
Arlene Gassmann says
Great idea
dyeandpigment55 says
Love your bracelet.
Tonnie says
Great idea!
jenscull says
this bracelet is not only super cute, but I bet it is super fun to wear! what a clever idea! this new line is fabulous! 🙂
Laura says
Yes, it is so fun to have all those little charms dangling on my wrist. It reminds me of the good old 80’s when I was little and wore those plastic charm bracelets that were so popular!
Eunice B says
Hi Laura, what a lovely project. Thanks for the great tutorial,
LeAnn says
Really cute retro project!
Pat Haugse says
This is a wonderful project to try. Thank you for sharing.
Carol Watson says
Adorable bracelet, what fun dies
Pam Young says
How stinkin cute is this!! I love this set!!
Laura says
Thanks Pam, I love it too! There are so many different things you can make with all of these amazing dies. I’m thinking I need to throw a big 50’s party using all the new dies!!
Flo says
Cute bracelet. Love the 50’s theme.
susanscrap says
Very “charming”! Love it!
Jan Castle says
Absolutely adorable Laura!!!! Wonderful idea!!!!!
TFS
Jan
Laura says
Thanks Jan, I appreciate your sweet comment! I love finding new uses for my Sizzix dies!
Vanessa Cole says
great project! It’s the most!
Laura says
Thanks so much Vanessa! It was SO much fun to make! 🙂
Lydia says
OMG you are a genius! Why do I always forget the 8 metric tons of shrink plastic in my closet?? LOL. Very adorable!
Laura says
Haha, 8 metric tons?! You have a lot of charms to start making! 😉 So glad you like them!!
lisa808 says
This is awesome! Thanks so much for sharing this super fun project.
Bonnie Isabelle says
This is so cute. I love “shrinky dinks” and use them a lot to make jewelry and embellishments. I just Love the 50s charm bracelet. Definitely have to get me some of this collection
Karen Erickson says
The cutest thing ever!
Kathy says
Great charm bracelet.. I think shrinky dinks is a great idea!
Rachel Greig says
Awesome project 🙂 Love the 50’s!!
Jasmine Patrick says
Love this bracelet!!!
patricia kiser says
Your bracelet is wonderful!I have to make one–Thanks
Linda Dale says
nice
Diana Ramsey says
I actually had a 1950’s car at one time. Love your charm bracelet idea!
Rachel says
Oh wow. I love shrink plastic, what a fabulous way to use the dies.
Gilda (mcstamper) says
Darling idea.
bearsmother says
I forgot about making these. I have the materials to do it. thanks for refreshing the idea.
Robyn Conners says
I had no idea!! This is AMAZING!! Can’t wait to try it!!
Robin B. says
What a cute charm bracelet, thanks for sharing!
betty lou says
Great bracelet! Thanks for sharing!!
Karen Beitzinger Schroeder says
Your charm bracelet rocks! Love how you used the shrinky dinks!
Angelique Vela says
So very cute!
Heather Thompson says
What a great gift idea!!! very fun!
KarenR says
Your bracelet is very cool. I never would have thought to use shrinky dinks.
Celeste Goff says
Oh my gosh, what a fun and creative way to use these dies! I would never have thought of something so clever.
Su says
Great idea for your kids or grand kids
Betty Sue says
Great bracelet!! What fun!
Julia Aston says
What a fun project! love these 50’s dies and they look so cute in miniature!!
jan metcalf says
Too cute!! Love your sun glass charm! Very clever idea!
Crafty Paws says
Absolutely adorable! The only thing I would change is to add lots of the poodle! LOL I love my poodle so much. xoxo TFS Hugs, kristina
Paulette S says
Oh Laura, your bracelet is Super Cool! Are those words from the 50’s? I know someone from that era who uses Super in just about every sentence. LOL I love your bracelet, what a great tribute to the 50’s and a fun way to use more than one set of the dies.
Chriss Blagrave says
Soooooo cute! These dies are really cute 50’s icons. Perfect for your 50’s dance!
Denise Bryant says
Adorable charm bracelet! Great project! The dies are fabulous!
tlady2 says
SOOOO CUTE LAURA!!!! What a cute way to use these dies! Your charm bracelet looks WONDERFUL!!! Yep, you’ll be making your girls these! 😀
Eileen Barton says
Oh my gosh how cute! I love the saddle shoes charm!
Alison Dietz says
This is cute! I didn’t think about Sizzix dies being able to cut shrink plastic. Great idea!
Cindy B says
This is so cute and adorable! Love it
Konnie Wren says
HOW fun is this? I am from Louisiana and I originally thought, “What a cute hurricane glass” now upon closer inspection I see that it is an ice cream soda glass. Guess you know where my mind is. Too cute…cannot wait to get these dies.
Pat says
What a fun project, and as you say they shrink to the perfect size for a bracelet. x
Kristi says
Thanks for the tip about uses the die cuts to cut shrink plastic!!
beaglefest says
What a great idea! Love your bracelet!
Tanja S. says
Shrinkie dinks are so much fun – well done!
Laura says
Takes me back…..!