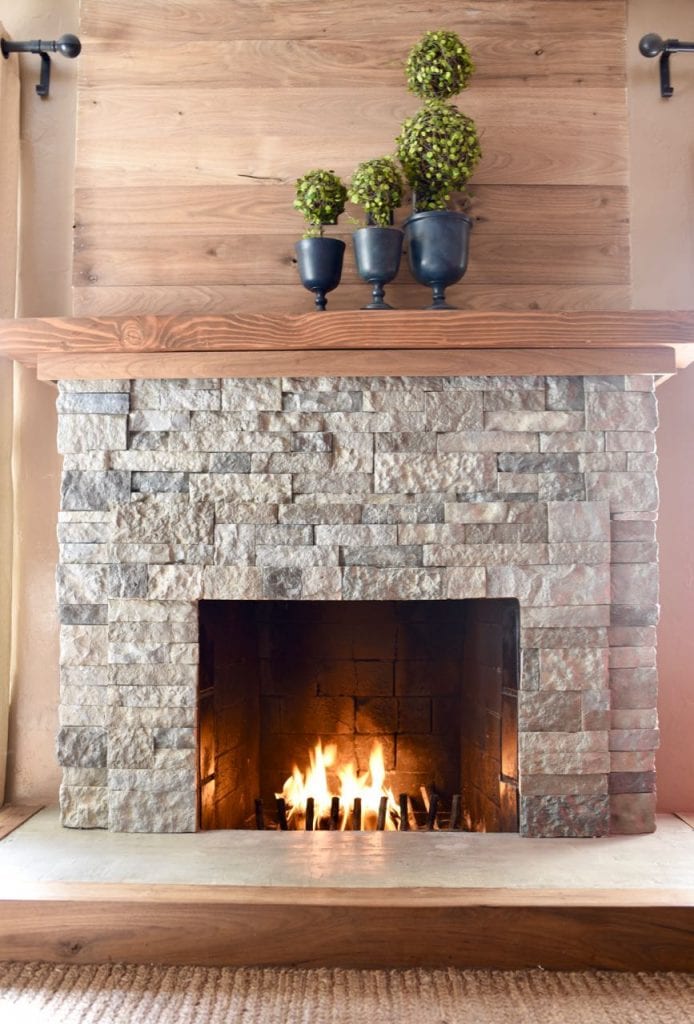
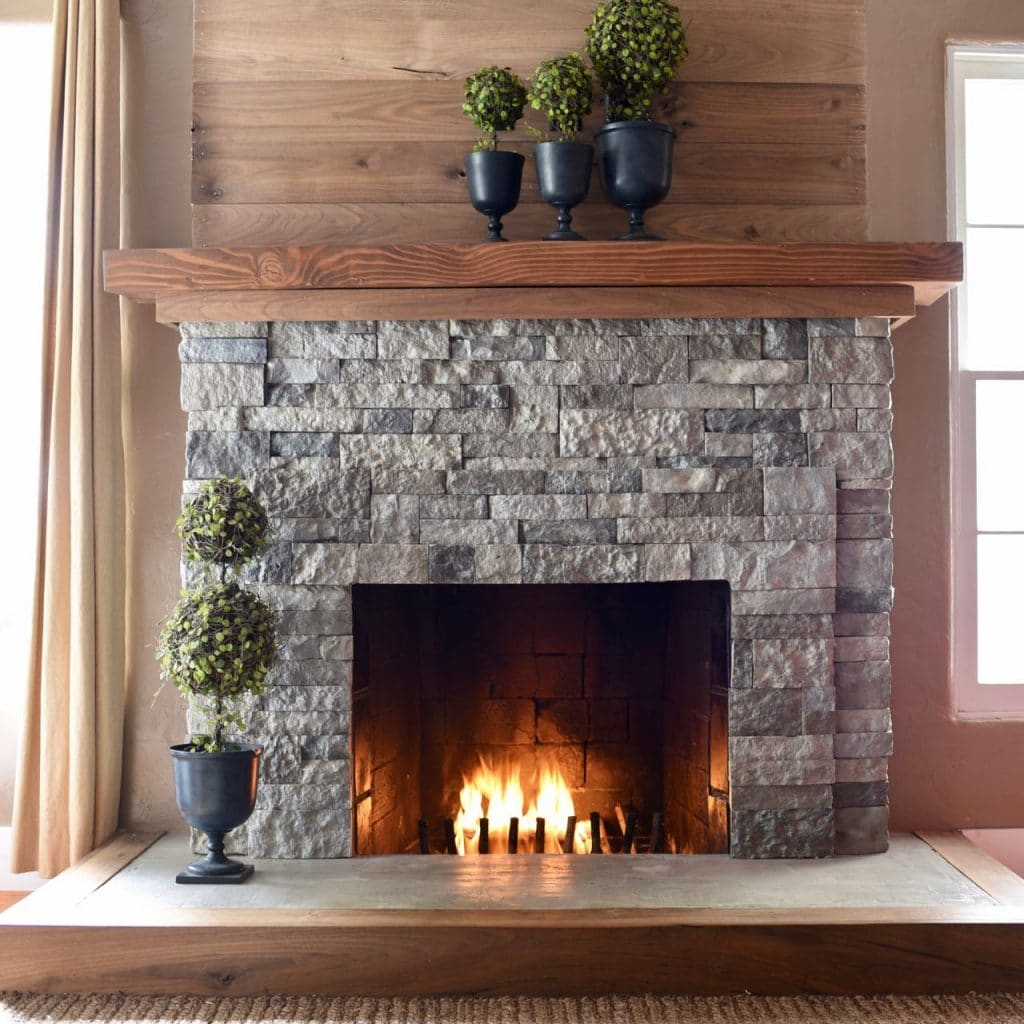
You won’t believe this amazing AirStone fireplace makeover! Learn how to transform an ugly fireplace step-by-step into a beautiful masterpiece with AirStone.
I am SO excited to share our AirStone fireplace makeover with you, and I can’t wait to show you the stunning transformation!
I hope that this DIY will inspire you and show you that anyone can have a gorgeous fireplace they love on a budget if they’re willing to do a little work.
Redoing our old, outdated, and ugly fireplace has been on my to do list for a while now.
At the end of last year we finally decided to tackle the eyesore of a fireplace that we had.
It was made of old red brick, had a tiny little mantle, and was in desperate need of a makeover.
Can you believe the transformation?!
AirStone Fireplace Video
I’m so excited to share with you exactly how we performed this incredible AirStone fireplace makeover!
Check out my video below to see the entire process.
Then you can read all the instructions below that detail exactly what we used and how we created our lovely AirStone fireplace.
AirStone Fireplace Makeover
I had seen a few fireplace makeovers on Pinterest using a product called AirStone, so I contacted the company, who sent me a few boxes for our AirStone fireplace makeover.
Their product looks just like real stone, but is easy to cut with a saw at home.
You don’t have to have fancy equipment, call an expert, or pay a ton of money for expensive natural stone.
AirStone is truly an amazing product!
Our project was not without its’ unexpected challenges and budget-busting surprises, all of which I’ll be sharing with you.
In the end, though, it was worth every second of time and every single penny that was spent.
We absolutely LOVE our new fireplace, and are so proud that we can say we did it all ourselves!
Fireplace Demo Day
To use AirStone, you just need to start with a clean surface.
We decided to pull off the wood paneling on our fireplace out of curiosity to see what was underneath, but it wasn’t necessary.
We could have started building the new fireplace right over the old one without any of the demo that we did.
Here’s the before shot.
See what I mean about it being ugly?!
When my husband starting pulling off the old wood paneling on demo day, we found many surprises!
First, hidden under all that wood paneling was a thick layer of plaster and concrete.
After chipping away at the plaster and concrete that was crumbly and falling apart, we found the original brick.
We wanted to make sure that we adhered the brick to a strong surface that wasn’t going to crumble or wear away over time.
During demolition, my husband found that there was a small hole at the top of the fireplace.
He reached his hand inside and felt nothing but dust and dirt.
He pulled off more drywall, only to discover extensive termite damage and an old rats’ nest.
Gross, and definitely NOT what we were expecting!
He pulled off more and more of the wall, until the whole front wall was torn off.
We couldn’t believe the damage that had been hiding behind that wall!
There was extensive termite damage and the studs were practically chewed all the way through and were just hanging there.
It was so shocking!
To top it all off, there was also loose electrical wires hanging in the wall, AND it wasn’t even framed correctly.
Framing the New Fireplace
My husband framed the wall with new pressure treated lumber and went a little overboard by doubling the 2×4’s and using 4×4 pressure treated lumber.
After seeing what the inside of the wall looked like, can you really blame him?
Because we already had the wall opened up, we figured it was a good time to redo the electrical as well.
My husband rewired the cable and added some new outlets towards the bottom middle of the wall for the tv and cable.
The tube you see is for the HDMI cords.
Our old mantle was small and pretty insignificant.
For our new fireplace we wanted a big chunky beam for our mantle.
We bought the thickest beam they sold at Home Depot, then cut it down, stained it, and framed it in.
I love how large it is now!
Building a New Concrete Hearth
Our old brick fireplace had a tiny little hearth, and we knew with our new fireplace we wanted a large, substantial hearth.
We wanted a rustic, modern look with our AirStone fireplace makeover, so we decided to create a large concrete hearth over the top of our old one.
Concrete countertops are all the rage, and we knew a fireplace mantle would look great with the AirStone.
Concrete would blend well with the look of the rest of our house.
First, we framed it by stacking 2×4’s on top of each other and drilling each one into the piece underneath.
The bottom 2×4 we drilled straight into our wood floor.
Then we mixed up lots of concrete, along with some concrete color to darken the color a bit so it would match the stone.
We poured the concrete into our fireplace hearth frame, then leveled it all off nice and smooth.
Once the concrete was completely dry we started in with the AirStone for the next step in our AirStone fireplace makeover.
AirStone Options
AirStone comes in two different sets of colors- Spring Creek (gray) and Autumn Mountain (more of a tan and light brown color).
You can find AirStone on Lowes.com and at most Lowes locations.
AirStone comes in boxes of flat edge stones, natural edge stones, and corner edge stones that are already made to fit the edges of the fireplace perfectly.
You’ll also need the AirStone Interior Adhesive, which is the “glue” that adheres the stones to the existing wall.
Organizing the AirStone
Before we started, we laid out all the pieces that we would be using by color and size.
We wanted to make sure we spaced out the different colors of stone, even though they’re brick, so we would have a nice variety in our fireplace.
The stone comes a little dusty, so we used a small brush to dust them off.
We started the first layer of stone right at the bottom of the fireplace.
We used wood shims in some spots in between the stone to make sure that our stones were nice and even and level.
How to Cut AirStone
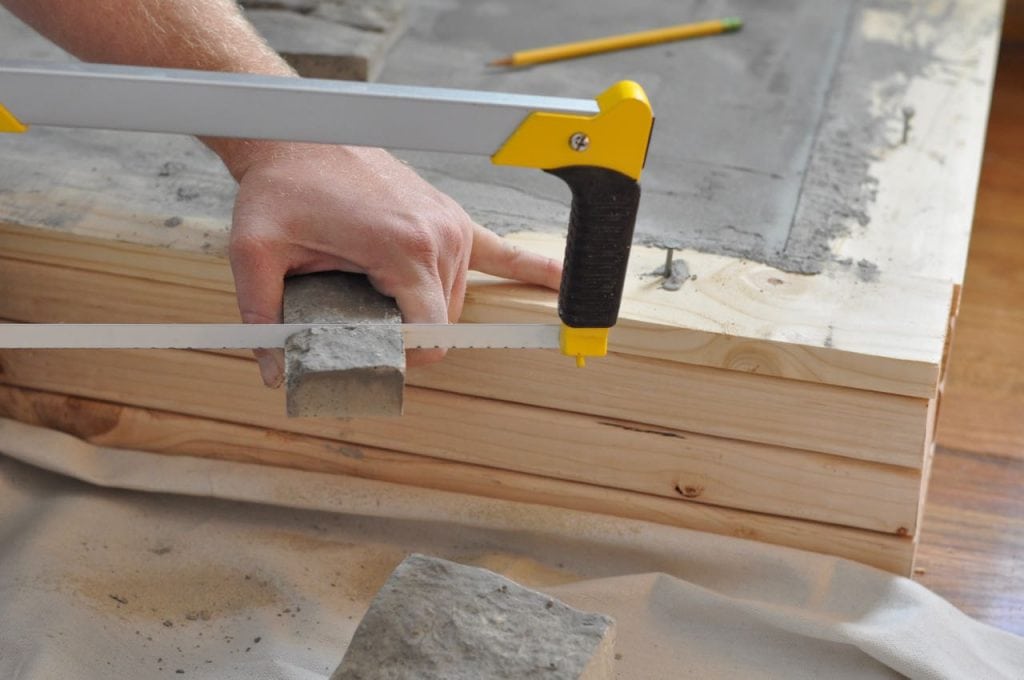
To cut pieces to fit on the ends, you’ll need a saw.
Using a Hack Saw
You can use a hack saw, but it can be pretty labor intensive and takes much much longer than using a rotary saw.
Just be sure to use a masonry blade in the rotary saw for easy cutting.
Using a Rotary Saw
If you don’t have a rotary saw, it’s definitely worth the time to borrow or rent one.
It will make the AirStone fireplace makeover project go SO much quicker!
Applying the AirStone
Start at the base of our fireplace with the first layer of stone.
To place the stone, use a putty knife to add some of the AirStone adhesive to the back.
Then just press the AirStone on where you would like it to go.
We held each stone in place for a few seconds, then added shims when necessary to keep it all straight.
If you add a little too much putty, don’t worry.
You can just wipe it off with the putty knife or a damp cloth.
Next we worked on the part of the fireplace just above the opening and the edges.
The bricks around the fireplace were stuck on there so well that they didn’t want to come off.
This ended up working better for us because it gives a little more visual interest to have two different layers.
We just kept stacking and placing, until the fireplace was all done.
It was SO exciting watching it all come together and seeing our old ugly brick fireplace being transformed into the beautiful rustic stone fireplace we dreamed of!
Walnut Feature Wall
We wanted to make our wall above the fireplace stand out a bit more, so we decided to create a feature wall from walnut.
While walnut isn’t the most budget-friendly wood, we love the natural color of the wood.
We didn’t have to stain it or treat it all and could keep it natural, which was one of the main reasons we chose walnut.
We used finishing nails to add each walnut board to the wall.
Walnut trim was also added around the base of our mantle and the base of the hearth to finish it off and make it all match.
Finishing Up the AirStone Fireplace
We had to do some plaster work to repair the wall around the walnut, since we had to open up the wall so much to complete the repair work inside.
Due to multiple fires, the inside of our fireplace was discolored.
I searched for a solution for a high heat paint, but all I could find that was available was the high heat black spray paint used for grills.
The employee told me that it would work inside a fireplace, but that because the heat is so high in there, I might need to reapply it.
I’m SO glad I painted the inside!
I think it makes all the difference to have the inside of the fireplace be all black and uniform in color.
It’s been one year later from when I sprayed it, and it still looks perfect!
We also ended up painting our living room a new richer color, adding base molding, and getting two new rugs.
We couldn’t have our new fireplace showing up the rest of the room now after our AirStone fireplace makeover.
Enjoying our Fireplace
We absolutely LOVE our new fireplace and couldn’t be happier with it, thanks to AirStone.
It was worth all of the effort and money for sure, and has transformed our living room.
The focal point in our home is now our stunning rustic modern stone fireplace.
I’m no longer embarrassed of our fireplace, and love showing it off now!
We have multiple fires a week in our new fireplace, especially since we have been getting a lot of rain and cold weather here in Southern California.
Thanks for letting me share our AirStone fireplace makeover with you!
I’m still so in awe of our finished fireplace.
It’s so rewarding to work so hard on a project and see it take shape and become everything you had hoped it would be.
For more home DIY’s and before and afters, be sure to check out our amazing front door makeover.
You’ll also like our navy blue accent wall in our bedroom.
What do you think of our AirStone fireplace makeover?
This tutorial was updated in August 2021 and was originally posted in January 2017.


Misty says
Where did you get the walnut ? And Home Depot had that big slab
Erin says
Wow, the fireplace looks great Laura. I have thought about using AirStone on our fireplace many times. Thanks for the detailed tutorial!
Justin says
What color did you stain your beam
Kathy Lanpher says
Hello, I am building a new house and love your fireplace makeover! I read that you used walnut for the “shiplap” and trim around the hearth and underneath the mantle. What wood did you use for the mantle?
Rynnetta says
Hi! I love this and plan to do something similar!!! For the walnut wall, did you just nail them directly into the studs? And you didn’t stain them at all?
I’m thinking about doing shiplap wall on top and Airstone on bottom.
Absolutely beautiful!!!
Cheryl Firth says
What color is the stain you used on your fireplace and what color did you paint the living room? You did a great job. It is beautiful.
Virginia says
This gives the room a real Lodge look! I would guess the first one alone was $300 with the adhesive? I think raising the firebox floor would help gat the heat and light into the room. I will be looking for paint to clean up inside my fireplace! Great ideas!
Laura says
Thanks so much Virginia, the rustic lodge look was exactly the look I was going for! Yes, the black paint really made a big difference in making the inside of our fireplace look better. I’m not sure what you mean about the first one alone being $300. Do you mean the AirStone boxes and adhesive?
Sarah jason says
Is this a natural fireplace!!! I’ve been wanting to use AirStone on my fireplace which is natural but wasn’t sure I could do it.
Laura says
Hi Sarah! Sorry for my late response, somehow I missed your comment. Yes, this is absolutely a natural fireplace! You can totally do it. AirStone is a truly amazing product and I absolutely LOVE our fireplace now, when I used to just hate it. AirStone is safe to use on the exterior of a real fireplace and looks great. Our friends couldn’t believe that we redid it ourselves for MUCH less than hiring someone to redo our fireplace in stone. I would 100% do it all over again!
Deneane says
Hi, Laura…. love the new fireplace…. curious if you used Spring Creek stone or if you Used Spring Creek & Autumn Stone.. we are getting ready to start our fireplace!
Laura says
Hi Deneane! We used all Spring Creek. Good luck on your fireplace!
Melissa Stanfield says
What color airstone did you use?
Laura says
Hi Melissa! I used Spring Creek. It’s more gray than the other option and I love it!
Sue W. says
Hi Laura, your fireplace looks great. I am doing something very similar to this and we are going to use Airstone. My question is have you had any problems with the stone adhesion above the fireplace opening? I assume you used the Airstone adhesive. Thanks for any help.
Laura says
Hi Sue, Yes, I used the AirStone adhesive and haven’t had any problems at ALL! We absolutely LOVE our AirStone fireplace- it’s held up perfectly and looks just like the day we finished, even years later. I definitely recommend it! Good luck on your fireplace! You will love it!