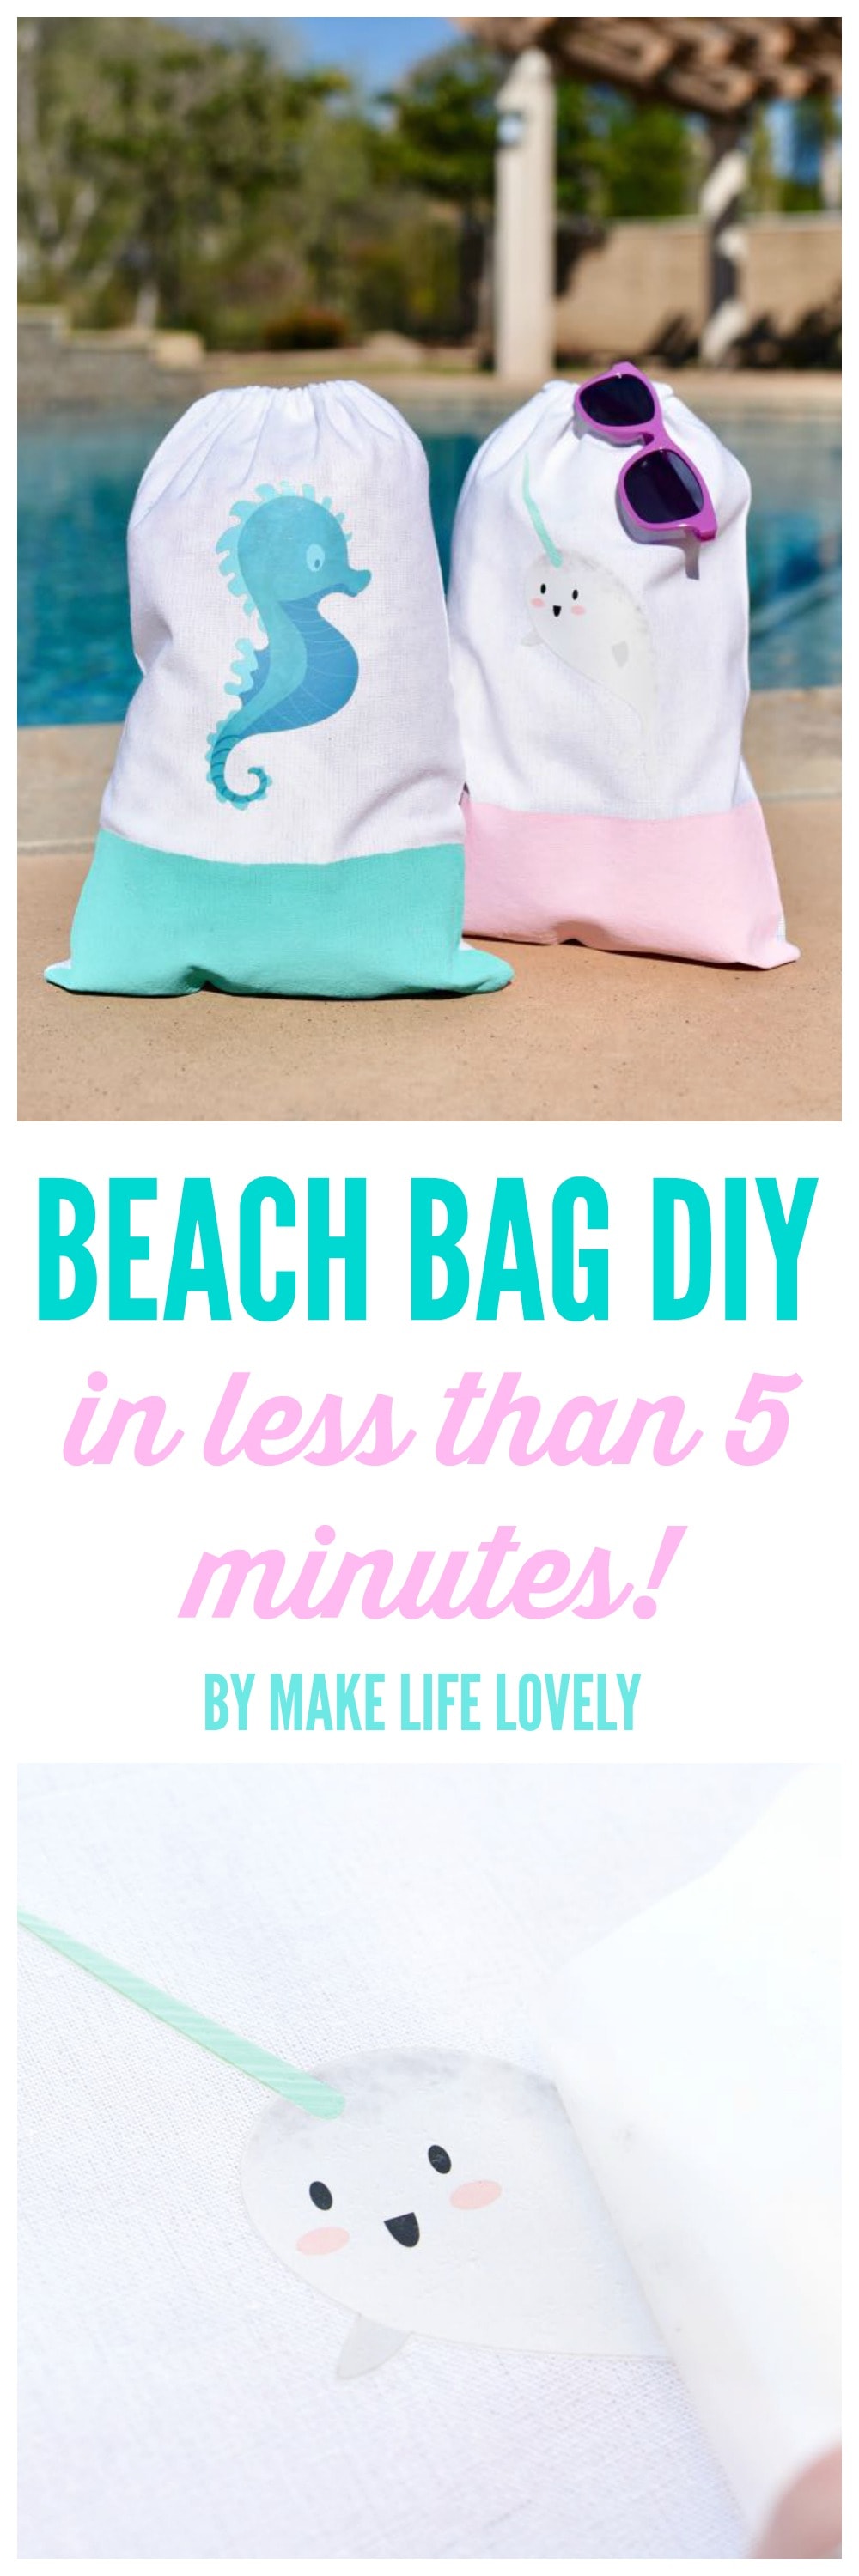
Summer will be here before we know it, which for us means plenty of popsicle making, splashing around in the pool, and relaxing beach days. With five kids now (one being a newborn), I’ve got a lot of gear to carry to the beach, so I created some CUTE bags for the kids to carry their own gear in. Today I’m sharing the beach bag DIY tutorial with you!
If you’re like me, you’ll be happy to know that this beach bag DIY requires no sewing or complicated instructions. You can knock out one of these bags in under 5 minutes, which is less time then it will actually take to pack that bag. 😉

What makes this beach bag DIY so simple is that we are using a premade bag and the new Cricut Iron-On Designs. Cricut Iron-On Designs are pre-made iron-ons that are ready to go… no Cricut machine or weeding necessary!
I’m so excited about how truly easy the pre-made Iron-On Designs are to use. These are a total game changer because they are so quick! Just a couple of minutes are all you need to create an amazing DIY without even having to turn on your Cricut machine.
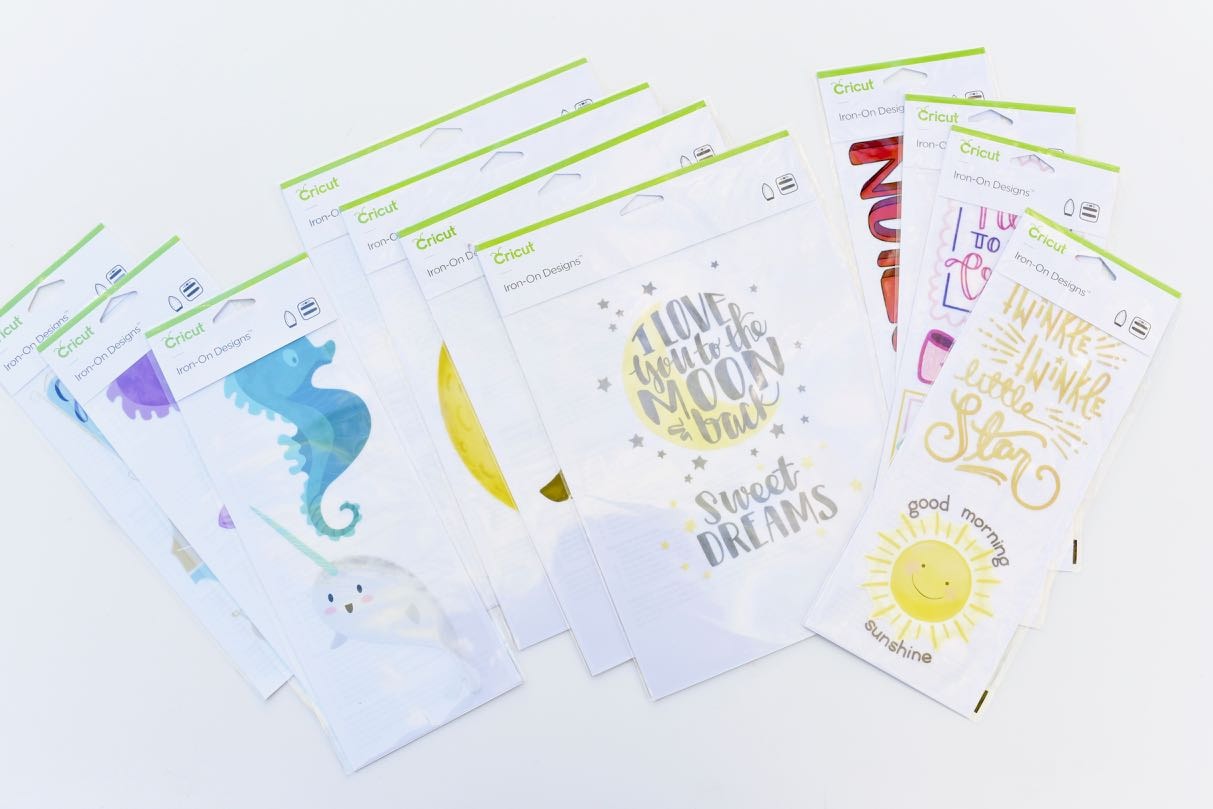
There are small and large Iron-On Designs, with over 50 different designs available and more coming soon!
This DIY beach bag tutorial contains affiliate links, which means I get a small percentage of any purchase made at no extra cost to you.
Simple Beach Bag DIY
Supplies:
- Plain tote bag or drawstring backpack (I used these backpacks that Oriental Trading sent me)
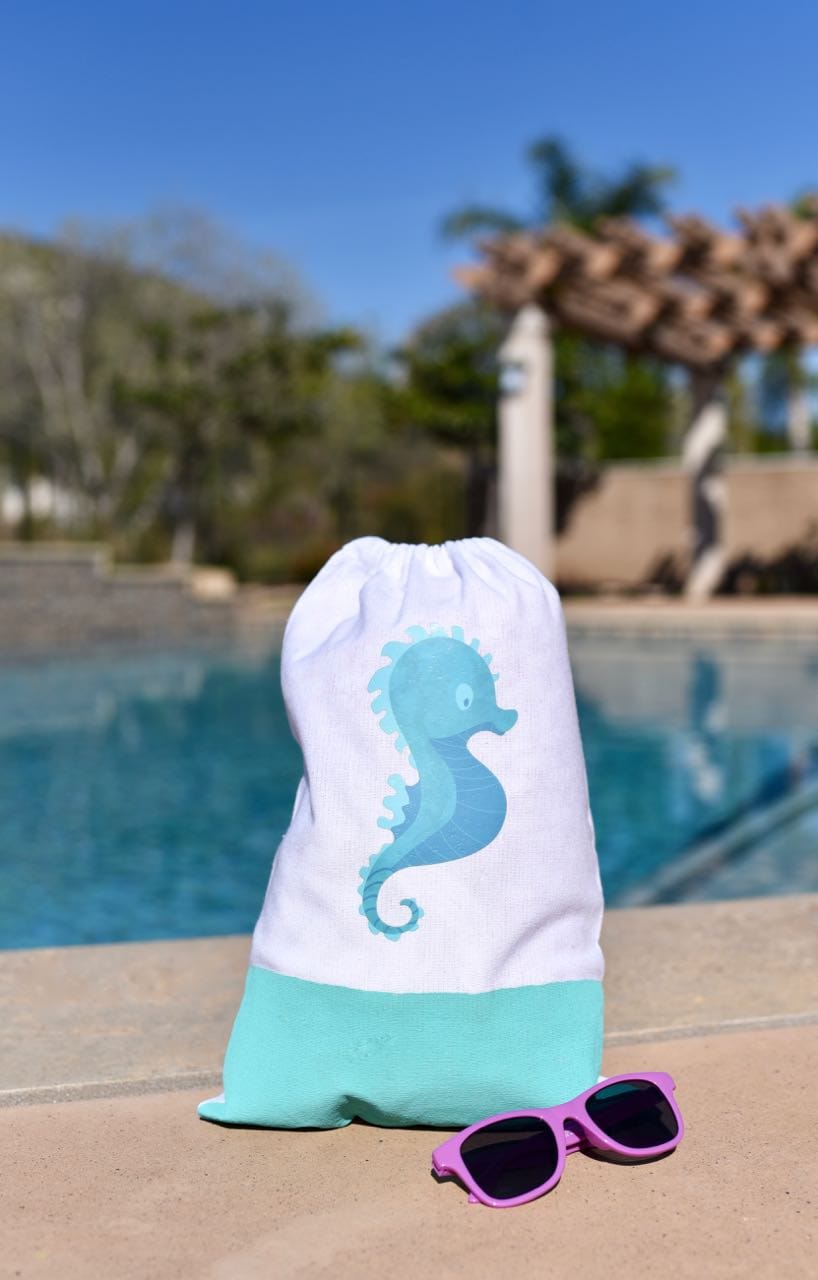
- Cricut Iron-On Designs (I used Cute Sea Boy and Cute Sea Girl)
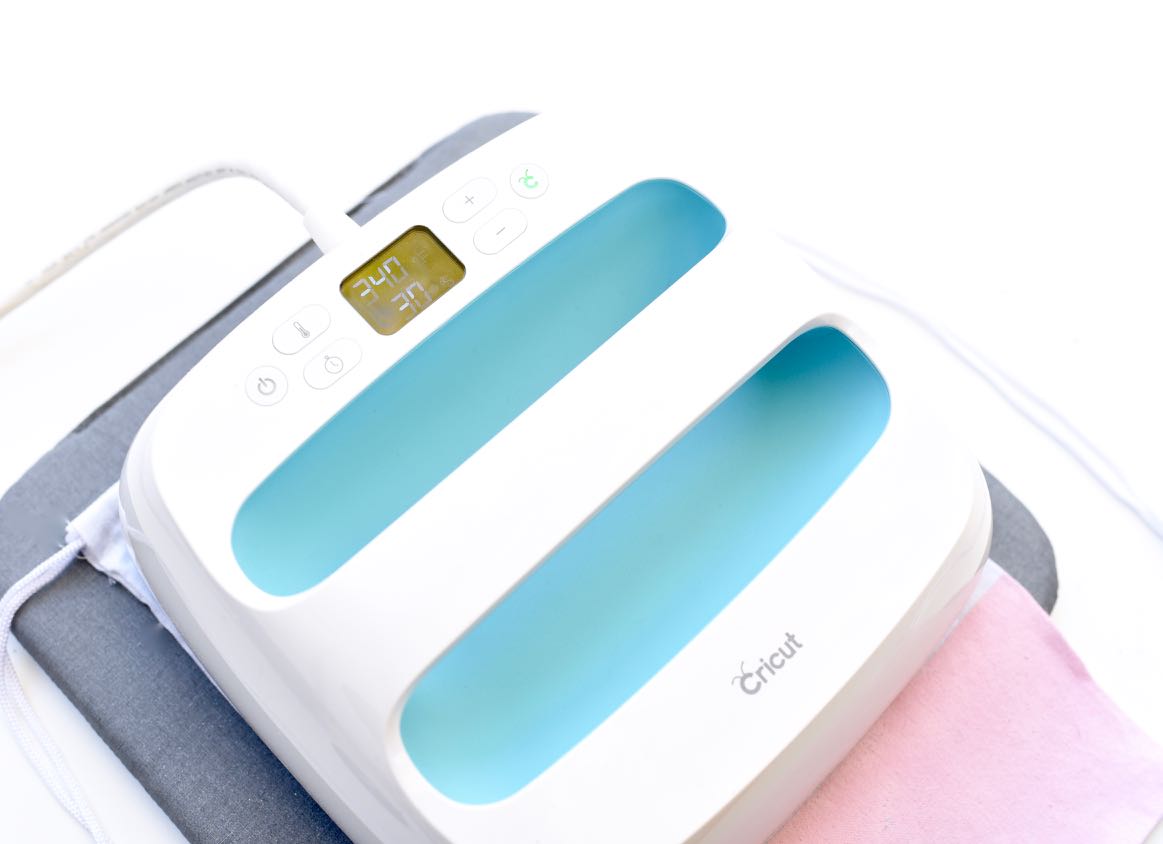
- Cricut EasyPress and EasyPress Mat- optional (but highly recommend!) or iron
The EasyPress is optional, but it’s such an amazing tool. It’s as efficient as a heat press but is so simple to use. I love how well the iron-ons stay on when I use my EasyPress!
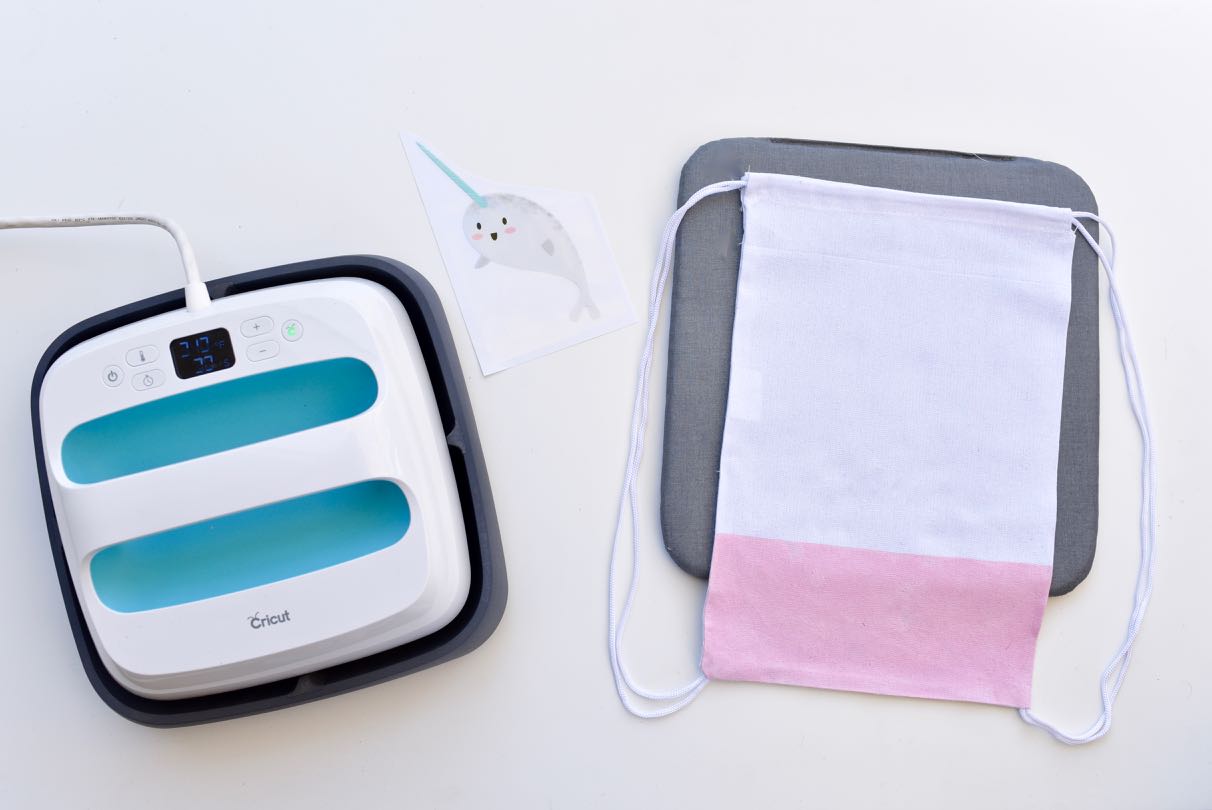
The EasyPress Mat is a new mat that you use underneath your material when using the EasyPress. I love how well the mat handles the heat from the EasyPress- it takes even less time to adhere an iron-on with the EasyPress mat.
With the new Iron-On Designs, the EasyPress, and the EasyPress mat, you have the ability to get creative and make quality shirts, bags, art, and more, all within minutes!
Step 1. Prewash your bag and preheat your EasyPress or iron.
- If using the EasyPress and EasyPress Mat, preheat to 340 degrees. If your bag is cotton or a cotton/polyester blend, then preheat the area where the Iron-On Design will go for 5 seconds. Place the Iron-On Design in place, place the EasyPress over the design, then hold firmly over the design for 30 seconds if using the EasyPress Mat.
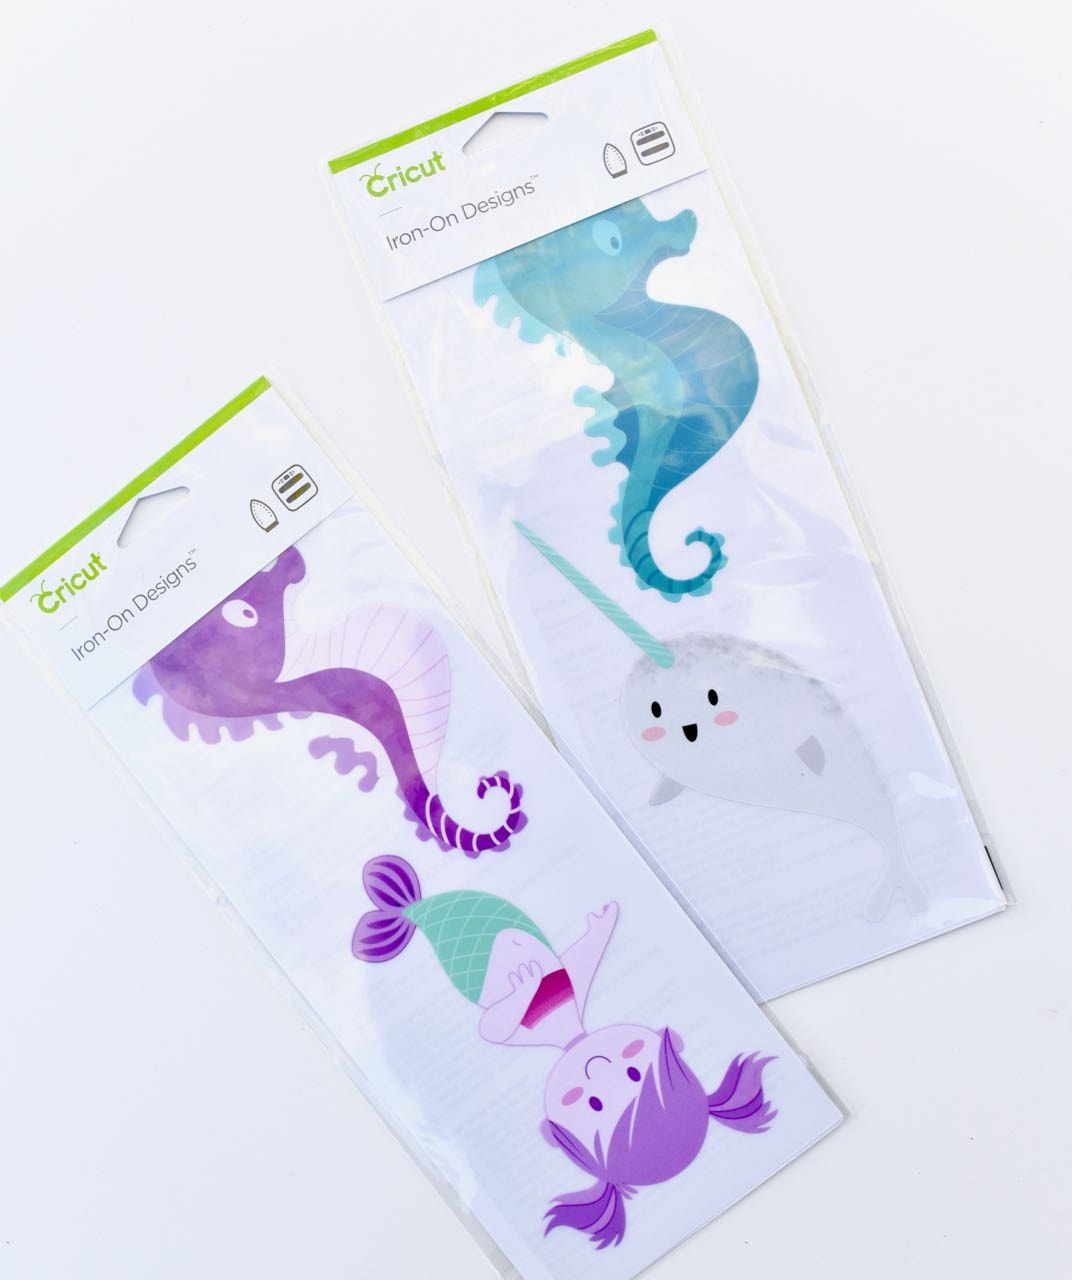
The Cute Sea Boy and Cute Sea Girl Iron-On Designs sets are my absolute favorites of all the designs!
- If you’re using the EasyPress with a towel, then you will need to hold the EasyPress over the design for 50 seconds instead of 30.
You can read about all of the different settings and recommended times on the Cricut EasyPress recommended settings page.
Flip the bag over and place the EasyPress or iron over the design area for 15 seconds.
- If you’re using an iron, then set your iron to the cotton/linen setting. Turn the steam off if your iron has this option. Preheat the fabric for 10-15 seconds, then place the Iron-On Design that you want on top. Place the EasyPress over the design, then hold firmy over the design for 50 seconds. Flip the bag over and heat over the design for 15 seconds. Let cool 1-2 minutes before removing the liner.
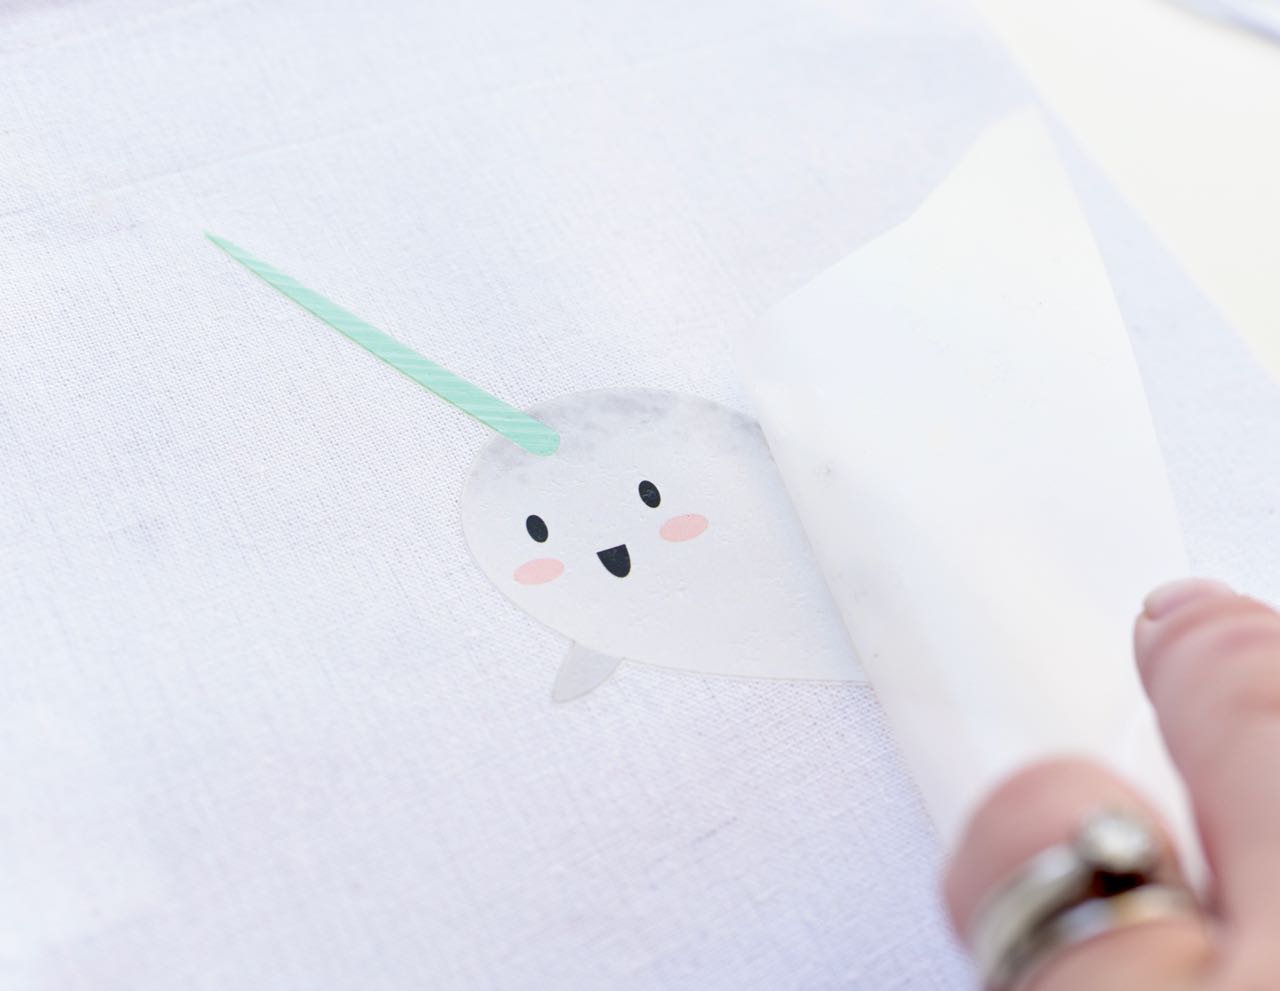
Step 2. Allow the design to cool completely before removing the liner. This is called a cold peel.
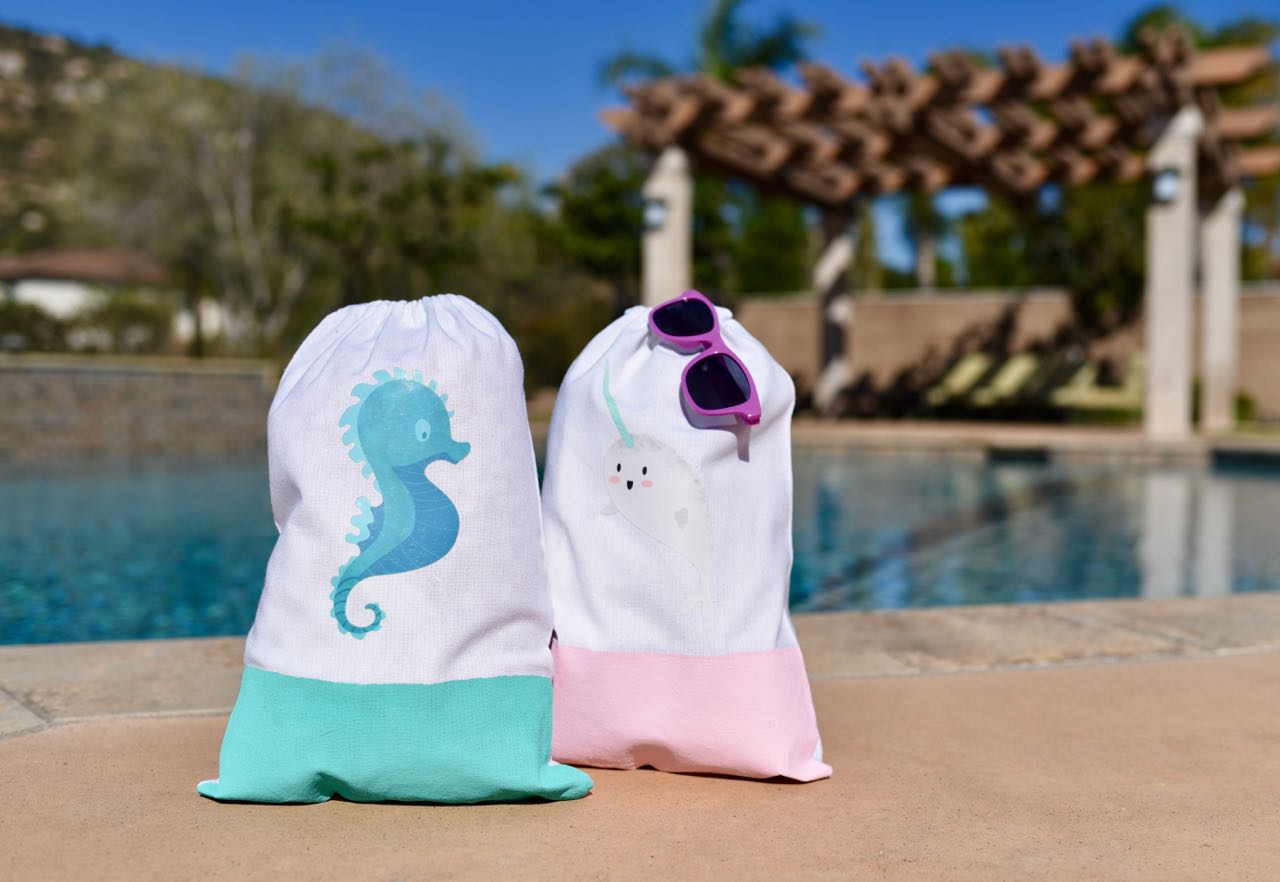
Voila! Adorable beach bag for the kiddos in under 5 minutes!
Optional: If you want to kick your bag up an extra notch, you can add a solid color at the bottom of the bag with some fabric paint.
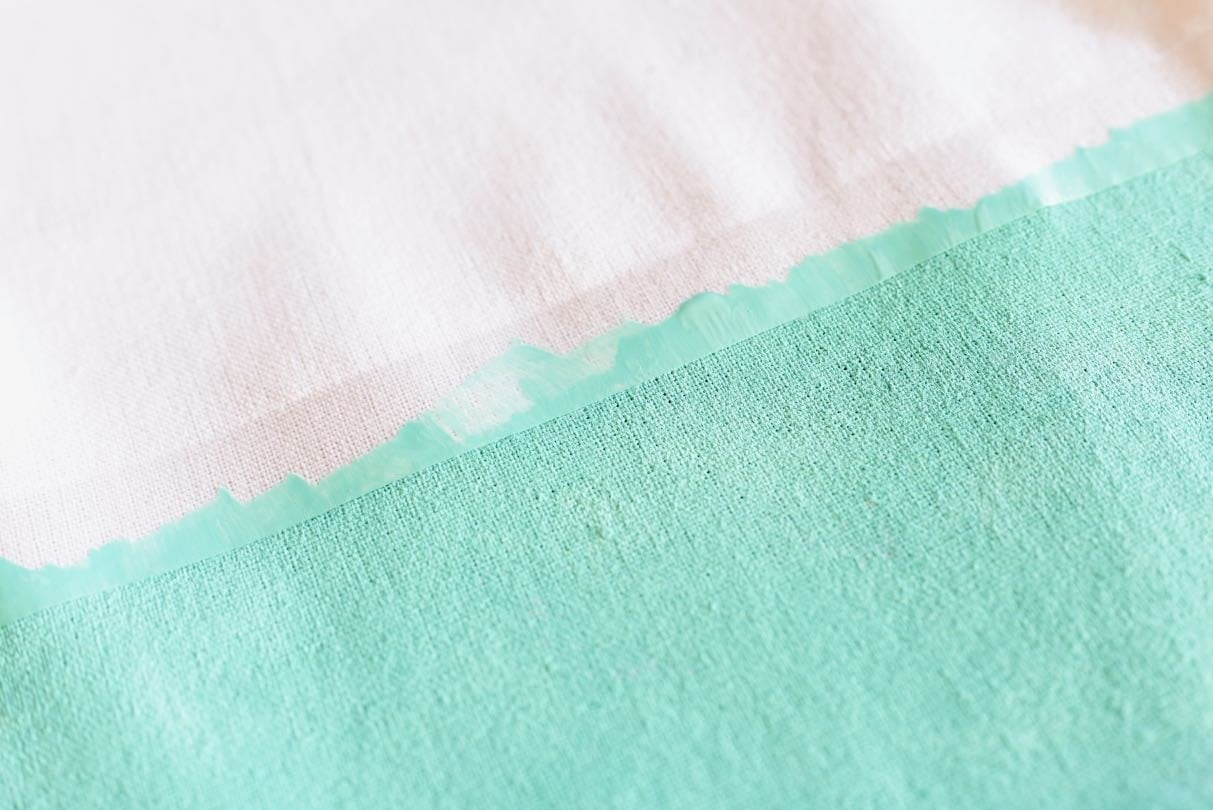
Use tape to create a straight line going horizontally across the bag where you would like your paint line to be. Would you believe I tried scotch tape since that’s what I had at my desk and it worked perfectly? Be sure to press firmly on the edges of the tape.
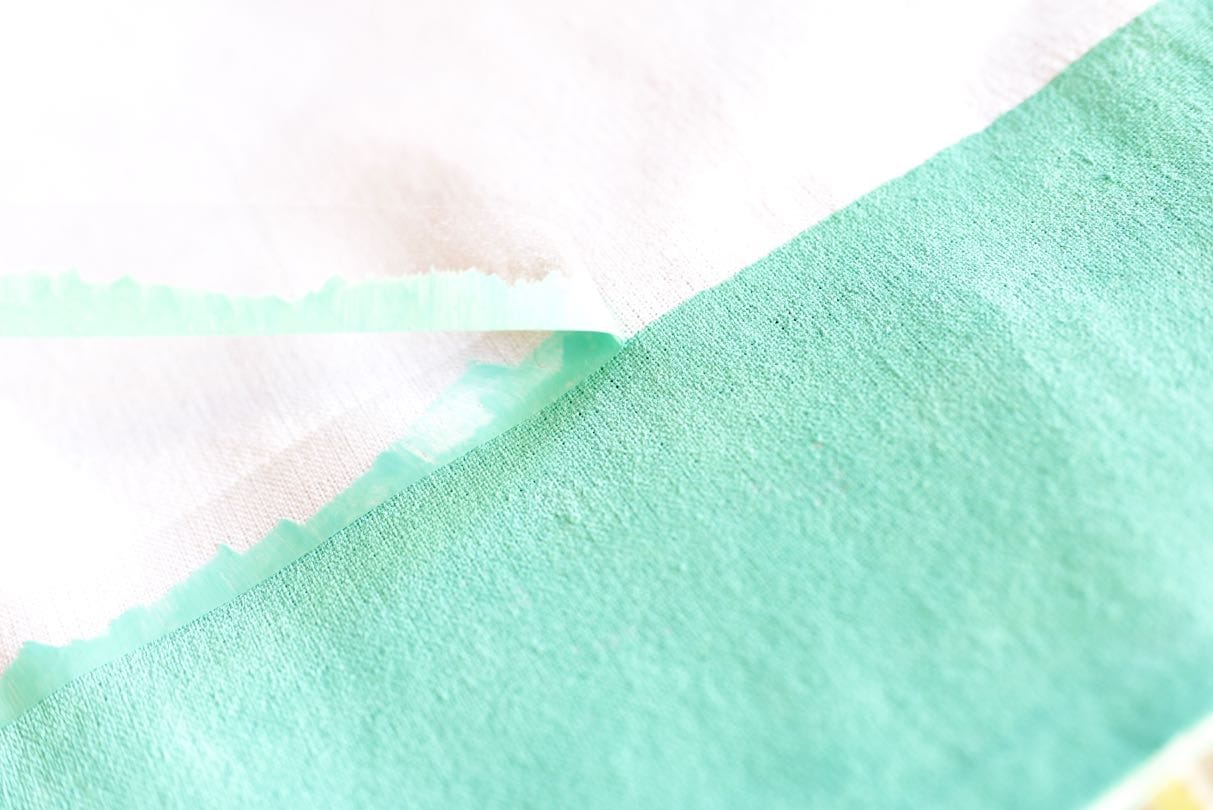
Use a paintbrush to paint the bottom section of the bag up to the paint line. Let dry, then repeat for a second coat. Let the paint dry, then remove. This beach bag DIY will have you ready for summer in no time!
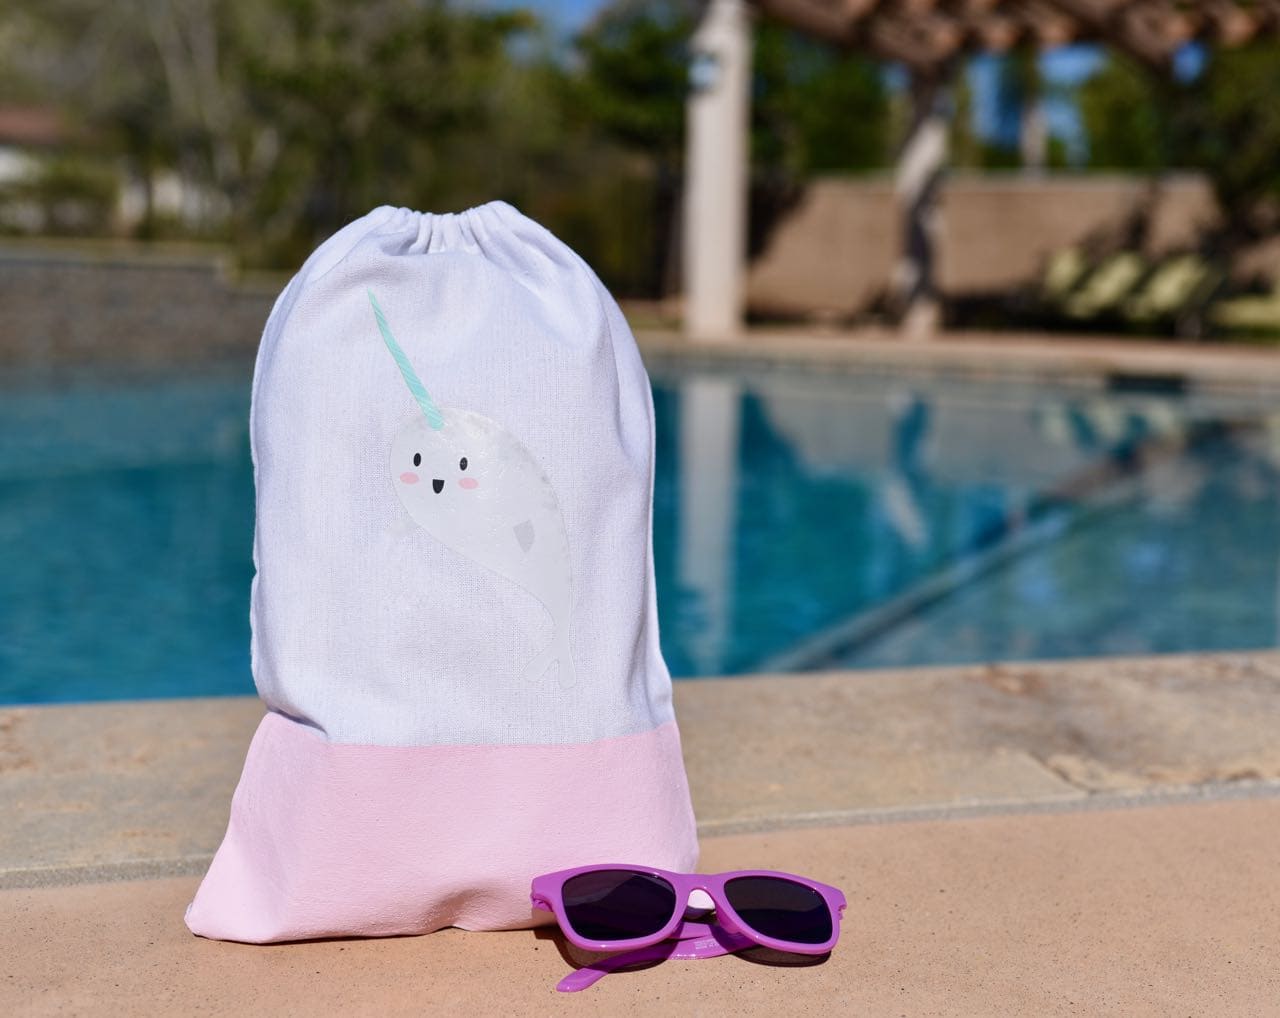
Aren’t these bags just darling?! That rosy-cheeked narwhal is my favorite!
*** Be sure to wait 24 hours before washing the beach bags. *** When it’s time to wash, be sure to wash and tumble dry inside out. Don’t use bleach. Turn bag inside out, then wash and dry on low or medium heat. If you need to iron, turn the bag inside out and iron the back.
I think these new Cricut Iron-On Designs are pretty amazing. I love that even those without a Cricut machine can get in on the crafty fun and make a cool iron-on project too!
These bags are also a fun craft for the kids to make for a craft project, make great party favors, birthday gifts, and more. The Iron-On Designs can be used on t-shirts, pillows, bags, and more! They also come in a huge variety of designs that adults and kids will love.
I can’t wait to see what Cricut comes out with next! I’d love to see them create even more patterns for their new Patterned Iron On. Disney Patterned Iron-On and Iron-On Designs would be pretty amazing too, don’t you think?
For more fab Cricut projects, you’ll love these-
How to Make Stickers Using Cricut Print then Cut

DIY Burp Cloths with Heat Transfer Vinyl and Cricut


Cricut Iron On Onesie, Leggings, and DIY Hair Bow for Baby

DIY Dinosaur Eggs + Favor Bags with Cricut

7 Reasons You Need a Cricut Maker in Your Life
Happy crafting!
![]()
This is a sponsored conversation written by me on behalf of Cricut. The opinions and text are all mine.
Leave a Reply