Learn how to make a gorgeous clay leaf from air dry clay in minutes! You’ll also learn how to make a clay bowl that’s the perfect easy fall craft for both kids and adults.
One of the most distinguishing symbols of fall for me are leaves and their changing colors during this time of year.

I wanted to create some pretty clay leaf bowls that could serve as small bowls for holding keys or jewelry.
They also make beautiful fall decorations or candle holders that add a nice warm glow to those cool fall nights.
Clay Leaf Bowls DIY
These clay leaf bowls were actually much simpler than I thought they would be and turned out even better than I even imagined!
This is a great fall craft for kids and adults alike.
The hardest part is waiting patiently for the leaves to dry so that you can paint and personalize them.
I chose to paint my diy clay leaf bowls in beautiful metallics, but deep reds, oranges, and yellows would be nice too.

Clay Leaf Supplies:
- Crayola Air Dry Clay
- Rolling pin
- Large leaves
- Small scissors
- Small bowl (to dry the leaf in)
- Foil
- Craft paint (I used a metallic gold and bronze)
- Paintbrush
Finding the Right Leaves
Find some large leaves that aren’t torn that are fresh.
I found that dry leaves don’t leave as good of an impression in the clay.
You can make this fun by going to the park and finding a collection of your favorite leaves, or even searching the trees in your own yard like I did.
If you’re doing this with kids, you can also turn it into a fun science lesson by identifying which trees have which kind of leaves, why the leaves change colors in the fall, etc.

Making the Clay Leaf
Take a medium-size piece of clay and roll it out a bit thicker than you would like your finished leaf to be.
Place your leaf onto the clay, then use your fingers to gently press the leaf into the clay.

Use a rolling pin to roll over the leaf to leave an imprint in the clay.
Pick up the clay and use a small pair of scissors to cut around the edge of the leaf.

Very carefully remove the leaf, starting with the stem.
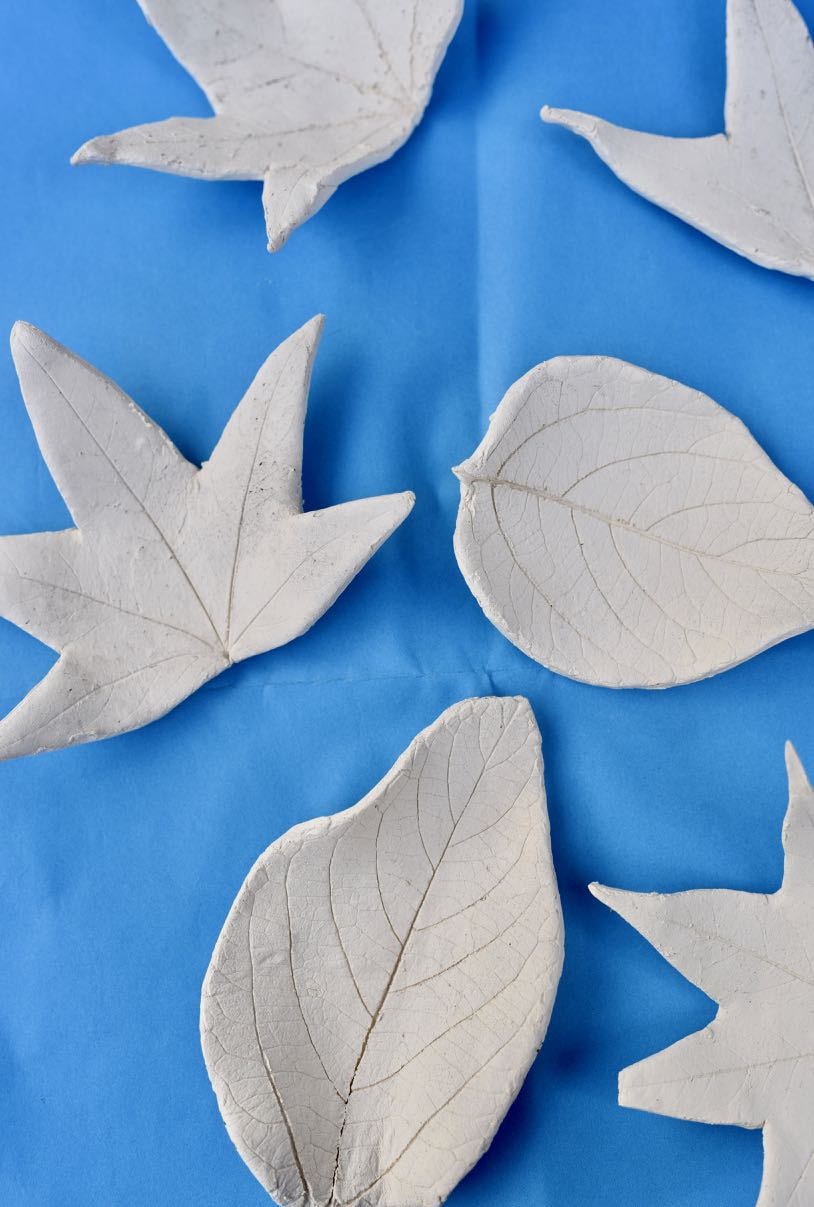
Look at all the veins and amazing detail on your leaf now.
Isn’t it gorgeous?

If for some reason you make a mistake, just roll our your dough and start over again.
No big deal!

How to Make a Clay Bowl
Place the clay leaf in a foil-covered small bowl.
Curl up the sides of the leaves along the edges of the bowl so the leaves are rounded like a bowl or to hold tealight candles.
Let the air dry clay dry for a day or two until completely hard and dry.
Painting the DIY Clay Bowls
Once your leaves are dry, it’s time to paint.

I used metallic gold and bronze paints on my leaves, then I let them dry.

Now it’s time to display your beautiful leaf bowls!
You can use them to hold small household items, place them around the house as decorations, or place small tealight candles on them and use them as clay leaf candle holders.

I used them for our Thanksgiving table as candle holders when I shared my delicious turkey cheese ball recipe.
It’s the perfect easy Thankgiving appetizer and looks great on the table!

I also scattered a few around the table for lovely fall decorations.
The bronze ones are my favorites!
Any way you use them, they are a great way to enjoy the beauty of fall and nature year round.
More Fall and Thanksgiving Ideas-

Turkey Cheese Ball Recipe and Thanksgiving Table Ideas


Fall Stovetop Potpourri Recipe

Fall Party + Acorn OREO Cookie Balls Recipe
Happy fall!
![]()
This article was updated in July 2021 and was originally posted in November 2017.
Leave a Reply