Make a colorful patriotic flag garland to decorate your home for the 4th of July with this easy tutorial.
Want a great way to show your pride in America this 4th of July?
This easy and fun DIY American flag garland is just the answer!
Some triangles have red and white stripes, and others have a blue background with white stars, all made with inexpensive (and very forgiving) burlap and spray paint.
The whole project only cost me $5 to make!

Here’s how you can make your very own red, white, and blue patriotic flag bunting, just in time for the 4th of July, that can also be used for Memorial Day, Veteran’s Day, etc.
Supplies:
- Burlap (I used 1 yard of the lightest color they had at Joanns- don’t forget your coupon!)
- Red & navy blue spray paint (Walmart for $1.50 each)
- Macrame cord (leftover from past projects from Joanns), or any jute, twine, or string
- Glue gun
- Painter’s tape (Scotch Blue is my tape)
- Star stickers, chipboard, die cuts, etc.- anything star shaped!
- Piece of cardboard or posterboard (for bunting template)
Step 1: Cut a triangle bunting template out of cardboard or posterboard in your preferred size. Trace the bunting shape with a pen onto your burlap, and cut out each triangle. Cut out as many as you would like for your bunting. I used 12 triangles in my bunting. The great thing about burlap is that you don’t have to sew it!
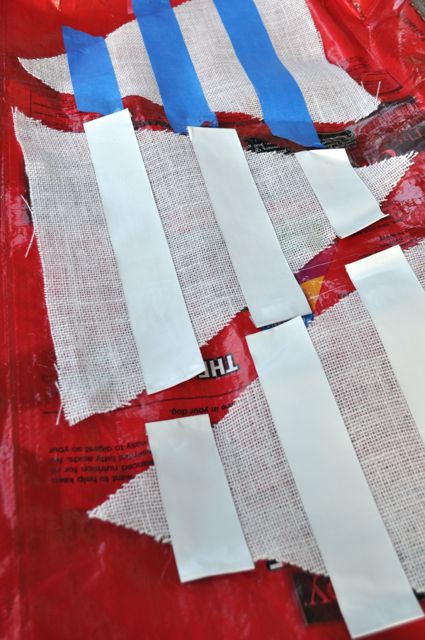
Step 2: Use the blue painter’s tape to create stripes onto your triangles that will be red and white. Since my bunting was made from 12 triangles, 4 triangles were blue and 8 were red and white.
Spray paint two light coats of red over each of the striped traingles. It will be white wherever you place the tape. Let dry before removing tape. Removing the tape is seriously the best part of this whole project! There’s something so satisfying about lifting up that tape and seeing the crisp red lines 🙂
And PS, don’t use Gorilla tape like I did the first time- worked perfectly, but was so strong it tore apart the edges when I tore it off… oops!
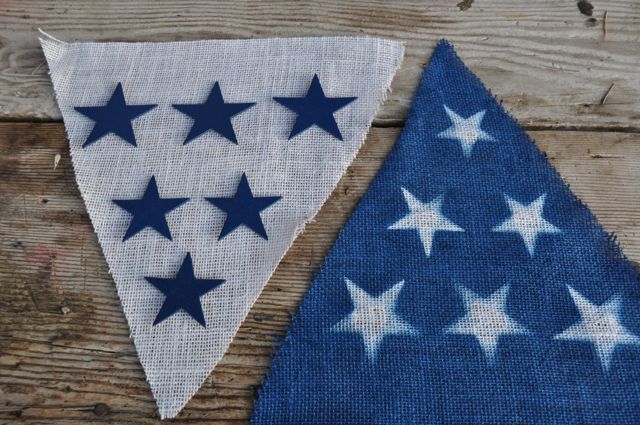
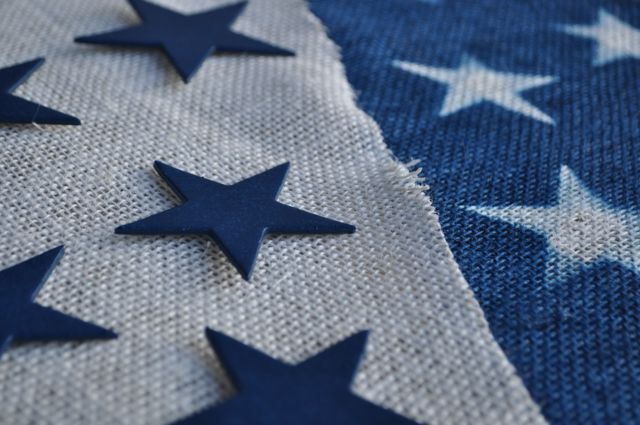
Step 3: Apply your star stickers, or stick on your chipboard, die cuts, or whatever you have that’s star shaped to use. I used some leftover star chipboard pieces I had from scrapbooking. Spray two coats of the navy blue over the traingles, and let dry before removing the stars. When spraying the stars, be sure to spray directly from overhead, so your star outline will be nice and crisp!
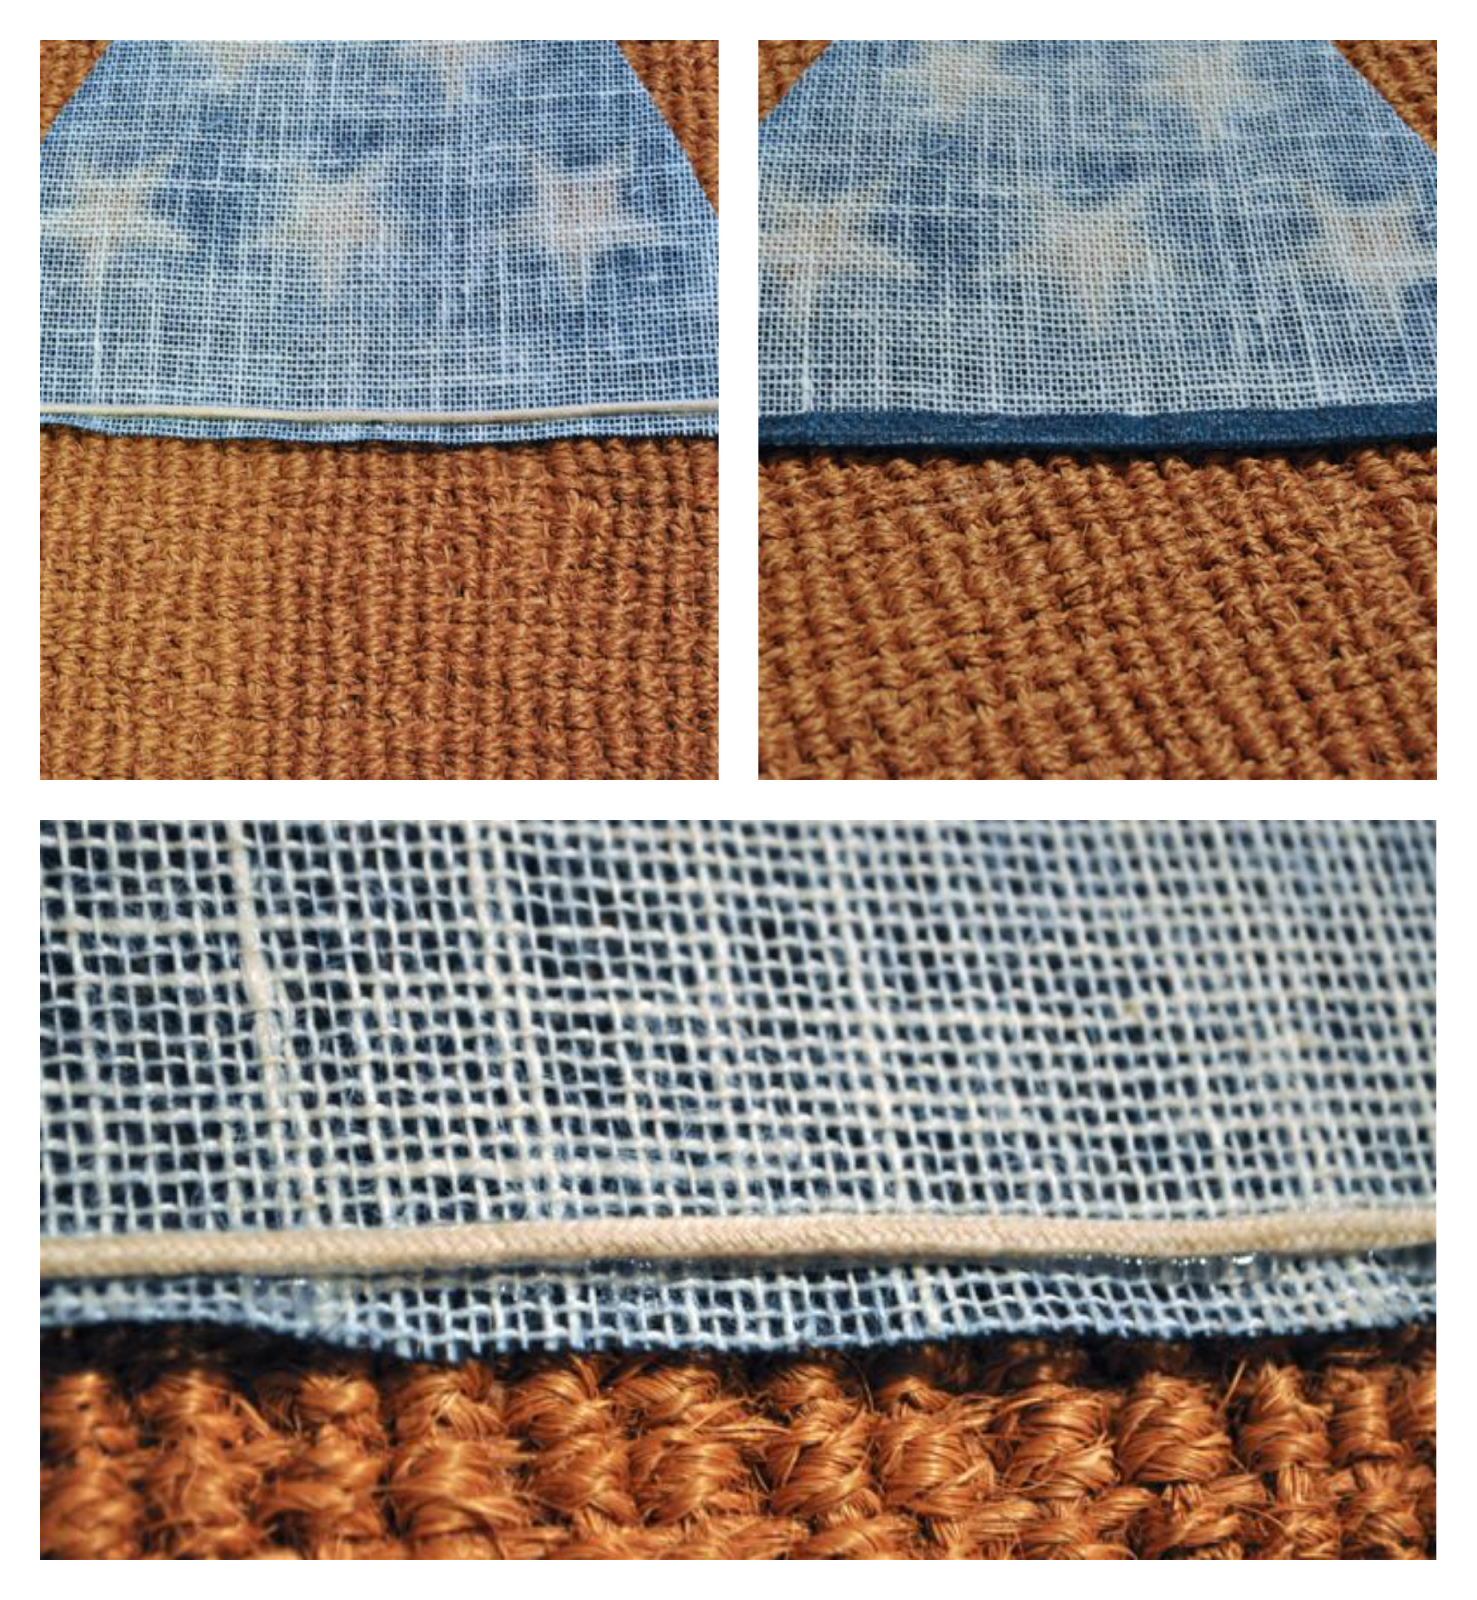
Step 4: Now that you’ve got your lovely painted garland pieces, it’s time to put the whole thing together. Turn first triangle backwards, and take your cord (or jute, twine, or string) and place at the top of your triangle, just a little bit under the top. Flip the top prtion of the traingle over the cord, and hot gue the whole top down. Repeat for every garland triangle, until the bunting is complete!
We took my bunting with us downtown and had some fun taking pictures!


I think I live in the most beautiful city, what do you think?
So have I inspired you to make your own flag garland for the Fourth of July? I hope so!! It’s super easy, inexpensive, and looks great!
Melanie@Crafty Cupboard says
I love how large-scale it is! And, yeah, I’m totally jealous of your city!
Laura @ Make Life Lovely says
Thanks Melanie! Go big or go home, right?! 🙂 Thanks, it’s a great place to live!!
Jennifer Pilgrim says
I adore these! Pinned.
Pretty please share this on a link party that I host with 4 other blogs called Moonlight & Mason Jars (live Monday at 5pm EST thru Sunday at midnight). We feature 5 blogs who link up every week.
Xo,
Jenn Pilgrim
The Newlywed Pilgrimage
srpprcrftr says
Now see what you’ve started, I’ve got to get some white burlap tomorrow and the spray paint. Great project. Your little guy is so adorable, enjoy him, what a sweetie.
First, do you live in San Diego? Not sure if the statues and all are there or not as haven’t been back for long time. I’ve heard tho that Old Town and the pier areas have been fixed up so nicely, even more. If you’re in San Diego, it is a great and gorgeous place to live. I really miss the beaches and lots of great things about San Diego.
We lived there for 21 yrs. then moved to MT on 20 acres in 92 on a big lake. Now we live in CO where we moved to from KY after MT. My oldest son is smart one, he moved back to S.D. from KY about 4 yrs. ago now.
The more I looked at your wonderful pics the more it looked like S.D. to me, I’m really homesick for it. Love your project, you sure inspired me. Happy Summer
Laura @ Make Life Lovely says
Thanks, so glad you like my project! The statues are somewhat new, they are down by the harbor. Yes, I’m sure things have changed a lot since you moved from San Diego. It really is a great place to live, and you can’t beat the weather! 20 acres and a big lake sure sound nice, though, too! I hope you give the project a try, and thanks for reading!!
Chelsea B. says
Such a fun idea and I love the photo shoot too! You have a great city! I’d love for you to check out our Pattern Party! Those with free patterns and templates to share are invited to link up! Starts on the 1st of each month.