Hi friends! Today I’m sharing the sweetest little diy bean bag apple that you can make in just 15 minutes.
Really, I timed it!

This cute apple bean bag is fun for the kids to play with, is great for teachers to use in the classroom, and would make a great back to school gift for your child’s teacher.
Apple Bean Bags
Each apple bean bag takes just 15 minutes.
You could make a whole set of these while watching a movie or binge watching your favorite series!
Bean Bag Supplies
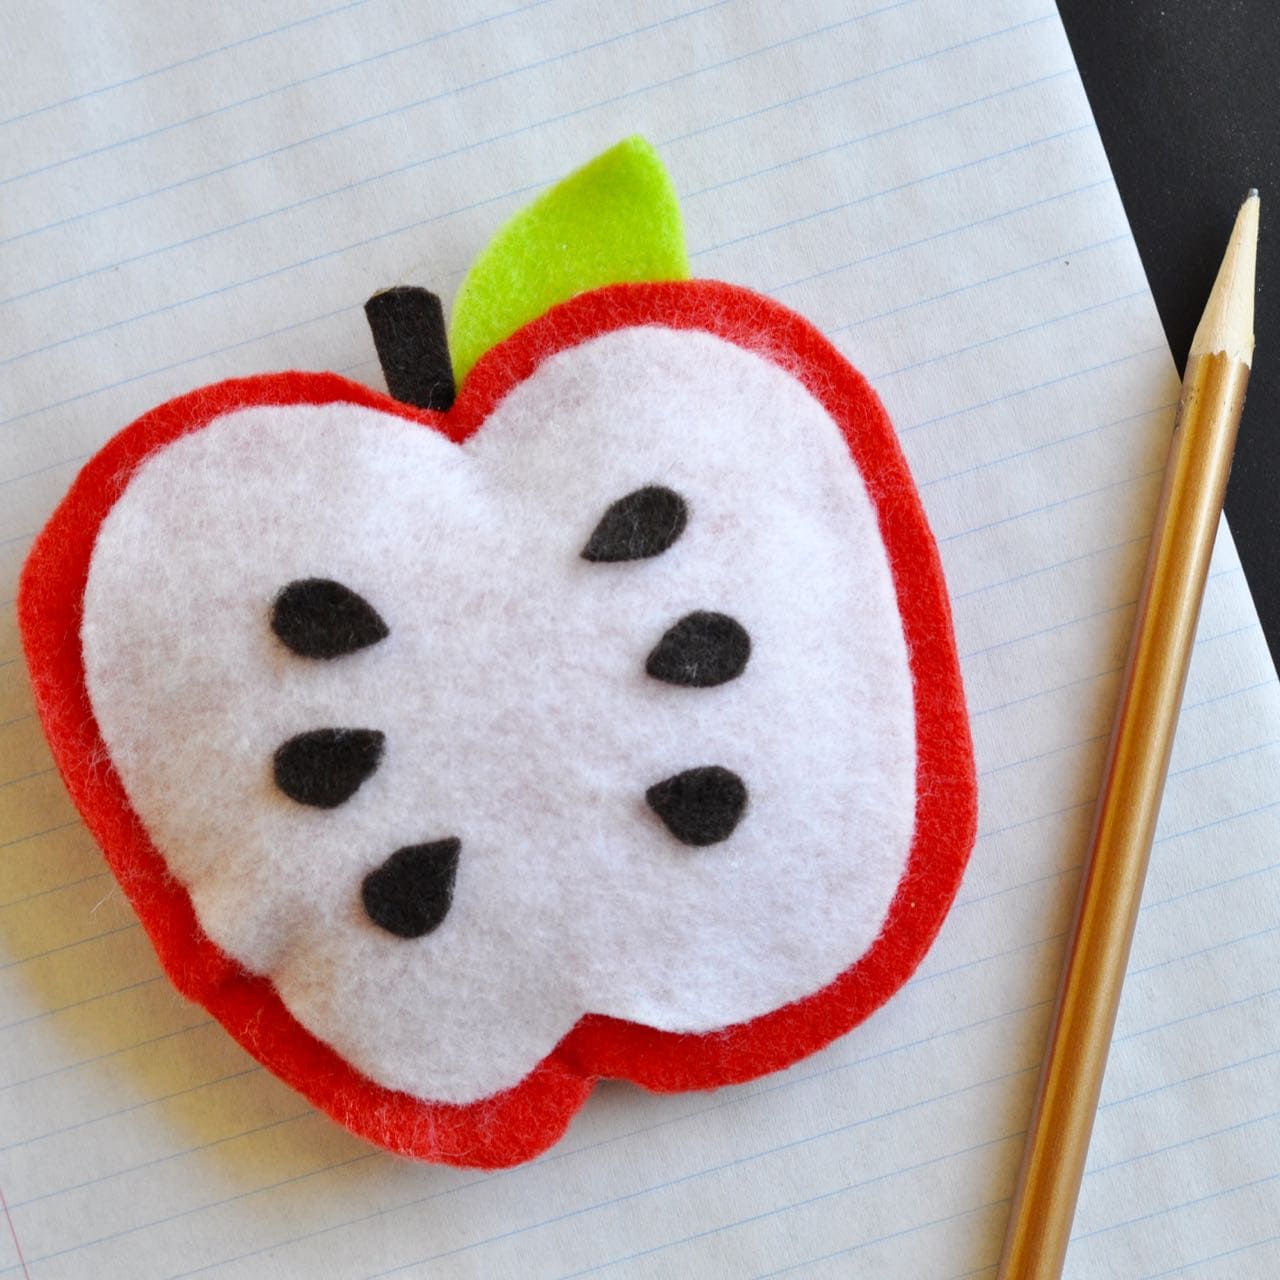
- Red, white, and brown felt
- Scissors
- Hot glue
- Rice, beans, or bean bag fill
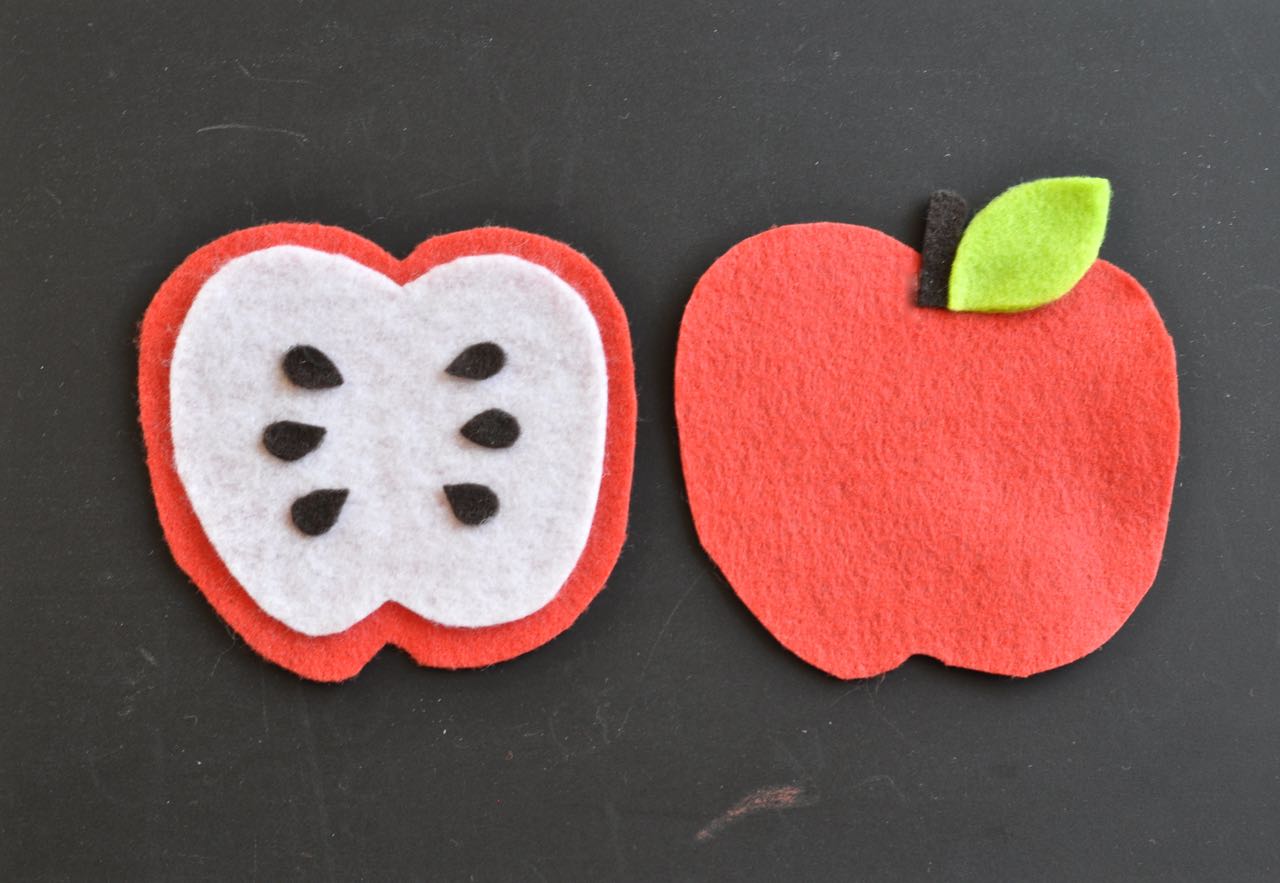
Step 1. Fold over a piece of red felt and cut out two identical apple shapes with sharp scissors.
I just cut freehand, but you could also print and cut out an apple shape, trace it onto your felt, and then cut.

Step 2. Use one of the red apple shapes to cut out a matching piece of white felt.
Now cut down that piece just a bit so it is smaller and fits evenly inside the red apple piece.
Cut out a brown stem, 6 brown seeds, and a green leaf.

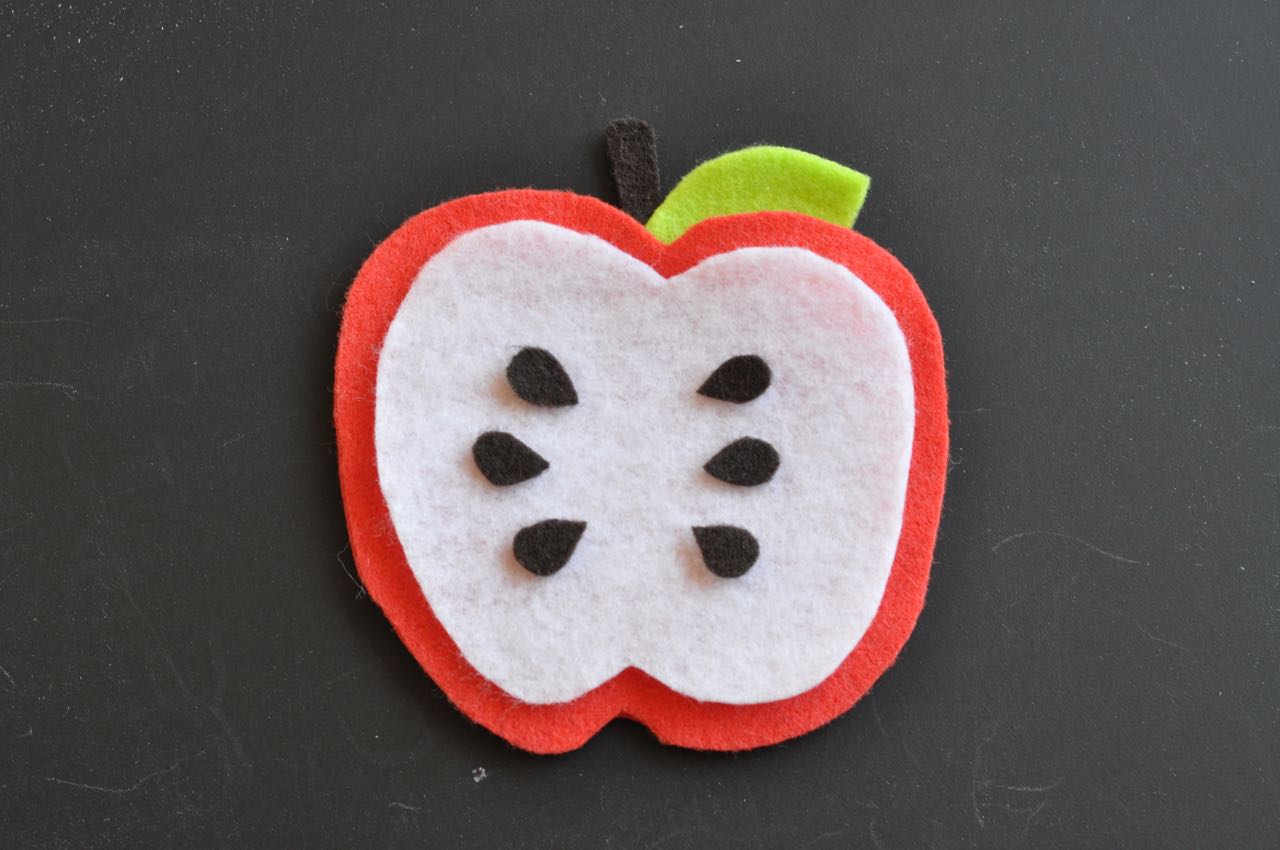
Step 3. Use the hot glue to glue the seeds onto the white felt, the white felt onto the red apple top.
Then glue the brown stem and the green leaf to the top of the second apple (these will be sticking out from the inside of the apples).
Step 4. Glue the two apple piece together by adding a line of hot glue just around the inside outline of the apple with the leaf and stem on it.
Be sure to leave a spot a few inches wide with no glue!
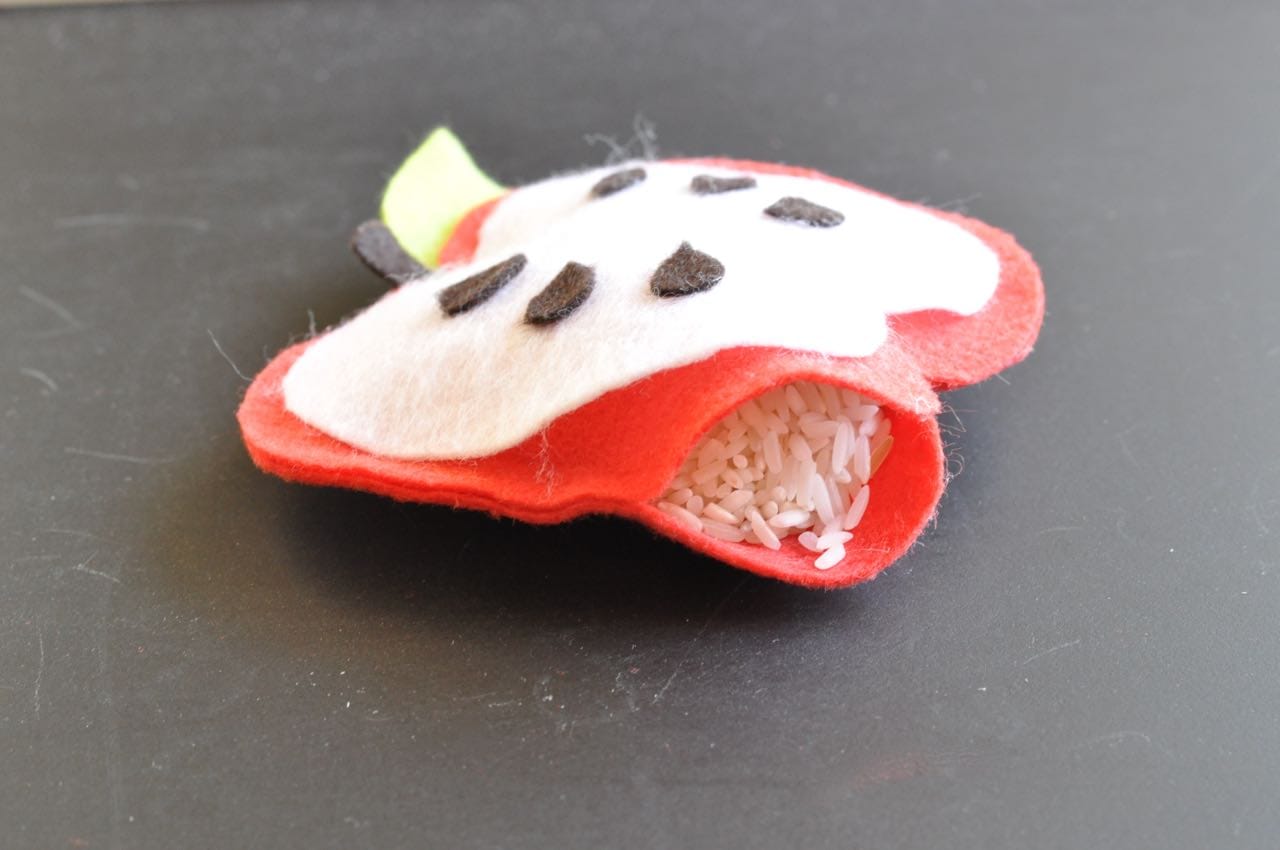
Step 5. Use a funnel to add your rice to the inside of the apple through the hole that you left, then add glue and seal up the apple.
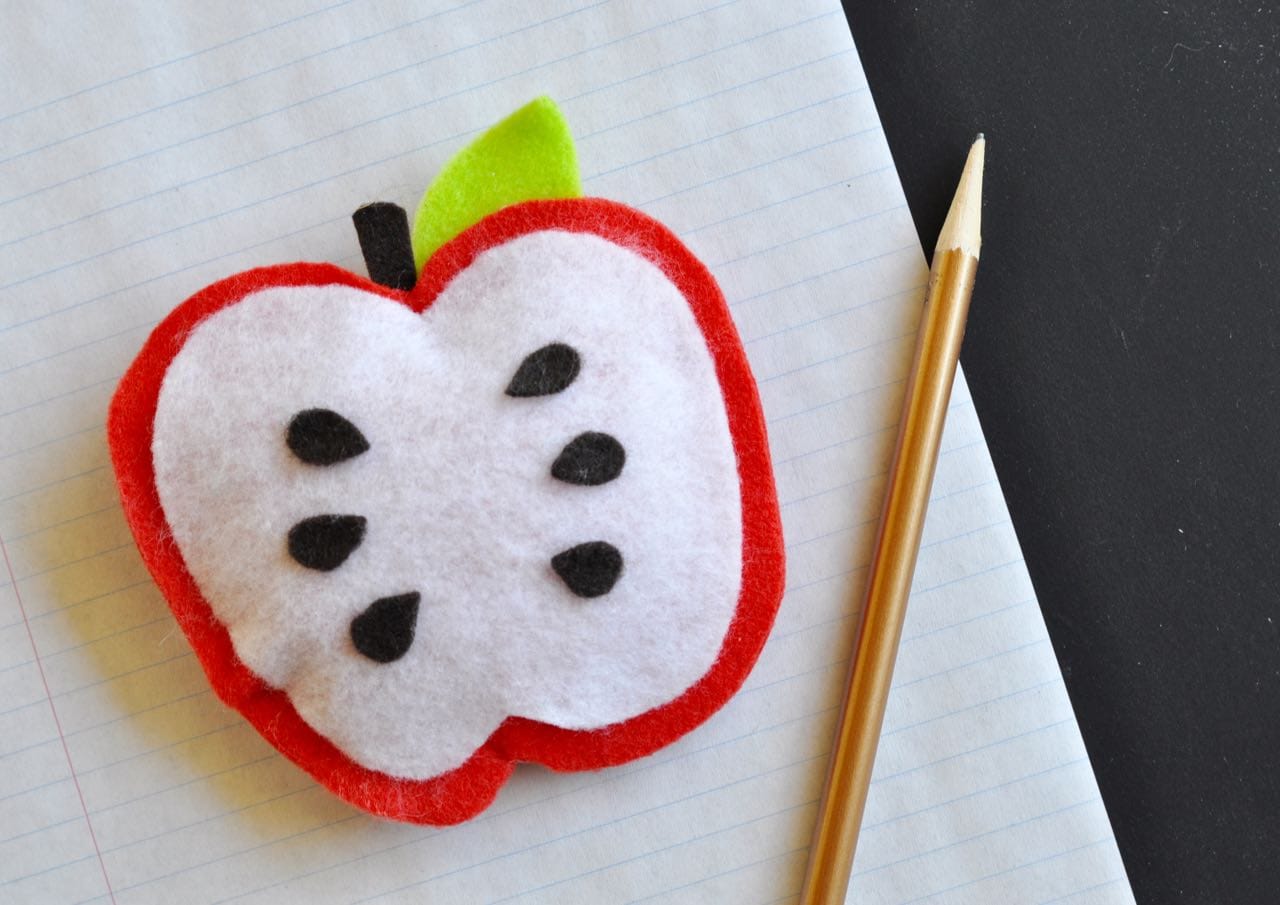
Easy! Now you’ve got an adorable apple bean bag that you made yourself in just 15 minutes, and plenty of time to make another one for another teacher, child, or friend.
This time in green maybe? 😉
Happy crafting!
![]()
Leave a Reply