This is a sponsored conversation written by me on behalf of Cricut. The opinions and text are all mine.
Learn how to make two fun DIY Christmas cards with your Cricut machine! These cards are so fun and are perfect for giving to those on your list this year.
I’ve always believed that homemade is better. When someone gives you a handmade Christmas card, you know that they took time out of their busy schedule to create something special just for you. 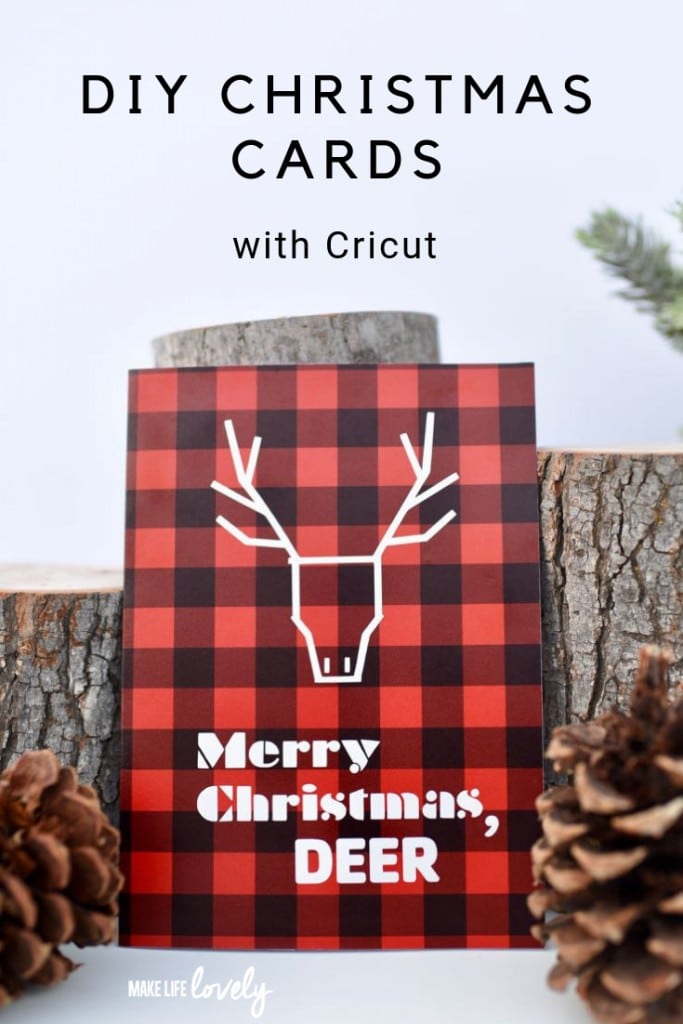
Today I’m going to teach you how to make two joyful handmade Christmas cards that will bring delight to anyone who receives them. I’m also sharing the cut files, so you can make these cards in a jiffy!
My Cricut Maker made these DIY Christmas cards perfectly! It’s an amazing machine that can cut thicker materials like chipboard, mat board, and fabric, as well as vinyl, iron-on, and more.
You can learn more about the Cricut Maker HERE and see why I love mine so much! 
The first of these DIY holiday cards is a modern rustic “punny” card I came up. It features a deer with the words “Merry Christmas, deer” on a black and red buffalo check background.
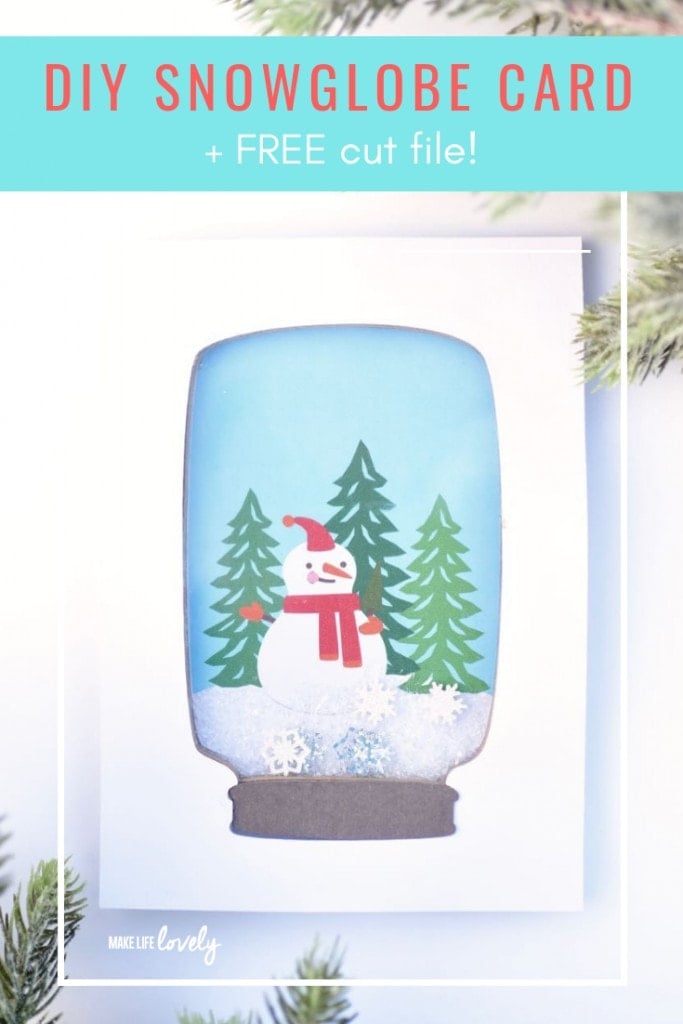
The second card is interactive and is perfect for both kids and adults. It’s a mason jar snow globe card with glitter and snowflakes inside that can actually shake and move like a real snow globe! Who wouldn’t love getting a fun card like this?
Let’s get crafting with these handmade Christmas cards ideas!
This post contains affiliate links, which means I get a very small percentage of any purchase made at no extra cost to you to help with my blog expenses. Thank you!
DIY Christmas Cards

Modern Deer Handmade Christmas Card
Supplies:
- Cricut Maker
- White Cardstock
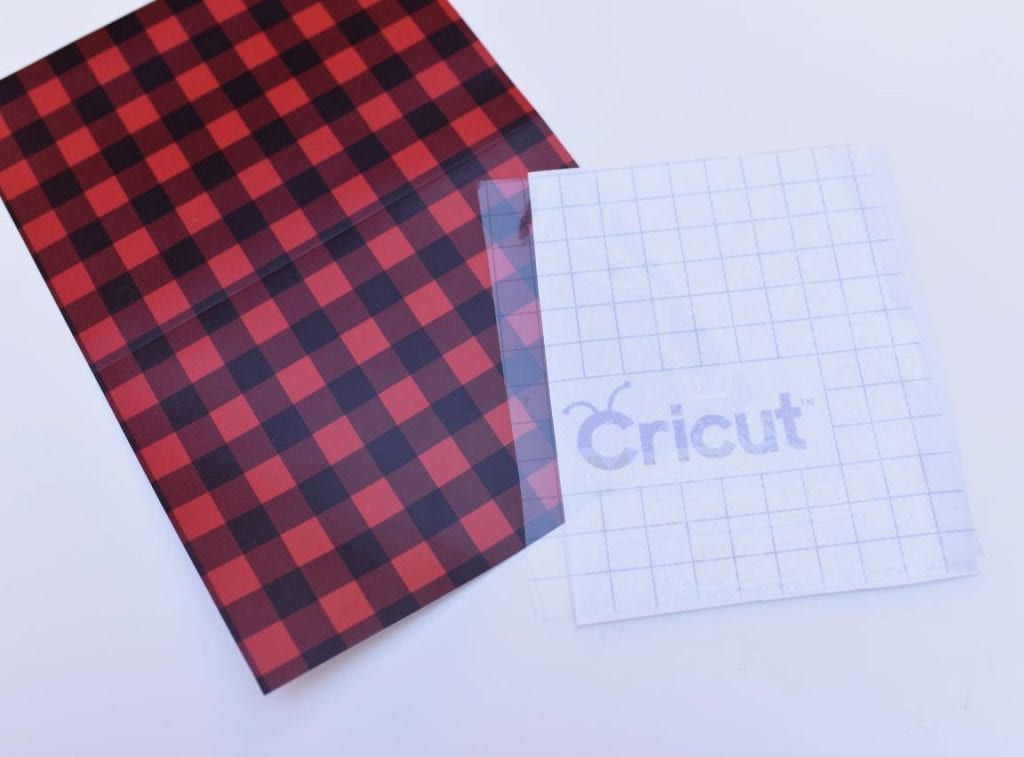
- Rustic Lodge Lumberjack Removable Premium Vinyl Sampler
- White Cricut Vinyl
- Transfer Tape
- Scoring Wheel

Step 1. Go to the card cut file I created in Design Space.

Place a piece of the white vinyl onto a cutting mat. Press “Make It” and follow the prompts to cut the words for the card from the white vinyl.
Step 2. Remove the adhesive back and press a piece of buffalo plaid vinyl (from the Rustic Lodge Lumberjack set) onto a piece of white card stock.
Cut and score the card out with the Maker using the provided cut file. The Cricut Scoring Wheel makes this nice and easy since it creates a scored line for you to easily fold the card.

Step 3. Use a weeding tool to remove the extra white vinyl on the words you cut so that just the words “Merry Christmas, deer” are left.
Cut a piece of Transfer Tape that’s slightly bigger than the vinyl words.

I used my TrueControl Knife to make the quick cut. This knife is amazing and I love that when I set it down it doesn’t roll off because of the anti-roll feature. Brilliant!

Place the sticky side of a piece of Transfer Tape over the words, then press down firmly. Remove the Transfer Tape with the words adhered to them centered onto the front of the card. Rub firmly over the words, then remove the Transfer Tape.

Ta da! Now you have some gorgeous modern yet rustic DIY Christmas cards. I love this design so much.
Buffalo plaid is always a trendy pattern during the holidays and these cards are stylish and so much fun!

Shaker Snow Globe Card
Supplies:
- White Cardstock
- White Glitter Cardstock
- Antiquity Cardstock
- Silver Party Foil
- Heavy Chipboard
- Cricut Knife Blade
- Scoring Wheel
- Strong Grip Mat (Purple mat)
- Clear acetate (or a clear piece of plastic from product packaging)
- Diamond Dust or clear glitter
- Glue gun or other strong adhesive
- Mod Podge

Step 1. Go to the card cut file I created in Design Space. Press “Make It” and follow the prompts to cut out all the pieces for the card.
Here is a list of all the pieces you’ll cut and what materials to cut them out of-

Print then Cut snow globe- Print the design with your printer, then follow the prompts to cut our the snow globe with your Maker and the Fine Point Blade.
Gray mason jar lid- Cut the gray lid out of gray card stock.

Card base and mason jar cut out- Cut both of these out of white card stock. Use the Scoring Wheel to score the card on the fold line.

Mini snowflakes- Cut the mini snowflakes out of silver party foil and white glitter card stock.

Chipboard jar frame- Place a piece of heavy chipboard onto a purple strong grip mat, then place masking tape all the way around each side. Follow the prompts to cut the chipboard frame outline out. This will take multiple passes since the chipboard is so thick.
You can cut one or two of these, depending on how thick you want your card and how deep you want your snow globe to be. One works great and is deep enough. I tried gluing two frames together, and it made the snow globe deeper, but you could see in between the card pieces. You’ll have to choose which works best for you!
Clear snow globe “glass”- Cut a piece of plastic from product packaging or use a piece of acetate. Cut a rectangle that is bigger than the mason jar.
Step 2. Now it’s time to assemble the card!
Glue the piece of plastic or acetate to the back of the card stock with the mason jar cut out of it. If you are using two pieces of chipboard, glue the together on top of each other.

Now glue the chipboard frame onto the back of the plastic around the jar opening so that it’s nice and even. I originally used a quick dry tacky glue, but changed my mind and used a glue gun for this part. The glue gun worked much better and held immediately.

Use your favorite adhesive to glue the mason jar scene with the snowman onto the front of the white card.

Step 3. Brush on a thin layer of Mod Podge over the snow on the snow globe. Sprinkle some Diamond Dust or other clear glitter over the Mod Podge, then gently shake off the excess.

Add some extra glitter over the top of the jar, then place the cut mini snowflakes on top of that.

Use a glue gun to glue the chipboard frame onto the front of the card to make the snow globe dimensional. Make sure to use enough glue so the glitter doesn’t come out from the card.
Give the card a good shake to make sure you have a tight seal. Glue on the gray lid bottom of the mason jar.
Now write a nice note inside your DIY Christmas cards, then give them to your favorite people. Even old Scrooge himself would be delighted to receive one of these sweet handmade Christmas cards!
SO, which of these DIY Christmas cards is your favorite?
I just can’t decide, I love them both so much! I bet you can guess which one is my kids’ favorite though! 😉
Here are more holiday ideas to make with your Cricut machine-
- Rustic Buffalo Plaid Party with Cricut
- DIY Advent Calendar Boxes
- Christmas Chalkboard Sign
- Hot Cocoa Gift Basket
Happy crafting!
![]()
Leave a Reply