Learn how to make a gorgeous felt advent calendar to count down the days until Christmas! Each day on this Christmas advent calendar has a pocket to place treats and activities inside.
I have always wanted a nice felt advent calendar for our family, but I just haven’t found any that I fell in love with. That is, until now. I am head over heels for the DIY advent calendar that I just finished!

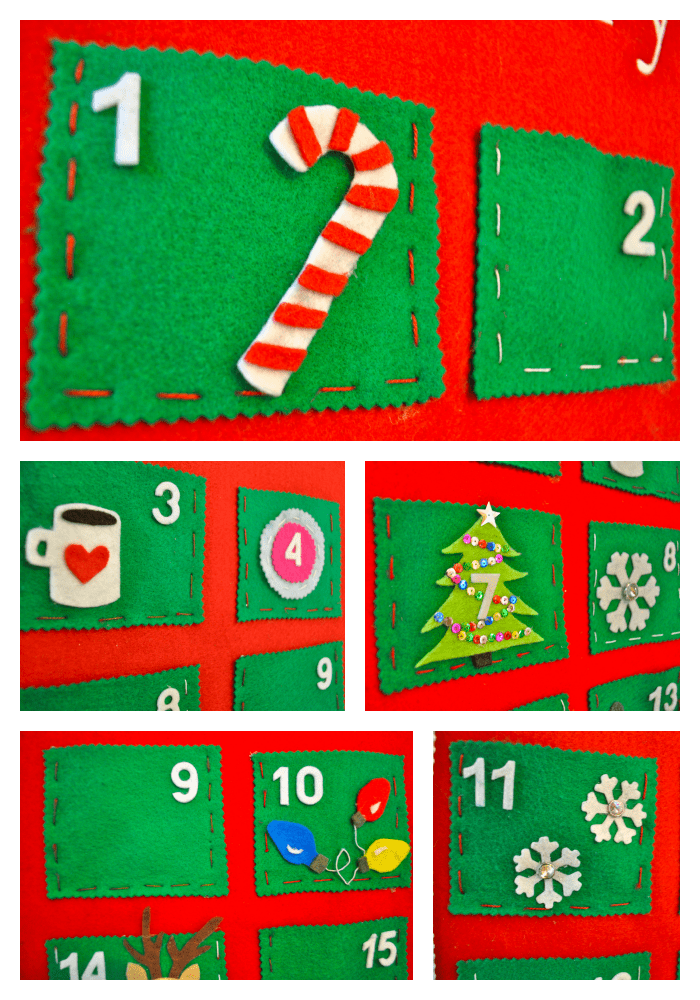
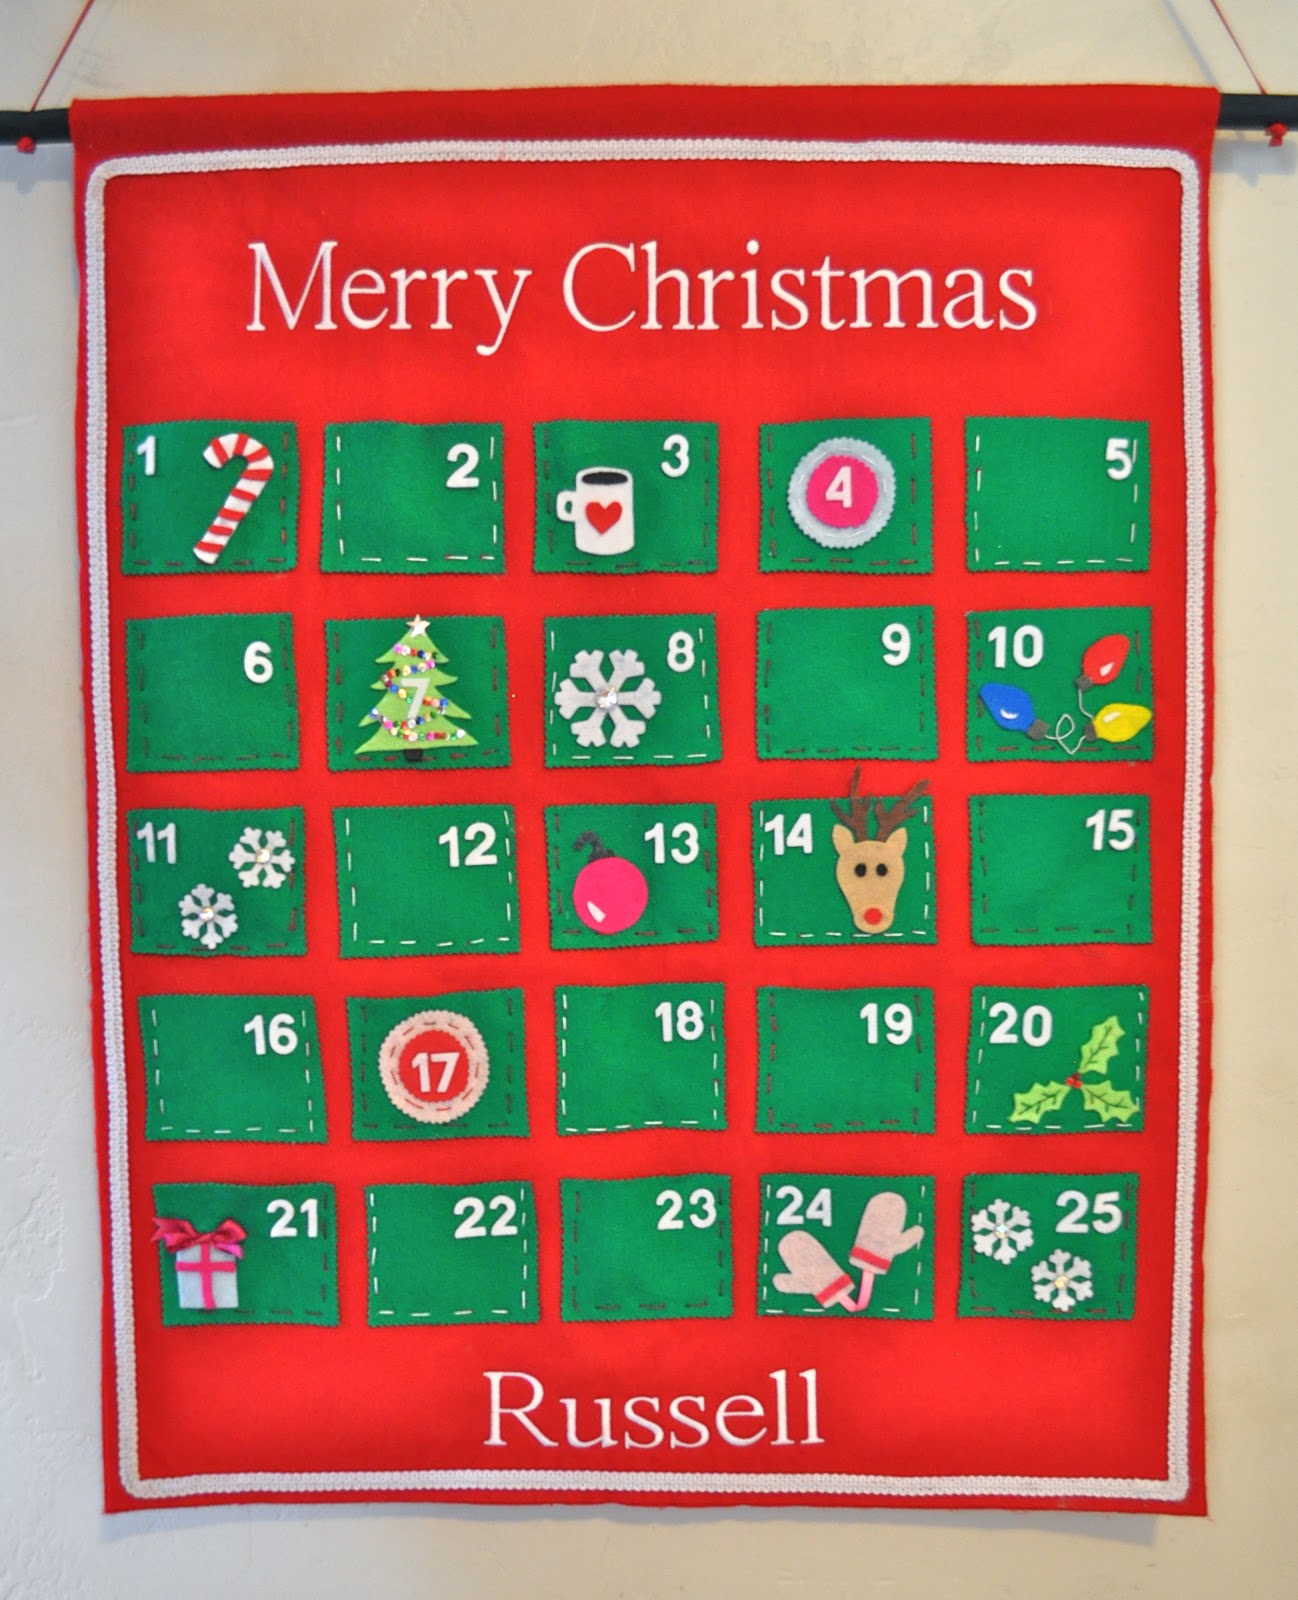
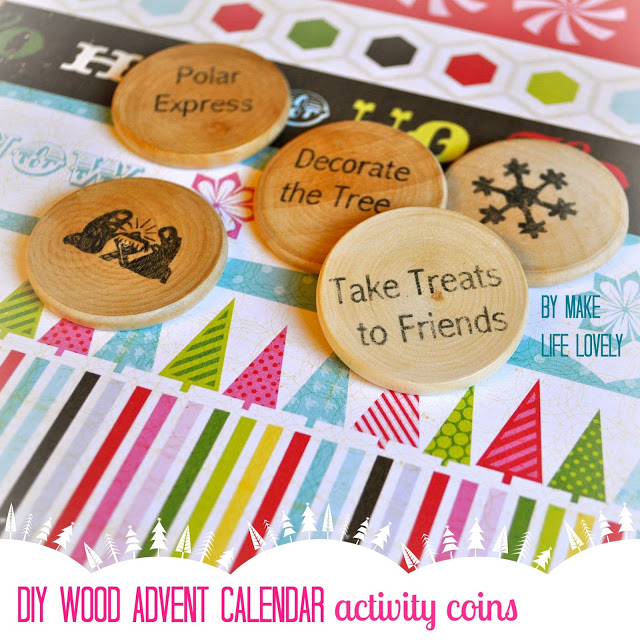
Our pocket advent calendar is pretty big, and has a pocket for each day in December through Christmas. The pockets are big enough for treats for all four of my kids, plus one of these easy DIY wood advent activity coins for each day.
 |

How to Make a Felt Advent Calendar
- 1 yard premium red felt (72″ wide- I bought mine at Joann)
- Green felt (I bought a yard but had a bunch left over)
- Small pieces of other colors of felt (for the Christmas objects on the pockets)
- White 1″ felt numbers (enough for all the numbers 1-25)
- Embroidery floss (whatever colors you choose- I used white, red, brown, and green)
- Glue gun and glue sticks
- White trim (optional)
- Sewing scissors
- Pinking shears (optional)
- Any embellishments you want to use (optional- I used 3 red crystals, sequins, white felt pre-cut snowflakes, and a little bit of pink ribbon)
- Dowel
- Flat black spray paint (optional- for the dowel)
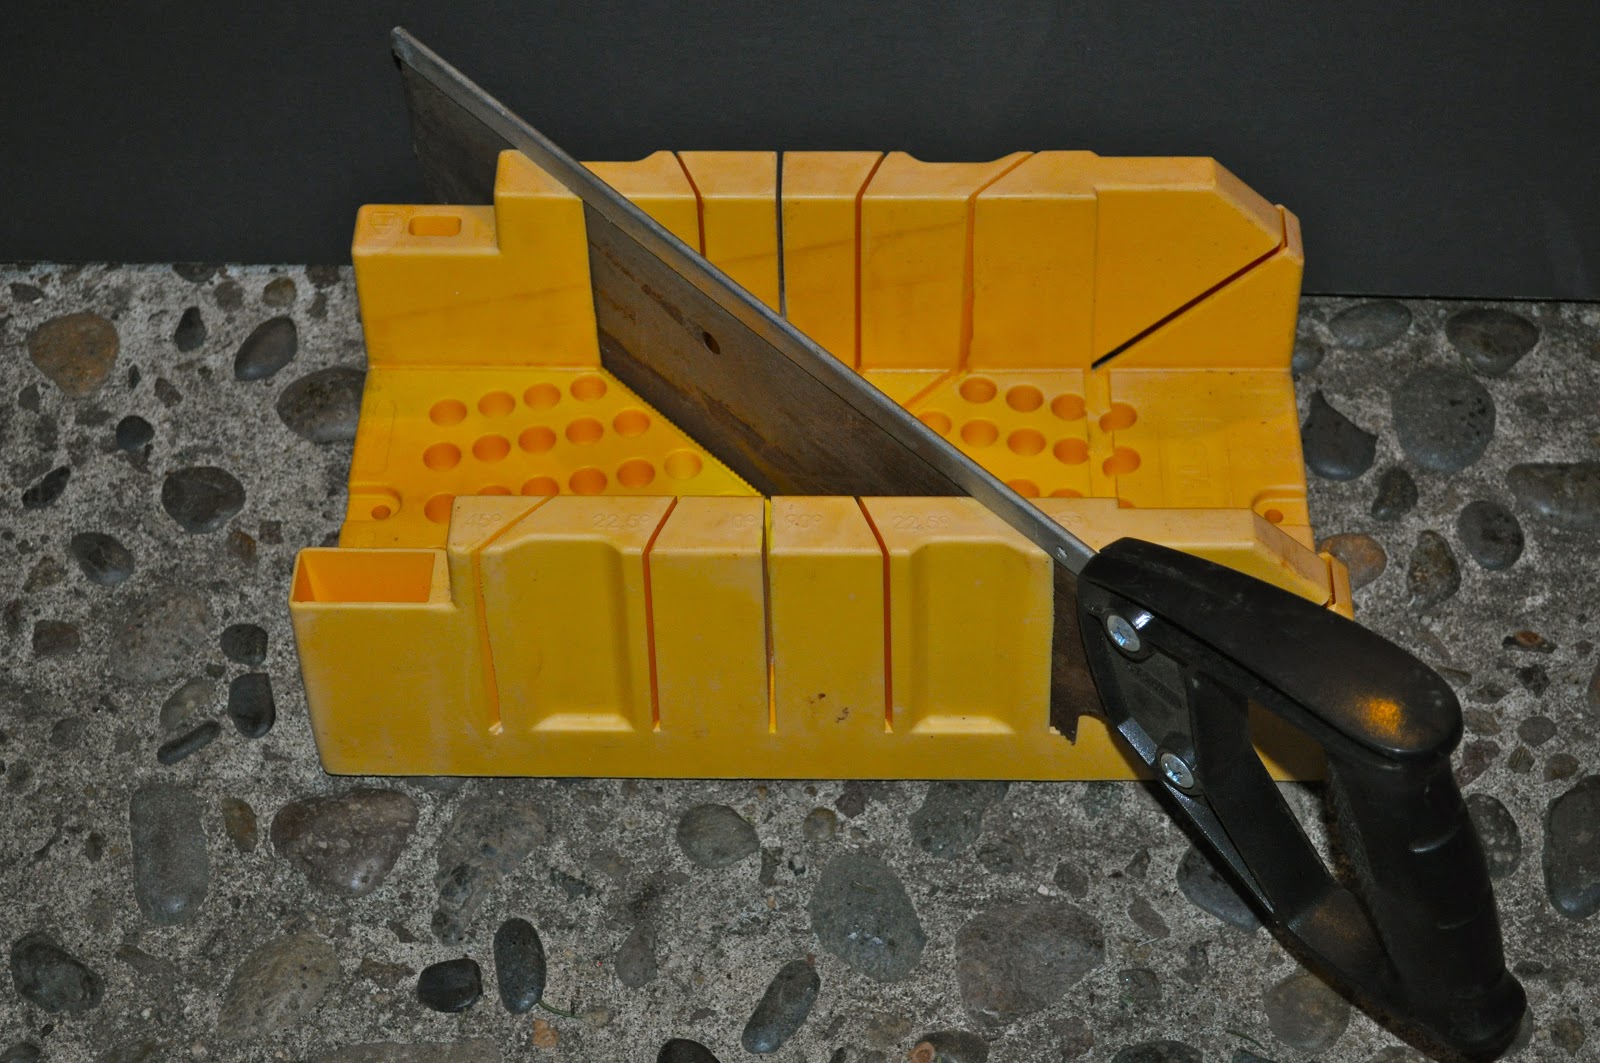
- Saw, sander or sandpaper, and drill (for the dowel)
- Red ribbon
Step 1.
Fold the red felt in half so that instead of 72″ long it is now 36″ long and 36″ wide. Put the folded edge on the top, and trim along the other three sides (not the folded edge) so that all of the edges and nice and straight and even.
Sew along the left side, bottom, and right side of the banner, leaving a border around the edges. Sew along the top of the banner, but leave a big enough loop at the top so that you can put your dowel through to hold the banner.
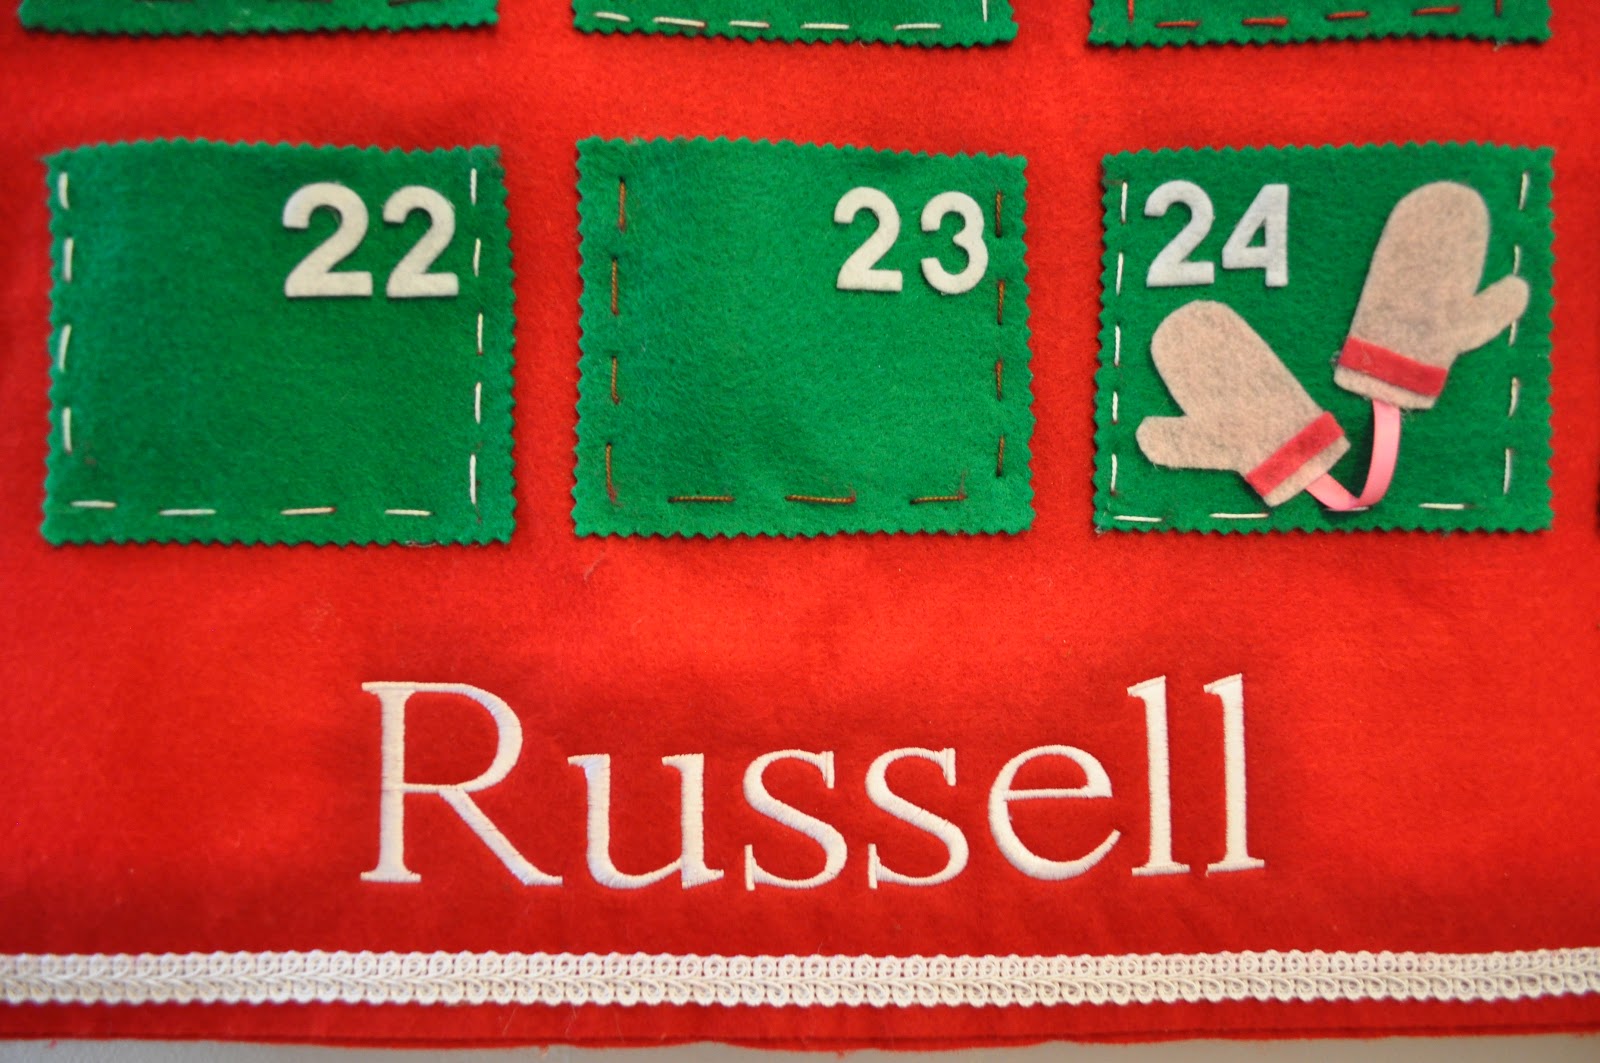
Step 2. Cut 25 green pieces of felt into rectangles measuring 4″ x 4 1/2.” I cut mine with pinking shears, but you could use regular sewing scissors too.
You can either hand stitch or use your glue gun to sew or glue around each pocket.
Step 3. Now for the fun part! Cut out simple Christmas shapes from the colored felt. I just free cut whatever Christmas objects came to mind, but you could also google, print, cut, and trace outlines if you don’t trust your cutting skills.
 |
| Looks good, but needs a little bling! |
 |
| We bought some little red Swarovski crystals by EK Success that were so sparkly and pretty (for the berries), sequins, some sparkly buttons (for the snowflake centers, pretty white trim for the border, and embroidery floss. Glue on any embellishments you choose to use. Glue the trim around the edges, covering up your sewing machine stitches. |
 |
| You’ll need these guys to drill, sand, and cut a hole in your dowel. |
Step 4. Measure how long you would like your dowel to be. Cut and sand it, and then drill a hole in each end. Spray paint the dowel with flat black spray paint. I did a couple of coats.
Step 5. I paid to get the “Merry Christmas” and “Russell” embroidered on my advent calendar to give it a more finished look, but this is totally optional.
It cost me $25 to do this, which was totally worth it to me, since I will be using this year after year and plan on having it forever. This part is up to you!
Put the dowel through the pocket in the top. Put your red ribbon in the holes in the dowel, tie knots, and hang your masterpiece. Mine is hanging on hooks on the bottom of our mirror in the entryway.
Yes, making your own felt advent calendar definitely takes time to make, but it will be in our family forever. It’s also a great reminder to do a Christmas activity with the kids every day!
 |
| Finished product hanging in my house |

Dan, Justyn, and Noah says
love it, so cute.
Laura Russell says
Thanks Justyn!