Happy Monday! I have been out of town at the SNAP Conference since Wednesday (a blogging conference for creative bloggers), and had such an amazing time! I have learned so much, and can’t wait to share with you my experiences and some of the things I will be implementing on the blog… stay tuned!

In the meantime, I have a fun tutorial to share with you that I just love! I came up with a really fun way to pretty up those paper straws that are all the rage right now. These DIY flower straws are so pretty, and would be perfect for a little girl’s party, or even an adult’s party. I would totally use these at my own birthday! Despite the fact that they look complicated and difficult to make, they are actually quite easy to put together.
Here’s what you’ll need:
- Tissue paper
 (in desired colors)
 - Striped paper straws
- Sizzix Big Shot
- Sizzix Brenda Walton Camellia Die
- Sizzix cutting pads
- Stapler
- Glue gun

First, pick the tissue paper colors that you would like your flowers to be. I chose a metallic gold tissue paper, along with pink and purple.
Fold each piece of tissue paper so that you have multiple layers. I folded in half, then half again, and half again, and just kept folding until the tissue paper fit on the Brenda Walton Camellia flower die. I would give exact dimensions, but it will depend on what size tissue paper you use. You really can’t mess this up if you make sure that the tissue paper is folded so that it covers the medium and the small flowers on the die. My tissue paper had about 24 layers to it, and the Big Shot cut through the whole stack like a champ!
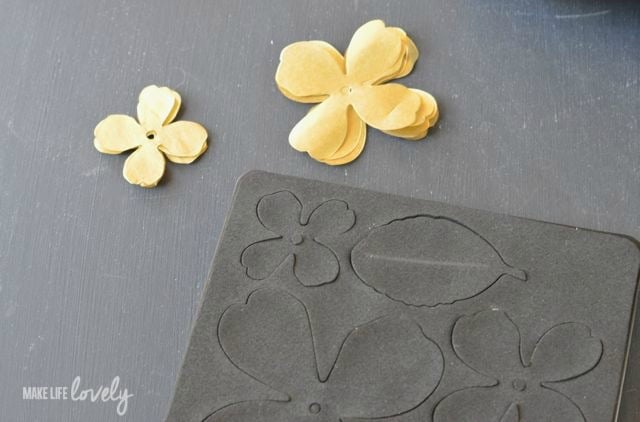
Make a “sandwich” with one of the cutting pads on the bottom, then the Brenda Walton Camellia die with the flowers facing up, then the folded tissue paper (making sure that it covers the small and medium flowers on the die), and then the other cutting pad. Place the “sandwich” on the Sizzix Big Shot, and roll it through by turning the handle. When it comes out the other side of the Big Shot, remove the tissue paper flowers. You will have layers of gorgeous thin colorful flowers!
 Stack and center six small tissue paper flowers over six medium tissue paper flowers. Staple the stack right in the center, and use your fingers to fluff up the flower and make it poofy instead of flat. One you like how the flower looks, apply a small blob of hot glue to the straw where you would like the flower. Carefully place the finished flower on top of the hot glue. You can use a wood skewer stick to press down (instead of your fingers) to make sure the flower is stuck down well.
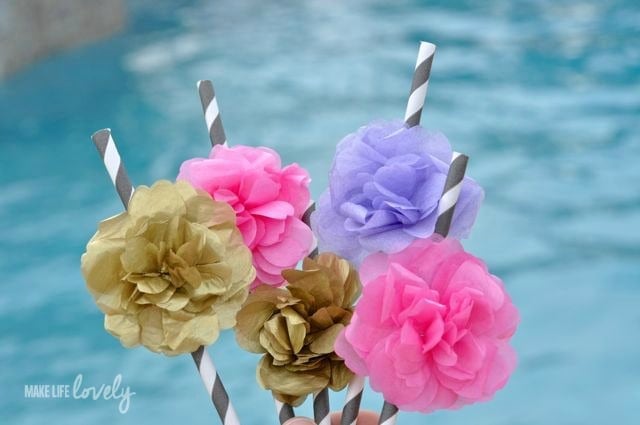
Grab one more medium tissue paper flower, apply a small amount of hot glue to the back of the straw and finished flower, and then stick it onto the back to cover the glue. Use the skewer again to press down on the hot glue, not your fingers!
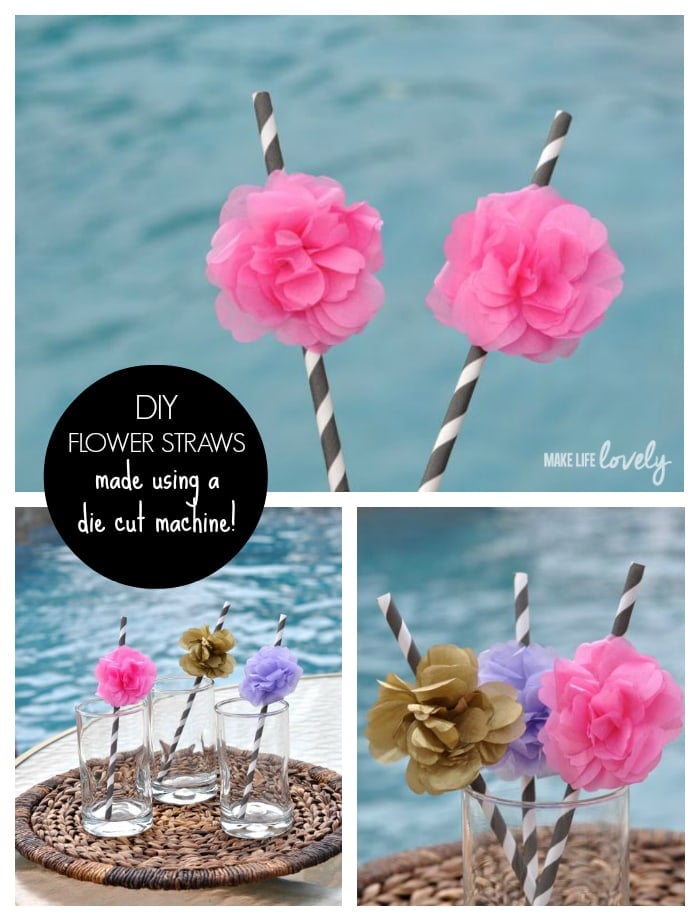
Now you have a beautiful flower straw, perfect for your next party! Just repeat the process, which goes really quickly since every set of flowers you cut makes a few straws. I’m going to let you in on a little secret. My favorite place to buy striped straws from is Amazon. They sell Kikkerland striped straws in bulk (144 straws) for cheaper than anywhere I’ve ever seen!
This ![]() box of 144 gray and white striped paper straws
box of 144 gray and white striped paper straws![]() is only $6.61, which means each straw is less than 5 cents! They also sell them in red stripes
is only $6.61, which means each straw is less than 5 cents! They also sell them in red stripes![]() , blue stripes
, blue stripes![]() , green stripes
, green stripes![]() , and much more for around $5-$7, which is a great deal. I’ve bought many of these boxes of straws and used them for many parties and giveaways, and I still haven’t used up any of my boxes. They’re my favorite!
, and much more for around $5-$7, which is a great deal. I’ve bought many of these boxes of straws and used them for many parties and giveaways, and I still haven’t used up any of my boxes. They’re my favorite!

For more papercrafting fun, you’ll want to check out these tissue paper cupcake toppers that are so fun and festive and easy to make!

You might also like to make these colorful rainbow cakes baked in baby food jars… yum!
Hapy crafting!
![]()
This post contains affiliate links. Please read my disclosure policy.
Photograph Afficionado says
Such a cute idea! And they’ve come out really gorgeous!
Brenda Walton says
I just found your delightful project! So glad you’re enjoying the die.
Laura says
Wow, thanks so much Brenda! What a fun surprise to find a comment from my favorite Sizzix designer! <3