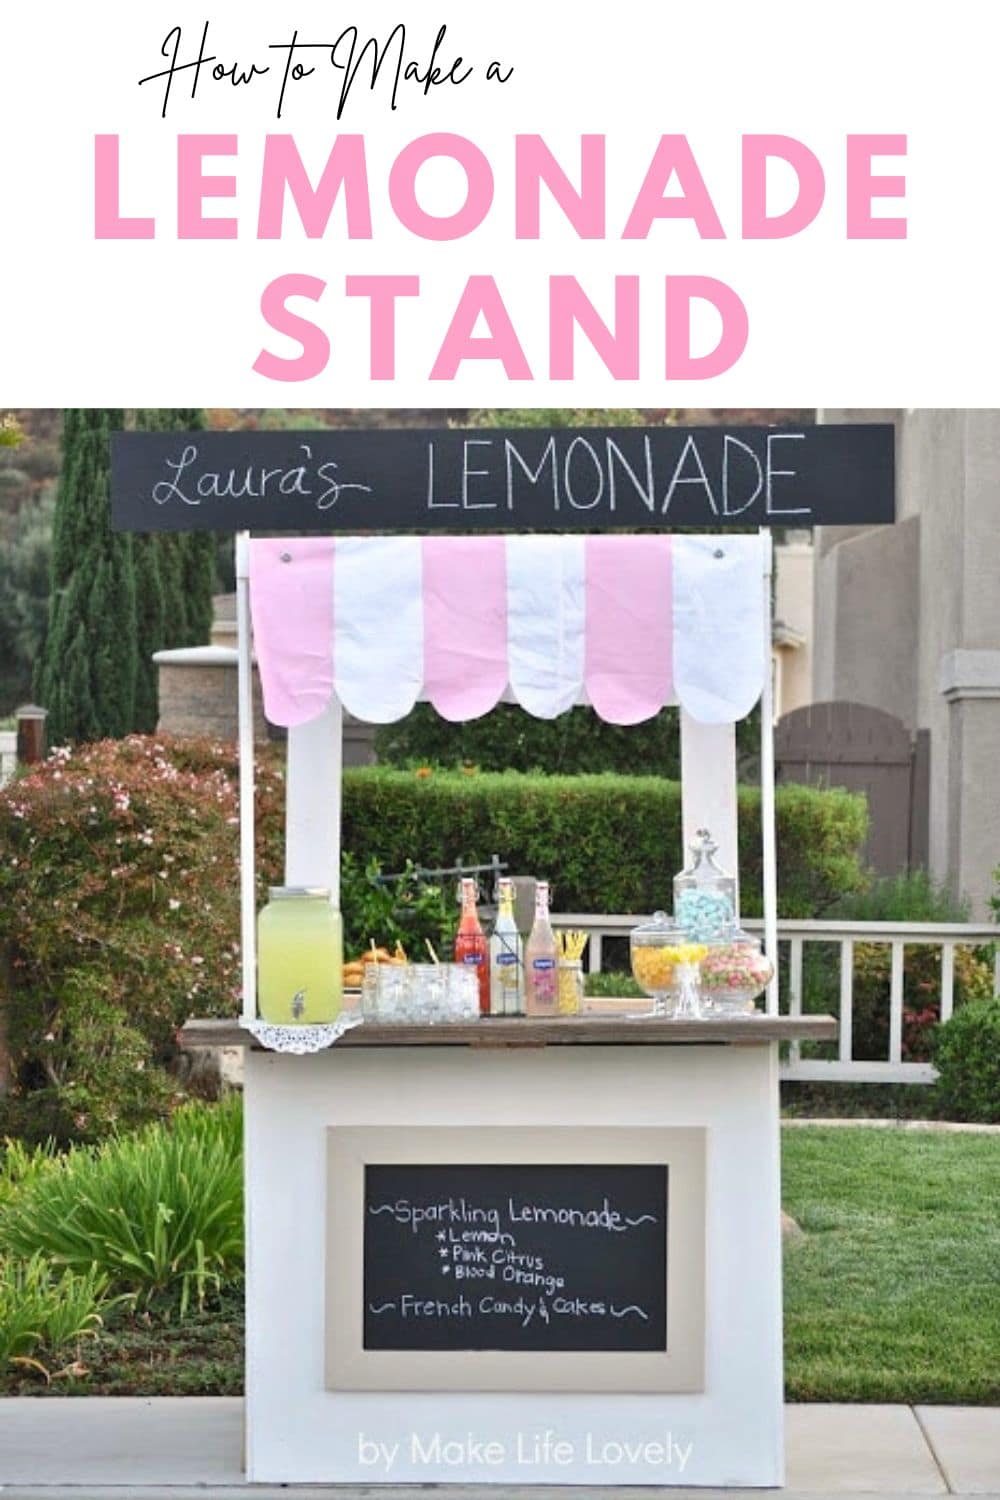
Learn how to make a lemonade stand from wood pallets that looks great and is sturdy and durable.
Today I am beyond thrilled to share with this project that I’ve worked long and hard on- an amazing wooden lemonade stand!

I have SO many plans for this stand already!
It’s not just a wood lemonade stand.
My stand doubles as a safari base camp outfitting post at my son’s jungle safari party, a concessions stand, an Italian soda bar, a ticket booth, a puppet show, and the list goes on and on!
How to Make a Lemonade Stand
Here are the directions for making a lemonade stand from wood pallets.
Keep in mind that wood pallets are not all the same size, so I tried to be as specific as possible with the directions without giving EXACT measurements.
Your pallets won’t be exactly the same dimensions as mine.
How to Adapt These Lemonade Stand Plans
Feel free to adapt these plans using wood that you have on hand, cheaper or more expensive wood, etc.
Do what works best for you!
You can also leave out some of the supplies if you would like to make this for cheaper.
The wood veneer I added to the front and sides is completely optional, although it does make it look more “finished.”
You could just leave the pallet exposed if you’d like.
An awning also isn’t absolutely necessary, but it sure adds to the cute factor, and provided much needed shade in the heat of the summer.
Just make sure that you follow the directions to build main structure- you wouldn’t want to leave out any important pieces support pieces that hold the stand together.
This post contains Amazon affiliate links, which means I make a small percentage of any purchase made at no extra cost to you. Thank you!

Supplies List
- 3 Wood pallets
- Wood veneer, bead board, or plywood (3 pieces cut to the size of your pallets)- optional
- Drill (this is the drill I use)
- Screws
- Piece of wood (optional– size of your choice, for frame on front),
- Chalkboard paint (optional– for frame on front, and the sign on the top)
- 4 long boards (for sides of pallet)
- L-brackets (at least 8)
- Wood board (for top support board- same length as the pallet)
- Wood board (for top sign- same length as the pallet)
- 2 Wood boards (for awning support in front and back- same length as the pallet)
- 2 pieces of old, distressed, thick wood (for counter)
- 4 small pieces of wood (to connect the two counter boards together)
- 2 spade bits (one to fit the head of your counter bolts, and one to fit the body of the bolt)
- 10 bolts (4 for the counter top, 4 for the awning, and 2 for the back), 10 washers, and 10 nuts
- White duck cloth (or other thick fabric- for the awning- optional)
- Painter’s tape (optional)
- White, pink, and tan paint
- Paintbrushes
- Grommet kit (extra large grommets)
- 2 Wood boards (braces inside the stand)
- Wood board (top back counter support)
How to Make the Front and Sides of the Lemonade Stand
Prep the Pallets
You’ll need 3 pallets for the structure of the lemonade stand.
There are different grades of pallets, so try to find the sturdier pallets with thicker wood that’s not split.
Remove any nails at the top corners of the pallets where you will be drilling holes (this will make more sense as you read on).

Add the Wood Veneer

Create the Chalkboard Sign on Top
Wooden Lemonade Stand Countertop
Creating the Wood Countertop
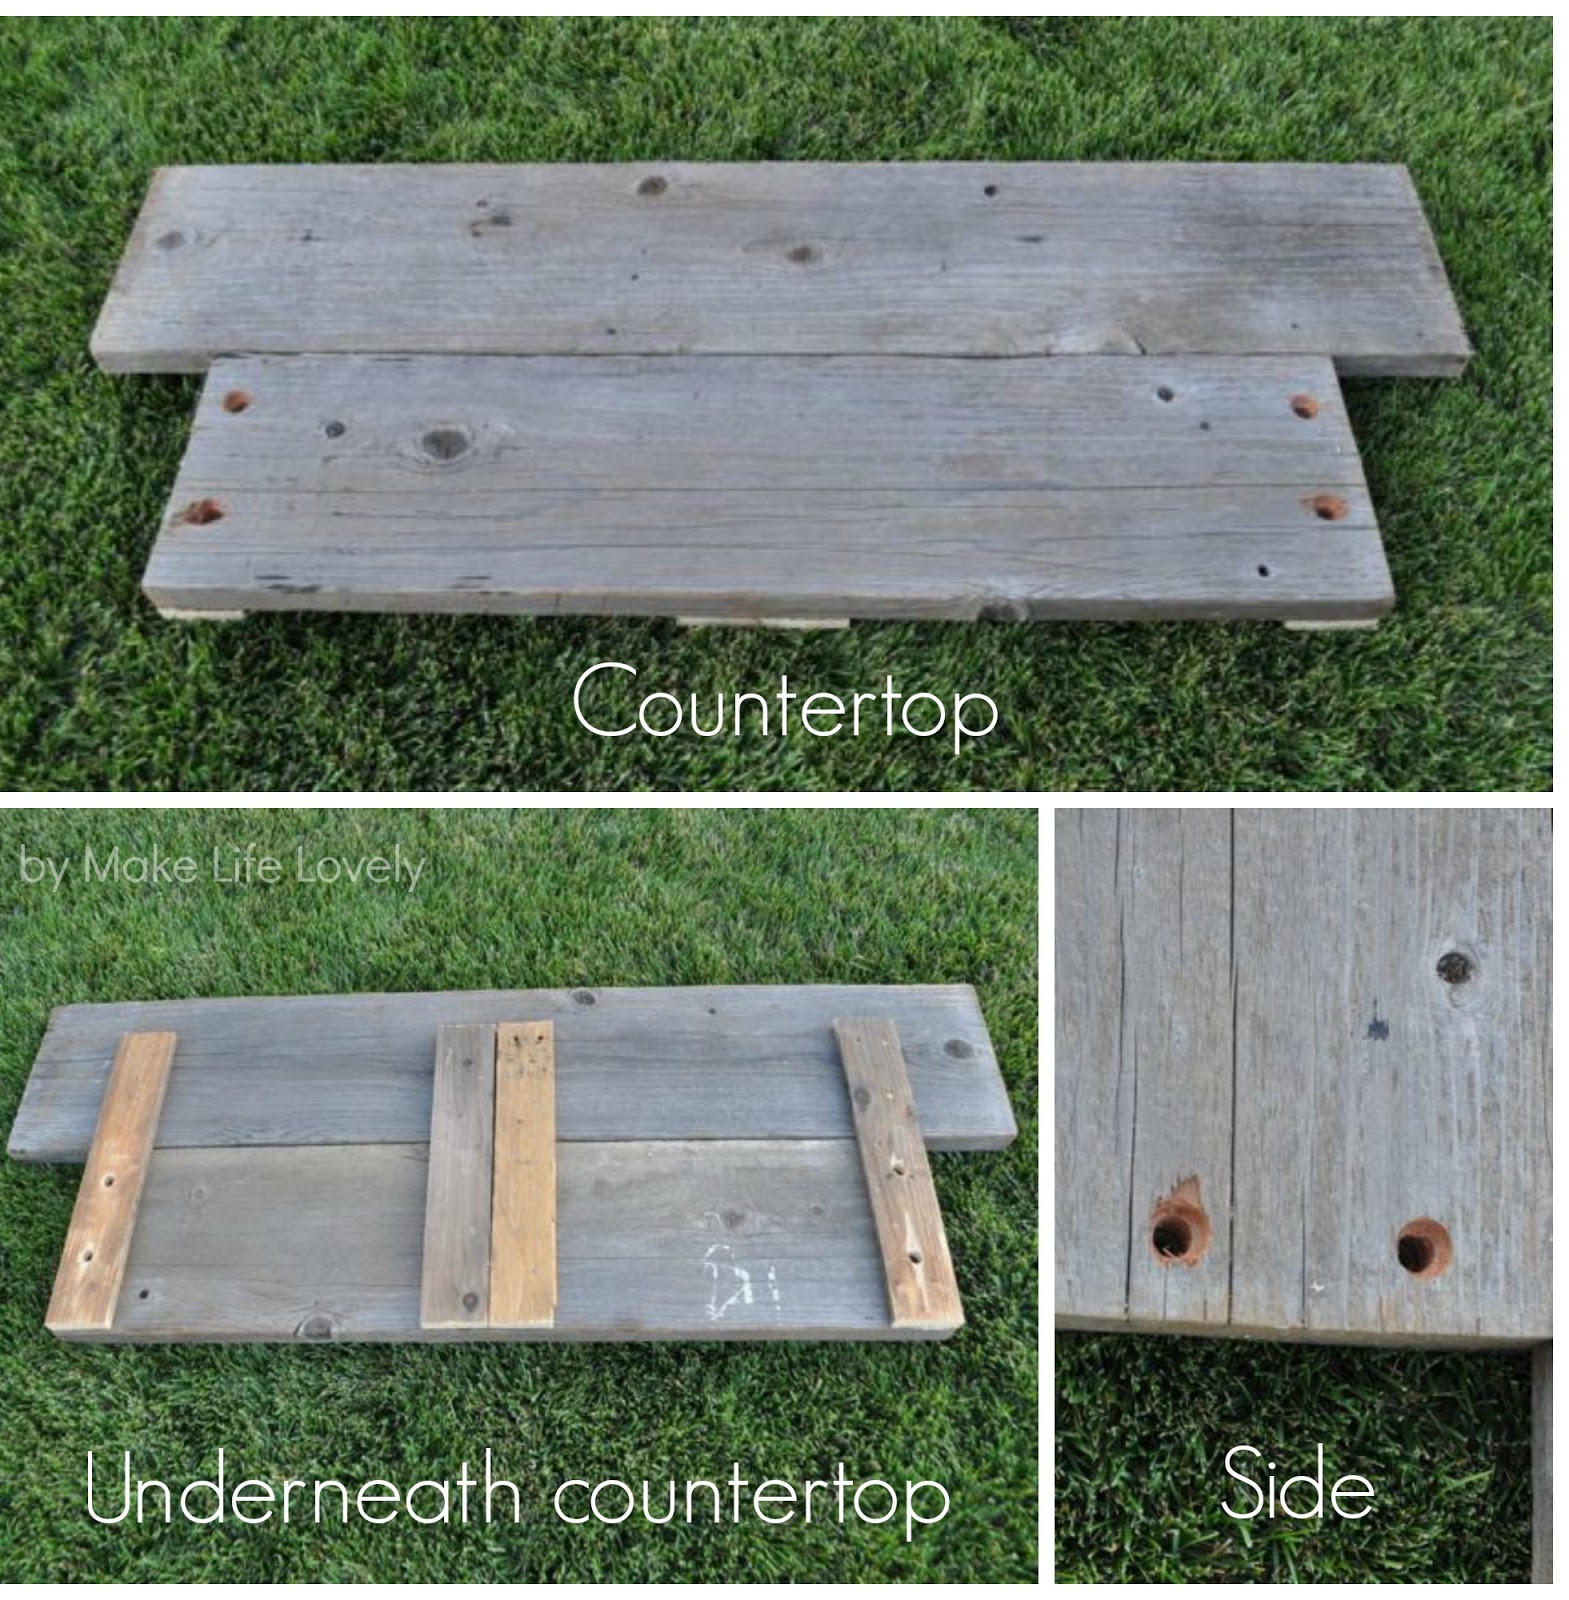
Attach the Lemonade Stand Countertop
Countersink the Bolt Heads
Make the Back of the Stand
Make the Awning
Attach the Awning

Add Support Braces

Top Back Counter Support

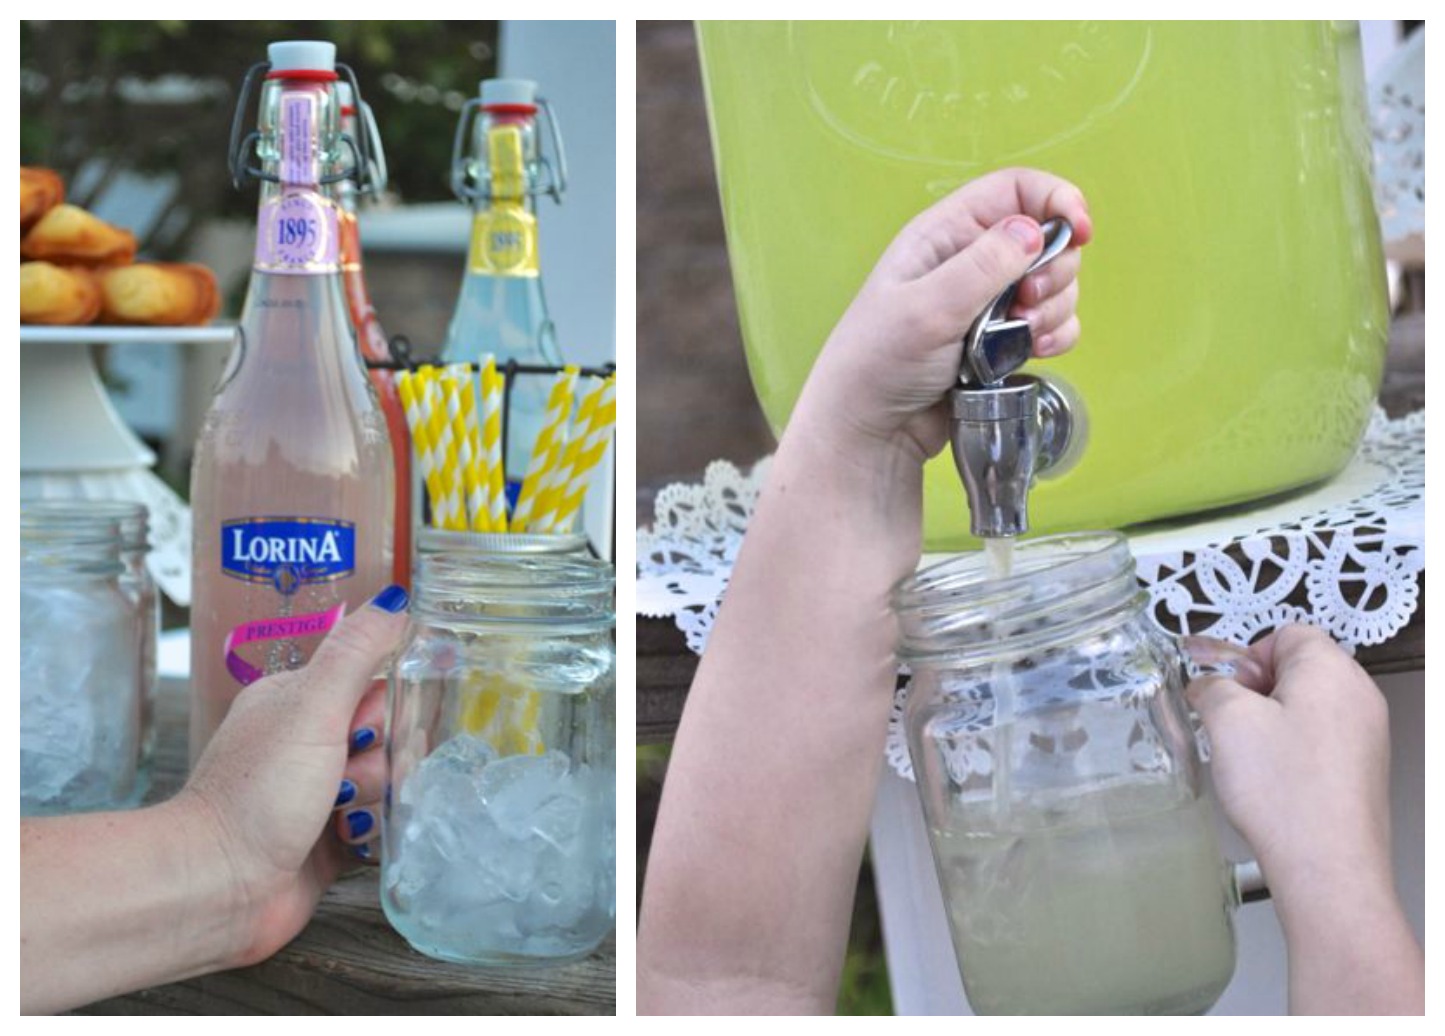
What I Served at My Cute Lemonade Stand
To make my lemonade stand extra special, I served delicious Lorina sparkling lemonade from World Market that was soooo yummy!


And why stop at lemonade?

My stand also included some sweet treats, because really, who can resist candy?!
Especially when it is served in beautiful clear glass apothecary jars.


Our candy selection also included the classic lemon drops (my husband’s favorites), as well as the cutest little lemon lollipops and salt water taffy.

Classic French madeleines were served on a lovely white porcelain cake stand.
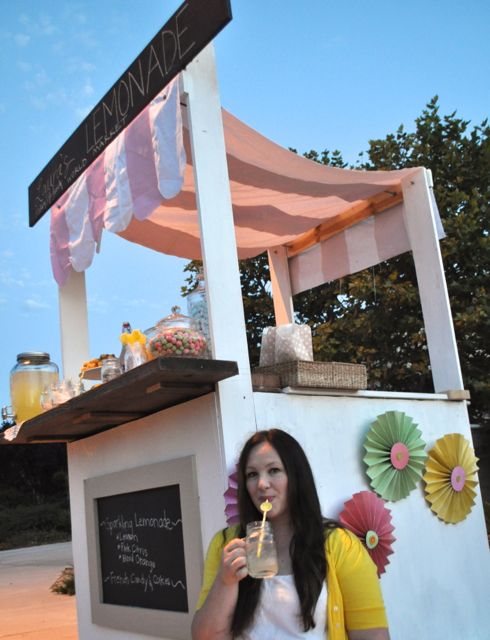
It took a lot of work and planning, but I LOVE the results!
If you want to build one and have any questions, I’d be happy to answer them!
![]()
This article was updated in February 2026 and was originally posted in July 2013.