Summer is almost halfway over for my kids (where did the time go?), and it’s time to start thinking about back to school and all of the supplies that I’ll need for my three kiddos.

I recently made a cool diy pencil case with Duck Tape and I thought I’d show you how I made it. It was surprisingly easy, and only took a couple supplies- a gallon-size plastic bag and some duck tape!
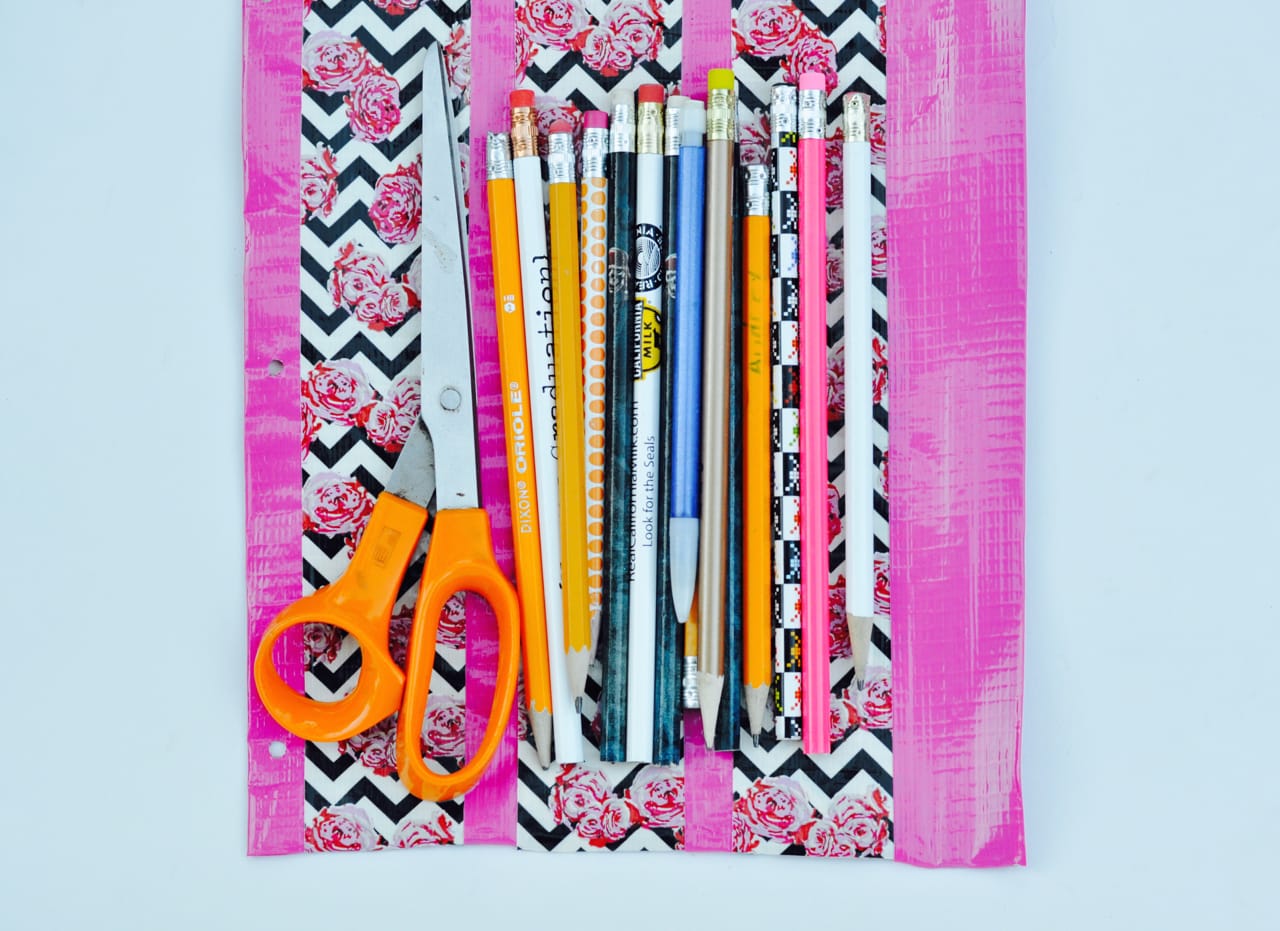
I made an XL pencil case because sometimes the pencil cases you buy from the store are so small, and don’t hold all of the pencils, colored pencils, markers, erasers, etc. that my kids need.
I wanted a large pencil case that would fit in their 3 ring binders and that wouldn’t cost me an arm and a leg to buy for my 3 kids. I’m pretty sure I solved that problem, and am so happy with how my first diy pencil case turned out! I almost don’t want to give it to one of my kids… 😉
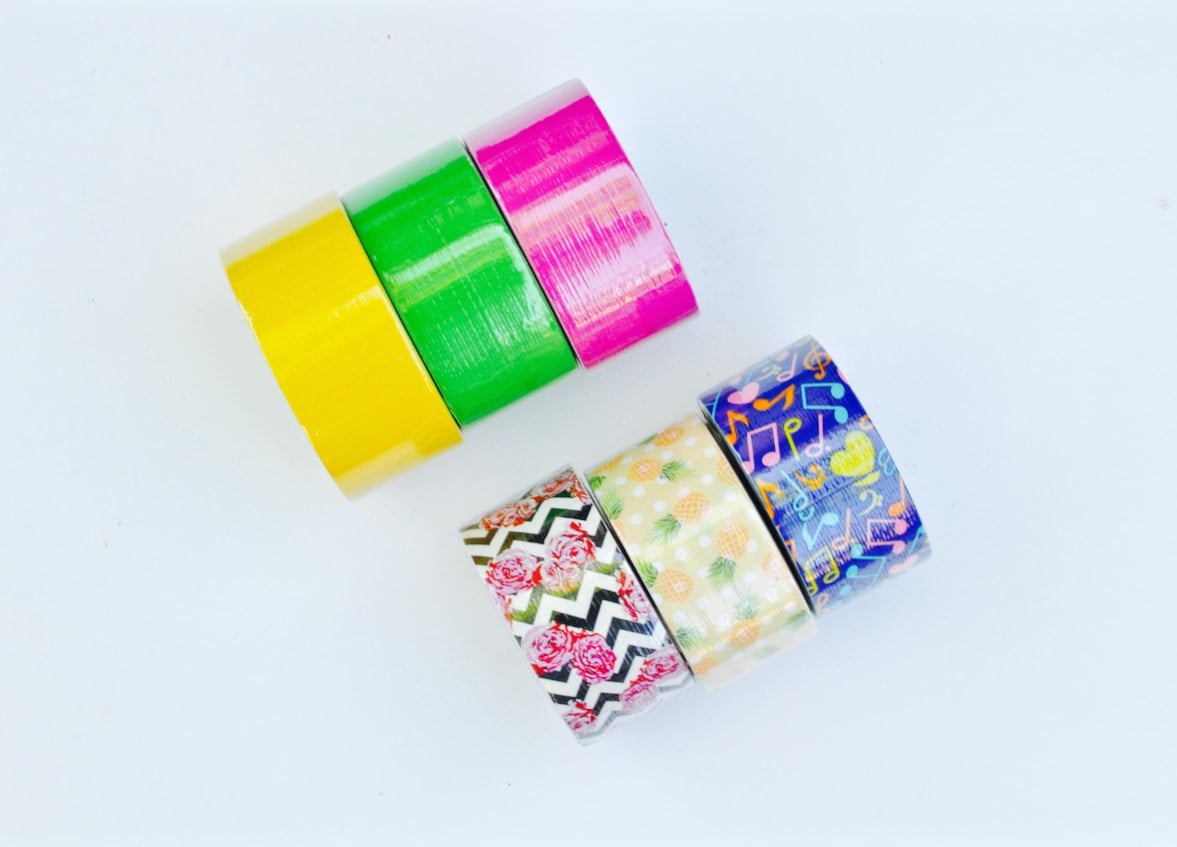 I plan on making one for each of the kids. There are so many fun printed Duck Tape patterns, and lots of solid colors too! I used a mixture of a cute floral printed Duck Tape and a solid pink Duck Tape that matched.
Here’s how to make your own…
Step 1. Start with a large freezer gallon bag. Measure how big you want the finished pencil bag to be. Since my pencil case was going in a 3 ring binder, I measured by placing the bag in my binder, and ended up cutting a few inches off the bottom of the bag.
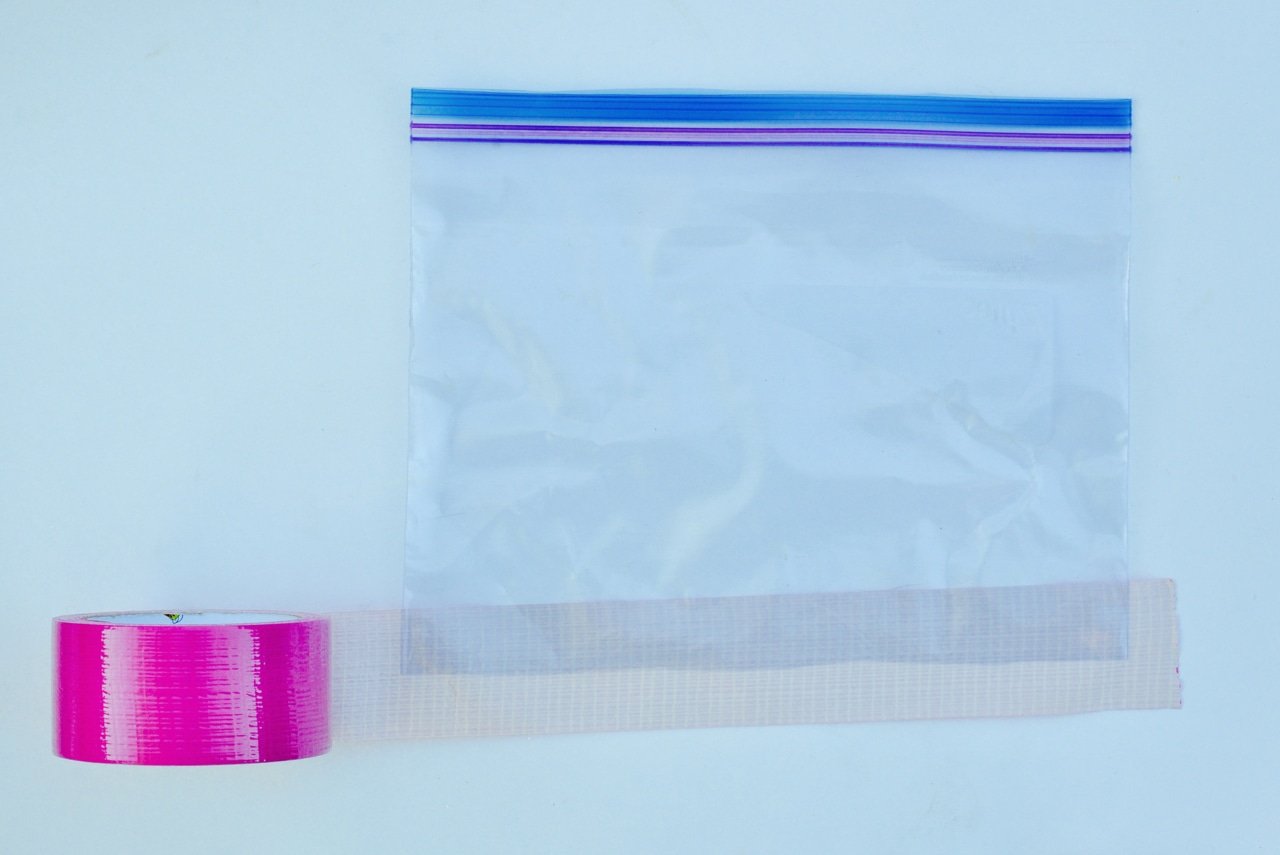
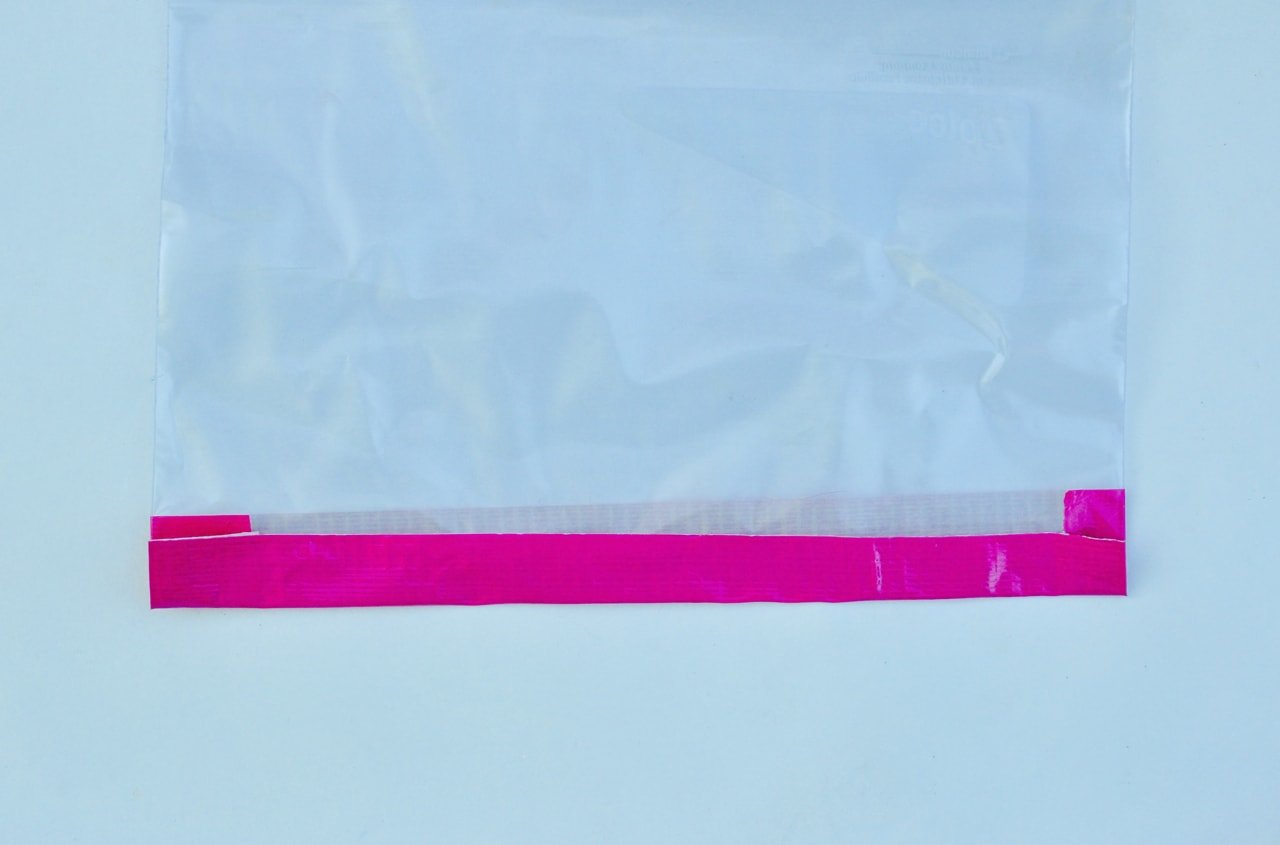
Step 2. Unroll a piece of Duck Tape, place underneath the bottom of the cut edge of bag sticky side up, and stick it to the bag so that it overlaps on each side. Cut the tape so that it overlaps a bit on the end, then fold the end pieces in flush with the plastic bag. Fold the bottom piece of tape over and press down to seal it.
 Step 3. Use another piece of Duck Tape (I used a pattern design this time) to overlap slightly over the solid color at the bottom. Adhere the Duck Tape to one side leaving a bit on the end to wrap around the other side, and then wrap the tape around the backside. Cut the tape off at the very edge of the bag, so that one piece wraps all around the whole thing.
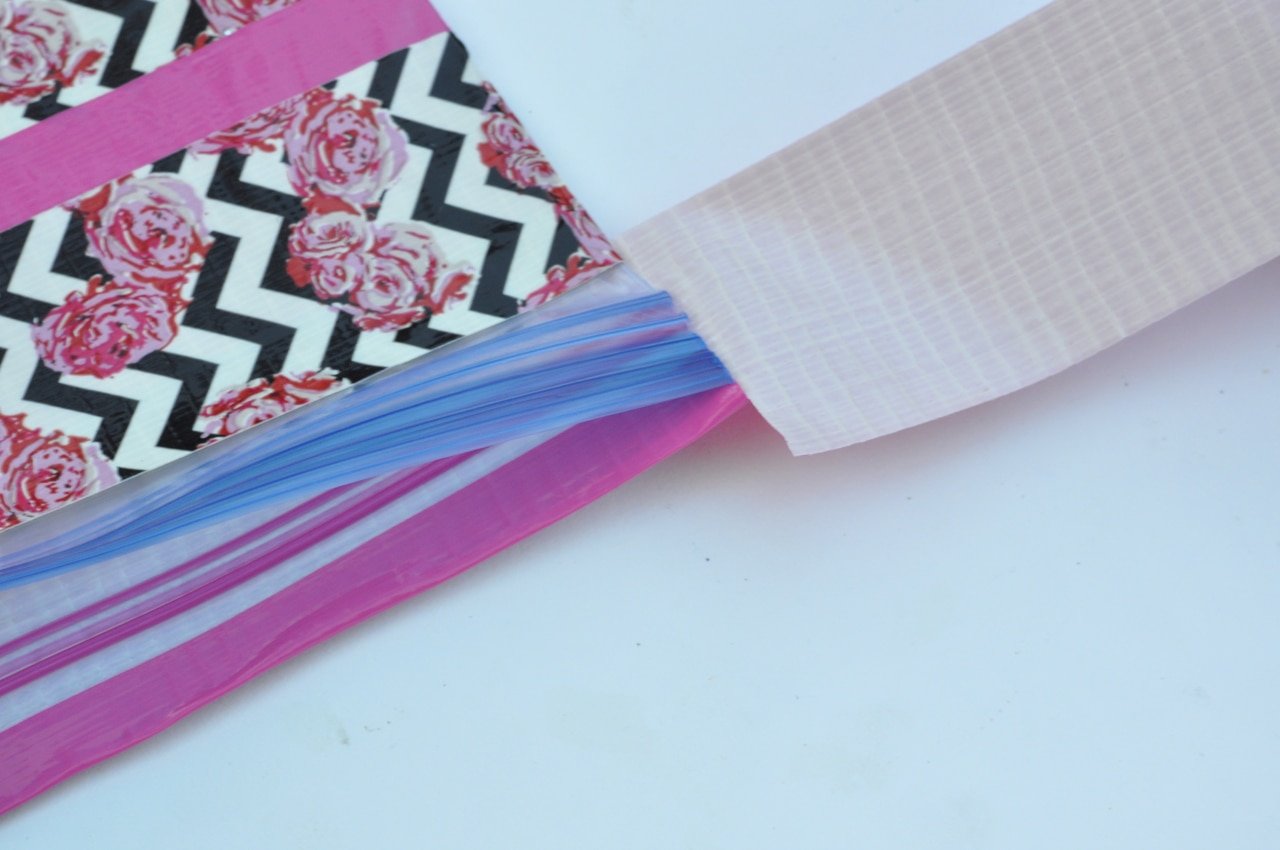
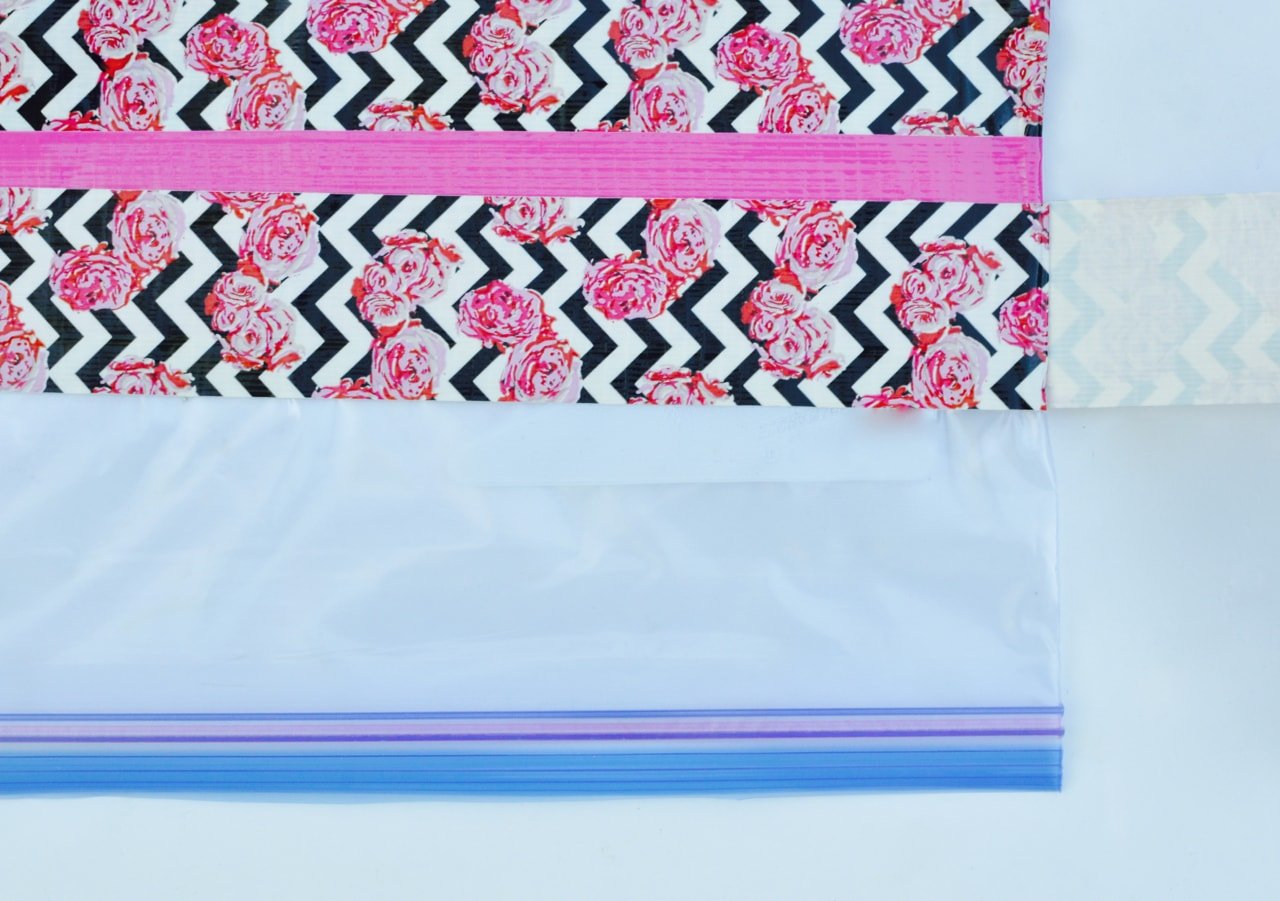 Step 4. Repeat step 3 for each strip of tape, going all the way up to the top of the bag. When you reach the very top of the pencil case, wrap around the last piece so that it stops just over the top of the Ziploc bag. Cut a slit in the tape on both ends of the bag, and then wrap the Duck Tape inside the bag. Make sure that the tape doesn’t overlap the zipper so the bag still opens and closes.
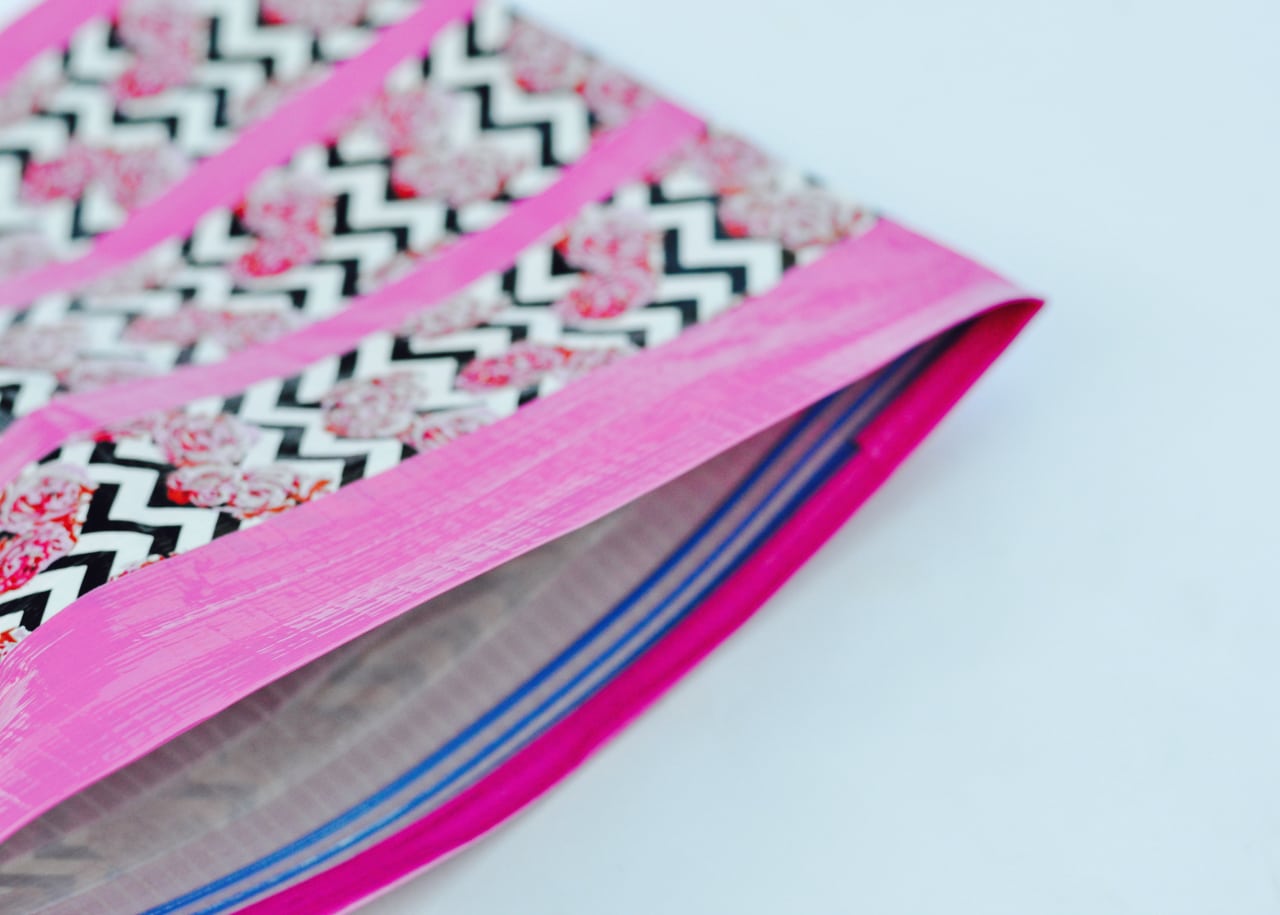 I love how our diy pencil case from Duck Tape turned out. It’s strong, solid, and ready to be filled with lots of school supplies!
Whether the kids are ready for school or not is a whole different story… 😉

What’s your favorite thing that you’ve seen made with Duck Tape?
Happy crafting!
![]()
Leave a Reply