This post brought to you by BIC®. The content and opinions expressed below are that of Make Life Lovely.
Can you believe that there are just 8 days until Christmas? Where has December gone?! Today I’m sharing with you some pretty DIY wood slice place card holders. There are so many reasons that I love this project!

These are very very fast to make (under 5 minutes for a whole set), cost me nothing, and use recycled natural products that were going in the trash that I rescued. Cute, quick, easy, free, and earth friendly? Yes please!
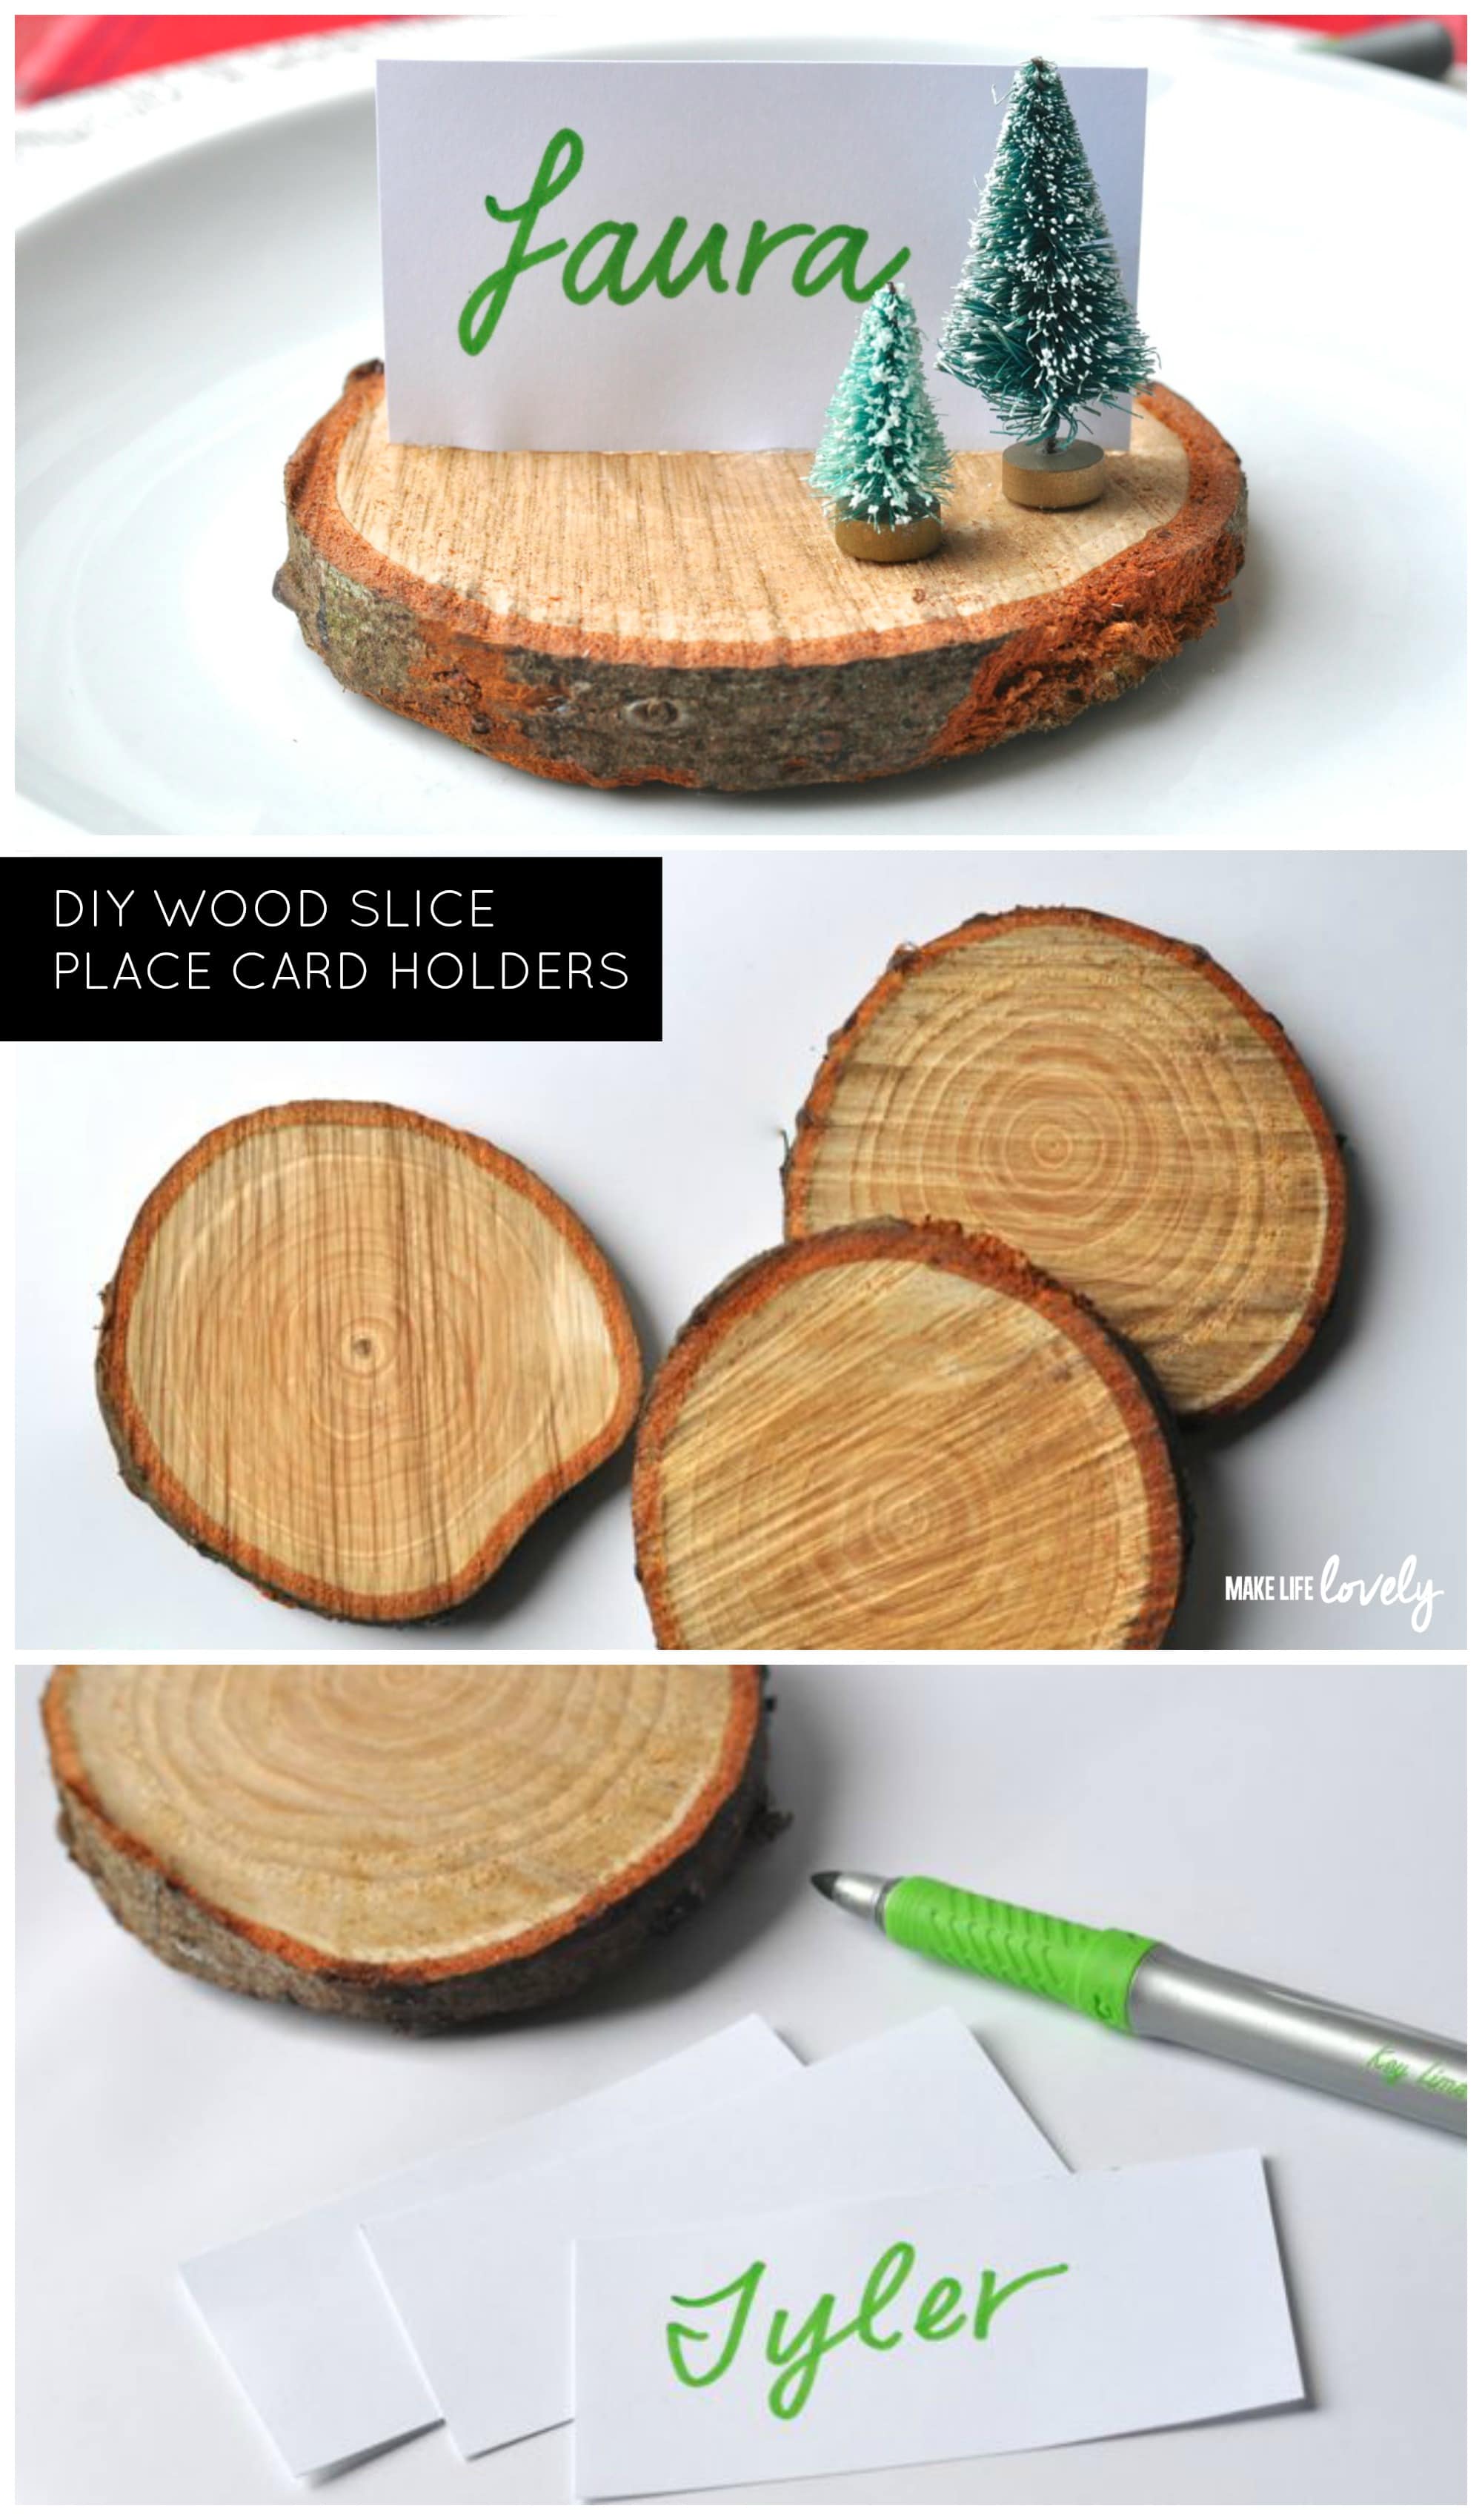
To score the lovely wood slices for free without any cutting or work at all, all I did was go to Home Depot (you could go anywhere that sells fresh Christmas trees), and ask kindly if I could have the wood slice pieces that they cut off when they make a fresh cut for a newly purchased tree. The guys were very nice and picked up all the wood slices for me- score!! Most of them were cut pretty straight, which meant no work on my part. Can’t beat that!
DIY Wood Slice Place Card Holders:
Supplies:
- Wood slices
- White cardstock
- Scissors
- BIC Mark-It® Markers
- Glue gun
- Small bottle brush trees (optional)
Directions:

Step 1. Clean up the wood slices by brushing off the wood dust and wiping off any sticky sap. You could also bake the slices for an hour in a 250 degree oven if you’re worried about any critters in the wood. Just be sure to keep an eye on it to be safe.

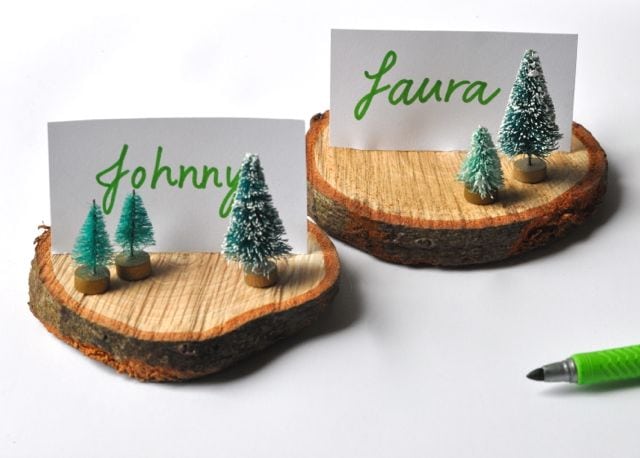
Step 2. Cut rectangles out of the white cardstock that fit the slices, one per slice. Write the name of each recipient on each card. I used the #emeraldgreen BIC Mark-It® marker to write each name. These markers are awesome! They come in a 36 pack of vibrant colors, so I can always find just the right color that I need for my projects.

Step 3. Use your hot glue gun to make a line of glue across the middle of a wood slice, as long as the card is. Place the name card on top of the glue, and hold it in place for a minute. When you let go, the glue will hold the place card in place.
If you want to keep these for another dinner, just peel off the string of hot glue to make the wood slice just like it was when you got it- mine peeled right up!
Aren’t they pretty? To add a little something more, I placed some small bottle brush trees that I already had onto each slice. I can’t get enough of these cute trees, and have more plans for them in the next few days!
If you liked this post, I’d love for you to follow me on Facebook, Pinterest, and Instagram. Thanks for following!
Happy crafting!
![]()
![]()
Leave a Reply