DIY Fall Thanksgiving Wreath
- Wreath form
- Glue gun and glue sticks
- Pencil
- Punched circles (from an old book or scrapbook paper)
- Paper (for the tag)
- Stickers, ink, or a printer (for the tag)
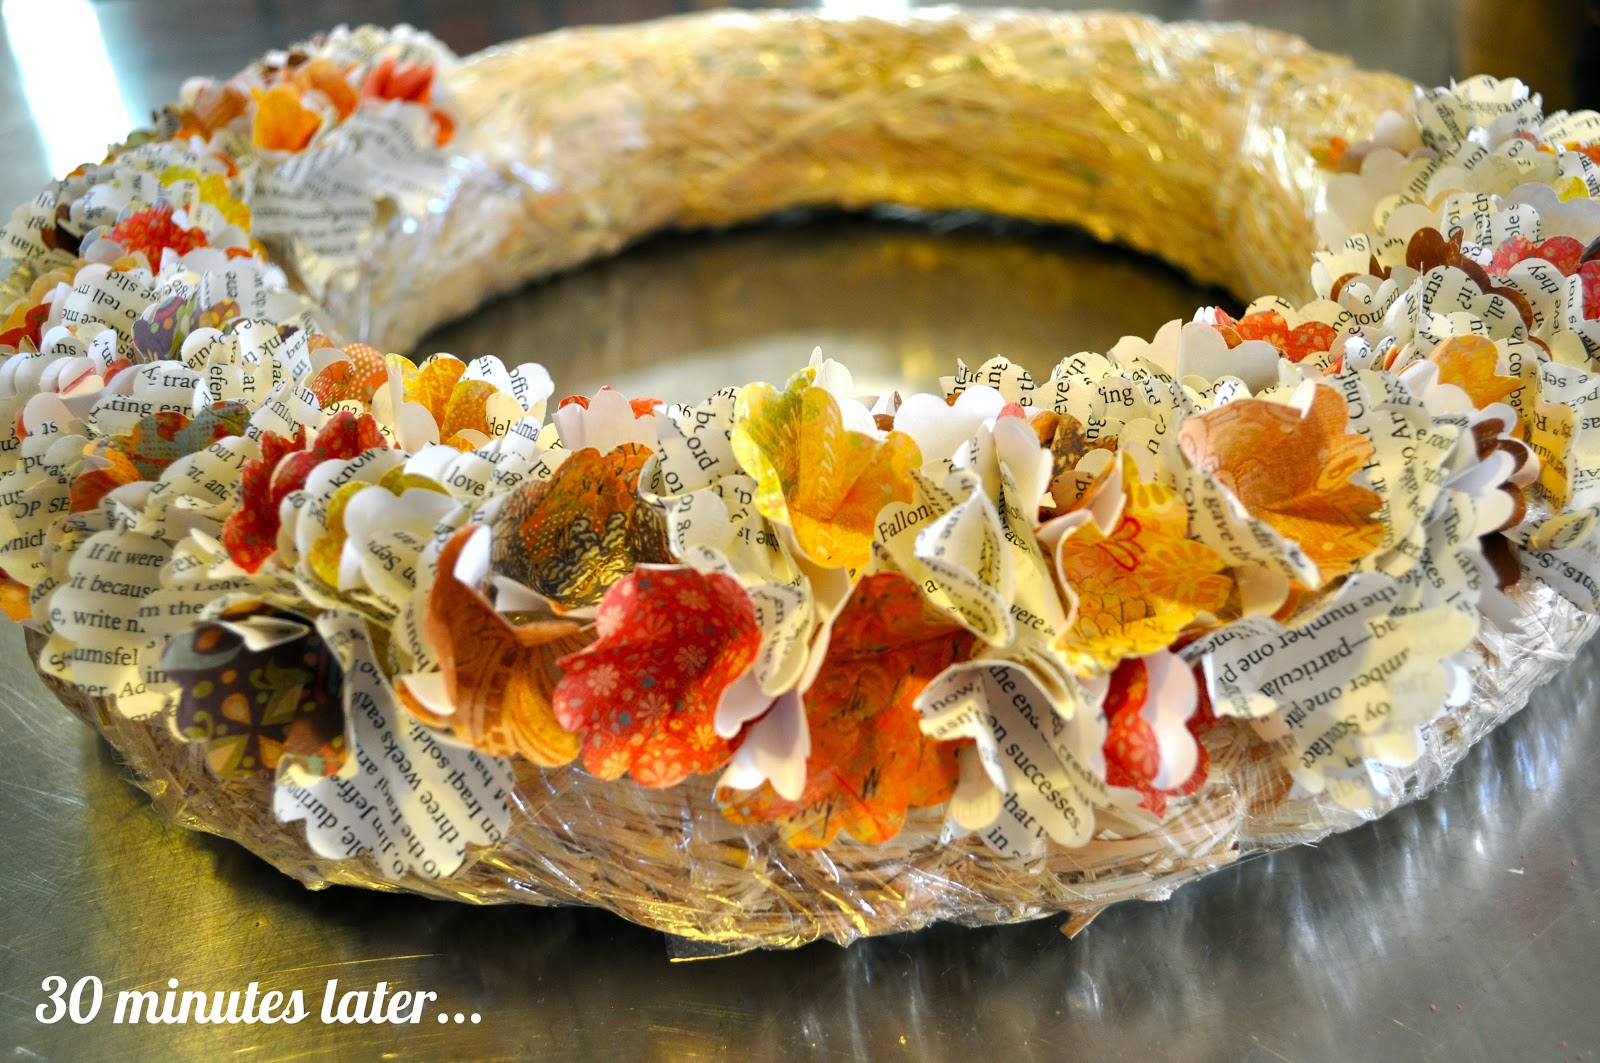
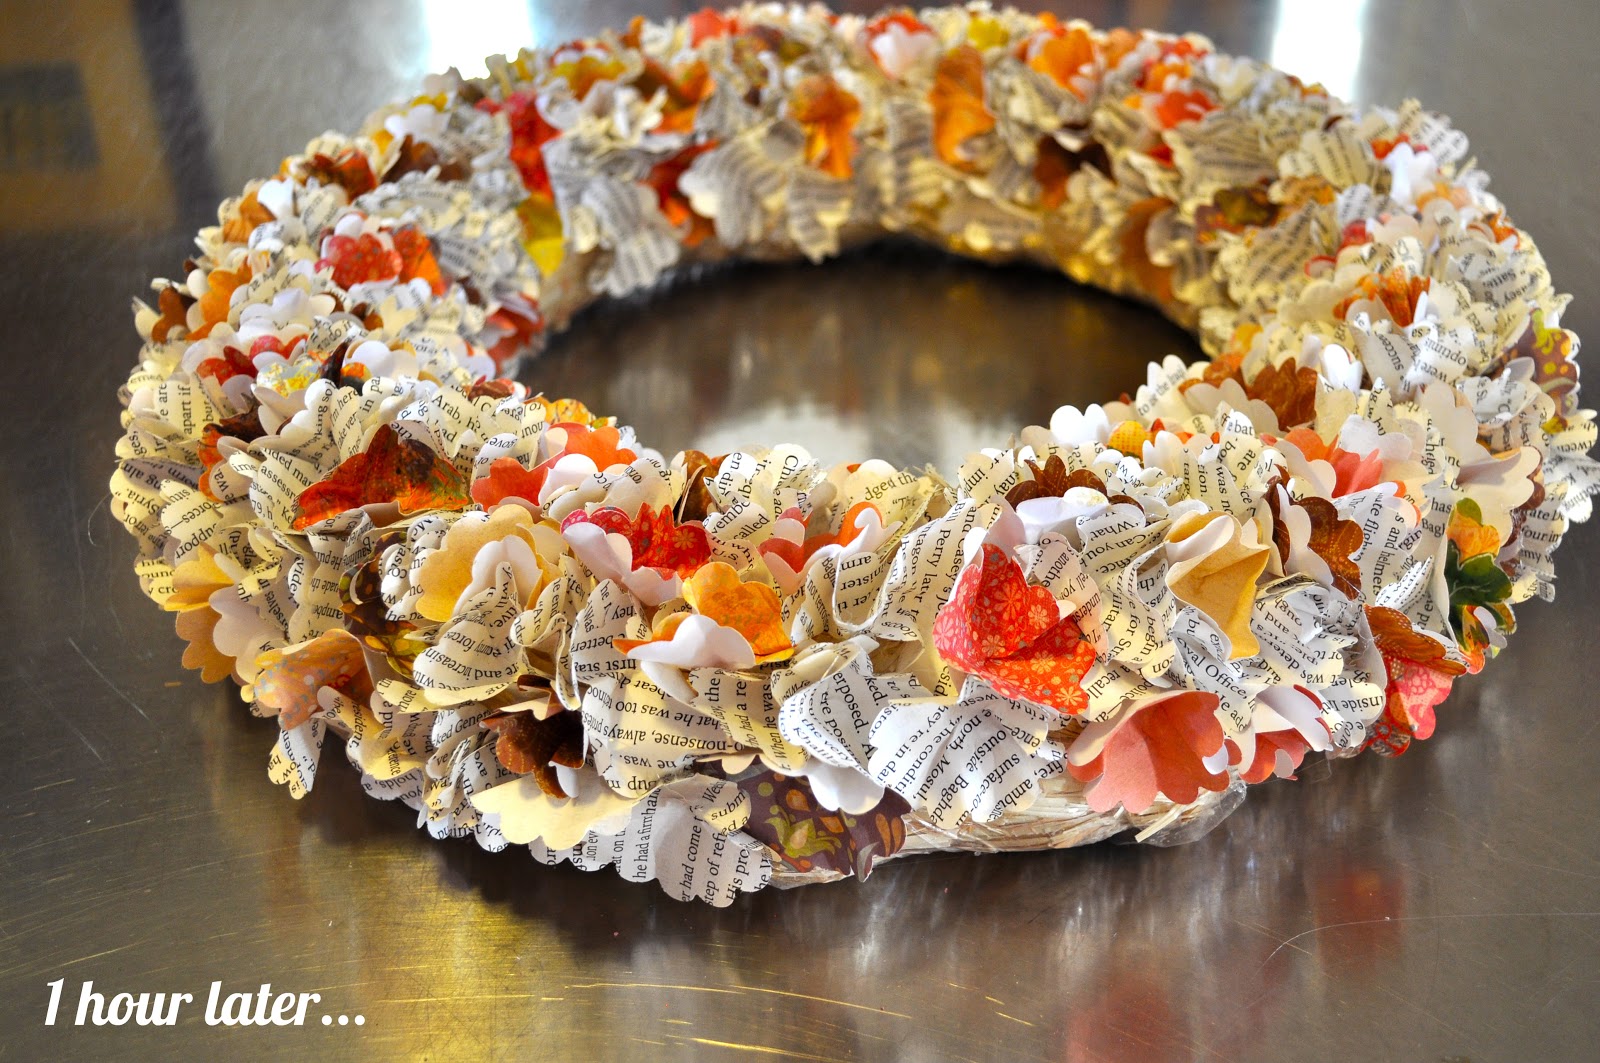
And finally…
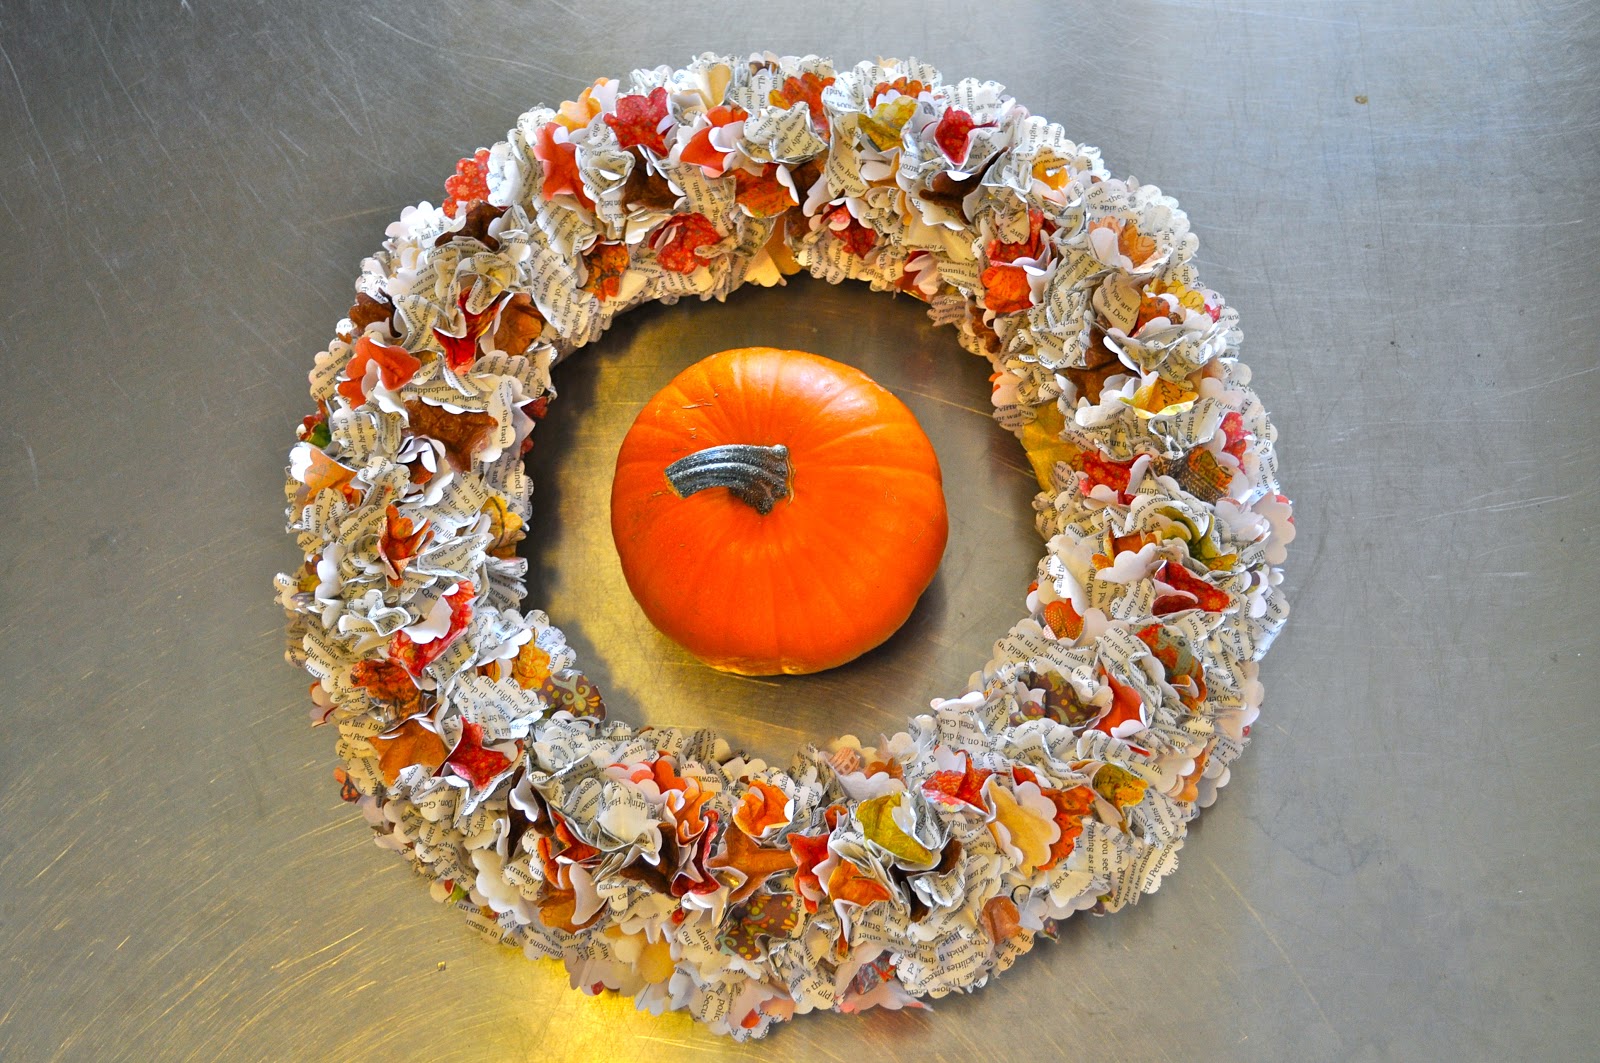
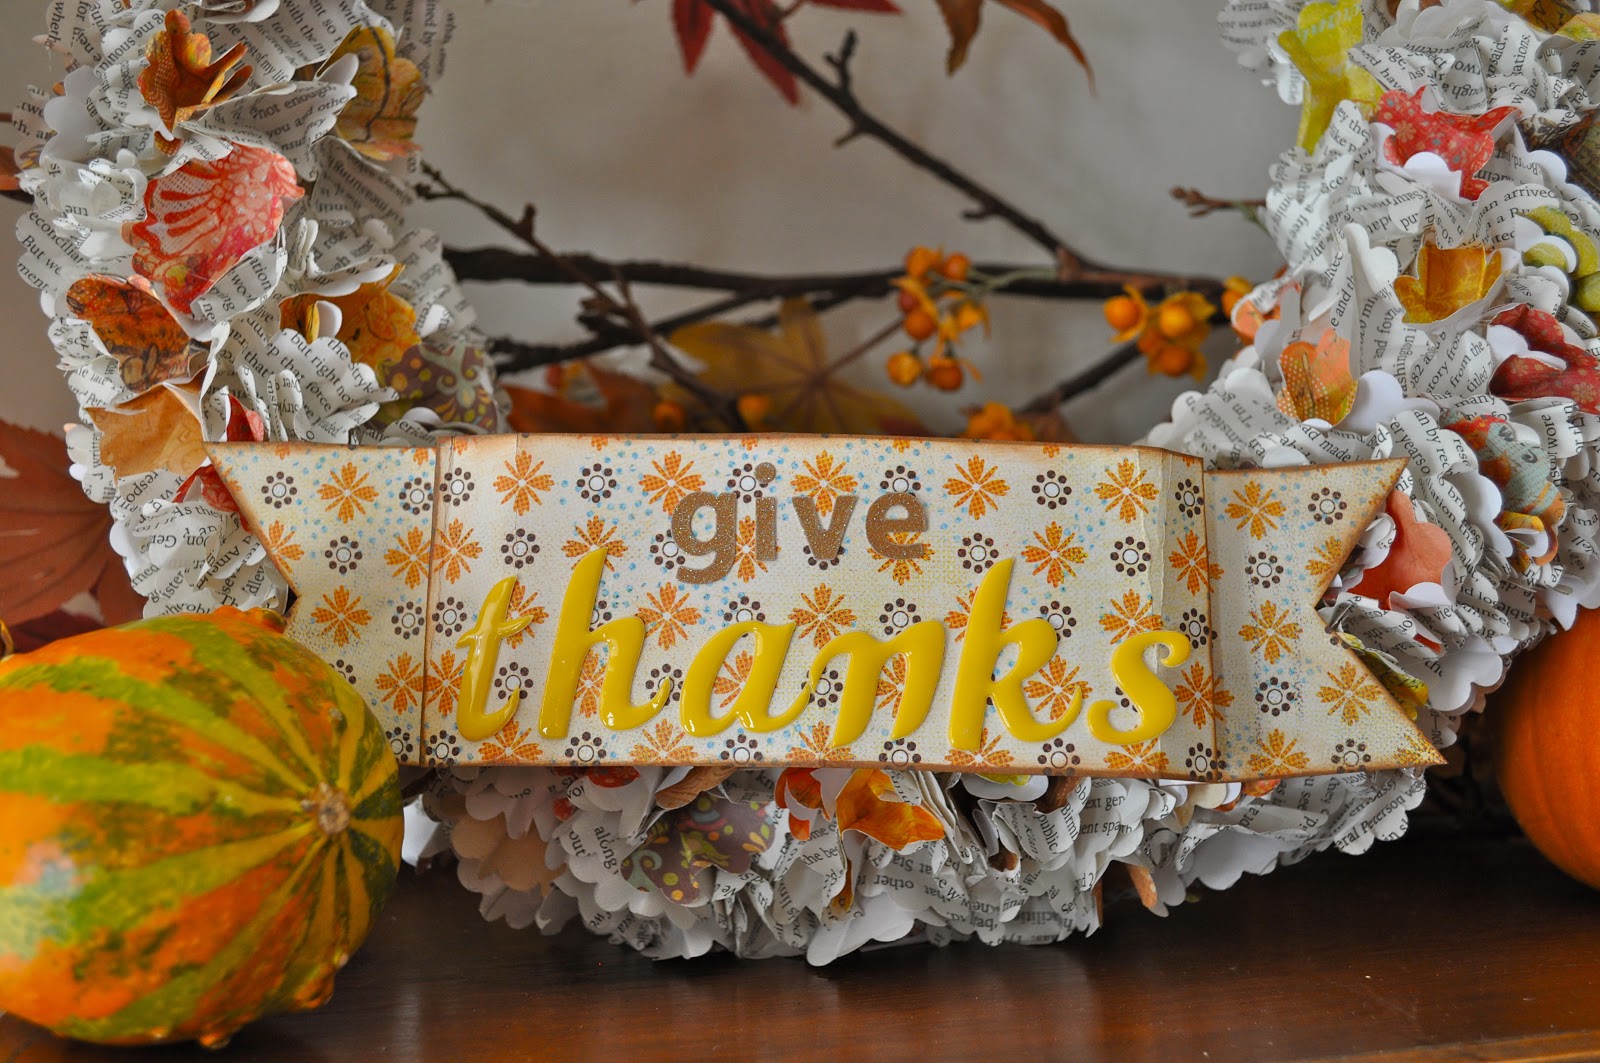
Step 3. Now your wreath is all full and beautiful, but it looks a little plain, don’t you think? Let’s make a little banner for the bottom.
I just took a strip of patterned paper, folded it, cut the ends, and added scrapbook letters to the top.
If you don’t have letters, or don’t want to buy any, you could also use a stamp, or put the patterned paper straight into your printer and print your banner. Be creative!!
My banner needed a little something more to make it stand out, so I took a brown ink pad and rubbed it along the edges to give them a little definition.
Then just glue your banner on with your glue gun, and voila, you have a new beautiful Thanksgiving wreath! Your friends will be so impressed with your amazing crafting ablilities. 😉
Rose Weeding says
I’m so happy I stopped by! This is an amazing blog. I’m not crafty at all (I think I gave away all of my abilities to my kids!)but I love looking at your stuff, and I may just try something. Thanks, Rose
Laura Russell says
Thanks Rose! So glad you stopped by too. You don’t have to be crafty to make this wreath. Even so, I’ve seen your cute little baby cupcakes that you make, so I know you are very crafty 😉 My four year old helped me stick the paper on, so anyone can do this!
Aarean Jergensen says
oh I so love this!!!!!
Laura Russell says
Thanks Aarean!!
Whitney says
Love it…I’ve been looking forward to the debut, and it didn’t disappoint!
Laura Russell says
Oh good, so happy to hear it Whitney! Thanks for stopping by.
tscrapper says
Would this work with book or magazine pages or does it need to be thicker paper, like a book?
Laura Russell says
It should still work with book or magazine pages, but I recommend using the book pages because it will hold up better if you plan on keeping the wreath for a few years. I just bought a cheap book at the dollar store that I didn’t mind cutting up. I also made one last year, and it is in perfect condition this year!
Linda says
For any of us(like me) who are craft challenged, can you explain or show a single punched circle? Don’t know anything about/have never used a punch circle cutter. So I was lost at step 1! Sorry!
Laura Russell says
No problem, Linda! Here is a link to a scallop circle paper punch so you can see what it looks like:
https://www.amazon.com/Fiskars-Lever-X-Large-Scalloped-Circle/dp/B003F7XLYC
You can find them at any craft store (Michael’s, Joannes, Hobby Lobby, etc.), and you can use a scalloped edge circle punch or regular circle punch for this project. The punch I used was almost 2″ diameter, but anything close to that would work. Hope this helps. Good luck!
JMD says
That is really nice, now, if I only had a punch circle cutter.
Laura Russell says
You can pick one up at Michael’s or Joanne’s, and they’re fairly inexpensive, especially if you buy one on sale or with a coupon. OR if you have a scrapbooking friend, maybe you could borrow one 🙂
Katelyn says
Thanks so much for sharing this, I can’t wait to make one!
Laura Russell says
You are welcome, be sure to come back and let me know how it goes! Thanks for stopping by.
FeedYourSoulArt says
This is the sweetest idea!! Thinkin of one for the winter season already. Thanks for sharing. Kat
Laura Russell says
Thanks Kat! I need to get started on a Christmas wreath, too. Thanks for the reminder, so glad you stopped by!
Susie @homemaker-mom.com says
That is amazing!
Laura @ Make Life Lovely says
Thanks Susie!
Sue says
Love this wreath! What size circle punch did you use on this! Thanks!!
Laura @ Make Life Lovely says
Good question, Sue! It was a scalloped paper punch that was almost 2″ in diameter. Hope that helps!
savidavi08 says
I don’t know how you made it in only 2 hours! I have made one for Valentines day and Halloween and it always ends up taking me weeks to finish! They are well worth the effort though.
Laura @ Make Life Lovely says
I kind of get in a groove after I’ve been making them for a few minutes, and I work really fast. If someone tries to talk to me, though, I lose my concentration, and go much slower! 🙂 My first one took forever to make, but my second and third I definitely did in two hours. I tried not to worry about it looking “perfect,” and just go for it, and that made it go much faster. Yes, definitely worth the effort- so cute and inexpensive!
savidavi08 says
I don’t know how you made it in only 2 hours! I have made one for Valentines day and Halloween and it always ends up taking me weeks to finish! They are well worth the effort though.
Tara and Devin says
Laura- I love how this wreath turned out! Such a great idea and I really like the overall look. Can’t wait to make one for fall and halloween! I featured this on my blog today! Thanks for sharing such a cute wreath!!
XOXO
Tara
Salt and Pepper Moms
Laura @ Make Life Lovely says
Thanks so much for sharing on your blog! Going over to check it out now… 🙂
Robyn Lipschutz says
This is really beautiful but can you tell me how large the wreath form was and the size of the scalloped circle punch and about how many circles you punched out to make this wonderful wreath. Than you very much for getting back to me. robyn
Gigi says
OMG this is amazing. I might need to make one for Christmas. I think it would look beautiful with red paper.
Jenny says
This is just so pretty and I was wondering how to make it. I saw a lady making one just like it at the last scrap camp but I had no ideal how big to make the circle etc. You have answered all my questions and I”m am going to make one tonight for Christmas with a Disney theme. Merry Christmas to you and your family.
Mary Ellen Mandeville says
I like this wreath a whole lot, Laura and I especially like your website. You have such a beautiful
blog. I am so delighted to become a member of make life lovely and be friends with you.