I am so excited to share this easy Letterpress tutorial with you today! I just love the debossed and multicolored look of letterpress words and images. Up until recently, however, it was very, VERY expensive to get that gorgeous Letterpress look on your cards, invitations, etc. You either had to pay a lot of money for someone to letterpress your custom design, or you had to buy an expensive machine that could cost thousands of dollars and take up lots of valuable space.
Not anymore! We R Memory Keepers has come up with a brilliant method of achieving the Letterpress look at a tiny fraction of the price. I was lucky enough to attend the CHA Winter Show in January, where I first saw the Letterpress in action. I was very impressed at how easy it was to use the Letterpress, and how great the designs and words came out! We R Memory Keepers was kind enough to send me my own Letterpress since they knew I loved it so much, and I wanted to share with you the easy way to letterpress at home!
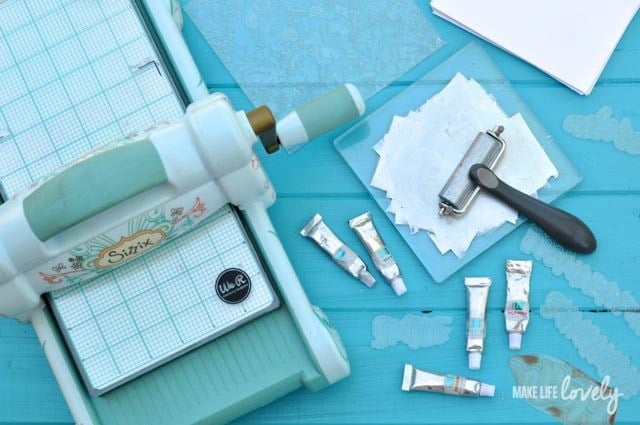
First off, I tried printing with one color. I love that I didn’t have to buy a machine to use the Letterpress. Since I already had a Sizzix Big Shot, I was able to use that. Besides a roller die cutting machine, like a Big Shot, the Evolution, or the Cuttlebug, everything else that I needed to create letterpress cards was included in the box with the Letterpress! It came with the Letterpress platform, 5 different colors of ink, a brayer, an ink base, paper placement guides, adhesive sheets, a pack of paper, cleaning cloths, ink guide strips, and a printing plate set.
I loved the look of the word “Hello” plate, so I decided to make a simple card with it. Here’s the process I used to make my card. I could tell you exactly how to use the Letterpress platform in detail, but it is explained so well in this video, I think I’ll share this with you so you can get a better visual of how it all works!
Easy, right?

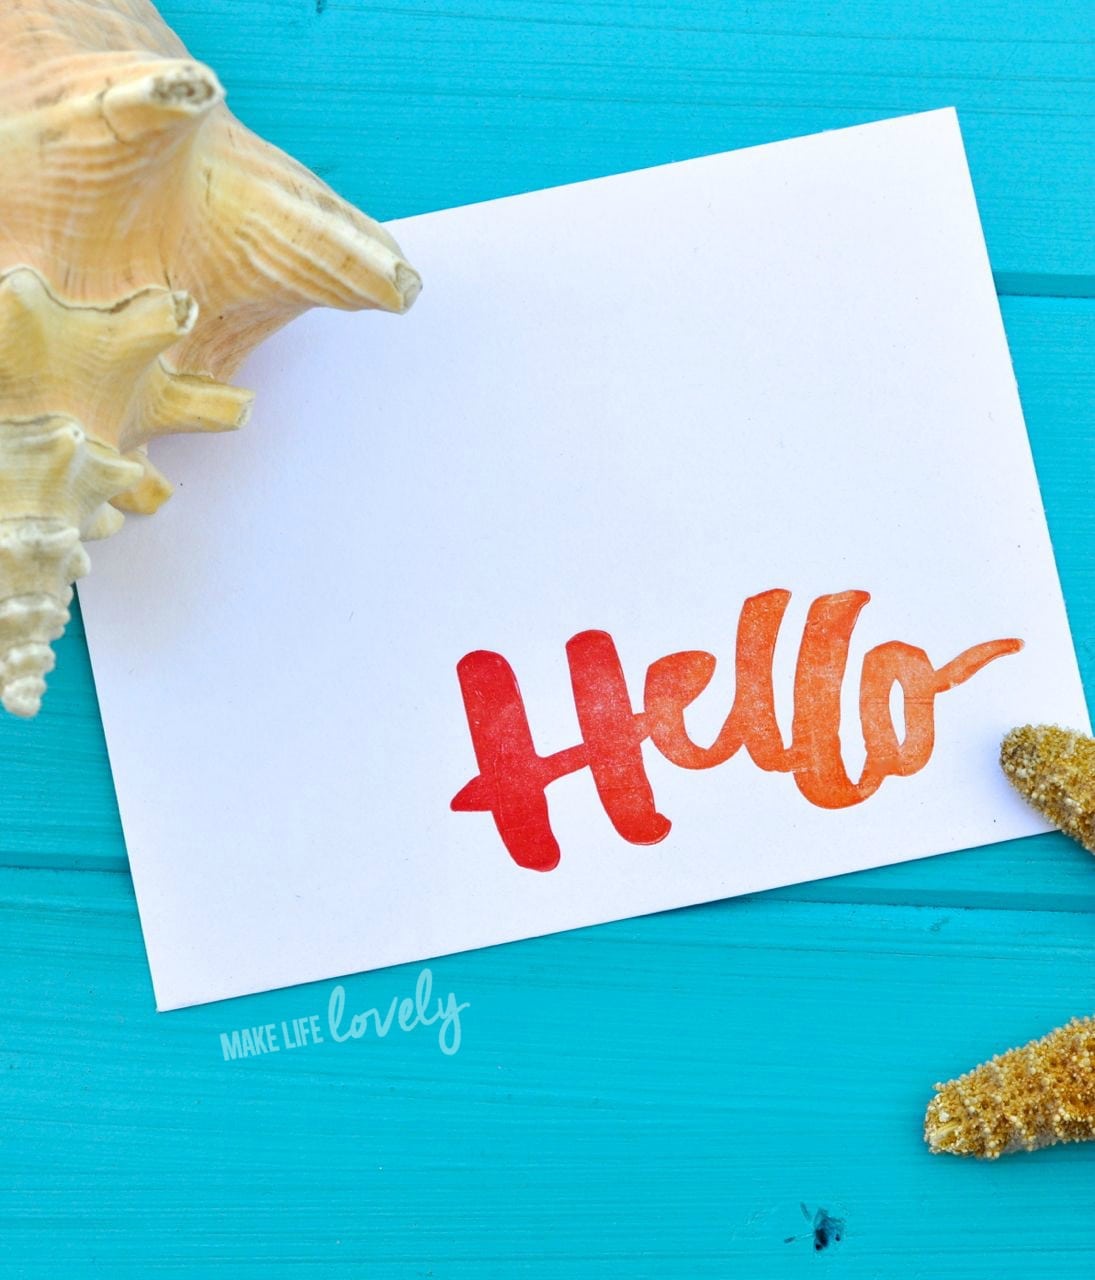
I started out by using one color for the word “Hello” on my card, but then I wondered how it would look if I rolled out two different colors on my ink base. I wanted to create an ombre look for the word, so I added a small amount of hot pink ink next to the orange ink I had already used. I rolled it out nice and evenly with the brayer, and used the brayer to apply the ink to the printing plate. I closed the cover of the platform, making sure that my paper was properly placed underneath, pressed firmly, then rolled the Letterpress platform through my Big Shot.

My idea worked perfectly! I love how the word “Hello” starts out a bright red-pink color, then gradually changes to a solid orange color by the end of the word. It might be hard to tell in the pictures, but the word is debossed perfectly, just like it would be with the traditional letterpress method. The paper that came with the Letterpress was nice and thick, and debossed very nicely.
I decided to use my “Hello” paper to create a postcard to send to my niece living in another state who had just had a birthday. I just turned the inked side around, used a Sharpie to draw a vertical line down the middle, wrote my message on the left hand side, and my niece’s name and address on the right hand side. All I have to do is add a stamp, and I’ve got a beautiful custom letterpress postcard ready to send! I know my niece will love it!

Of course I couldn’t stop at one, so I made five more of the same postcards, so that I had them ready to go when I needed a card or postcard to send to a friend or family member who could use a little love. I also played around with some of the other printing plates and ink colors. There are so many different design and color combinations that you can come up with, and so many different printing plate sets that are available. You can even get a custom plate created for any purpose, such as a wedding invitation or favors, business cards, or for any other reason! I think is such an amazing way to customize the look of a party or a business.
So that’s the way that I create easy letterpress at home! I can’t wait to dig in and play some more with new color and design combinations. If you have any questions about the Letterpress or the process, I’d love to answer them. Just leave a comment below!
If you liked this post, I’d love for you to follow along on Facebook, Pinterest, Instagram, Twitter, and Blog Lovin’! You can also get my posts delivered straight to your inbox by entering your email address where it says SUBSCRIBE over on the right hand side towards the top of this page. Thank you!
Happy crafting!
![]()
