Have you ever used freezer paper as a stencil? If not, it is a VERY easy way to create a unique, one of a kind shirt, bag, or whatever else you would like to make!

The process is easy: create, cut, and paint. I’ll walk you through each step, and you’ll be on your way to your own custom shirts in no time! This method I am going to show you how I made the elephant t-shirt for my son’s Jungle Safari Birthday Party, the shirt for my daughter’s Under the Sea Party (coming soon to the blog!), and many more fun shirts.
Freezer paper stencils shirts are a great way to have a custom look for birthday shirts, holidays, or just for fun! Freezer paper looks almost like wax paper, but it is not the same thing. You can’t do this with wax paper! You can find freezer paper at Walmart, and maybe Target? It comes in a big roll in a blue box, like wax paper, but the box is a bit bigger.
Supplies:
- Freezer Paper
- Craft knife
- T-shirt (or other fabric to paint on)
- Iron
- Piece of cardboard (from box, cereal box, etc.)
- All surface craft paint or fabric paint
- Paintbrush (I used a stencil brush)
Directions:
1. Create the design that you would like on the shirt. You can do this on the computer, or by drawing. I like to find free clip art online, and then add words to it on my computer. Make sure the design is the size that you would like the final product to be, and then print directly onto the freezer paper. You can do this by cutting a piece of freezer paper to 8 1/2 x 11″, and inserting into your ink jet printer shiny side up (you will be printing on the paper side). Print as usual.

2. Using a craft knife on a safe surface (I use a self healing mat), carefully cut out the design. The printed part that you are cutting out is the part that will be painted. If you have letters or any part of the design that isn’t just a silhouette, save those pieces! You will need them soon.
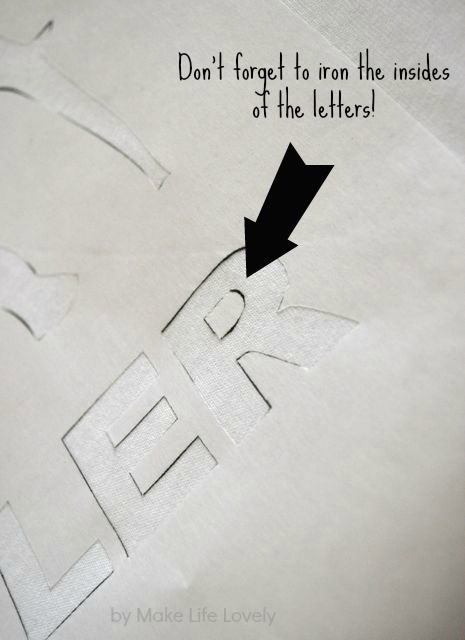
3. Place the stencil where you would like it on your t-shirt shiny side DOWN, and iron on the highest setting on your iron with no steam. Leave the iron on each area for about 10-15 seconds, moving slowly. Make sure to iron on any small pieces that were left out from cutting- for example, the middle circle in the lower case “a,” etc. If you don’t iron on the little pieces, the whole thing will be painted (like the whole inside of an “a.” Make sense?
4. Once the design is all ironed on, make sure that all of the pieces are secured to the shirt. Place the piece of cardboard inside the shirt, so that the paint doesn’t bleed through to the other side. Paint the shirt any colors that you like, and let dry.
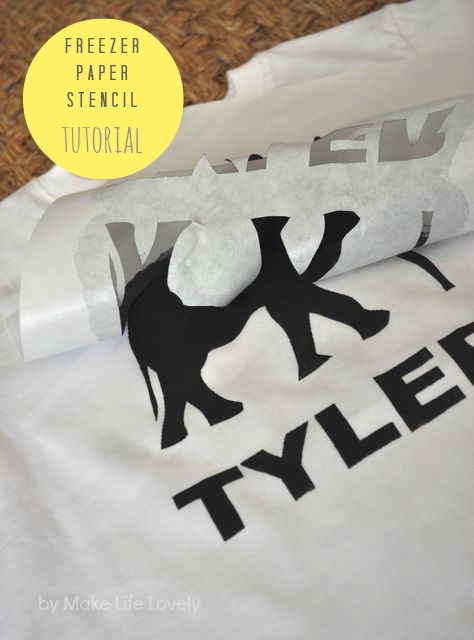
5. Now for the fun part! Once the paint is completely dry, peel up the freezer paper by lifting carefully on a corner. Slowly peel up all of the freezer paper, and be amazed at your beautiful shirt!

Freezer paper stenciling is SO easy, and is a great way to get a custom look without the custom price! Once you buy a roll of freezer paper, it will last you forever. The roll is huge!

Have fun with this technique- the possibilities are endless! You can see my son wearing this shirt and all the details of his Jungle Safari Birthday Party here and here.

For a great way to make your mornings much smoother, you can check out these free printable daily outfit closet organizers. They’ve helped me out a TON!
Happy crafting!
If you liked this project, please follow me on Facebook, Twitter, Pinterest, Bloglovin’, and Instagram.
xo, Laura
Leave a Reply