This shop has been compensated by Collective Bias, Inc. and its advertiser, Mars, Incorporated. All opinions are mine alone. #SpookyTreats #CollectiveBias
I am thrilled to be sharing our haunted forest Halloween party with you today. This party has a classic feel to it and is a little scary and a whole lot of fun!

My inspiration for our haunted forest Halloween party comes from one of my favorite literary characters of all time, Ichabod Crane, and his fateful ride through the forest on Halloween night.
Keep reading to see how to create your own spooky haunted forest party including the trees backdrop, the yummy treats that were served, and the devilishly delightful decorations!

Haunted Forest Halloween Party
There are so many fun individual elements of this party that combine to give it that spooky forest feel.

From the real tree branches backdrop to the creepy animals to the natural elements like the wood slices, the pumpkins, and the moss, they all combine to give the haunted forest Halloween party an outdoor, natural creepy forest feel.
Haunted Forest Halloween Party Food
Caramel apples are a Halloween party must, so I served various varieties of caramel apples for the party. Some had chocolate spider webs on them, some were covered with chopped nuts, and others were butterscotch caramel flavored.

To create the butterscotch caramel apples, simply make caramel apples as usual, then as the caramel is partly cooled, press some M&M’S Boo-tterscotch White Chocolate candy into it. YUM!


Apple turnovers and pumpkin bread are the perfect fall treats to serve at a Halloween party!
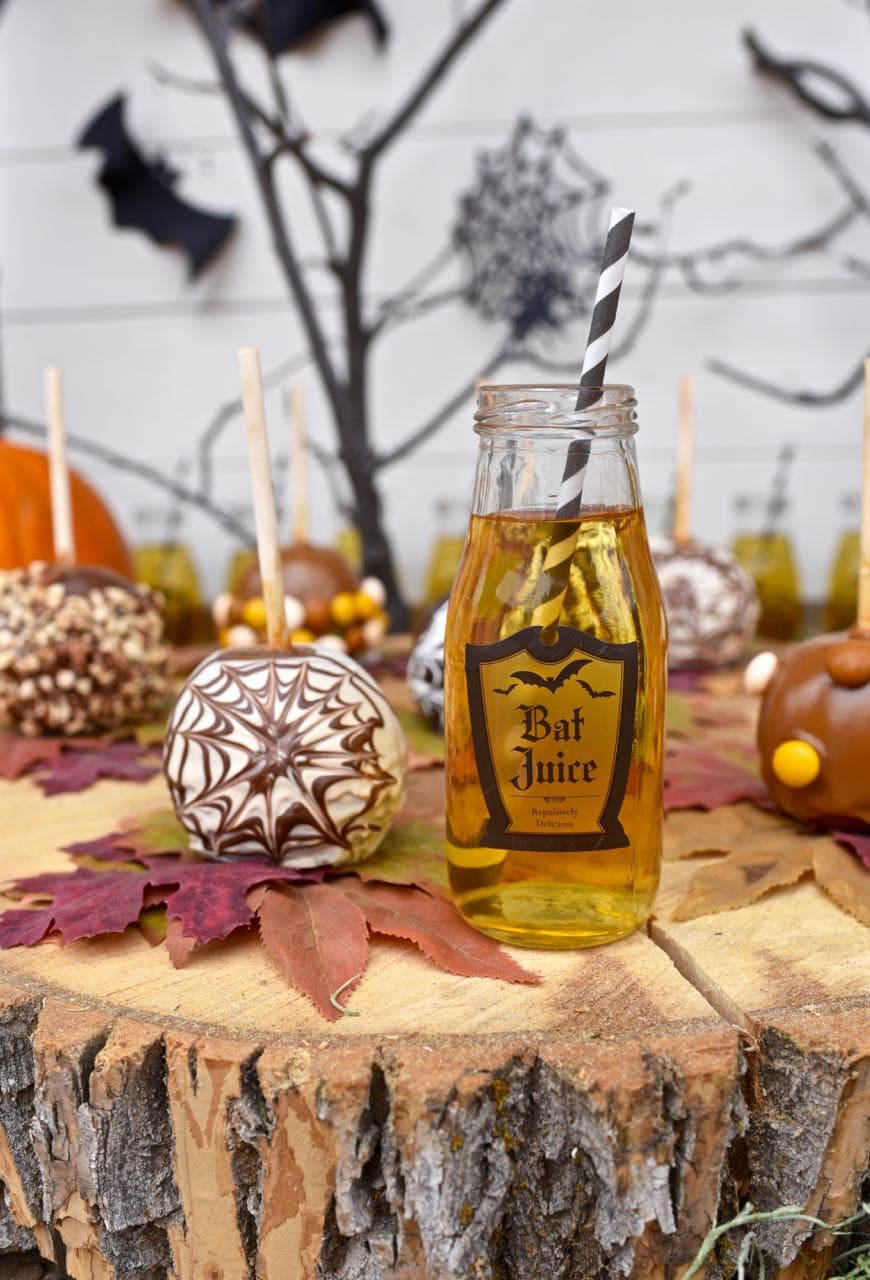
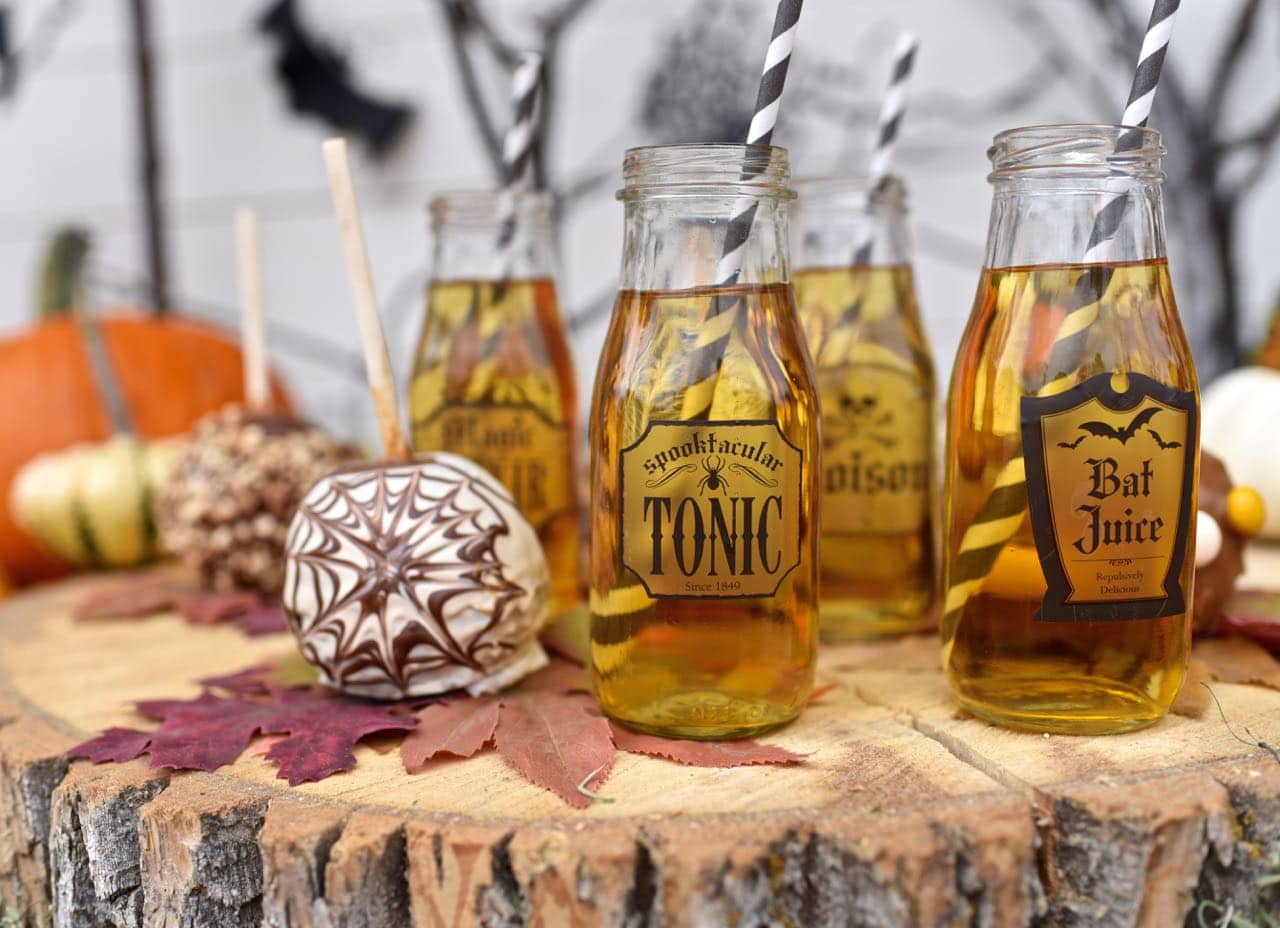
Apple cider paired well with our haunted forest Halloween party food, and looked extra spooky with some clear Halloween stick-on labels on the glass bottles and black and white striped straws.
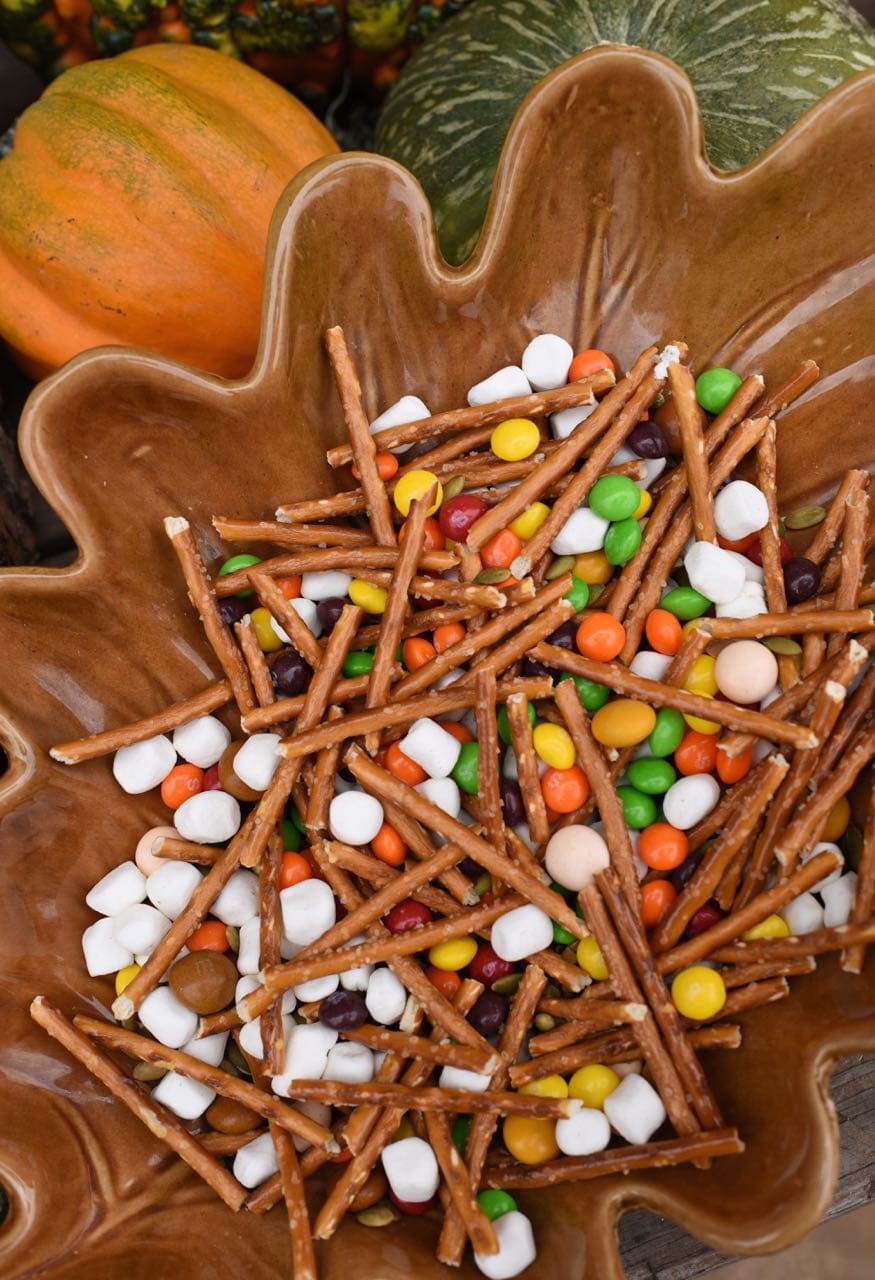
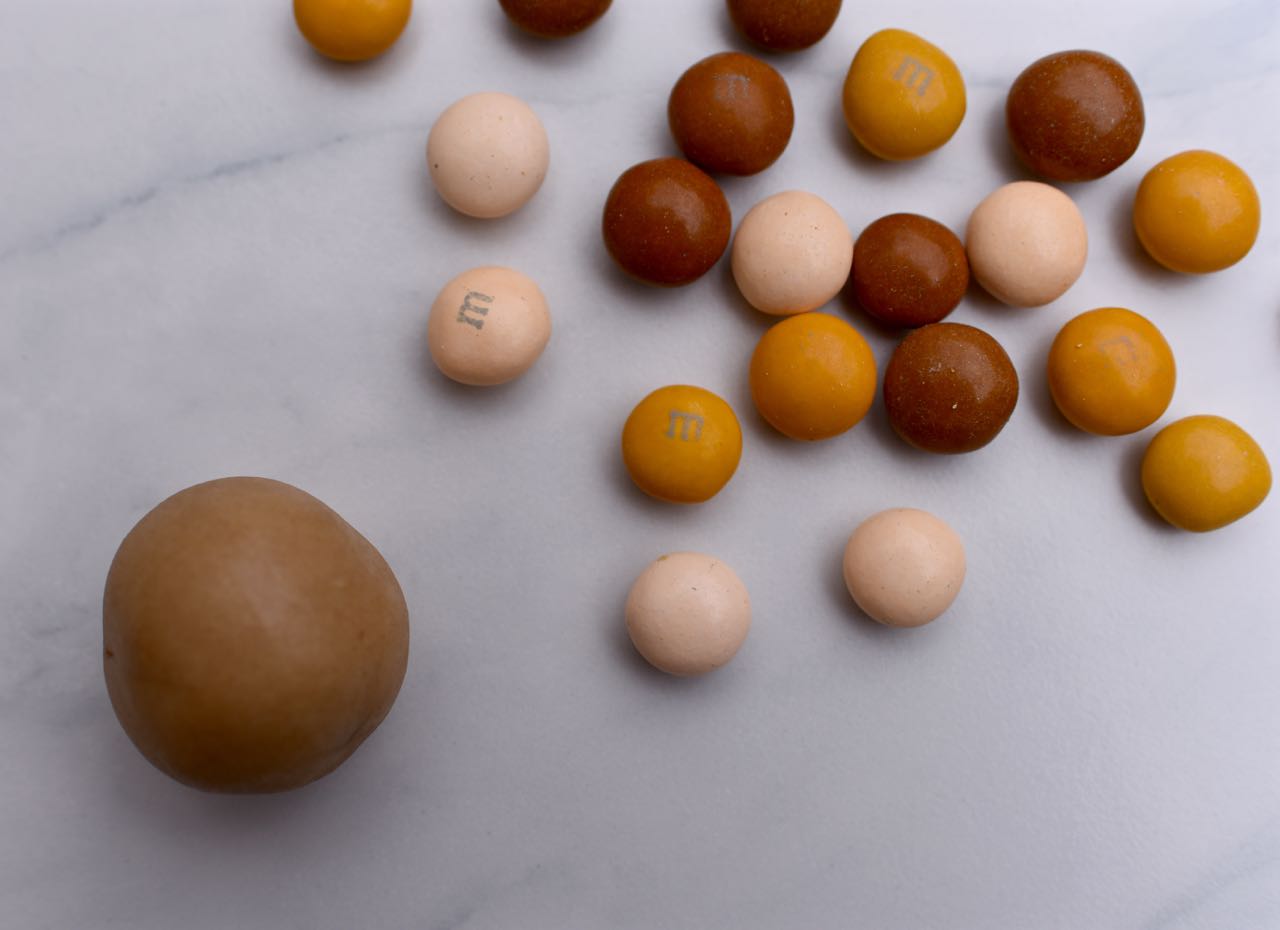
Other party food included a tasty Halloween snack mix with Skittles, more M&M’S Boo-tterscotch White Chocolate, salted pepitas (the inner portion of a pumpkin seed), pretzels, and mini marshmallows, served in a beautiful fall leaf serving dish that fit the forest theme perfectly.

Butterscotch cookie dough pops were another tasty addition to our party, and were very easy to make! They taste just like cookie dough (bit are safe to eat since there are no raw eggs inside) with the flavor of butterscotch too. These taste SO good!

Butterscotch Cookie Dough Pops Recipe
Ingredients:
- 1 stick butter, softened
- 1/2 cup sugar
- 1/2 cup brown sugar
- 1 1/2 cups flour
- 1/2 tsp salt
- 1 tsp vanilla
- 3 Tbsp. water
- M&M’S Boo-tterscotch White Chocolate
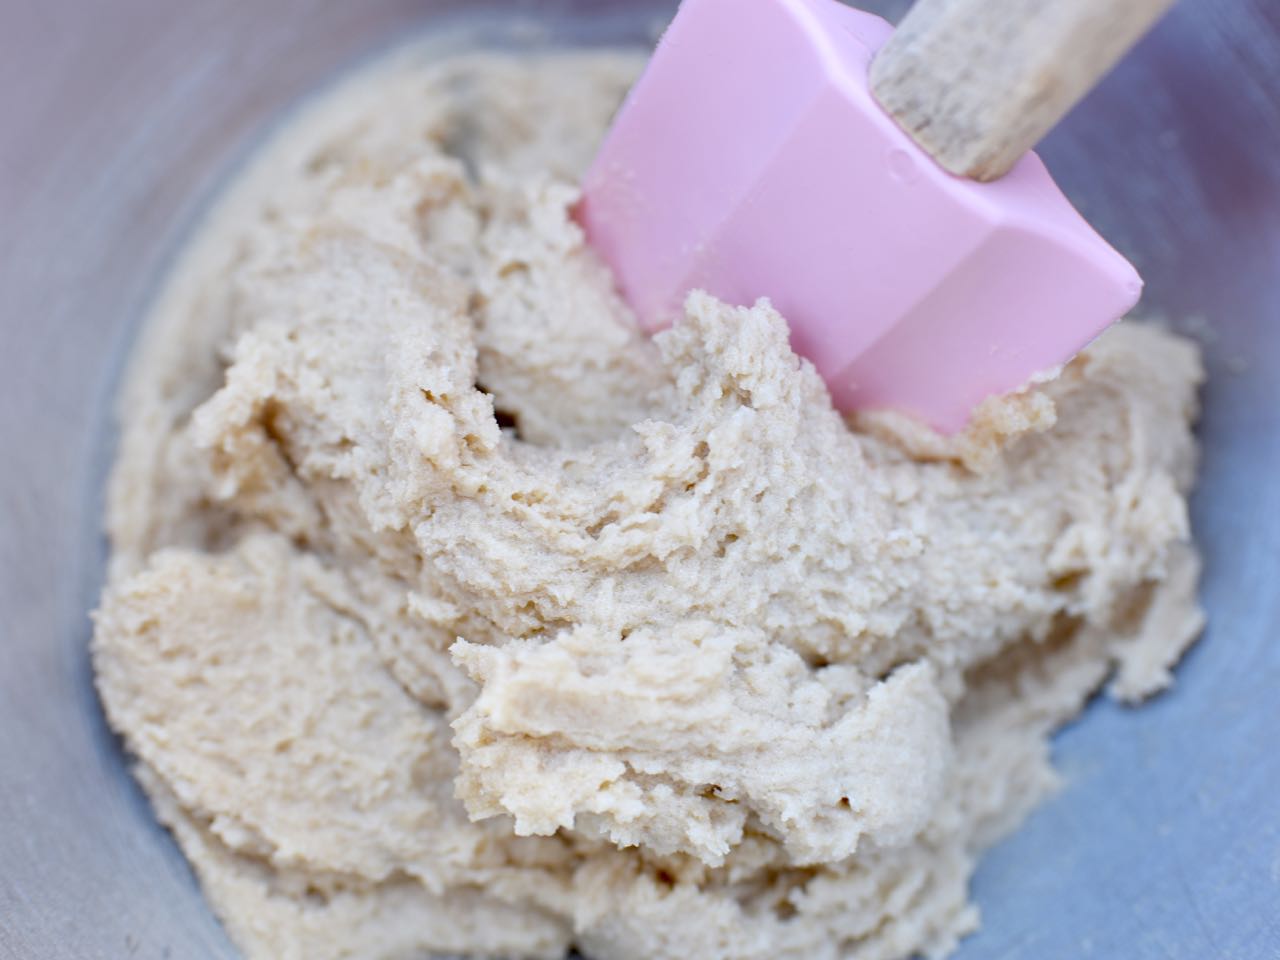
Step 1. Combine the softened butter, sugar, and brown sugar. Mix on high-speed until combined and fluffy.
Step 2. Add the flour, salt, vanilla, and water, and mix on medium speed until incorporated. Place in refrigerator for 30 minutes.
Step 3. Remove the dough from the fridge, then roll into balls.
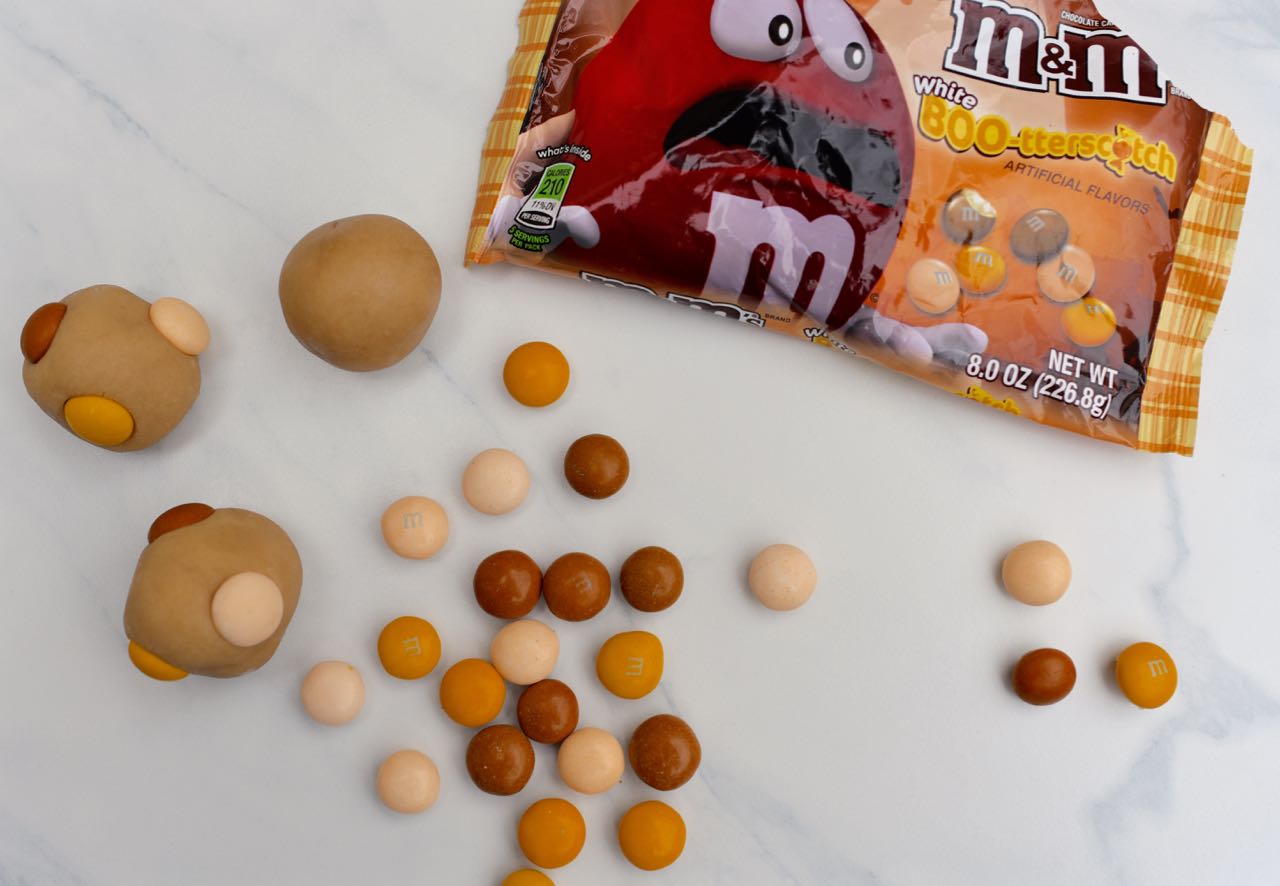
Press three M&M’S Boo-tterscotch White Chocolate into each ball, then insert a sucker stick into the top middle.
Refrigerate until ready to serve.
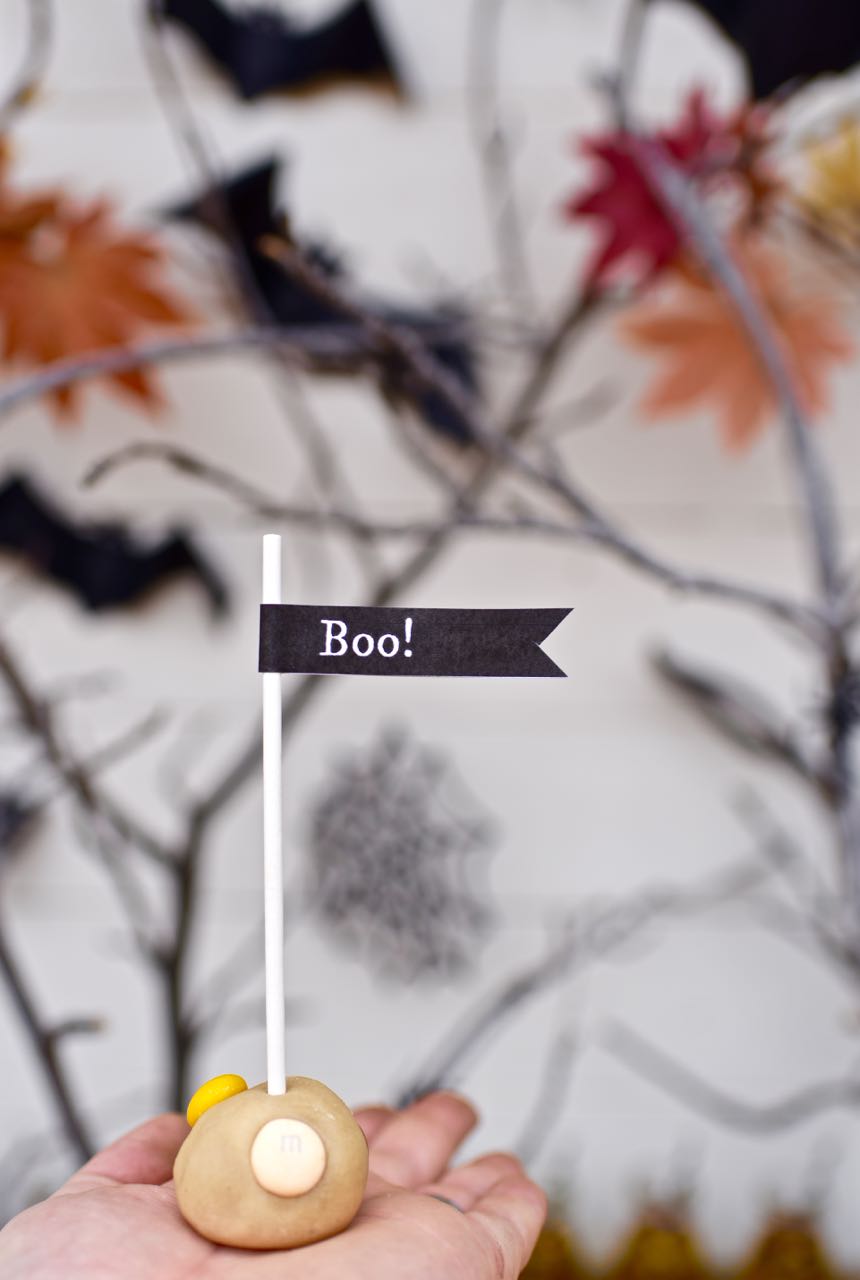
To make these butterscotch cookie dough pops even cuter, you can download and print the free printables that I created for you!
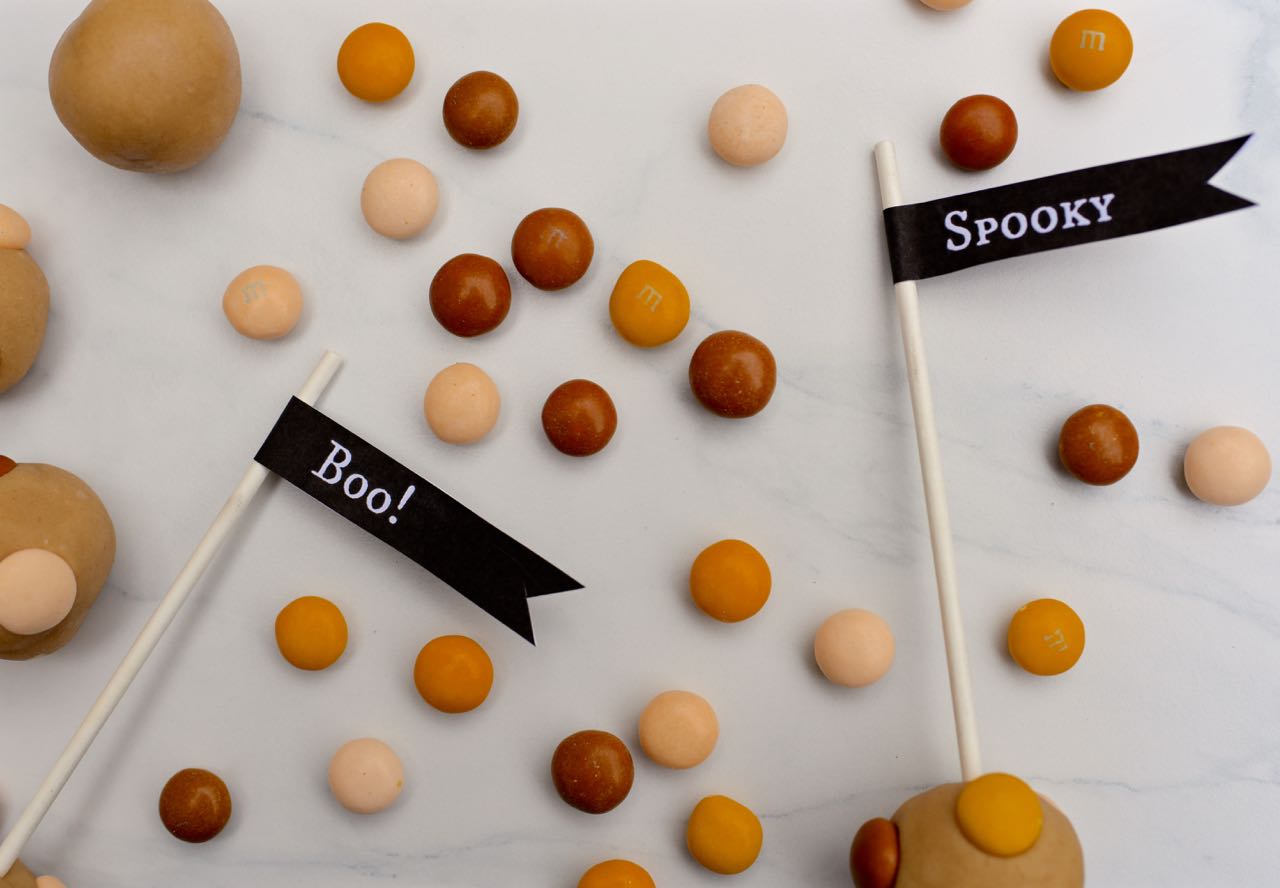
Just print and cut the flags, then glue or tape them to the top of each flag.
Download free Halloween printable flags and tags
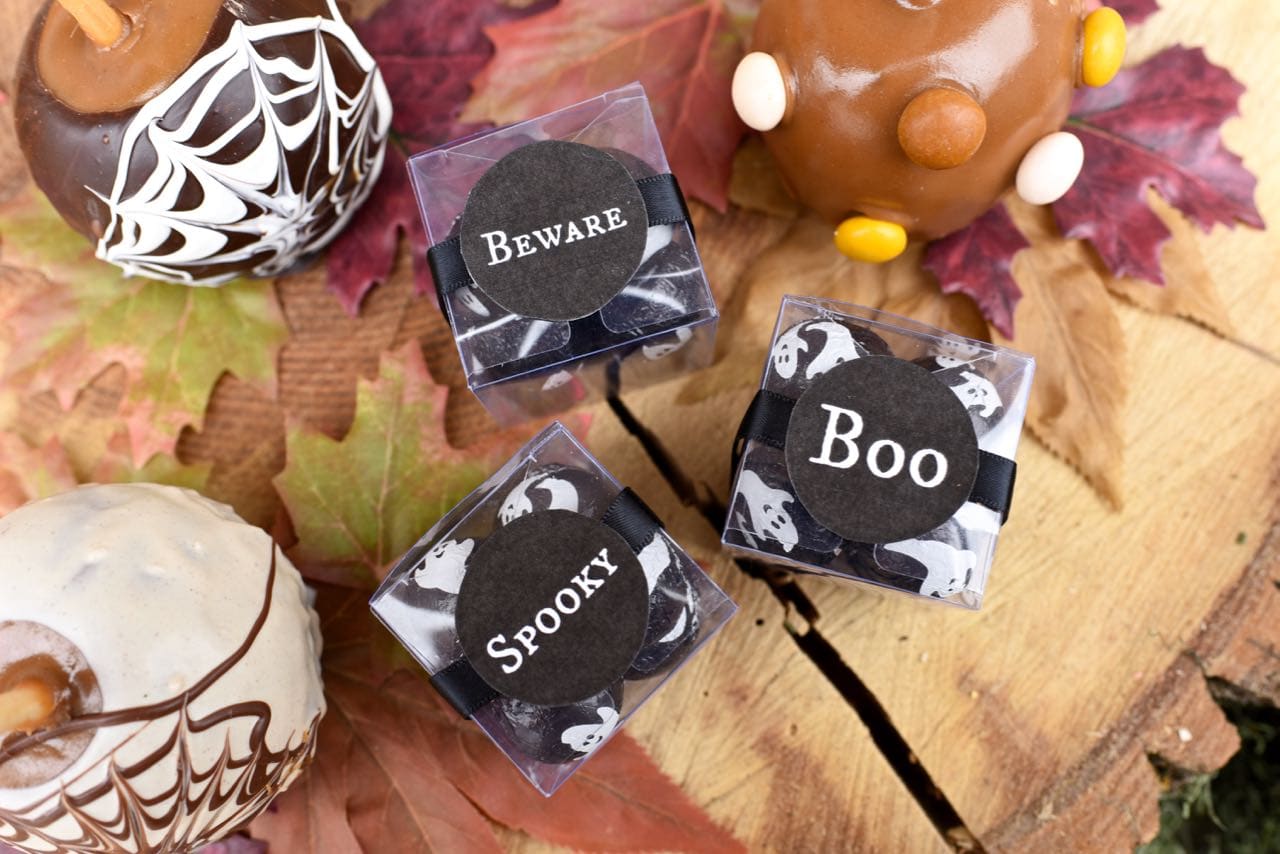
You just can’t have a party without party favors, and these ghost chocolate party favors are the perfect treat to send guests home with!
I’m sharing the printables for the cute round Halloween tags that I designed. Just add some black satin ribbon and tape or glue on the tag, and you’ve got some sinister sweets to share!
Download free Halloween printable tags and flags
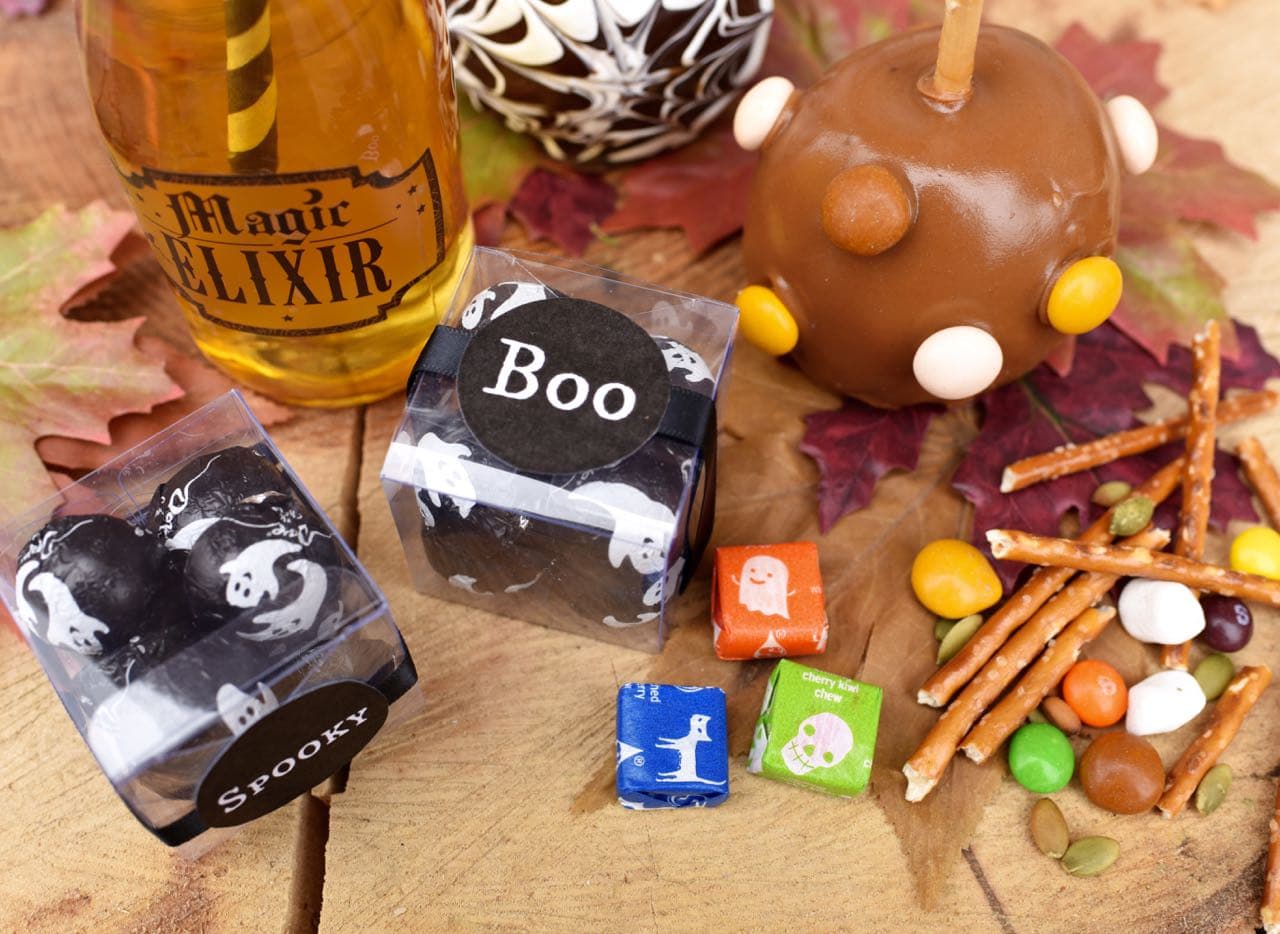
Each clear box is filled with creamy rich Dove Milk Chocolate Ghosts. Dove Milk Chocolate Ghosts and M&M’S Boo-tterscotch White Chocolate are both exclusive to Target and can be found in the Halloween section of the store.
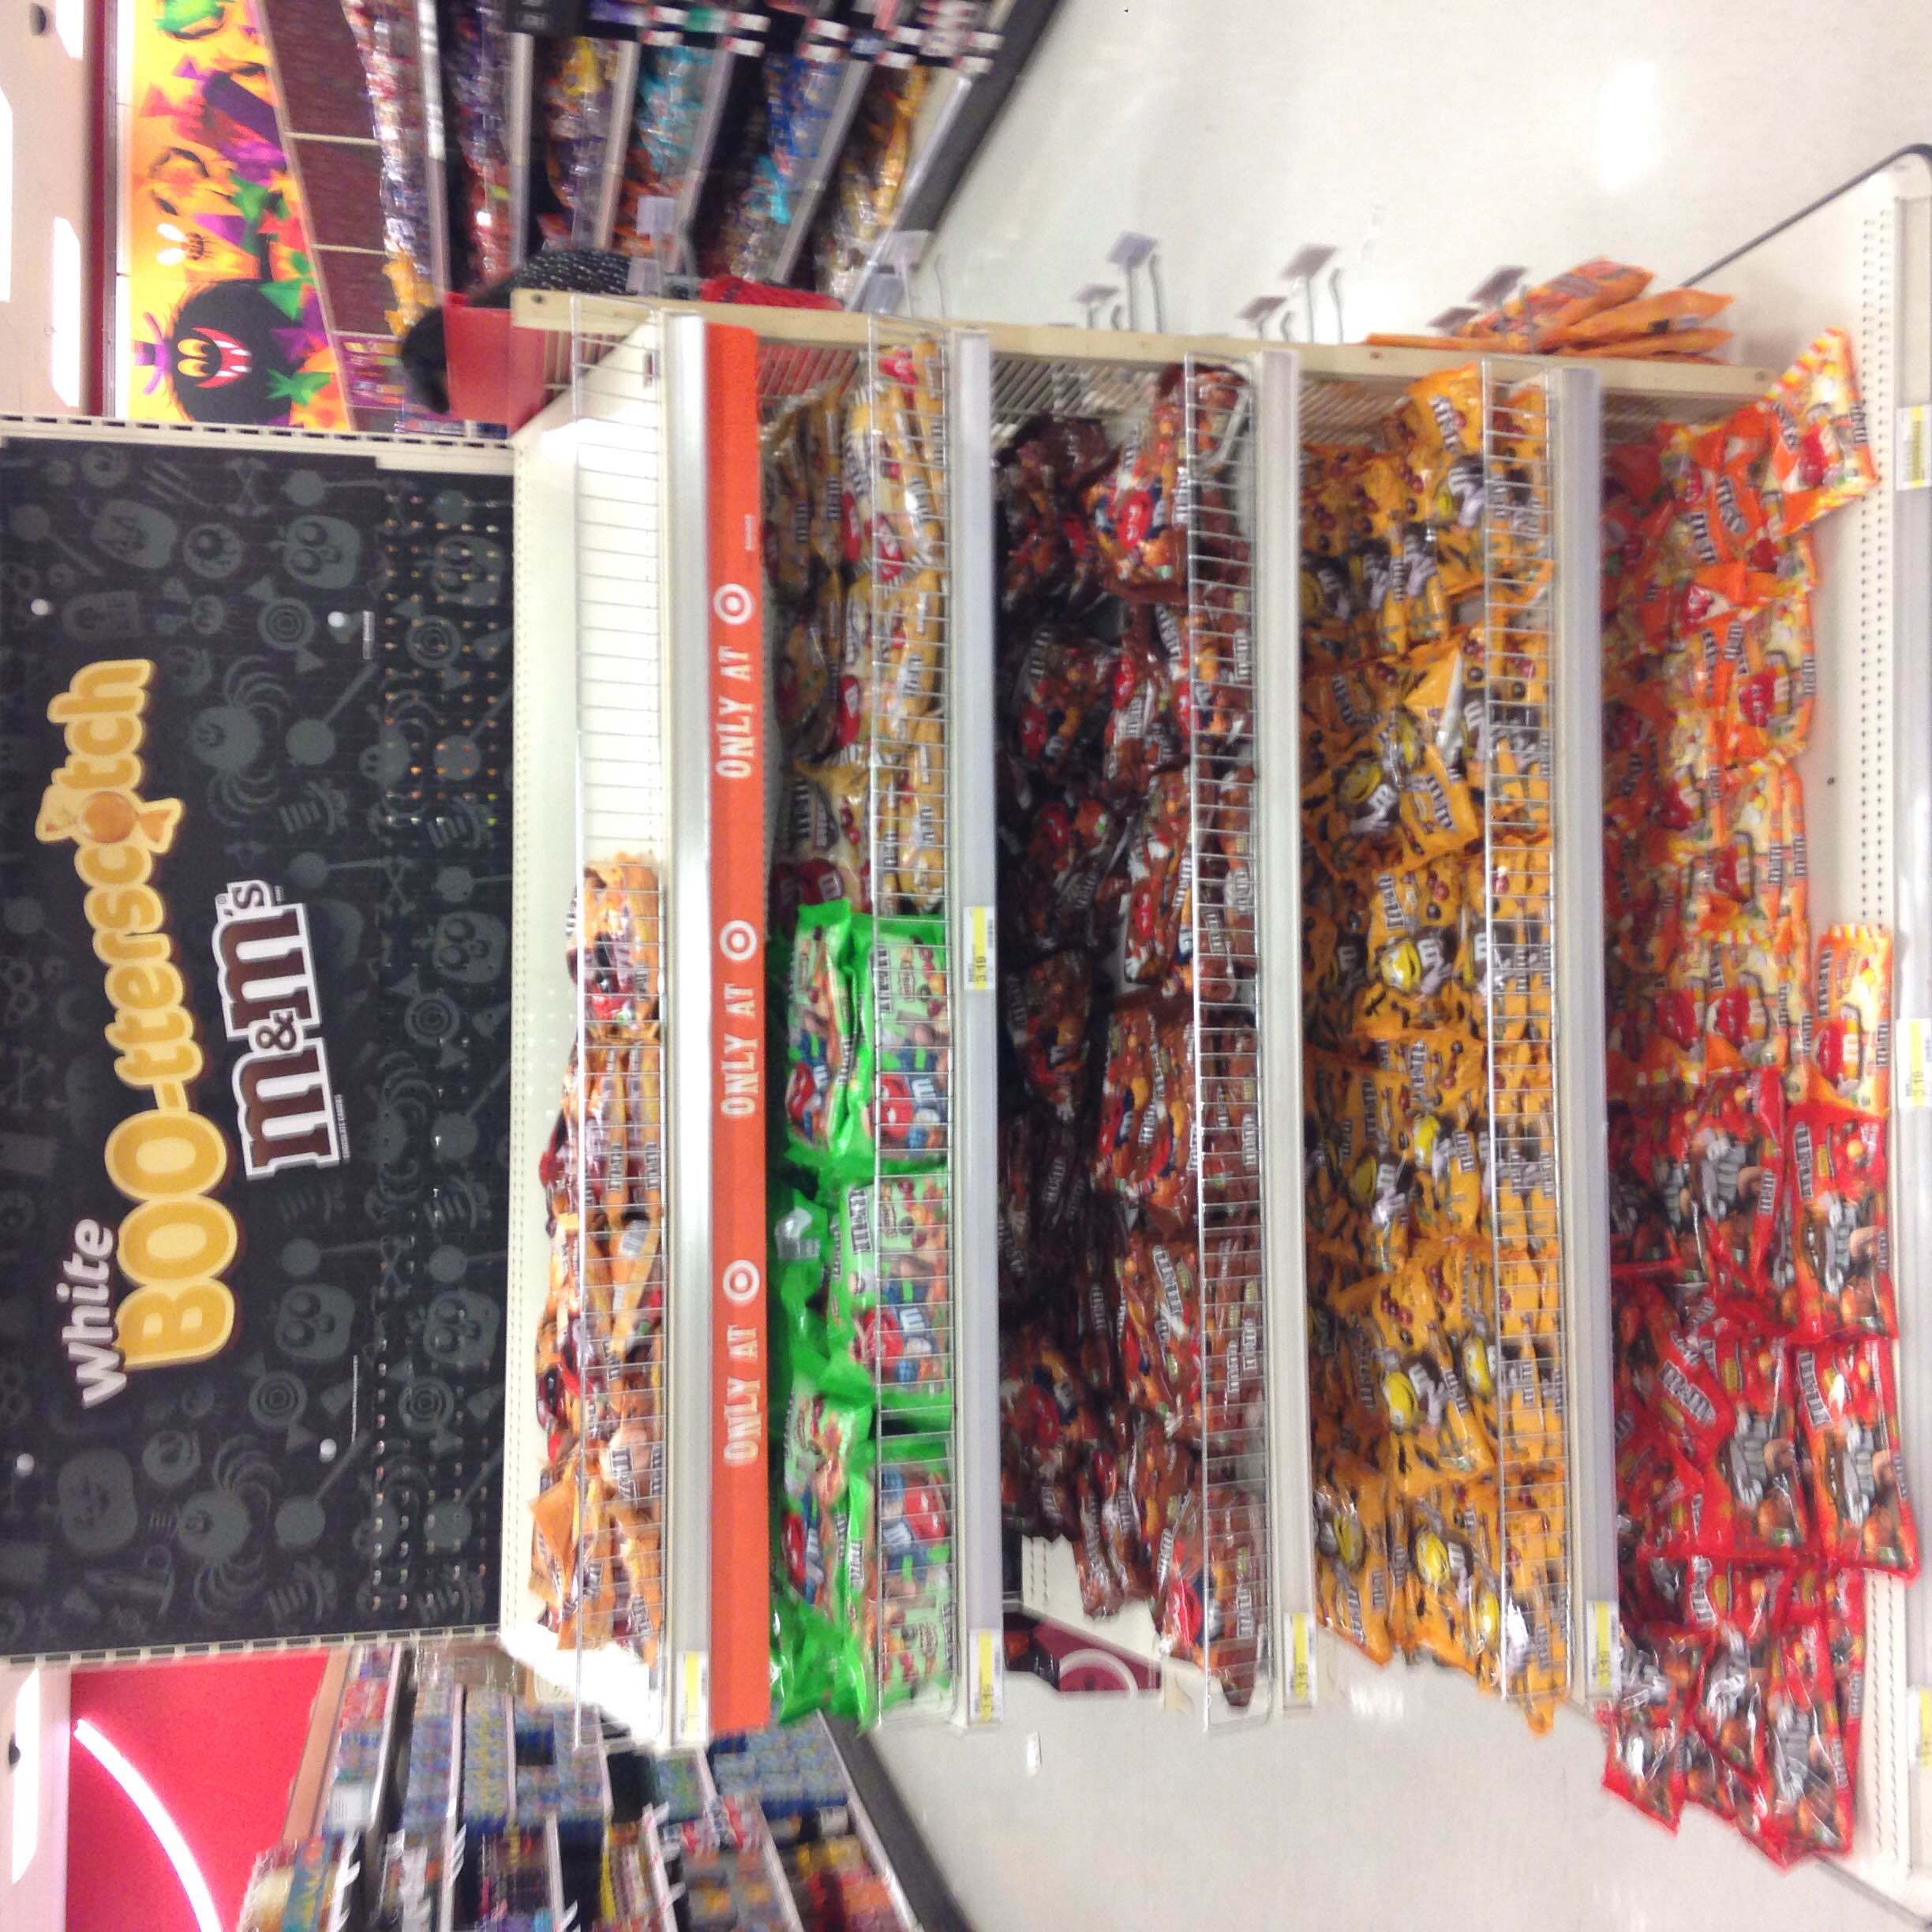
They were easy to find on my store displayed on an end cap.

Black and orange Halloween cups were filled with Starburst candies in fun Halloween packaging. These are one of my favorites!
Haunted Forest Halloween Party Backdrop DIY
Create your own haunted forest party backdrop for your own Halloween party! Follow the directions below to see how I made ours. It looks great and is very easy to put together!
Supplies:
- Tree branches (I used branches of a tree from our yard for free!)
- Branches with leaves (Mine are artificial that I already owned)
- Spiders and spider webs
- Bats
- Ravens and crows
- Pumpkins
- Artificial leaves and moss

Step 1. Tree branches are the base for our Halloween backdrop. Trim branches off trees or look for dead branches that are already on the ground. The more gnarled and tangled, the better!
You can leave your branches the color they are or spray paint them black. I really liked the black and white colors of my branches, so I left them as is.
You can use branches that have no leaves, or add real ar artificial branches that have leaves. I used a mixture of both since I wanted to add a bit more color to our table.

Arrange the branches on the back of the party table so that they are far away enough so they won’t be touched. Make sure the branches are steady so they don’t fall. Larger, bigger branches go in the back, then use the smaller branches to fill in any gaps.
You may need to trim the bases of the branches so they lay flat on the table so they are secure.

Step 2. Now that your trees are in place, it’s time to add some the fun details!
Spider webs, whether they’re fiber or paper, add a spooky feel to the forest, especially when there is a creepy spider nearby!

Step 3. Fluttering bats make are a perfect addition to the forest. I used Glue Dots to attach my bats as if they were flying through the trees.

They held them in place perfectly, and I love the flow that they give the forest!

Step 4. I bought LOTS of pumpkins for this party. They add an earthy feel and lots of color! The pumpkins are also perfect for hiding the bases of the trees. Stick a few pumpkins in front and the bases are out of sight!

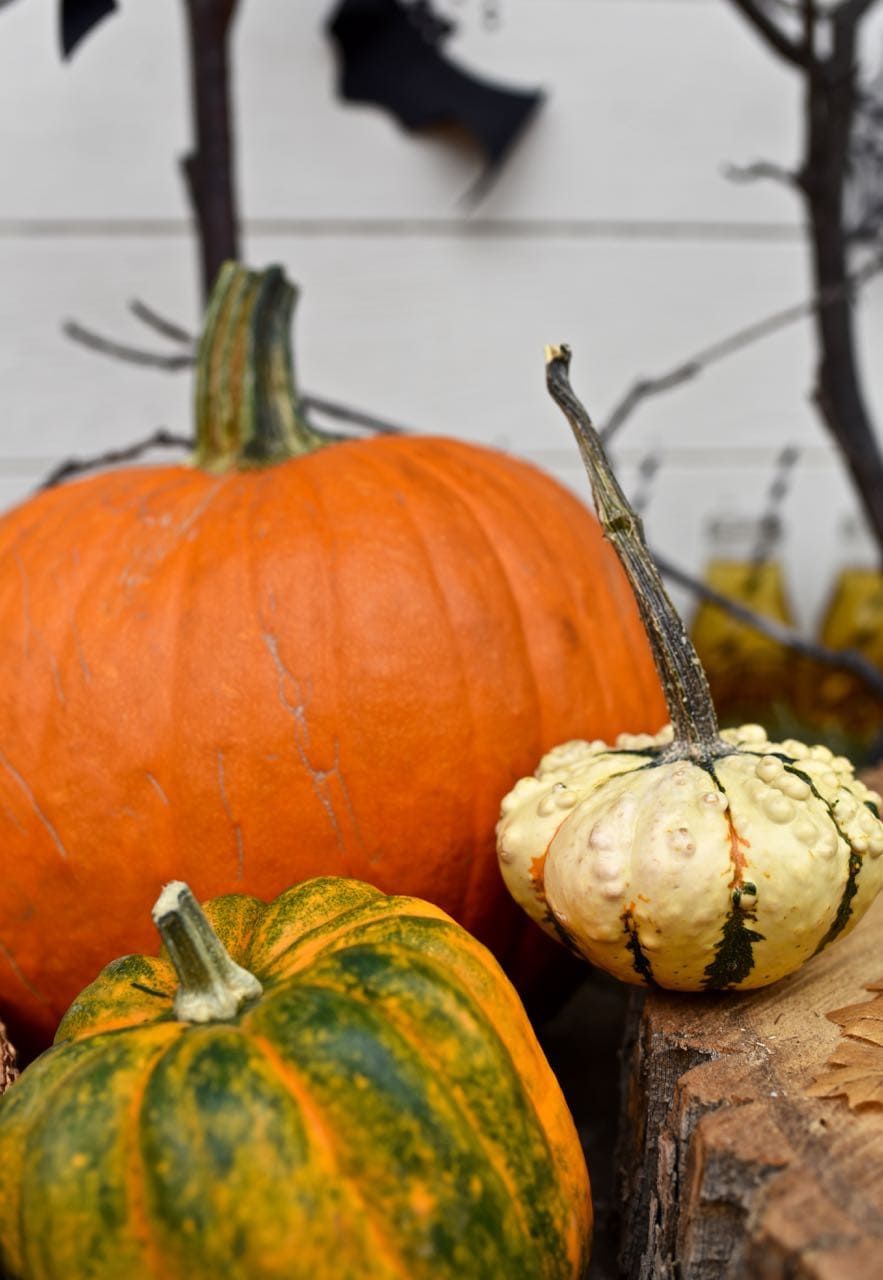
I used pumpkins in a variety of shapes, sizes, textures, and colors. That bumpy pumpkin looks like it has been cursed with warts and freaks my kids out, but it’s my absolute favorite one!
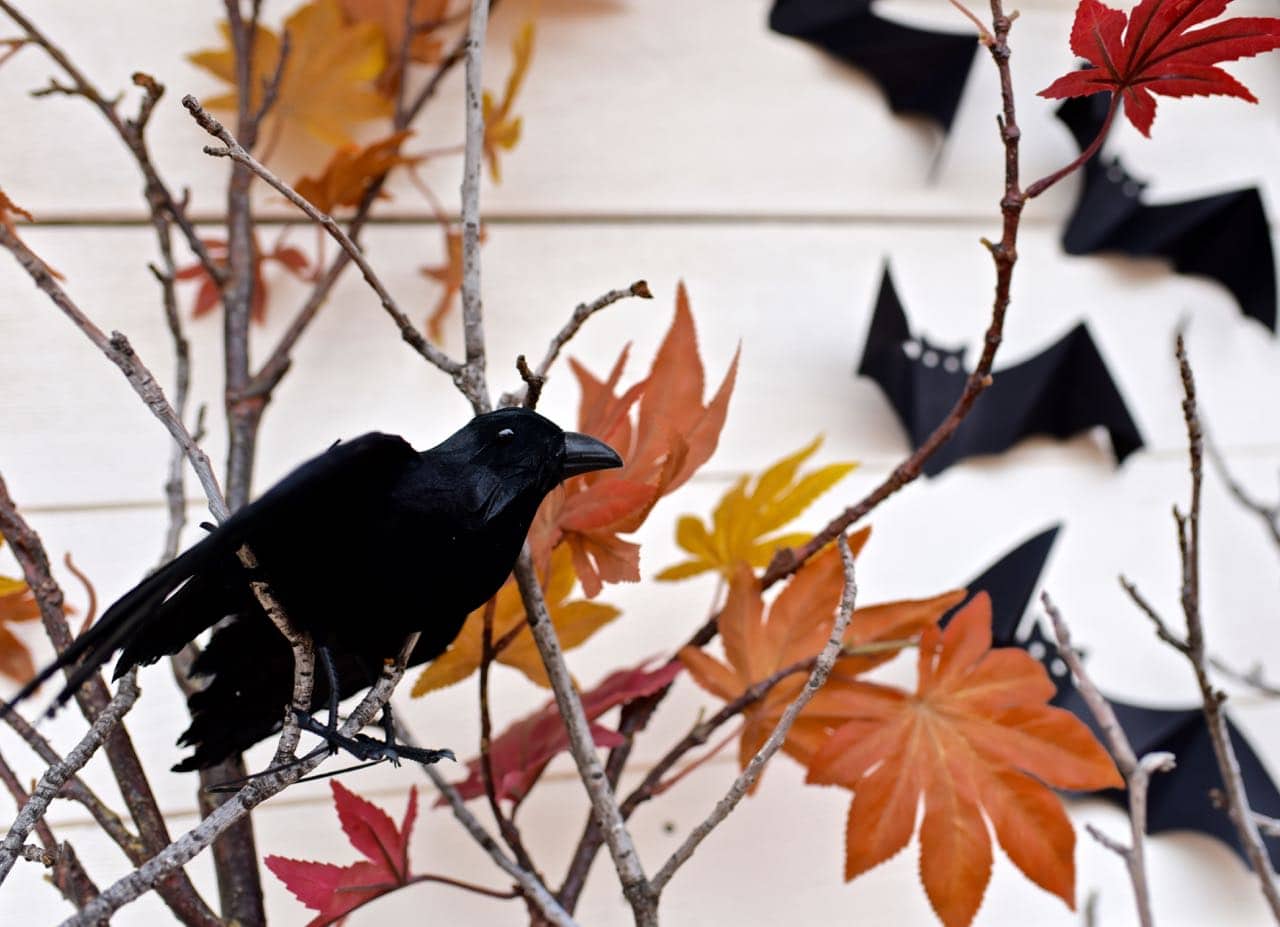
Step 5. Crows and ravens on the pumpkins and scattered throughout the trees add just the right amount of scariness to our forest. They sit, always watching.
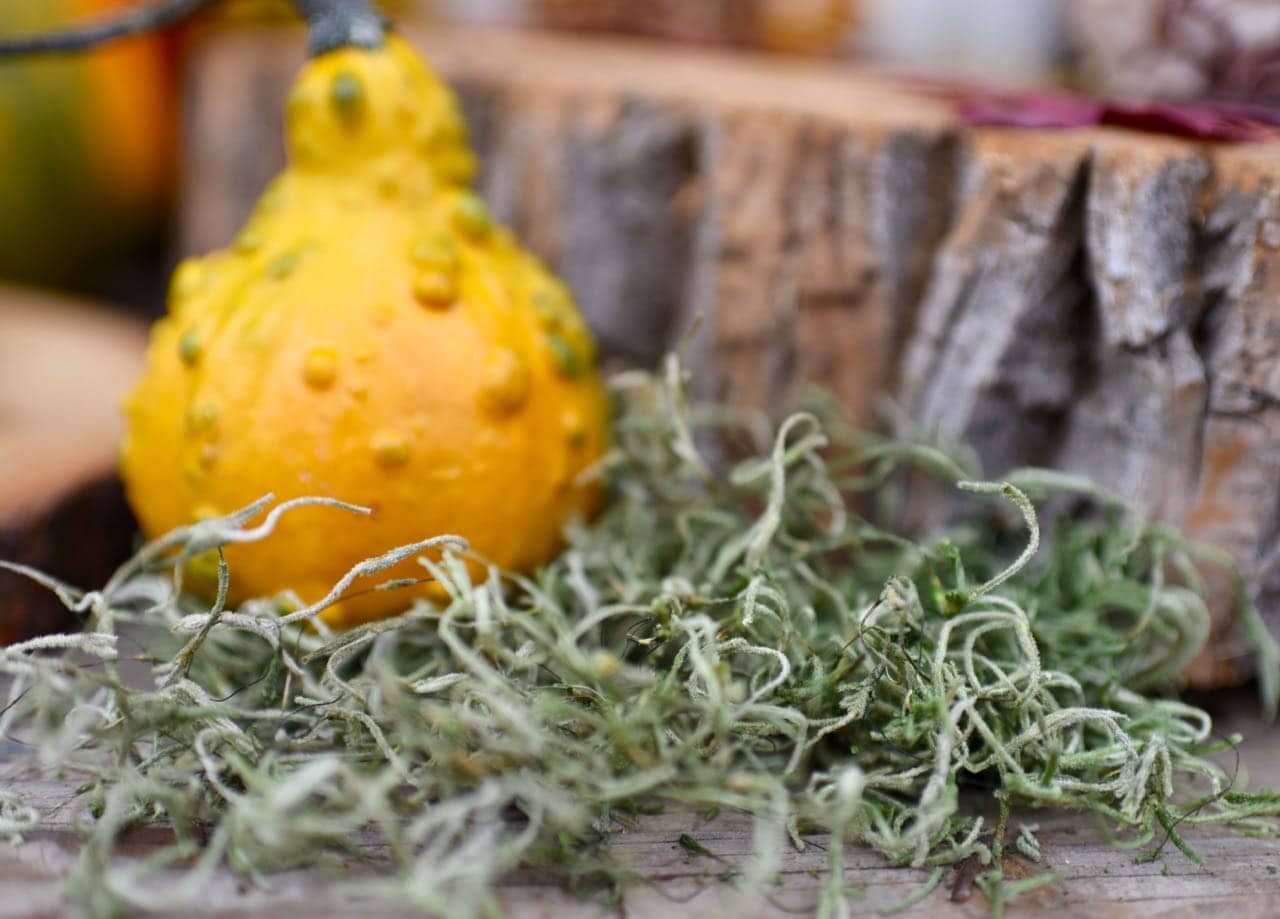
Step 6. A forest is covered with life, and adding some moss adds more texture and color and helps create a more realistic forest. I use the moss to fill in any gaps and add it in to the empty spaces between platters and trees.
You can also add in any other details that you like. An old abandoned lantern fit in perfectly and looked right at home among the pumpkin patch. See it in the background on the right hand side above?
You could also add a small wood pile, more twigs, leaves, etc. to add to the forest feel and create the perfect spooky haunted forest Halloween party!
I hope you enjoyed our haunted forest Halloween party even half as much as I enjoyed creating it! Right now you can save on your Halloween candy here!
Happy haunting!
![]()
Leave a Reply