Thank you Pennzoil and Walmart for sponsoring this post on How to Change the Oil in A Car. All ideas and opinions are always 100% my own. #DIYOilChange #CollectiveBias
Raise your hand if you know how to change the oil in a car. Did you know that it’s not as hard as you think it might be, and that it can save you money to do it yourself?
Back in college I had a friend who did his own oil changes, and he volunteered to show me how to change the oil in my car. It felt really good to have the knowledge and skills to be able to change the oil in a car myself. It really is doable!

Today I want to share the basics of a DIY oil change with you with easy step by step directions and photos, and show you how I changed the oil in my Chevy Tahoe. This tutorial will show you the general steps you will need to take to change the oil in your car, but be aware that each car is different, and the process for your vehicle might be slightly different.
* If you aren’t sure or have any questions, be sure to consult a professional. Please use standard safety procedures when changing your oil. You should always refer to your own car’s manual before changing your oil.
To change the oil in your car yourself, you’ll need a few supplies and tools.
Here are some of the tools, from left to right:

- Ratchet with socket
- Oil filter socket (if you have an oil filter housing to take off)
- Canister type oil filter wrenches
- Funnel
- Drain pan
You’ll also need:
- Motor oil (be sure to look up the correct type of oil that you’ll need for your make and model of car)
- Oil filter (again, look up the correct oil filter for your vehicle)
- Rag
- Gloves
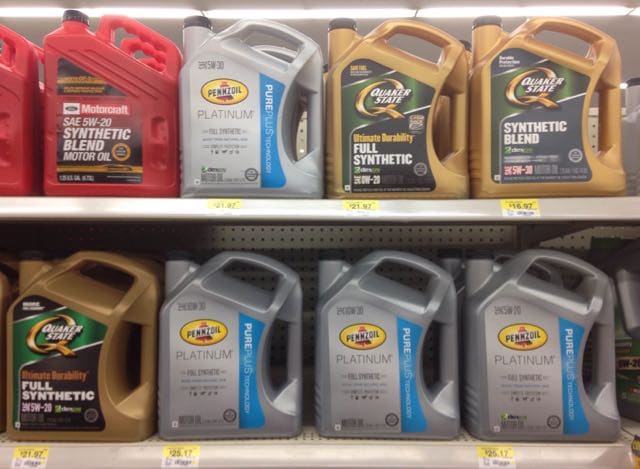
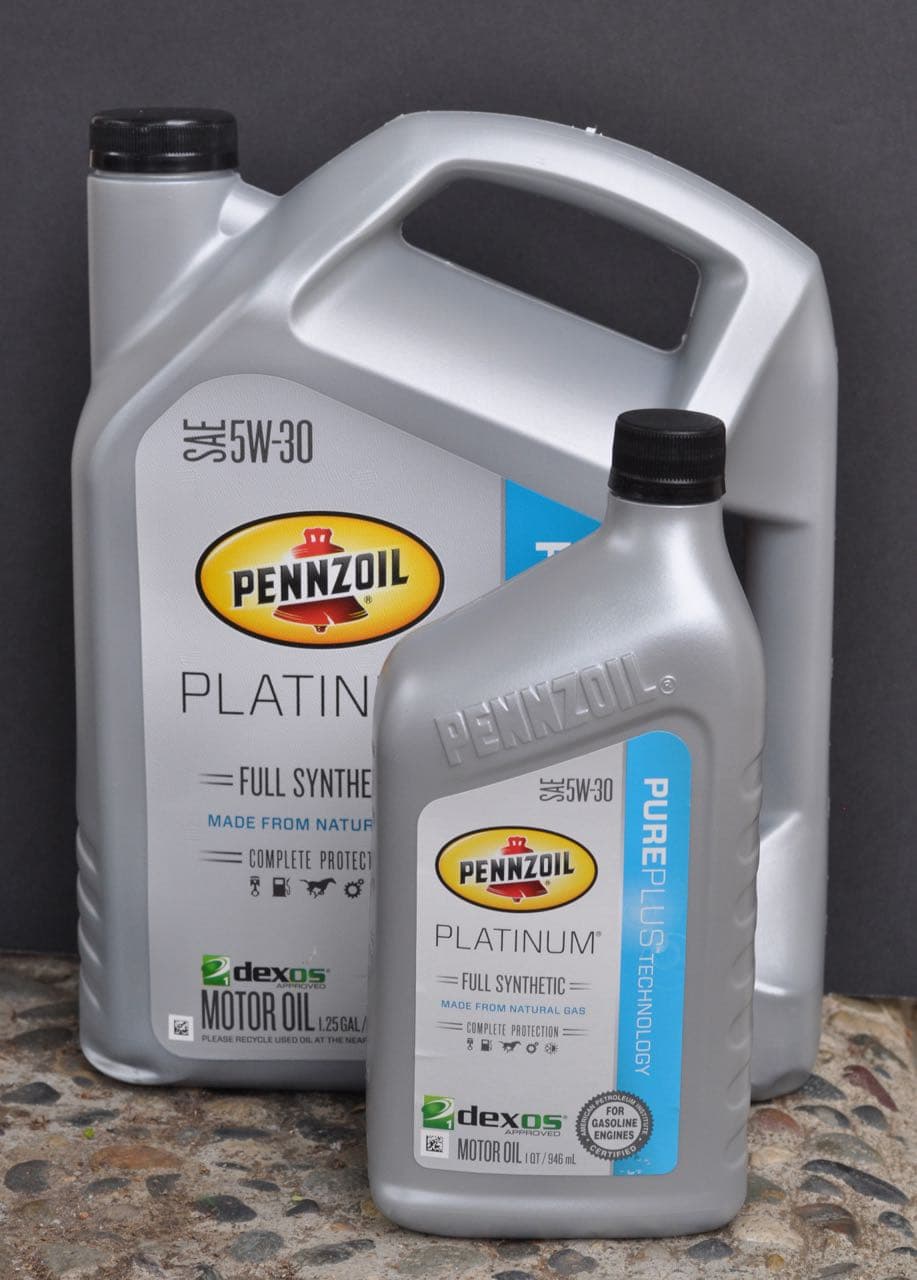
I purchased Pennzoil Platinum full synthetic motor oil when I was at Walmart. I found it in the auto care section. It’s a high quality oil that is specially designed to give your engine complete protection. You can drive on average an extra 500 miles per year with a clean engine vs a dirty engine, which is huge! Pennzoil Platinum full synthetic oil keeps your pistons up to 40% cleaner than the toughest industry standards and is backed by a 10 year/300,000 mile Lubrication Limited Warranty. Even BMW has recently switched to Pennzoil because of its’ high quality- Pennzoil is the recommended oil for BMW engines!

Step 1. Put the car up on ramps. While driving the car up, be sure to roll down the window and put your head out to make sure you don’t go over too far. Place wheel chalks on both back tires, then put on the emergency brake.
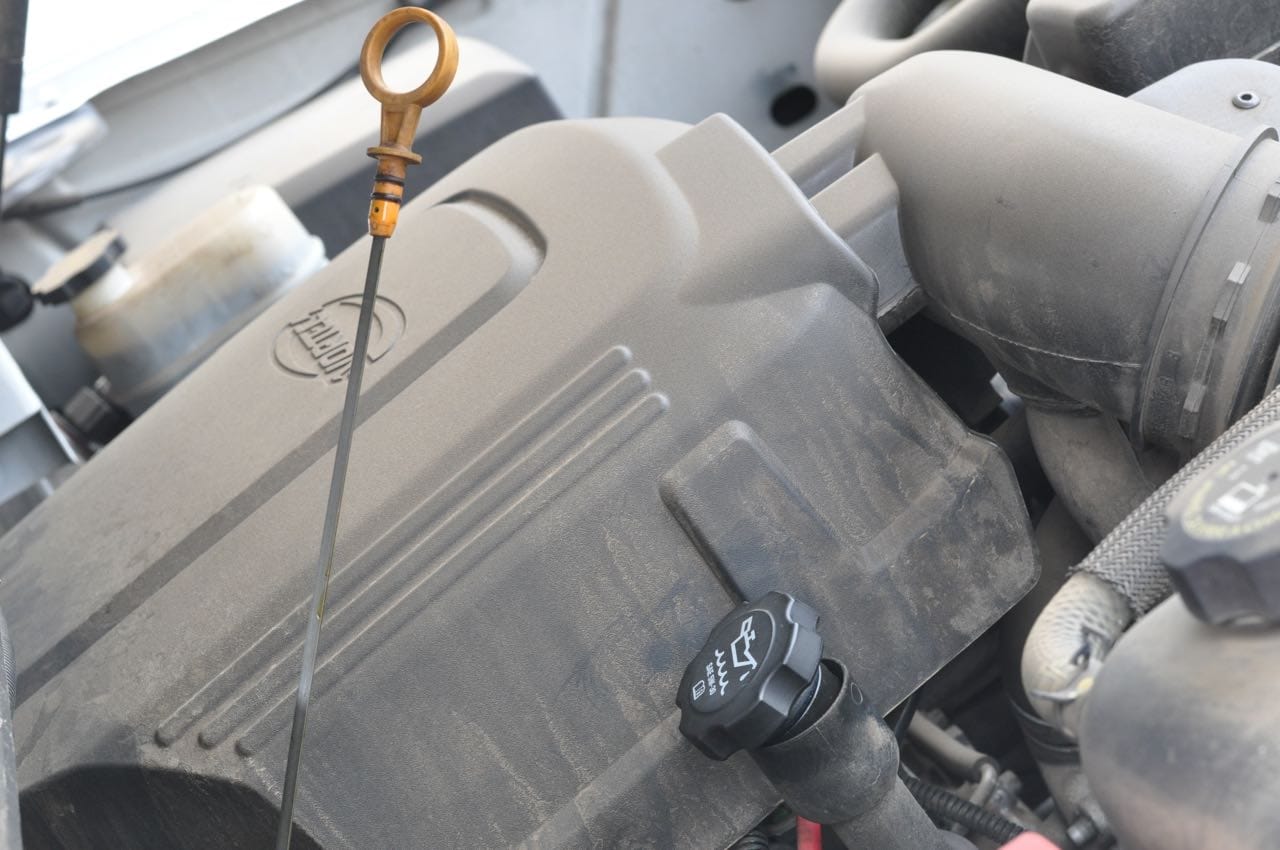
Step 2. Unscrew the oil fill cap and pull out the oil dip stick to vent the pressure from the oil system.
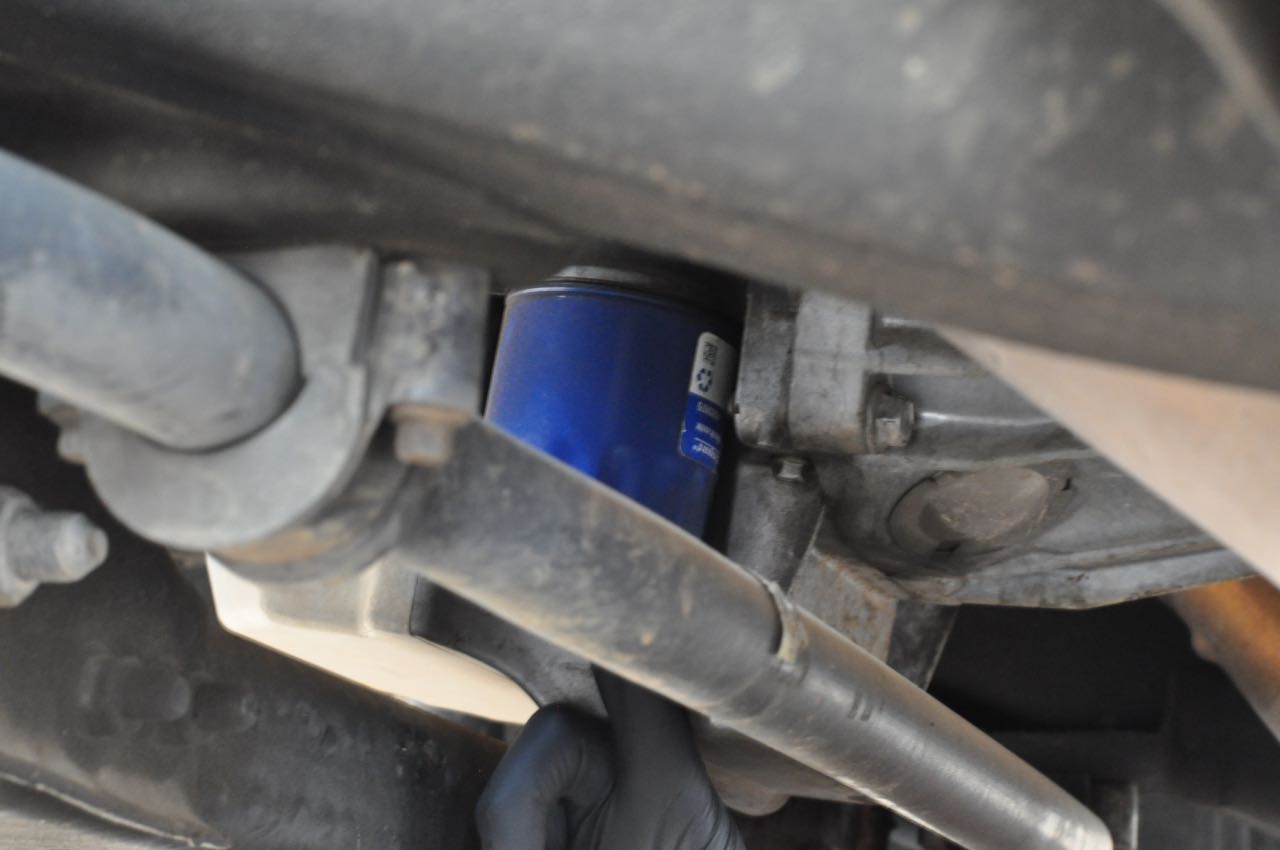
Step 3. Remove the oil filter with an oil filter wrench. There are different kinds of oil filter wrenches depending on your car, wo be sure to use the correct wrench for your vehicle. A good tip to make sure that you have the right wrench is to try your oil filter wrench on the new oil filter ahead of time to see if it fits.
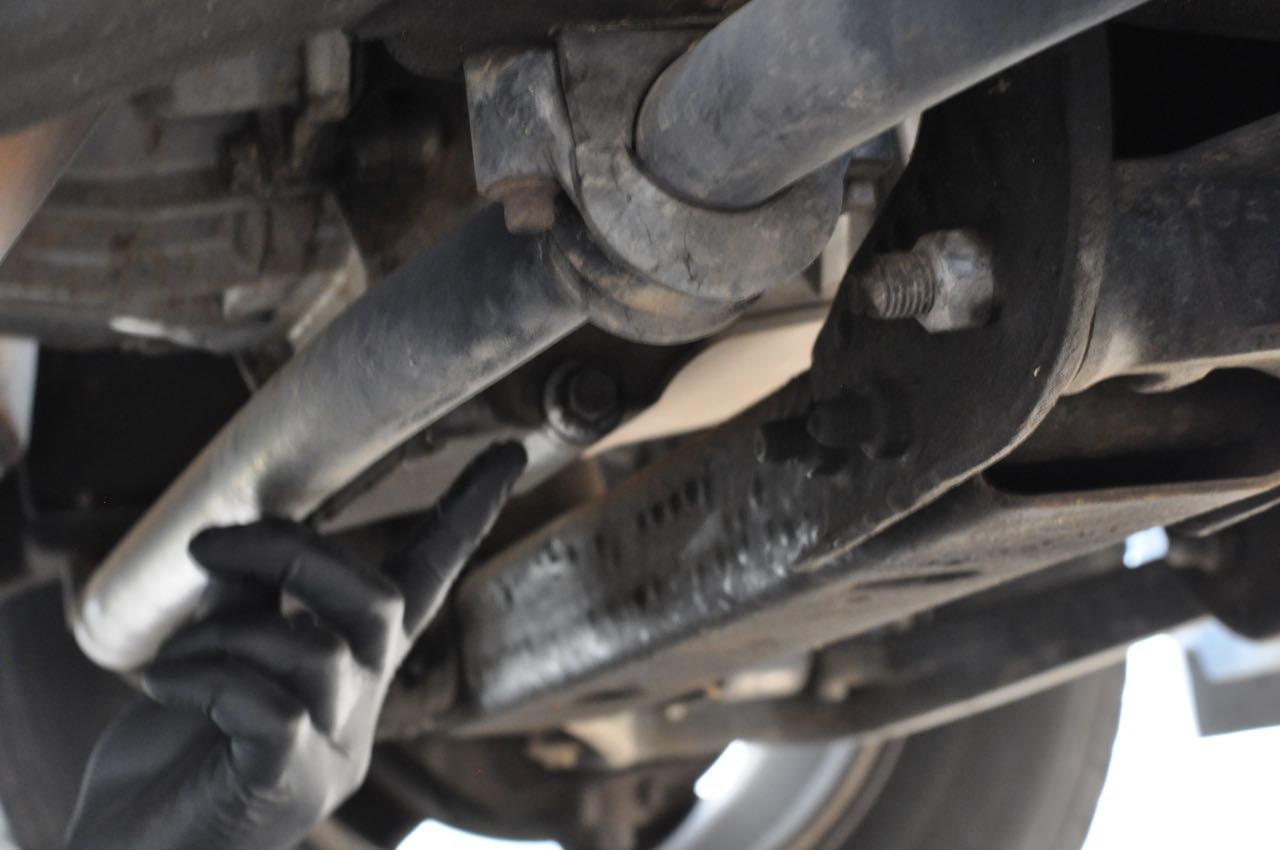
Step 4. Take the drain plug out with the ratchet socket. Remove the drain plug bolt and catch the oil in the drain pan. Once the oil has all drained, then you can reinstall and tighten the drain plug.

Step 5. Remove the old oil filter with the oil filter wrench and allow the oil to leak into the drain pan. There will be much less oil released than there was in step 4.
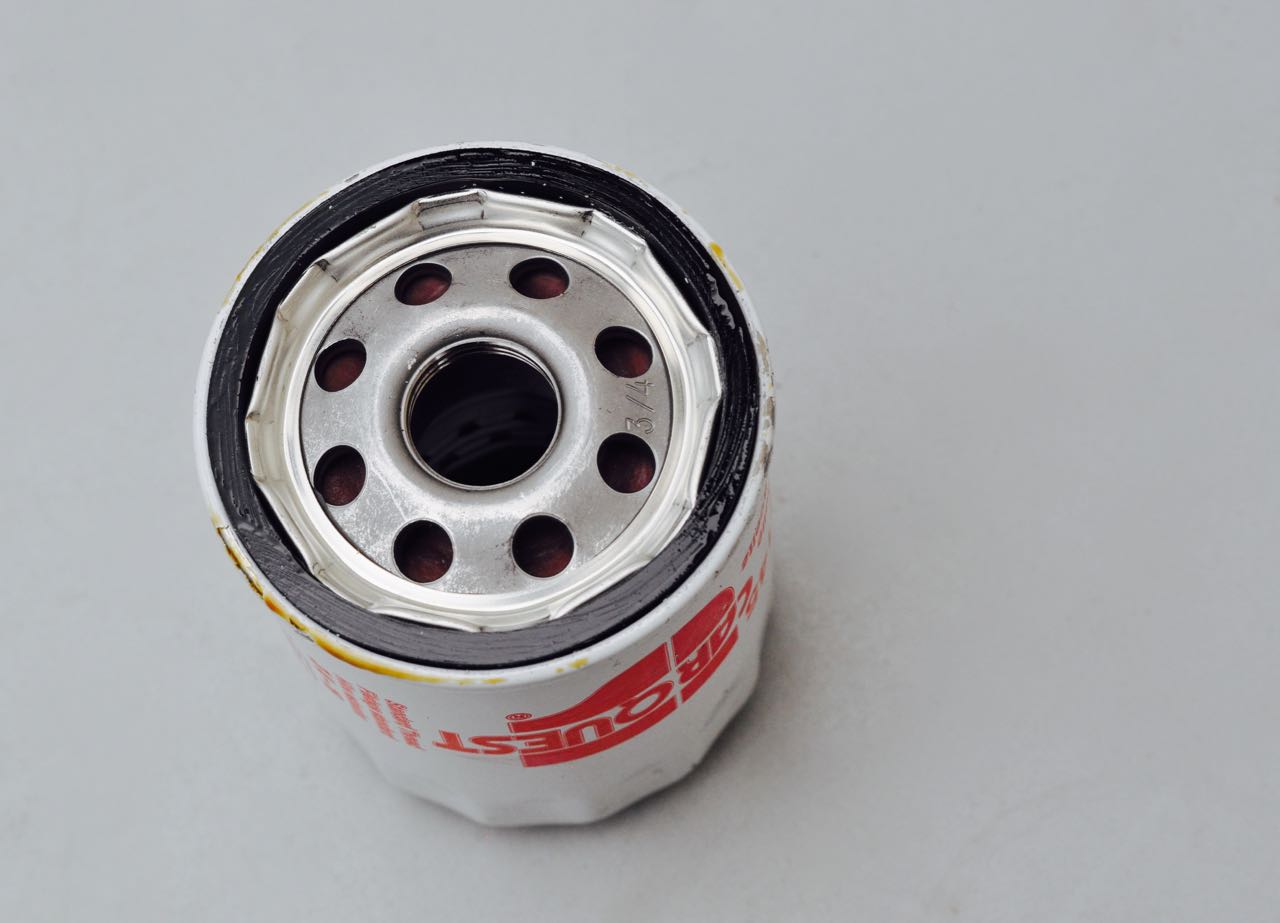
Step 6. Before you reinstall the new oil filter, be sure to clean the mounting surface area where the new oil filter will go. Place a thin layer of oil on the seal of the filter, then screw the oil filter back on by hand. It should be hand tight- using a tool to tighten this isn’t necessary.

Step 7. Remove the oil fill cap, and use a funnel to add in the recommended amount and type of oil for your vehicle.
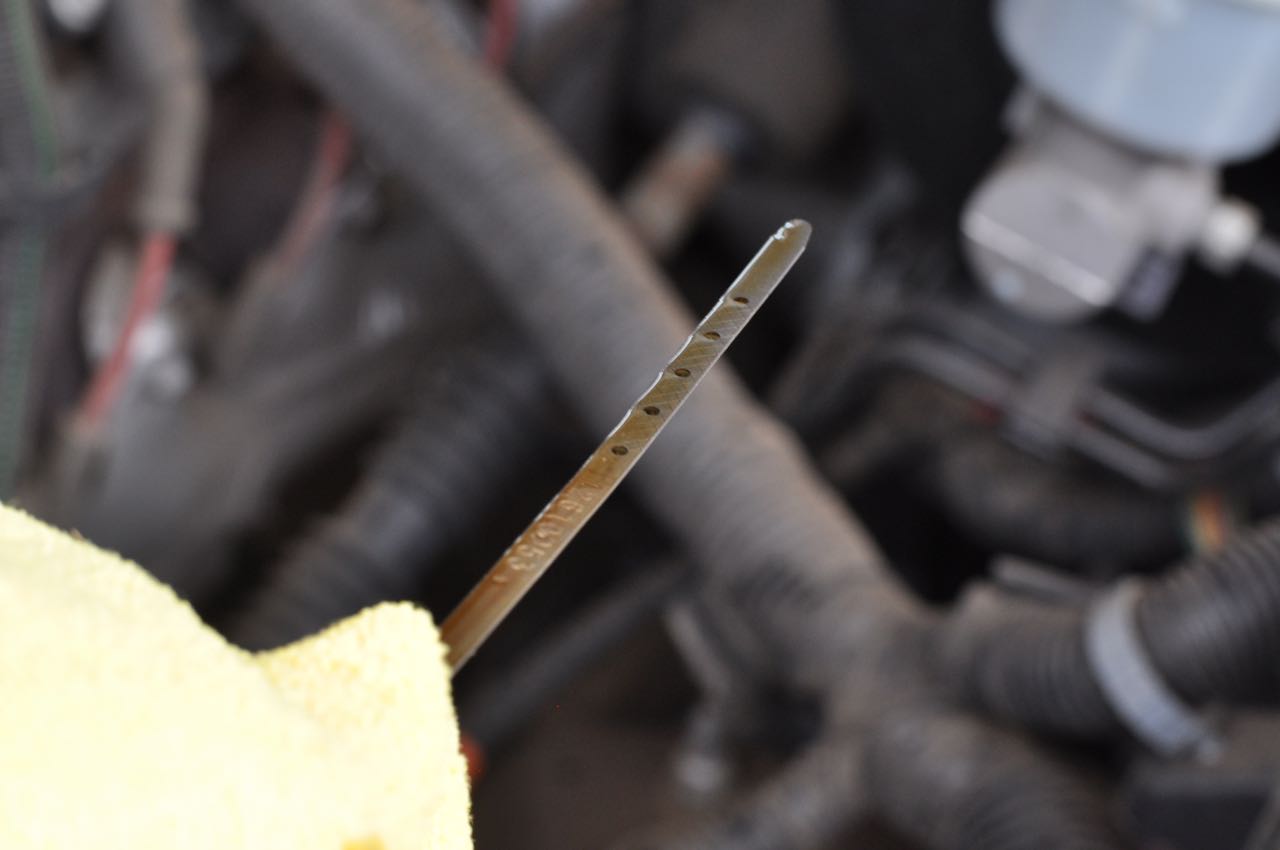
Step 8. Check the oil level with the dip stick. It’s always a good idea to check the other fluid levels in your vehicle while doing an oil change. Be sure to check the transmission fluid, brake fluid, antifreeze, power steering fluid, and washer fluid levels and fill them to the recommended levels if they are low. This is also a great time to check the tire pressure, and fill the tires if necessary.

Step 9. Reset your car to reflect that you just did an oil change. You’ll need to refer to your car manual for how to do this for your specific vehicle. For my Tahoe, I had to turn the key to right before where it starts (without starting it), then tap on my gas pedal 3 times within 5 seconds. Just like magic, the oil life on my car changed from the old percentage to 100%. So cool! Please ignore my dusty console, I’m now going to clean it immediately…
See, that wasn’t so bad, was it? With a bit of practice, you’ll be an expert in no time!
Here’s a great video that shows a DIY oil change using these same steps I just shared, but in a different vehicle, if you’d like to check it out.
Oh, and about all that old oil you now have sitting in your drain pan? Almost all auto parts retailers will recycle your old oil for you so you don’t have to worry about disposing of it yourself.
You can keep the old oil in the drain pan to recycle, which can be a big mess, or a better idea is to use a funnel and our the old oil into your empty new oil containers. This way there’s less of a chance of an oil spill in your car since you can screw on the lids nice and tight and clean the outside of the containers before putting them inside your car.
SO, I’d love to know, have you ever changed the oil on your car? How was your experience? Would you ever try it yourself?
![]()
spicedblog says
I have never changed my own oil, but you make it look so easy! I need to give this a shot next time I need an oil change! #client
Wayne says
It is recommended that the final oil level check be made with the car on level ground and after it has run a short time because the filter absorbs a lot of oil. Leaked should also be checked while the car is running but do not get under a running car. A subsequent level check should be done after driven and cooled.
Since this is an add and synthetic oil is mentioned you might note that synthetic is different for a reason – of uniform molecular size and possible longevity.
Laura says
Yes, great points Wayne, thanks for the tips!