Learn how to easily decorate seashell cookies that look sophisticated and fancy, but are really simple to make!
I’m excited to show you how to decorate seashell cookies that look amazing and are just perfect for summer.

I have always been in awe of perfectly decorated sugar cookies, and wished that I had the skills to make them for my parties.
I recently took an online sugar cookie course and am SO excited with everything that I learned!

It’s definitely not as tough as I thought it would be to beautifully decorate sugar cookies with royal icing.
All the cookies I’m sharing with you today were from my first try, and I am seeing LOTS of batches of pretty sugar cookies in my future.
First you’ll need to bake some seashell cookies using your favorite sugar cookie recipe.
Let the cookies cool for a few hours, and then make a batch of royal icing.
I can’t share the recipe I used since I paid for it as part of my course, but just use Google to find one that you like.
The consistency of the frosting is everything when decorating with royal icing.

First outline the shell with royal icing very close to the edge, then fill in (flood) the cookie with more icing.
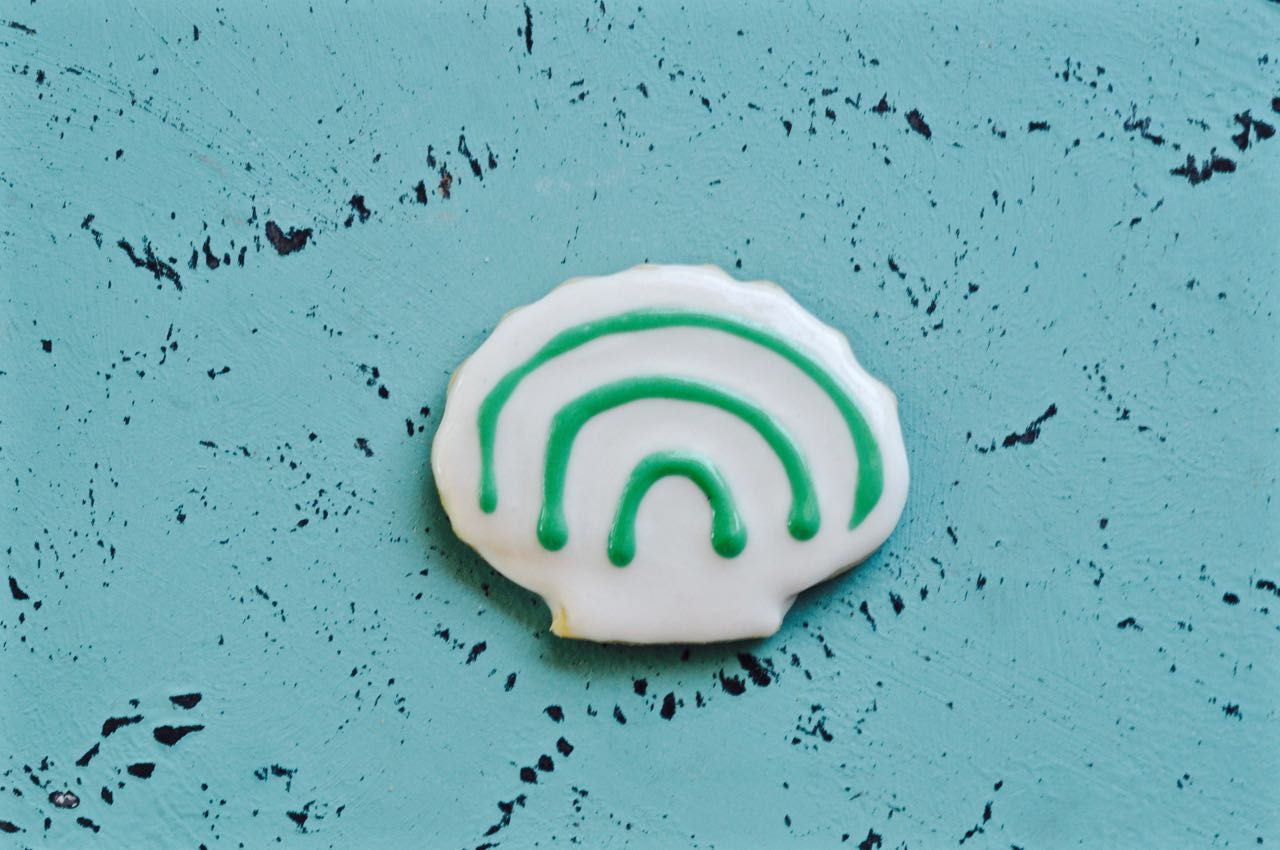
Next you will pipe a tall rainbow or horseshoe shape starting from one edge of the cookie to the next in another color of icing.
Repeat to make another smaller rainbow under the first one, and then make a third small rainbow at the bottom.
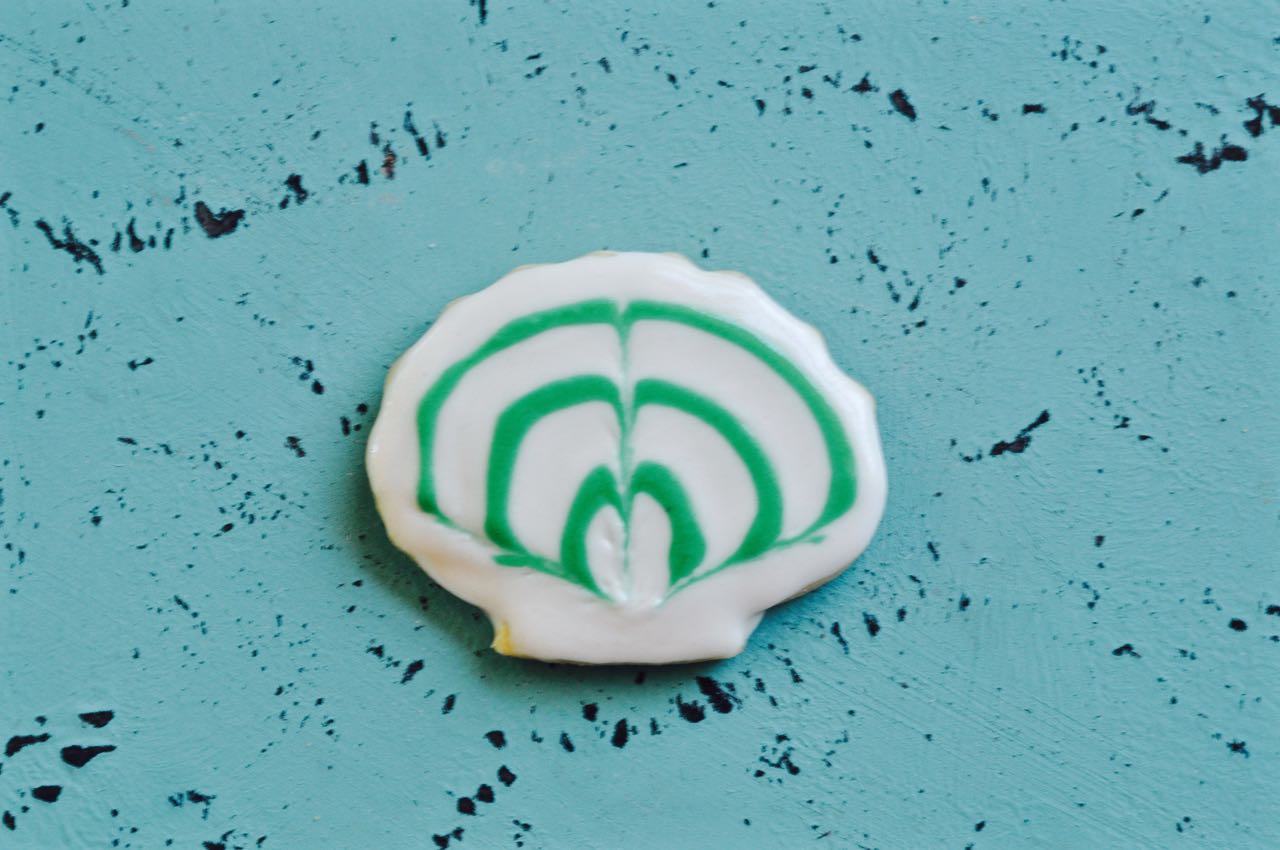
Now for the fun part!
Using a toothpick, start at the top end of the rainbow and drag the icing down at an angle so that it touches all of the ends of the rainbows.
Stop towards the bottom.
Wipe off the end of the toothpick, then repeat for the other side of the rainbow, and then for the middle.
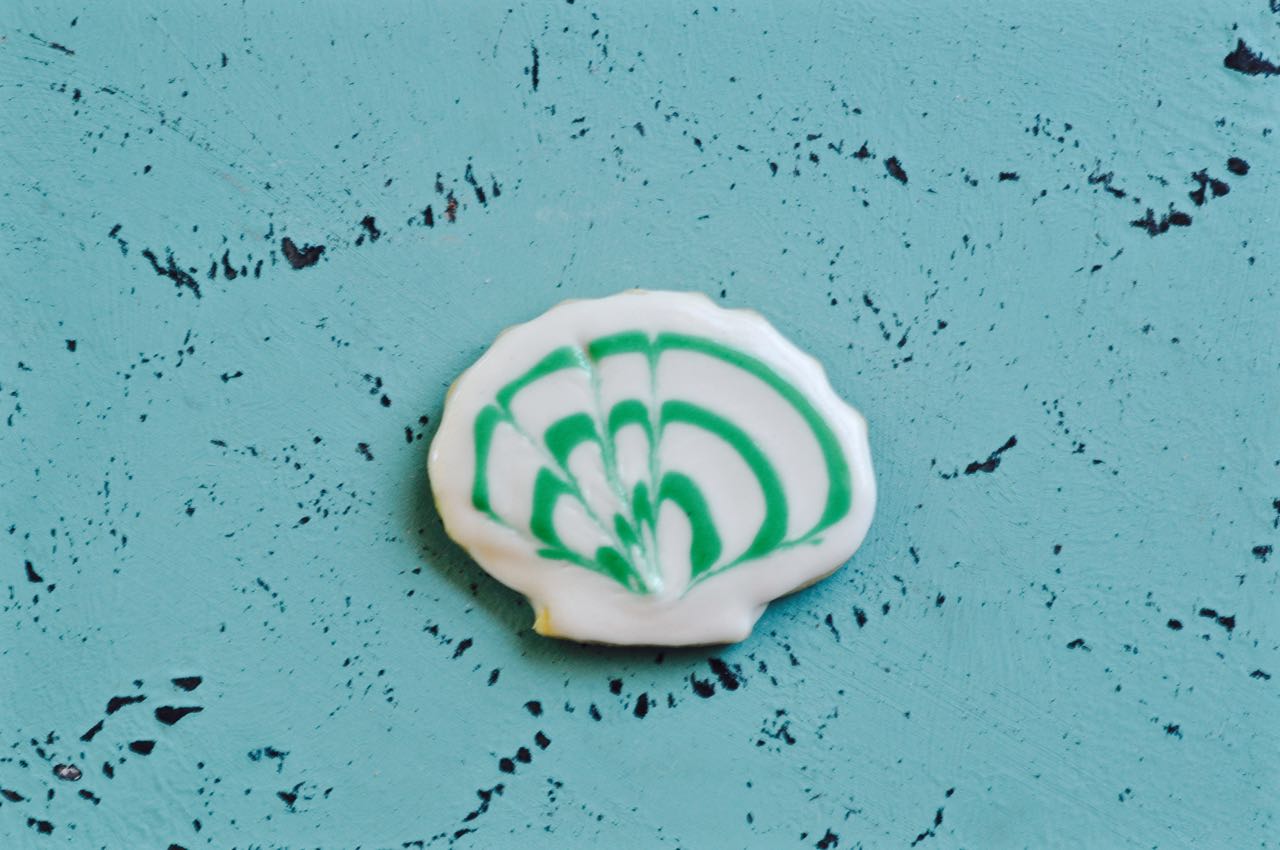
Now repeat a few more times for the middles of the cookies.
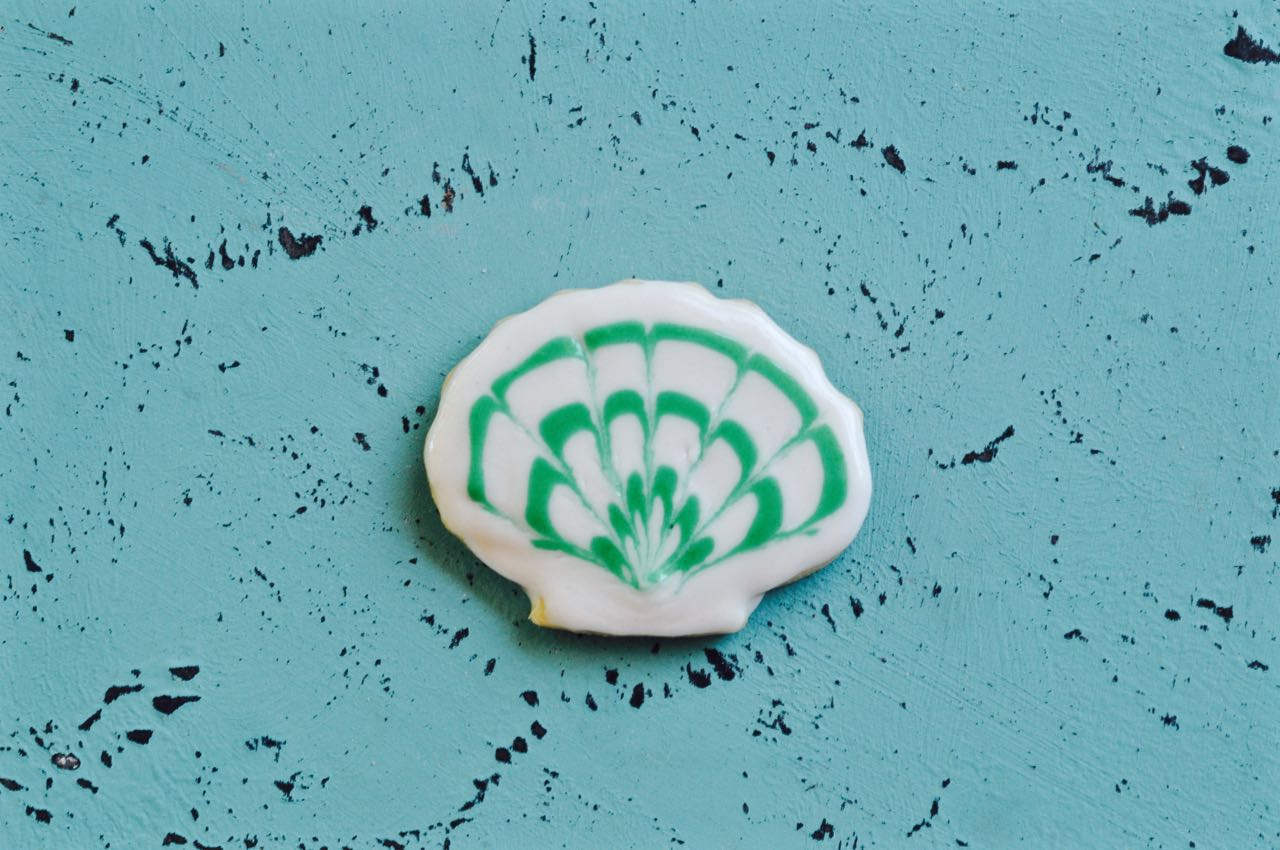
Wasn’t that easy?
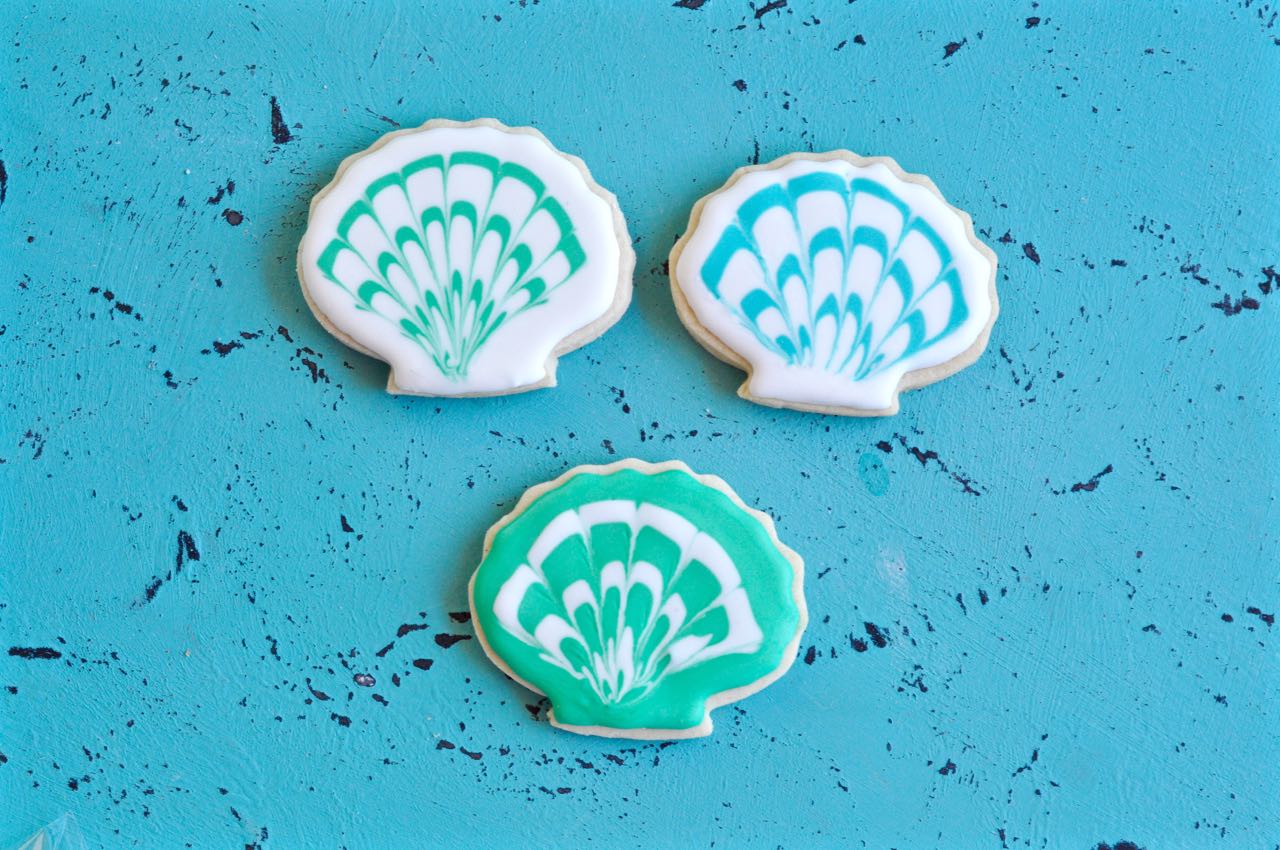
These seashell sugar cookies look MUCH harder to make than they really are.
It will be our little secret!
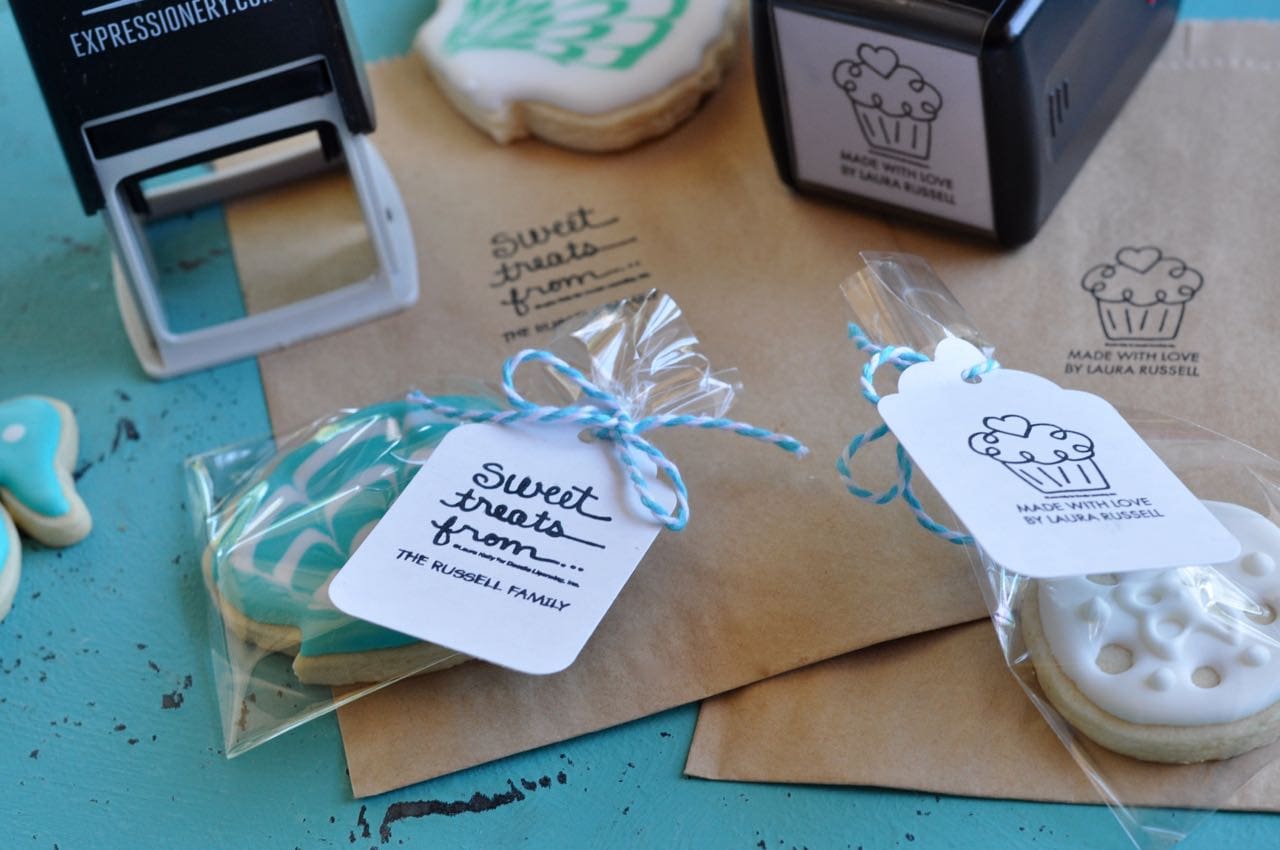
Now to package up the pretty cookies! The Bakers Party Shop was kind enough to provide me with some amazing supplies to package up my cookies.
I also used baking stamps to personalize the gift even more.
It’s the prefect way to add a personalized touch to your baking creations.
I had ours personalized with our last name, so the kids can even use it for the treats they bake for friends, teachers, etc.
The stamp is a great size for stamping onto gift tags, paper bags, and even fabric bags!
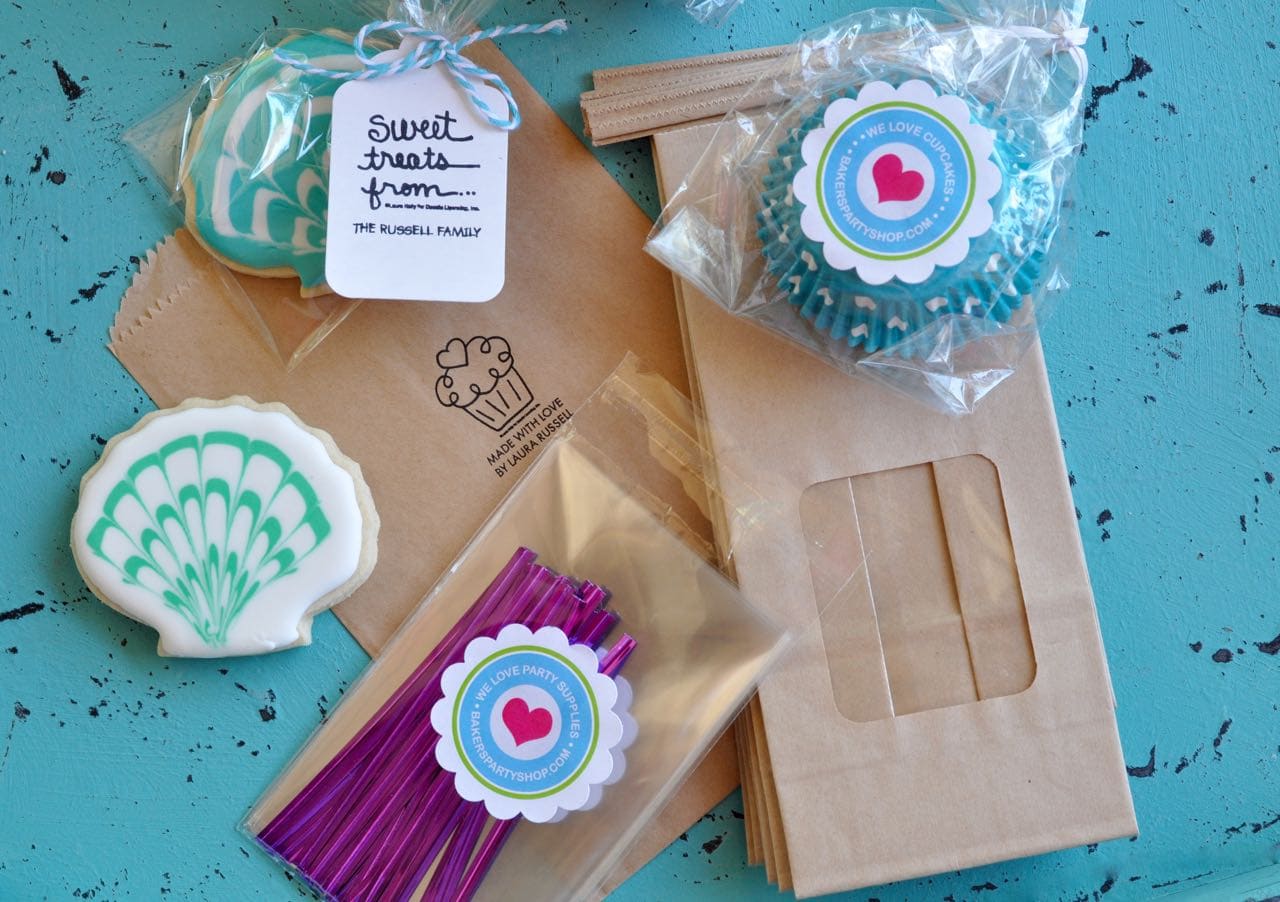
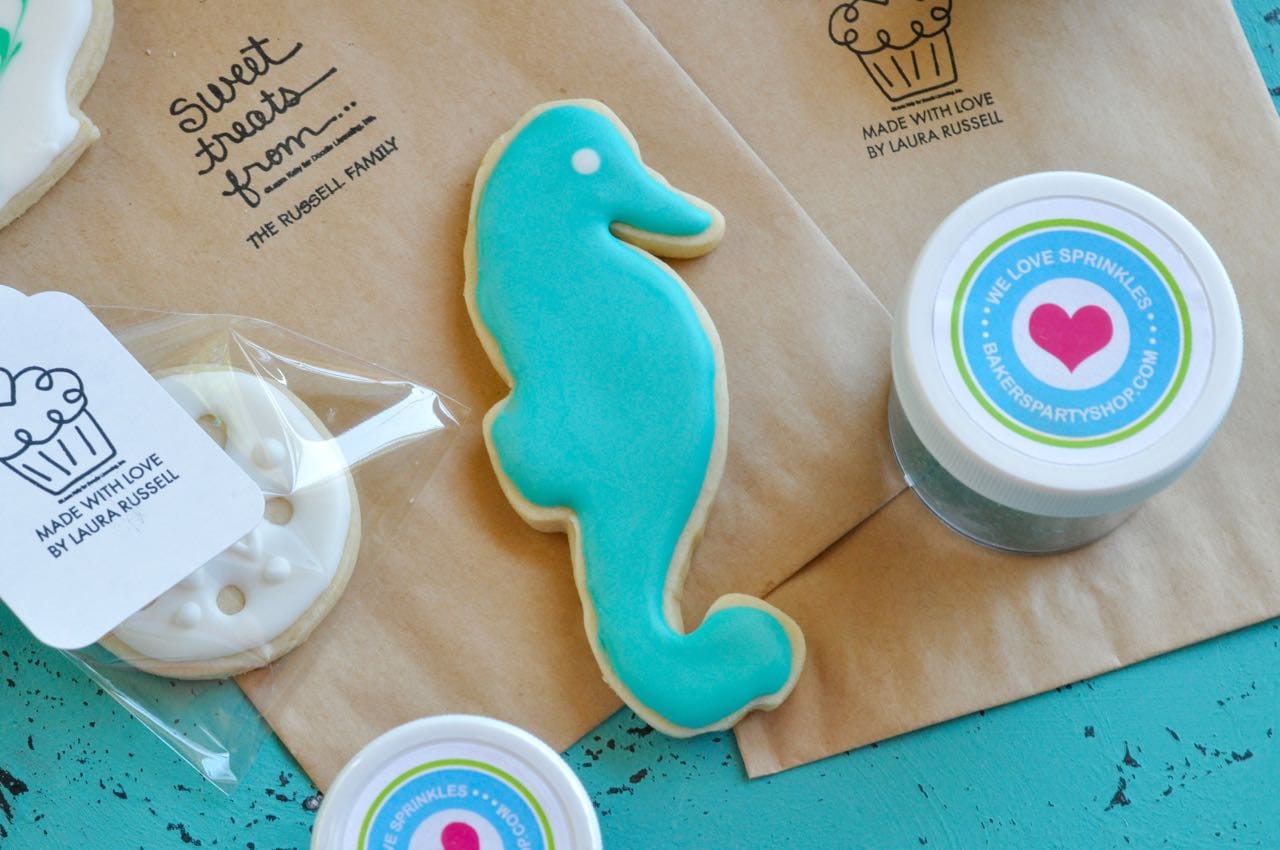
The Bakers Party Shop wowed me with a colorful package filled with all sorts of fun baking supplies.
There were sprinkles, gel food coloring, candy flavoring, clear plastic bags, kraft bags, tags, ice cream cups, Baker’s twine, a cookie cutter, gel frosting, and a chocolate-covered Oreo mold.
SO much fun!
I used the teal gel frosting they sent to color my icing.
To package up my individual cookies, I used the small plastic bags, which were the perfect size for my cookies.
I stamped one of the paper tags with my new stamp designed by my friend Laura Kelly, and then tied them up with the Baker’s twine.
Now they’re ready to give away!
![]()
Kimberly says
My favorite kind of cake is yellow cake with chocolate icing. (I’m entering your contest and it said to leave this in the blog comments.)
Colleen Boudreau says
Re velvet.
hembrey860 says
My favorite kind of cake is chocolate with chocolate chips in it and chocolate frosting and chocolate ice cream! Thanks 🙂
Les Johnson says
My favorite cake is a red velvet. I love the cream cheese icing on them.
noknowngnome says
My favorite kind of cake is pound cake with fresh fruit.
Kimberly L Hammond says
My favorite cake is red velvet cake!
Rhonda Greene says
They turned out awesome! LOVE!
Laura says
Thanks so much Rhonda! I really had fun making these!