Want to know how to grow a geode in an egg AND teach your kids science at the same time? Just follow these simple steps to create your own gorgeous, colorful geodes made from egg shells!
It takes under two days to make a geode, and most of that time is spent eagerly watching and waiting. My daughter grew a geode in an eggshell for her science project. It’s a great way to sneak in some learning without the kids even realizing!


For more egg fun, check out our 32 FREE Easter egg printables!
I originally saw how to grow a geode on Martha Stewart, whose guest on her show taught her how to make geodes out of eggs. However, his directions use LOTS of alum and only make 1 egg geode (or two egg halves).
Which is fine if you’re Martha and have unlimited resources. But for the average person, who wants to buy pounds and pounds of this stuff to grow a handful of eggs? Not me!
I’ve fine-tuned the process to make it easier and cheaper.
I’ve also come up with a way to make 6 geode egg halves instead of just 2, and without buying more ingredients!
I’ll show you the ingredients you NEED and show you exactly how to grow a geode successfully (and what to avoid).
- McCormick ALUM
 (see note below)
 - 3 eggs
- White glue (Elmer’s works great, or any other white glue is fine)
- Paintbrush
- 6 small glass jars (I used small mason jelly jars)
- Food coloring
- Newspaper
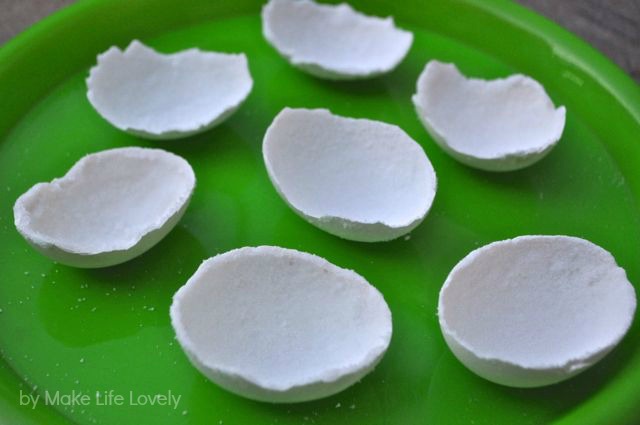
STEP 2. Rinse out your eggs with some warm water, and use your fingers to remove the inside membrane from the shell. Let dry completely.
Use a paintbrush to paint white glue all over the inside and cracked edge of the eggs. Generously sprinkle alum all over the glue, and let the egg shells sit out overnight to dry.
I used one small jar of McCormick’s alum for this step. Be sure to wait until the next day to do the next step!
STEP 3. This is where my directions differ from Martha’s. You’ll need two cups of VERY hot water (almost boiling). My tap water gets really hot, so I just used that, but you may need to heat yours up depending on your water temperature.
Add 3/4 cup of alum to the hot water, and continue stirring until the alum is completely dissolved. For me, 3/4 cup of alum was exactly three small glass jars![]() of McCormick’s alum- perfect!
of McCormick’s alum- perfect!
It is important that the crystals are completely dissolved! If they do not dissolve after stirring, then place in the microwave for a minute at a time to dissolve the alum.

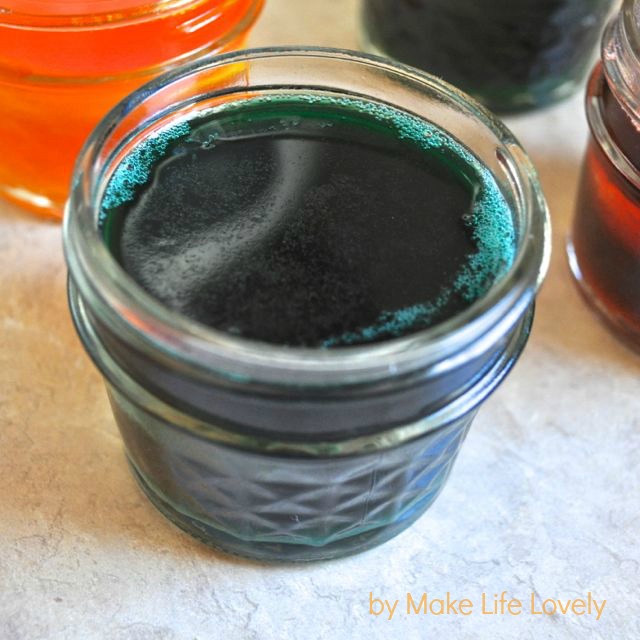
STEP 4. Once the crystals are completely dissolved, pour the mixture evenly into six small glass jars (see my photo). The small mason jelly jars I used were the perfect size!
Add about 20-30 drops of food coloring to each jar, and stir the color in with a plastic spoon. Feel free to mix colors!
Step 5. Let the mixture cool in the jars for about 15 minutes, and then carefully add one egg half to each jar, making sure that the egg half is completely covered by the colored alum mixture.
Let the eggs sit untouched for 12-24 hours. You can carefully check an egg after 12 hours, and if you want larger crystals, then place the egg back in the solution for longer.
When your crystals are your preferred size, then carefully pull the egg halves out of the jars, and let them dry.

Now you have your own beautiful geode eggs! Can you believe that something so easy can be so beautiful?
If you would like to read the scientific explanation of what is happening, then you can read more about it here, at the bottom of the post.


I hope you enjoyed this tutorial on how to grow a geode in an eggshell. My kids were very impressed with our geodes, and are already wanting to make another set of them!
I extra alum, so next week we’re going to make these again, but with different colors. These geode eggs would look really cool with neon food coloring too.
If you grow a geode in an egg, be sure to tell me how they turn out! It’s pretty exciting to watch a broken eggshell transform into something so beautiful, isn’t it?

Speaking of beautiful eggs, you can easily make beautiful marbled Easter eggs that can be kept from year to year.
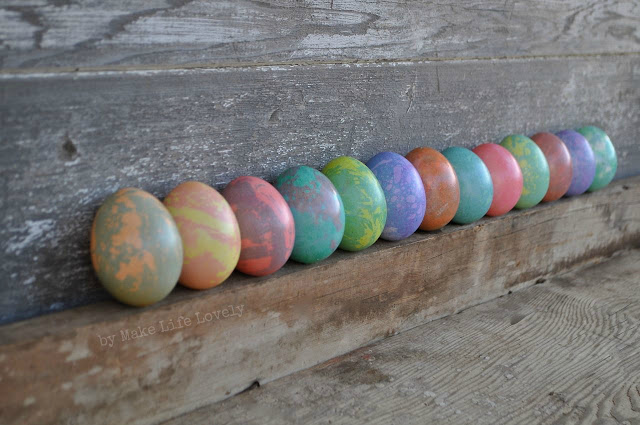
I still have some from a set I made more than 10 years ago! Here’s the tutorial with step by step photos to follow. This is a really fun Easter craft to do with the kids.
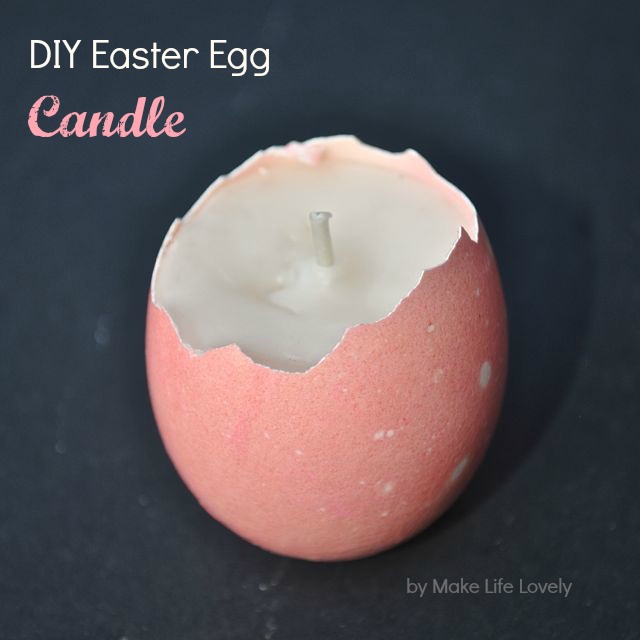
If you happen to break some of your lovely marbled eggs (like my son did), then you can also make these pretty marbled Easter egg candles!
Be sure to follow on Instagram, Pinterest, Facebook and Twitter for more creative parties, crafts, and recipes. Thanks for following!
![]()