It’s almost embarrassing how much fun I had making the project I’m sharing with you today. It really doesn’t get much better than smoothing on frosting and sifting colorful sprinkles through your fingers, does it? But when the end result is an ice cream sandwich box that won’t melt, won’t make you fat, and is cuter than just about anything you’ve ever seen, it’s even better!

When I saw the new Sizzix cookie box die designed by Eileen Hull, it immediately reminded me of an ice cream sandwich. Or maybe I was just hungry at the time. Either way, I knew that I wanted to make ice cream sandwich boxes from the die.
At CHA, I was lucky enough to be invited to a VIP breakfast by Plaid, the company that makes Mod Podge, Martha Stewart Crafts products, and so much more! I had the chance to chat with Cathie (of Cathie and Steve) about Collage Clay, and some of the many ways that it can be used. It comes in a tube that looks just like frosting, and it even comes with 3 different tips that you can screw right onto the tube to get different frosting looks. The Collage Clay made the perfect “ice cream” for my ice cream sandwiches!
DIY Ice Cream Sandwich Boxes:
Supplies:
- Sizzix Cookie Box Die
- Sizzix Big Shot, BIGKick, or Vagabond die cutting machine
- Little Sizzles Mat Board in white and black (or other mat board)
- Extended Cutting Pads
- White Collage Clay (I bought mine from Michaels)
- Glue gun
- Sprinkles (these can be beads that look like sprinkles or real sprinkles, like I used)
- Tan paint
- Paintbrush and/or foam brush
- Optional: Wax paper or freezer paper and Baker’s twine

Step 1. Start by making a Sizzix sandwich. Stack an extended cutting pad, the mat board, the cookie box die cutting side down, then the other extended cutting pad on top. Roll it all through the Big Shot, and pull out the pieces. Repeat for as many cookies and pieces that you need in your desired colors.

Step 2. To assemble the ice cream sandwich box, take the longest piece, and bend the end tabs down.

Use a glue gun to glue the tabs down and around the piece with 11 sides.
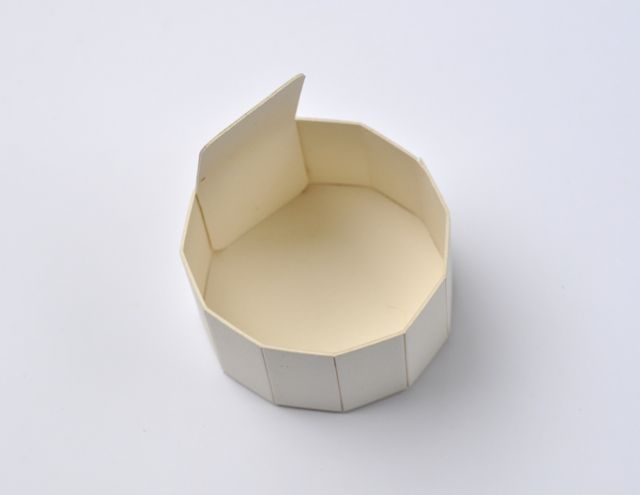
Glue the small tab to the inside back of the box, and fold along the score line.

Hot glue the scalloped top and bottom of the box.

Step 3. Apply your preferred tip to the Collage Clay. I used the star tip (since it let the most clay come out at a time), and squirted a large dab at a time.
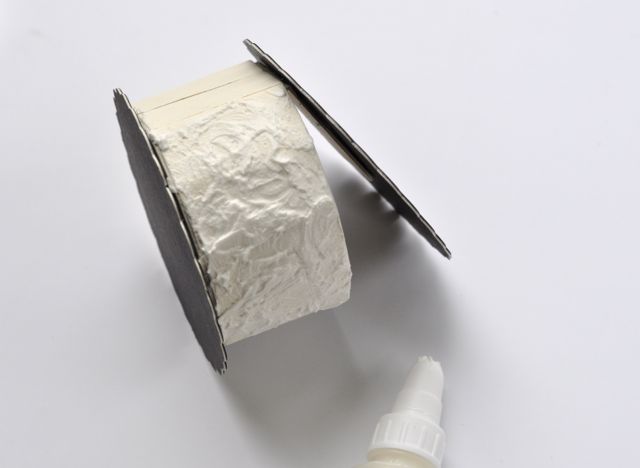
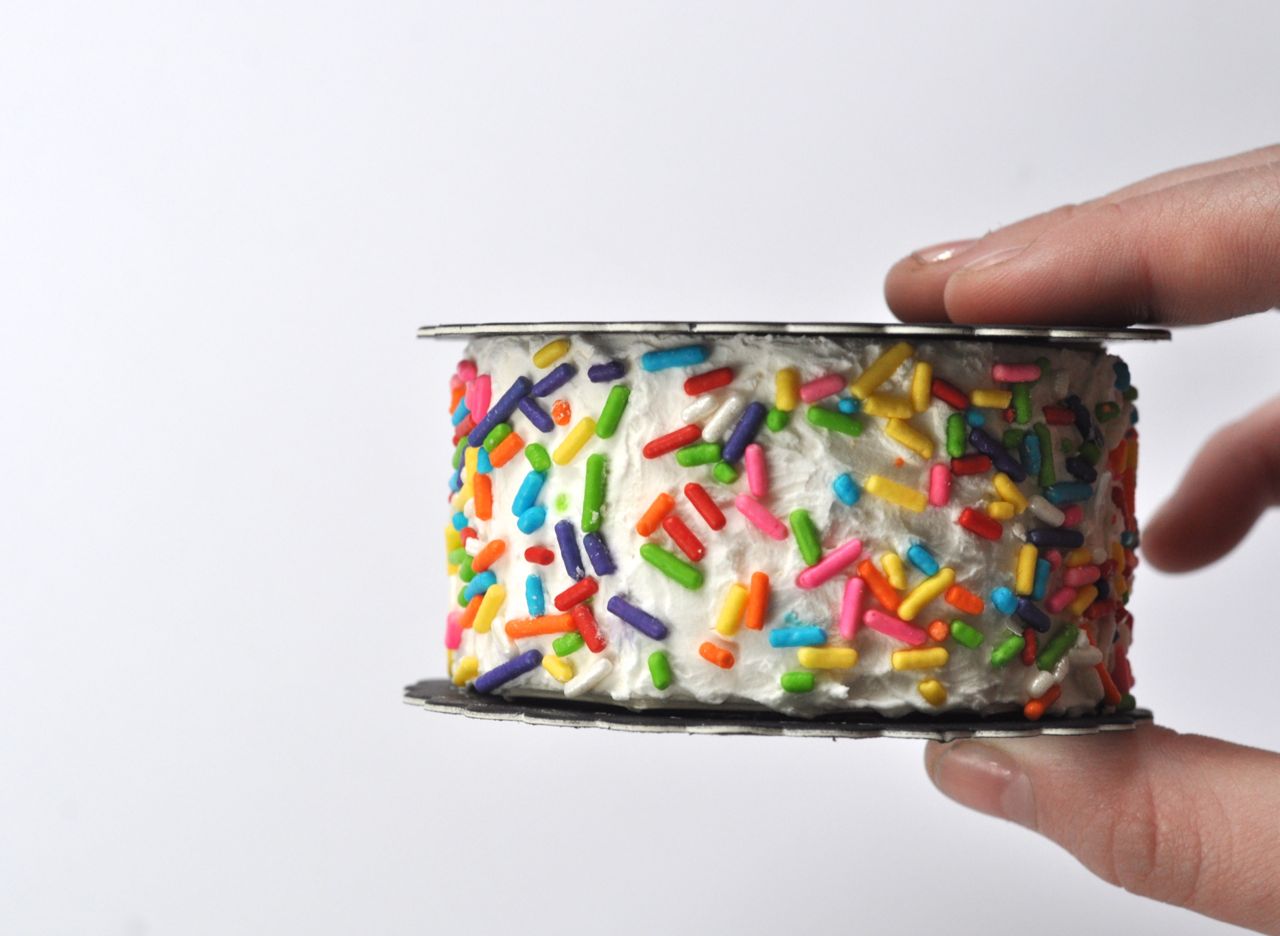
I started by using a plastic spoon to spread the Collage Clay onto the middle “ice cream” part of my sandwich, but quickly realized that it was easier and faster (and a whole lot more fun) just to use my fingers. The great part about this is that it really doesn’t have to be perfect, since there will be sprinkles covering it anyway.
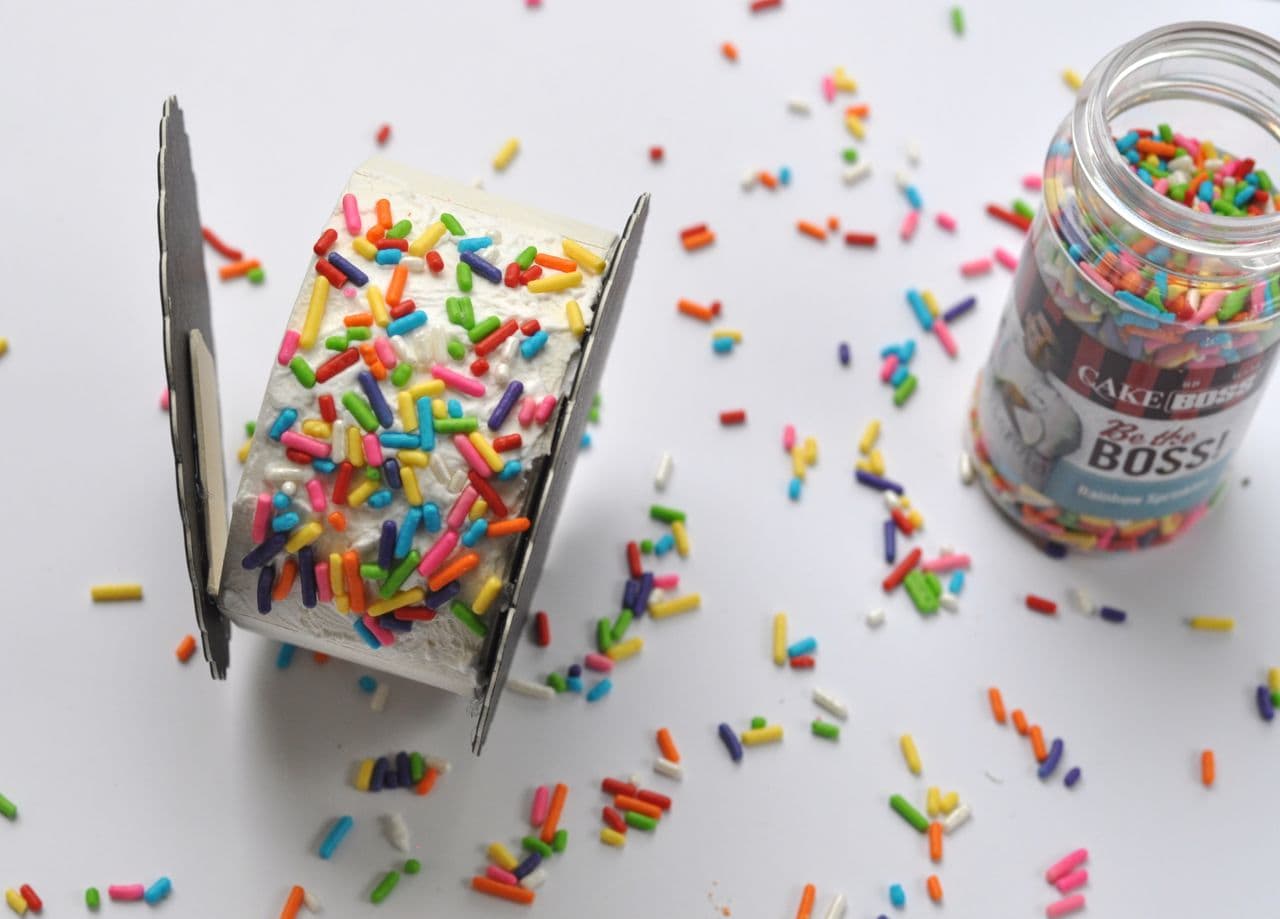
I applied the Collage Clay a section at a time, then sprinkled sprinkles onto that section. I used a clean finger to gently press down on the sprinkles so they stayed in place, and then moved on to the next section and repeated. My first box took me about 20 minutes for this part, but my third box took less than 5 minutes- it really does go quickly! Now comes the hard part- waiting. The Collage Clay needs time to fully dry, and you don’t want those sprinkles falling off when you finish the rest of the steps! Definitely follow the waiting time recommended on the box.
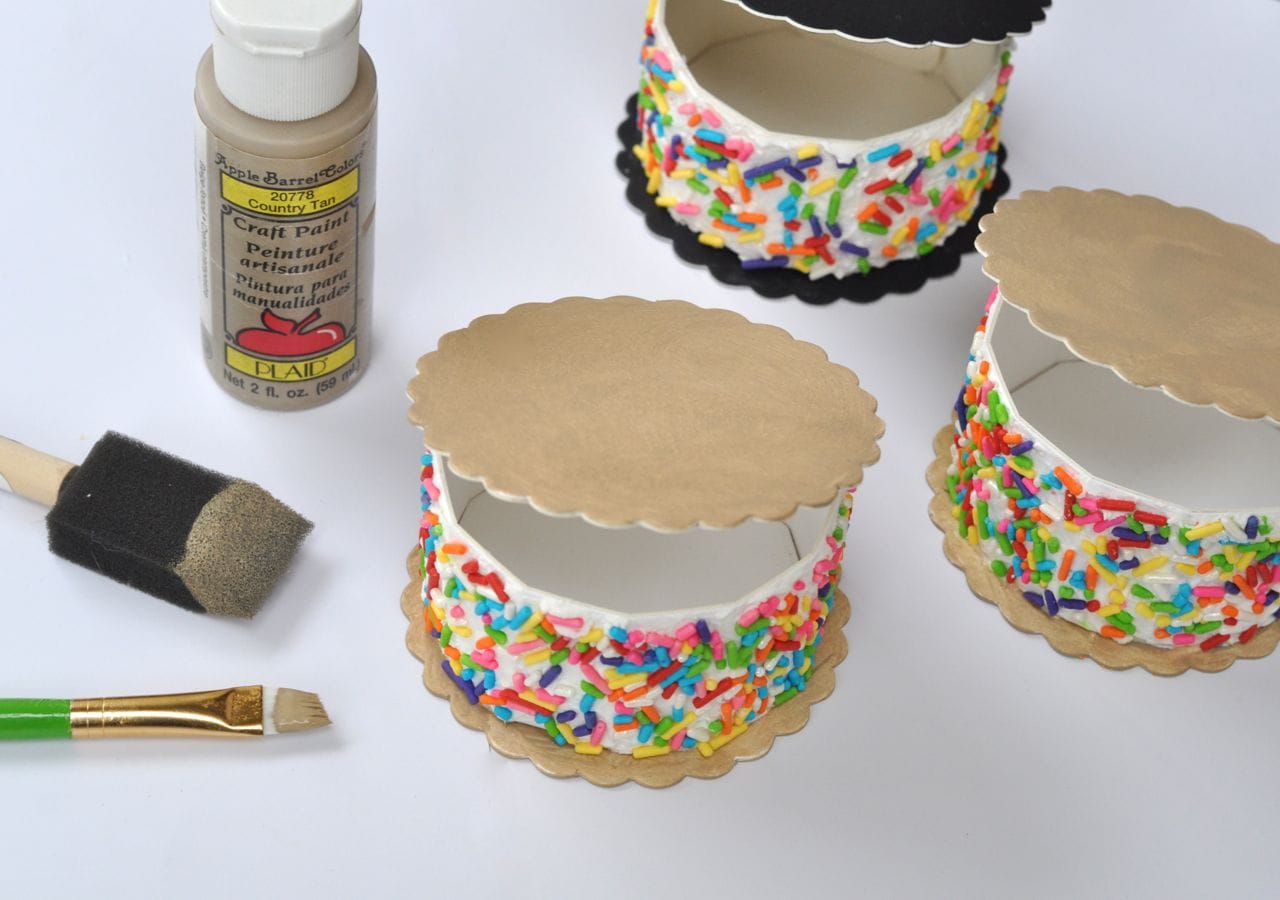
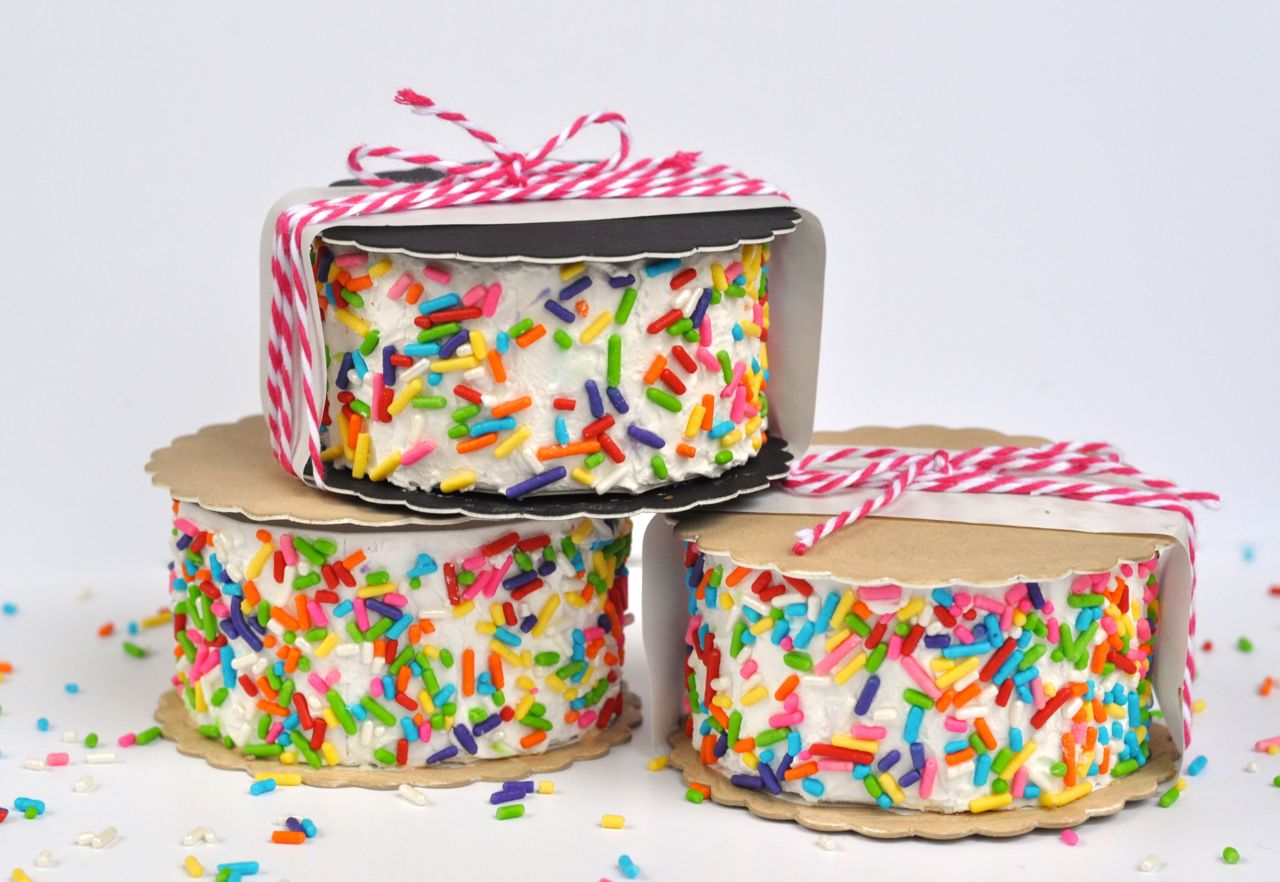
Step 4. If you used white mat board for the top and bottom of the box, you might want to paint the cookie part a dark tan/light brown color so it looks more realistic. I used a foam brush to paint on the Apple Barrel color “Country Tan” on the top cookie, which I thought was the perfect cookie color. I used a smaller paintbrush to paint the smaller edge of the bottom cookie. For one of the cookies I used black mat board, which looked great too, and required no painting.
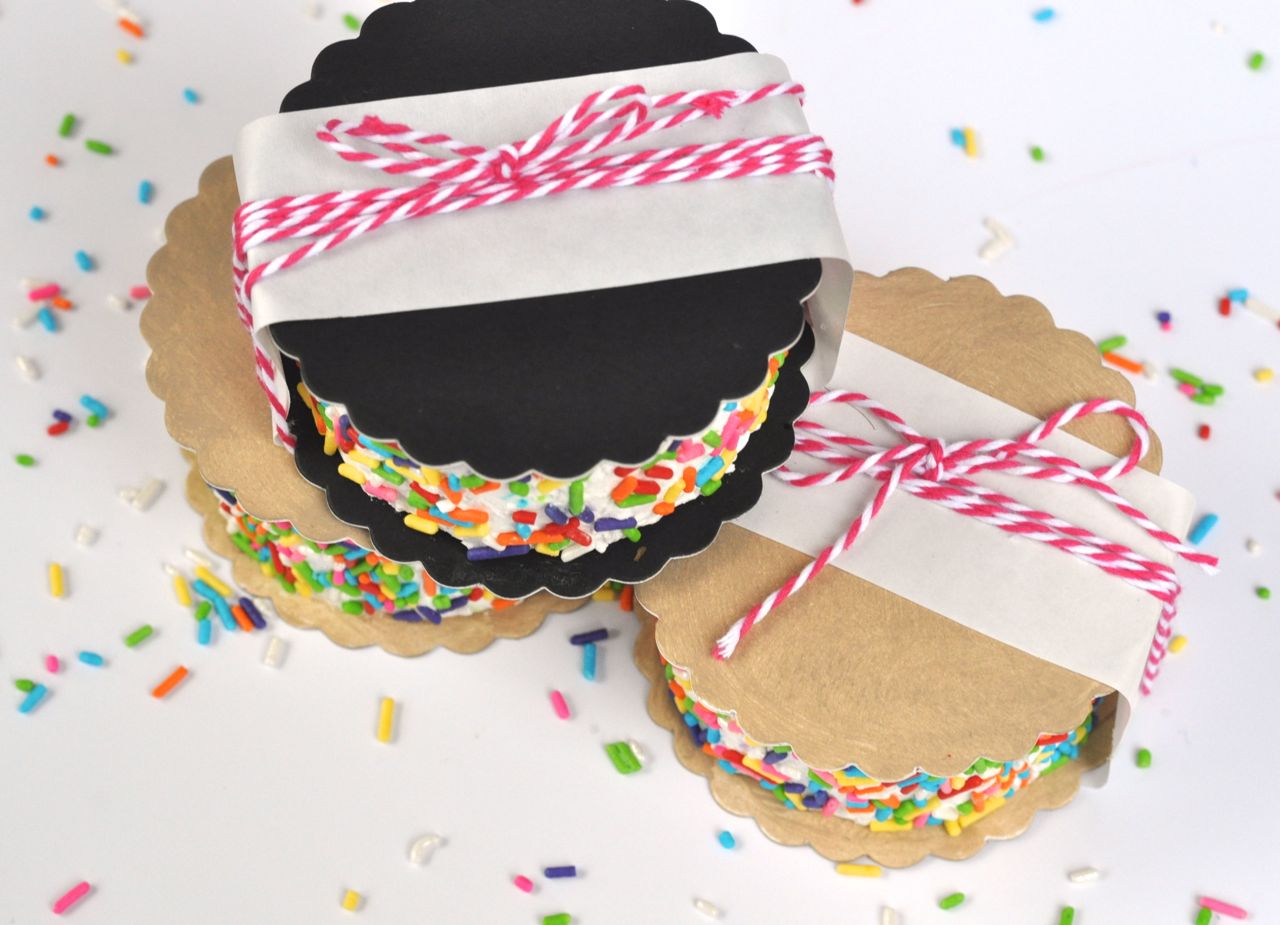
Step 5. To finish off a couple of the boxes, I cut a thin strip of freezer paper (since somehow I was out of wax paper), wrapped it around the ice cream sandwich, and used a tiny dab of hot glue to secure the piece at the bottom. I wrapped a piece of Baker’s twine around the center of the freezer paper a few times, then tied a bow around the top.
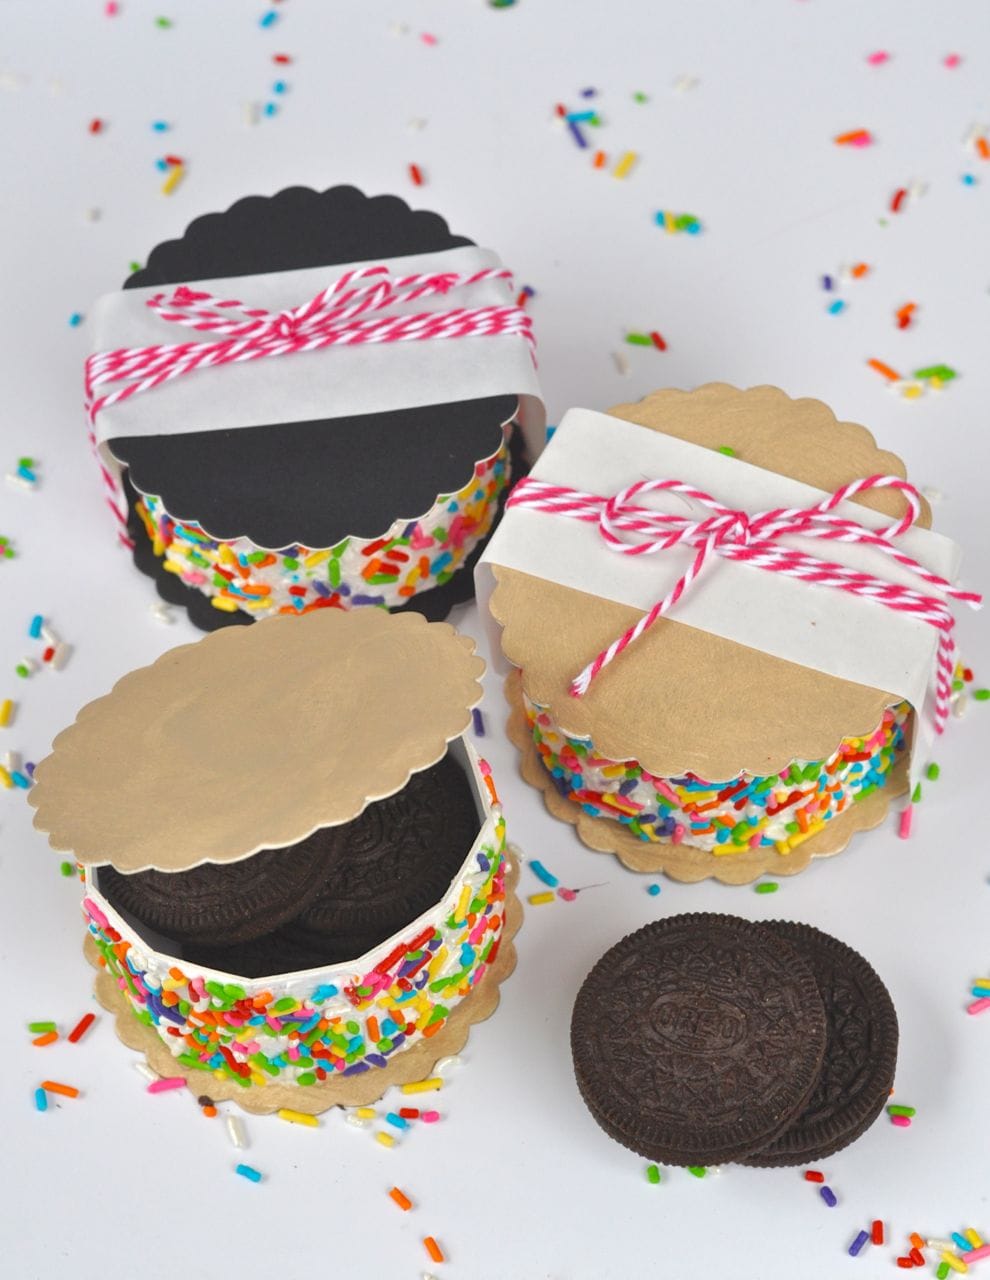
All done! You can keep your cute little box and use it to hold trinkets, or you can give it away. It makes a cute gift, especially when filled with sweet treats, like cookies! These ice cream sandwich boxes would also make great party favors. They are unique and fun, and I think anyone would be happy to get them. You can seal the sprinkles if you would like with a thin layer or two of Mod Podge.
I hope you enjoyed these cute non-edible treats as much as I did. Just make sure your little friends don’t try to eat the Collage Clay or the sprinkles off the box. As yummy as they look, they’re definitely not edible!
If you liked this post, I’d love for you to follow me on Facebook, Pinterest, and Instagram. Thanks for following!
Happy crafting!
![]()