I LOVE a good makeover, and I’m so excited to share my mercury glass frame thrift store makeover with you today!
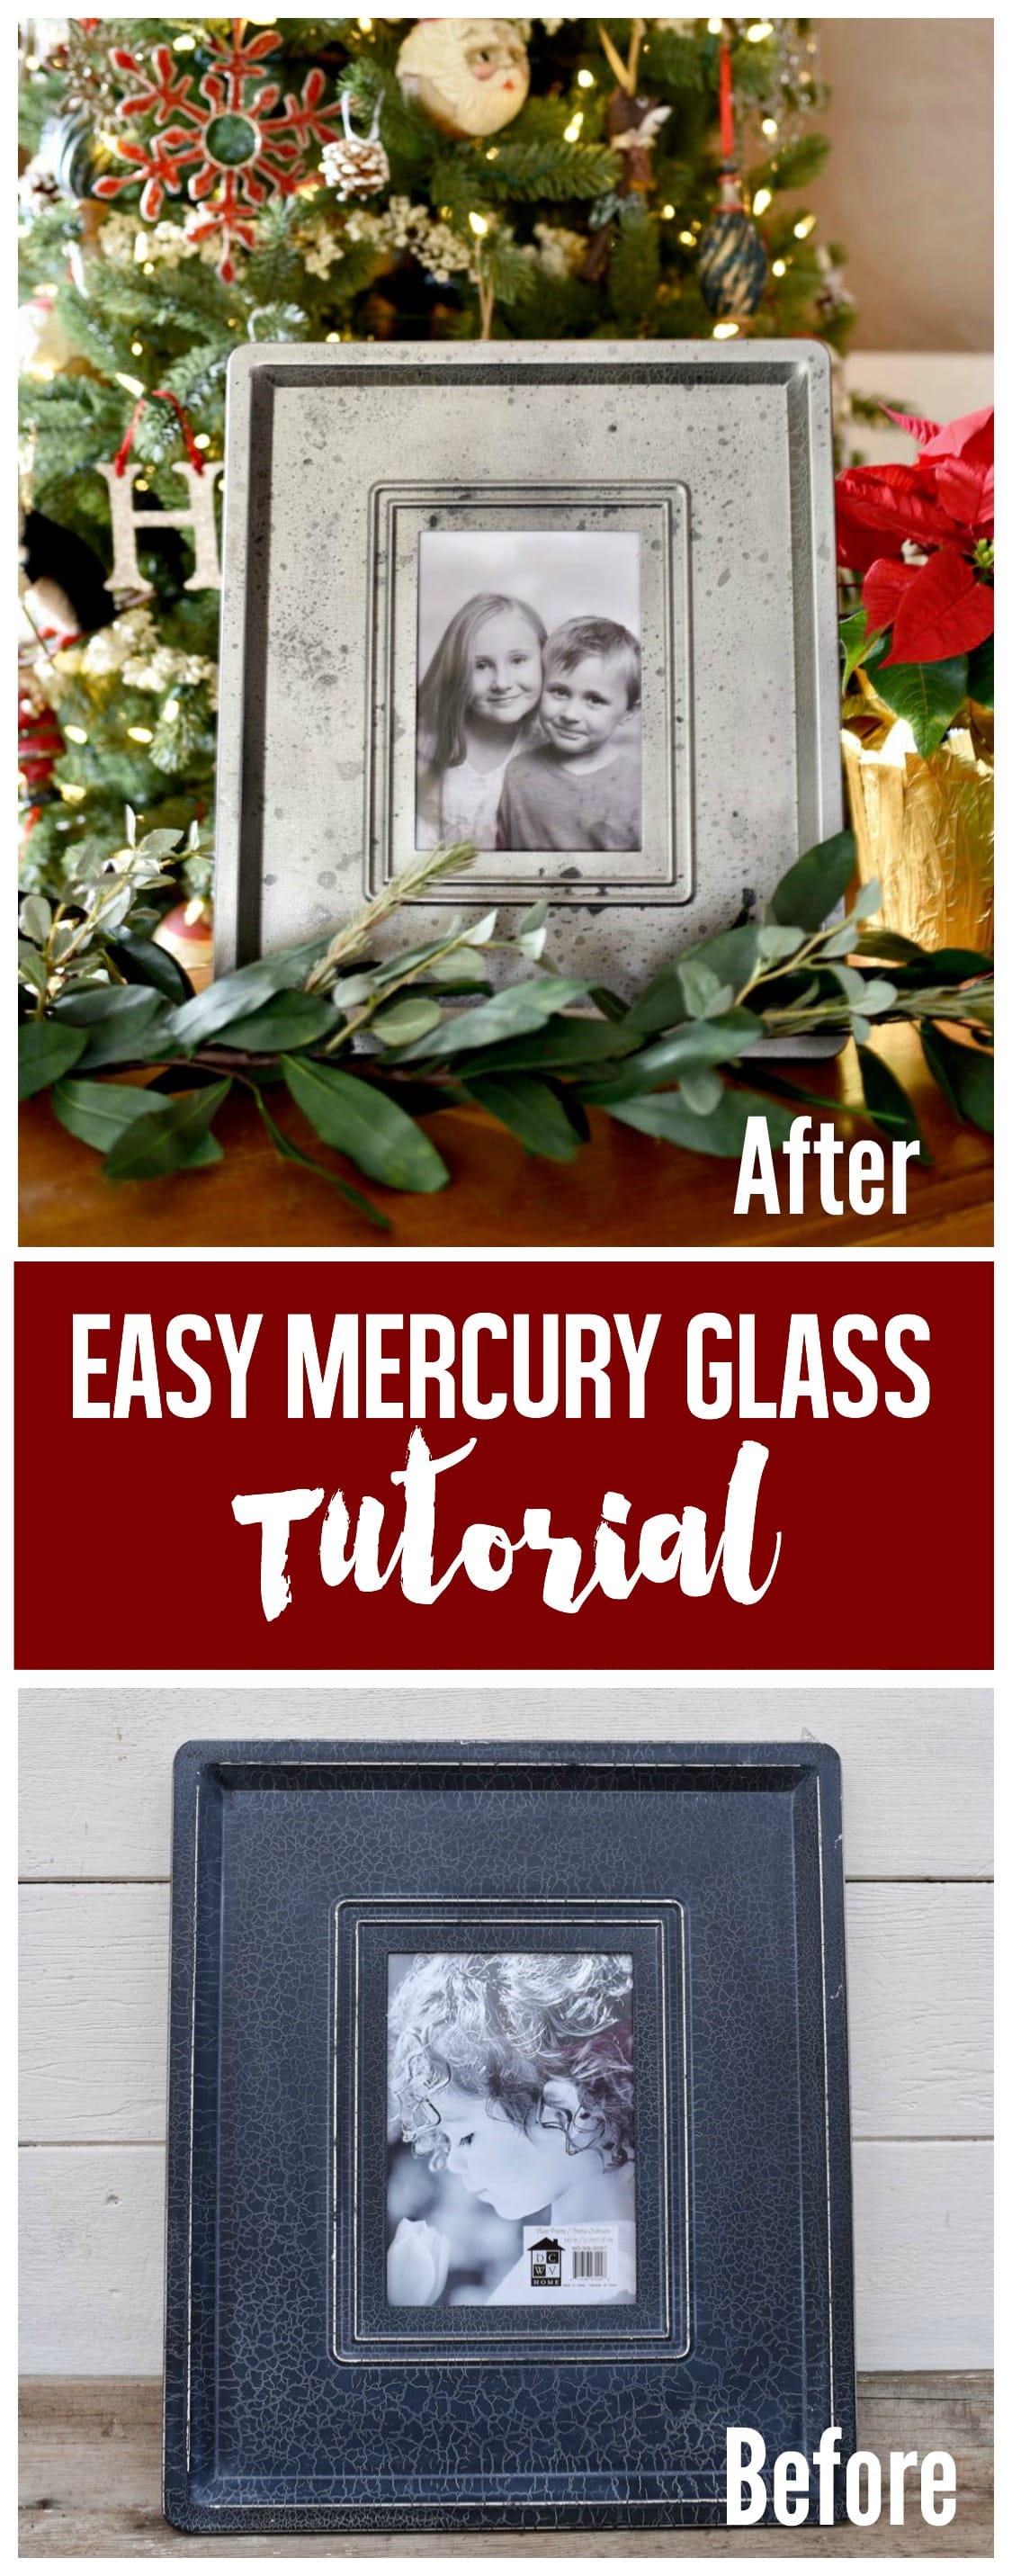
I recently went thrift store shopping at Deseret Industries (or D.I. as I lovingly call it) and found two large frames that weren’t the cutest, but had some major potential. I knew I could turn them into something beautiful. I’m working with them to share with you this fun transformation today!
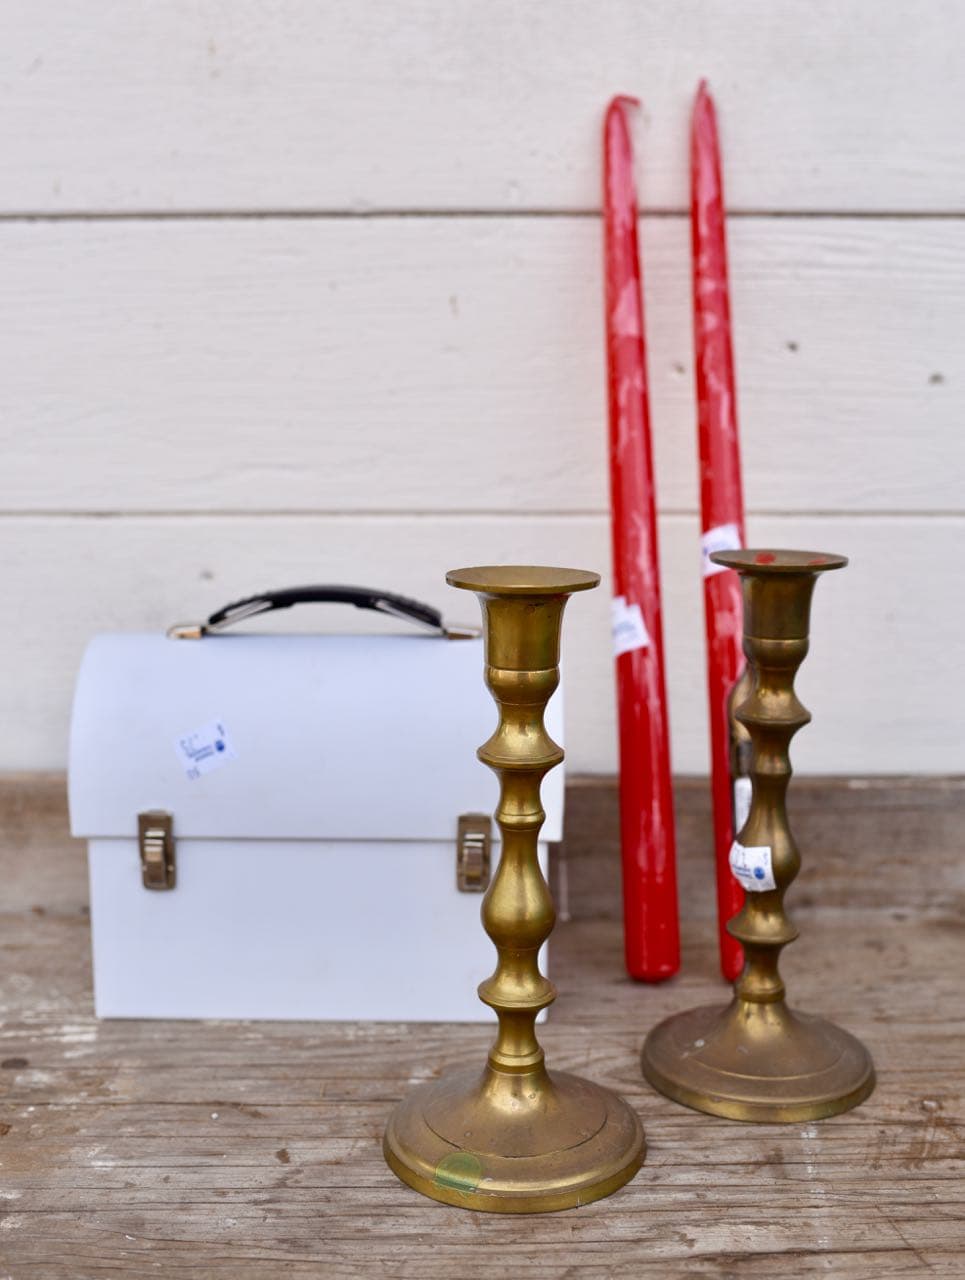
Two old candle holders, two red taper candles, and a cute little metal box were also among my scores that day. After spending $8 on my Deseret Industry finds, it was time to get to work!
I love the high-end, vintage look of mercury glass, and have bought some amazing pieces that were somewhat expensive at Pottery Barn and World Market. Here’s how I got the same look for MUCH less money.
** Keep in mind that when using the Looking Glass spray paint you’re supposed to do all the steps I’m outlining on the inside of glass. Since I’m not using glass and a frame doesn’t have an inside, I did everything on the surface of the frame and it turned out just fine!
Faux Mercury Glass Frame Tutorial
Supplies:
- Krylon Looking Glass Spray Paint
- Metal frame (or glass vase or jar would work too)
- Water bottle
- White vinegar
- Paper towels
Step 1. Mix up a solution of 1/4 cup vinegar and 1/4 cup water, then combine in a squirt bottle. Clean your frame (or other item) really well, then dry thoroughly.
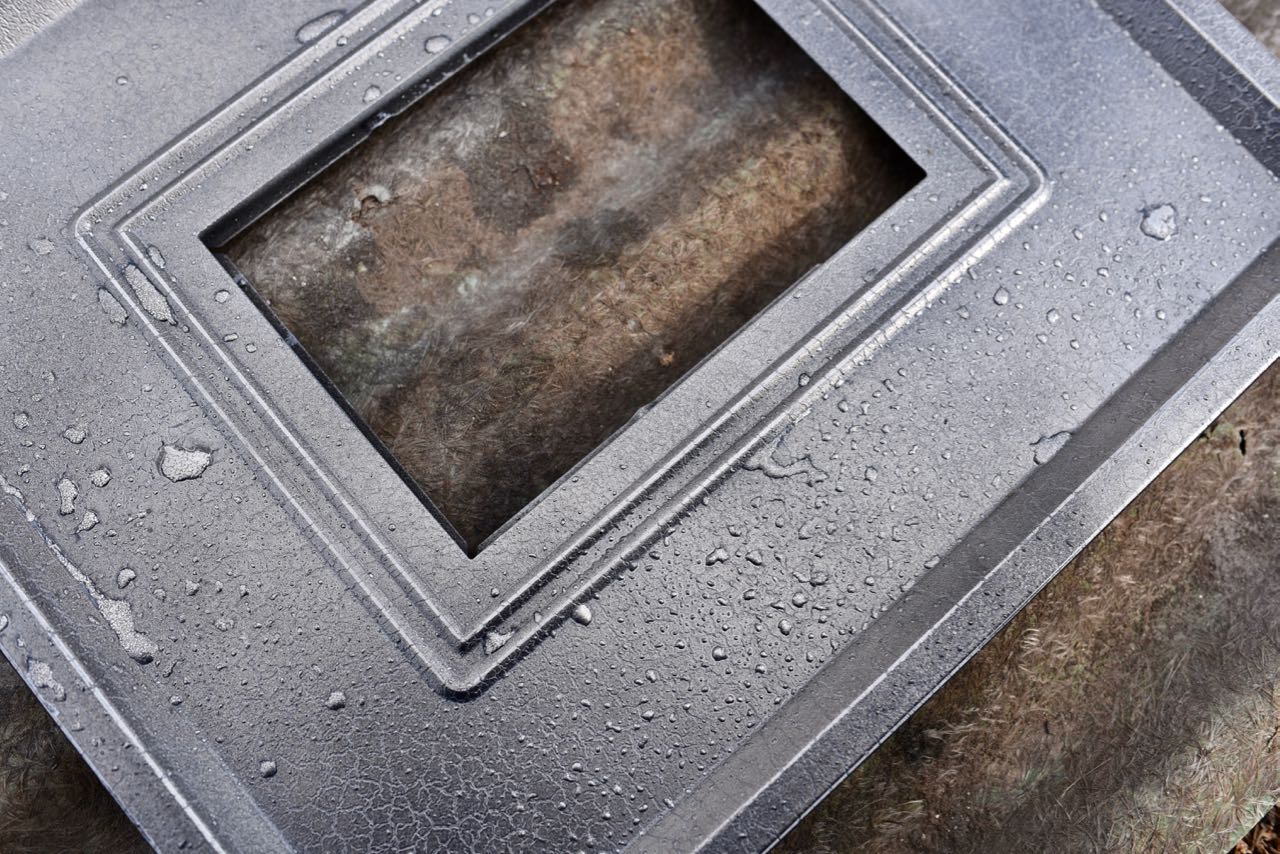
Step 2. Spray the entire frame with a squirt bottle so there are drops of the vinegar and water solution all over it. Make sure that your squirt bottle is on spray. As soon as the frame is covered with drops of water, spray a VERY thin coat of Looking Glass Spray right over it.
Step 3. Let the solution sit on the frame for about a minute. After that, lightly blot and gently wipe up all the liquid with a paper towel or a cloth. Depending on how hard you rub and how much water you use, you can manipulate the way that your frame looks. Repeat these steps until the frame looks how you want it to.
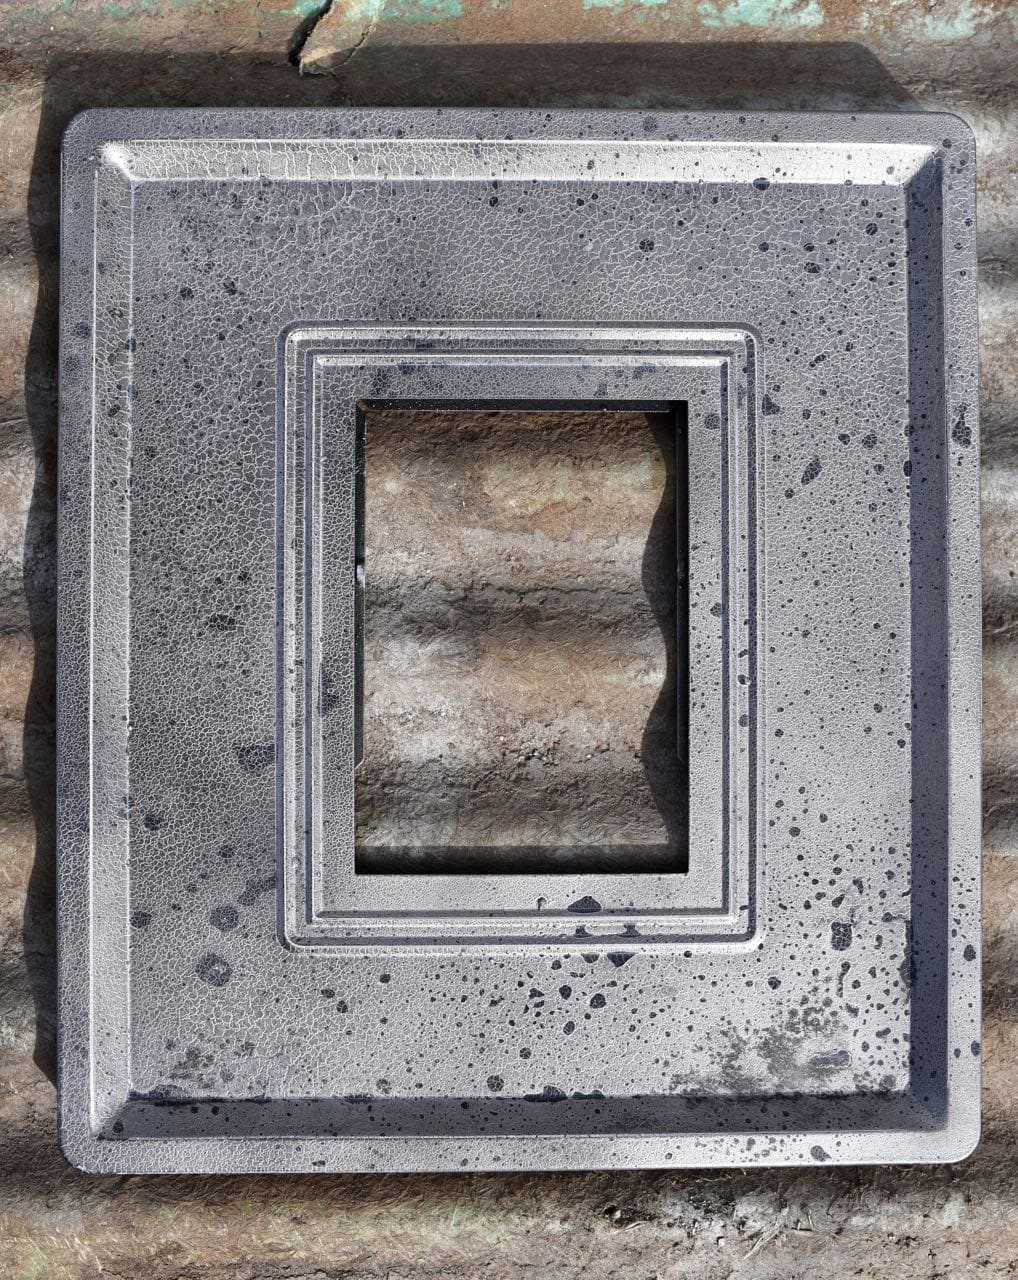
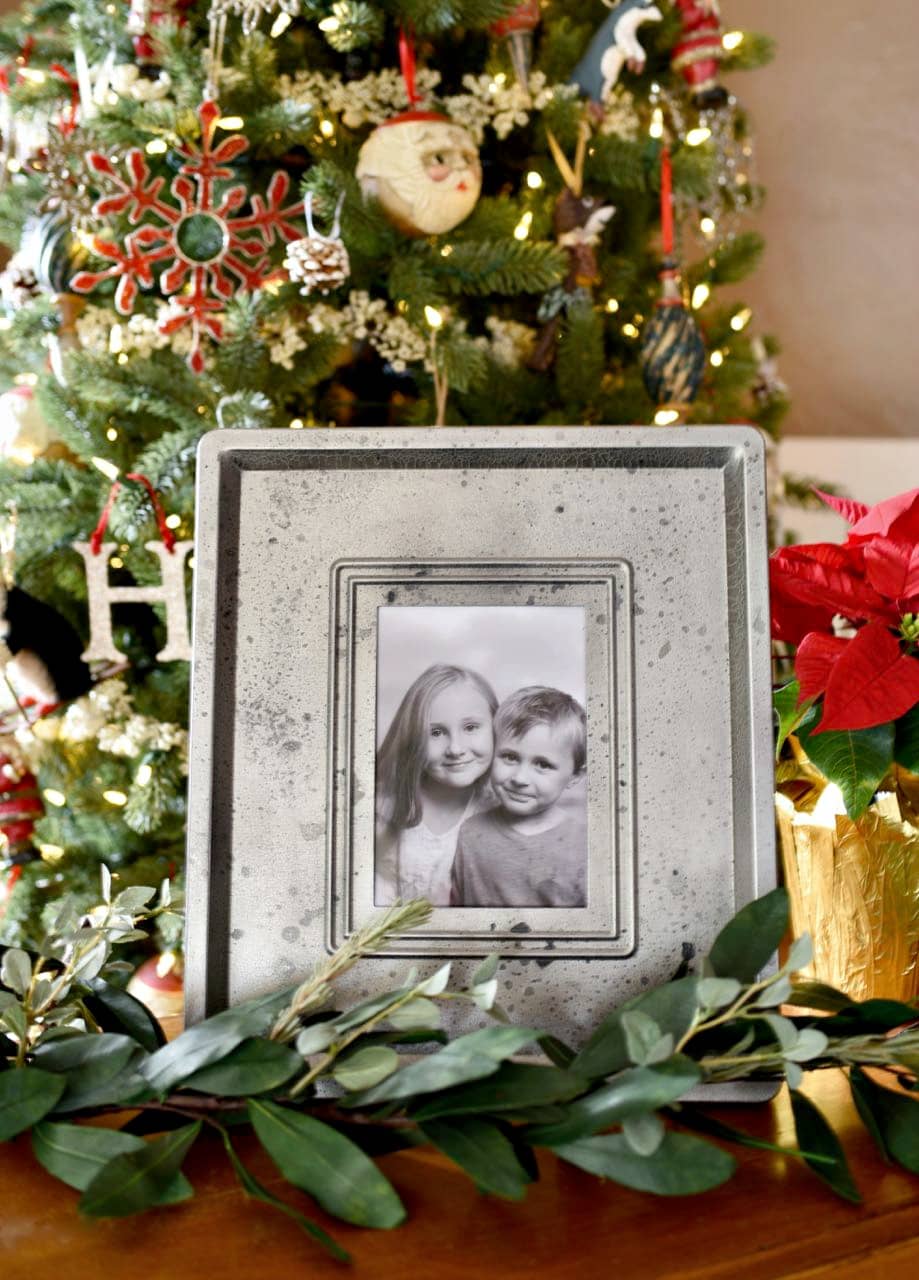
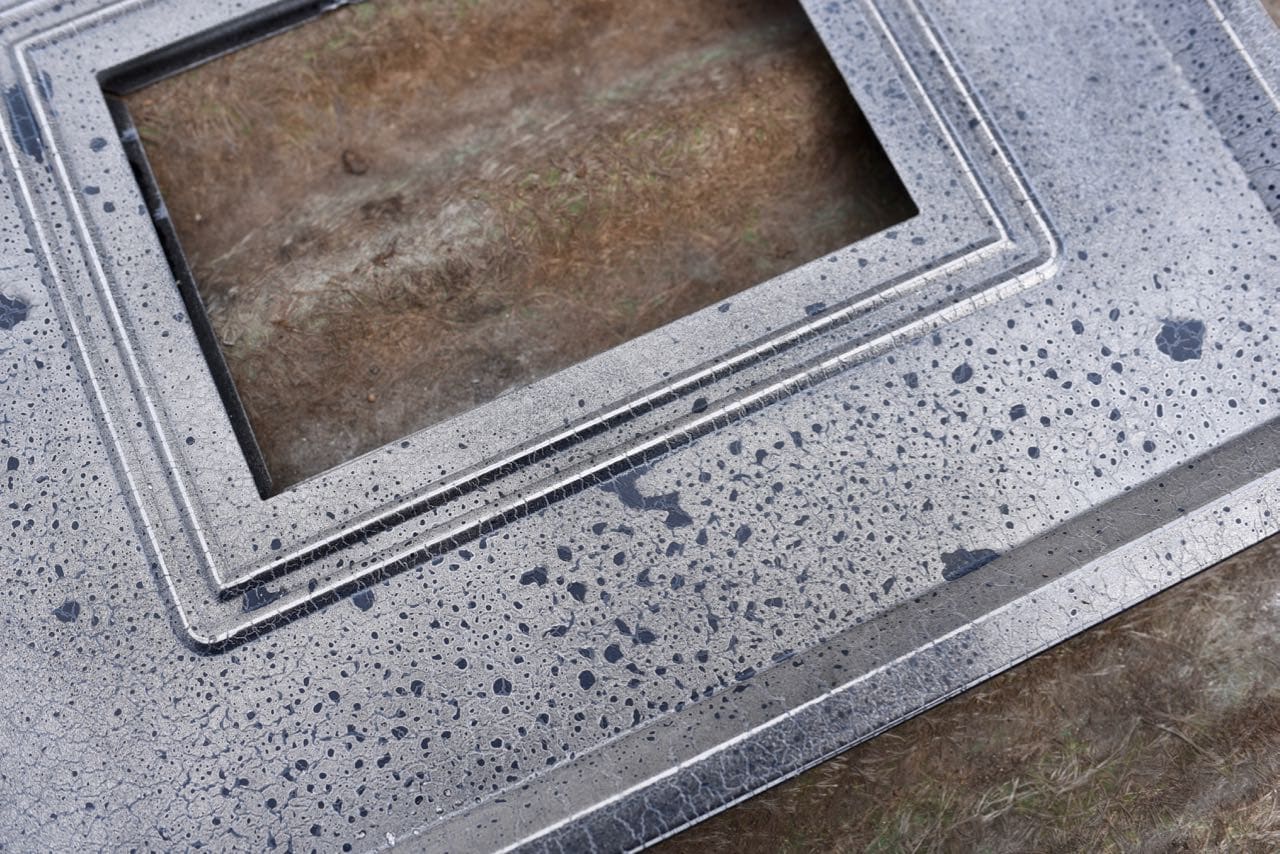
For me, I wanted my frame to look old and worn and for it to have that characteristic mercury glass look. My first frame looked okay, but by my second frame I had really gotten the hang of it and I think it looks so pretty!
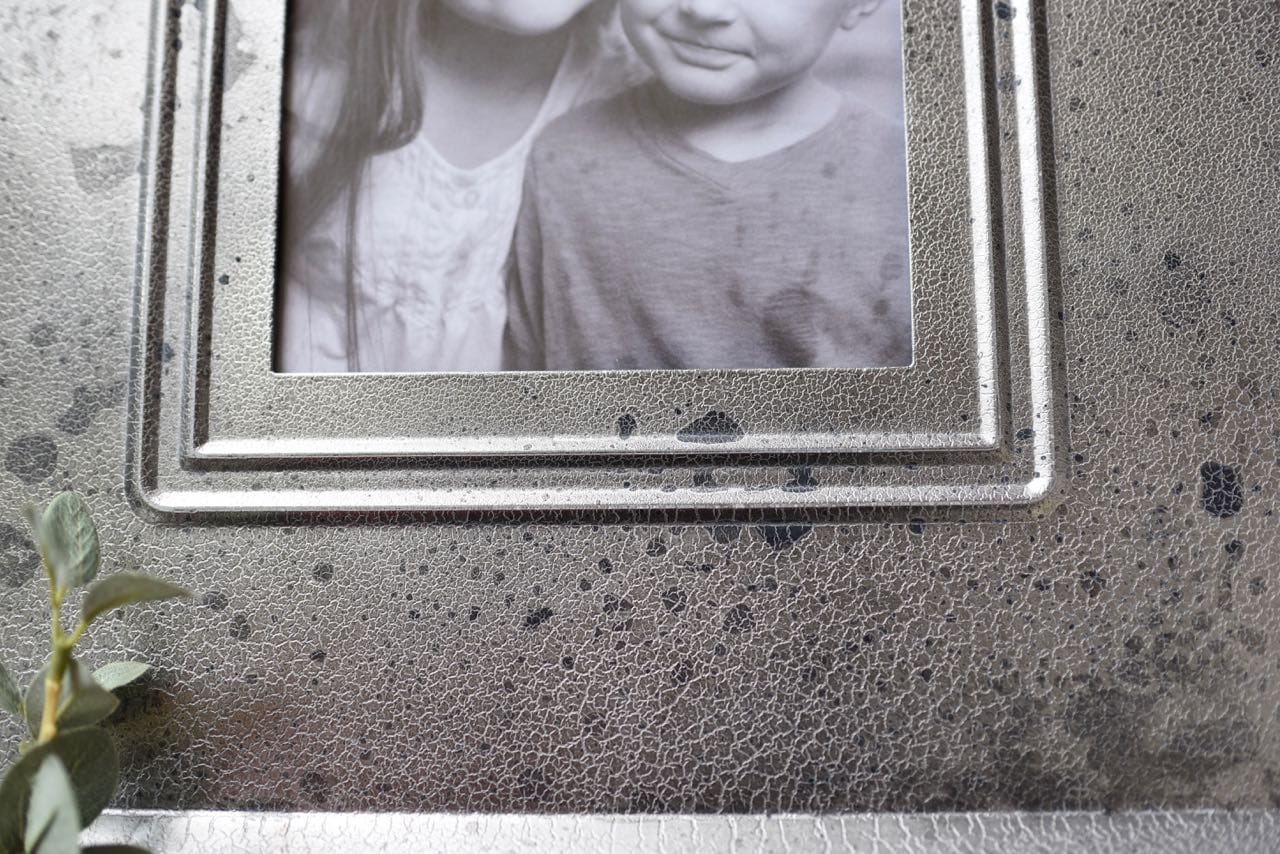
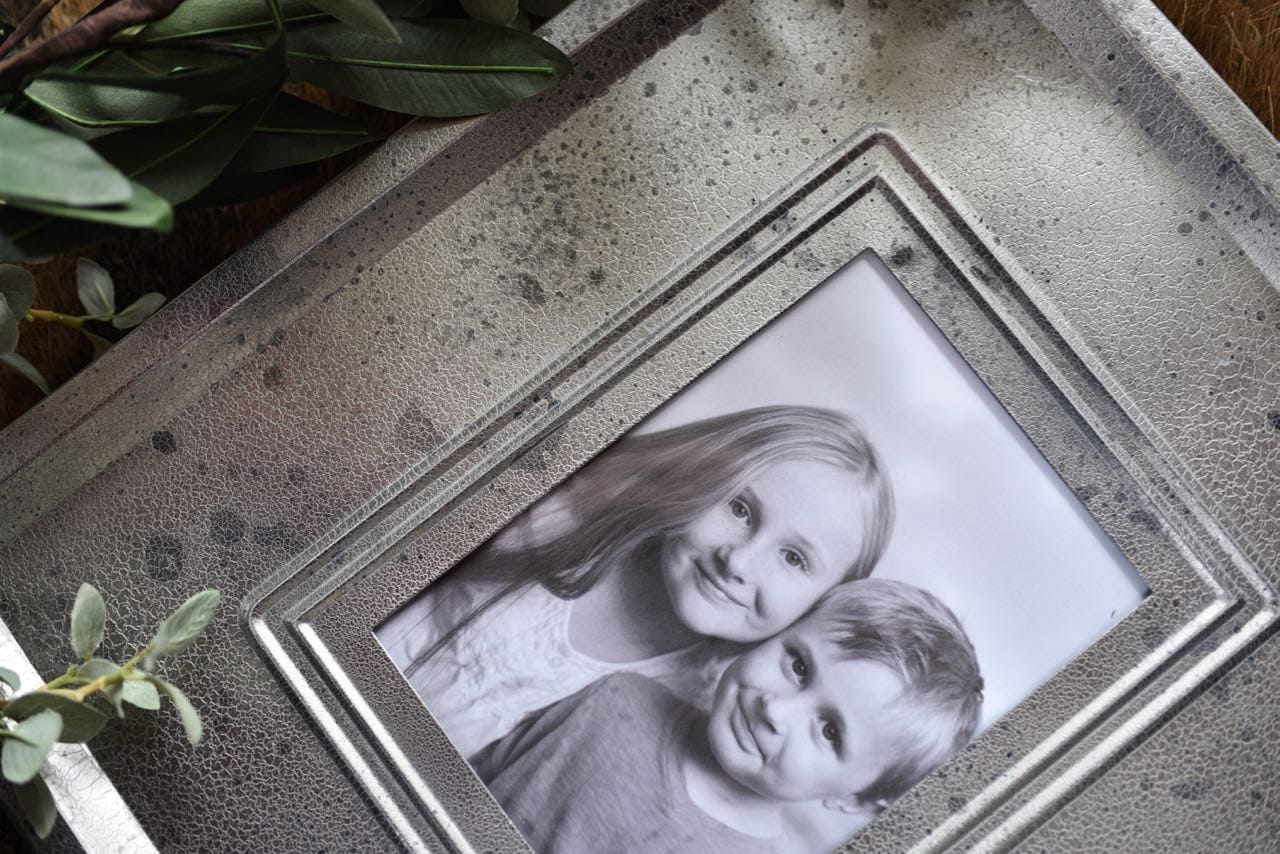
Look at the all the details. It’s so amazing to me how this process can transform a frame from boring to beautiful!
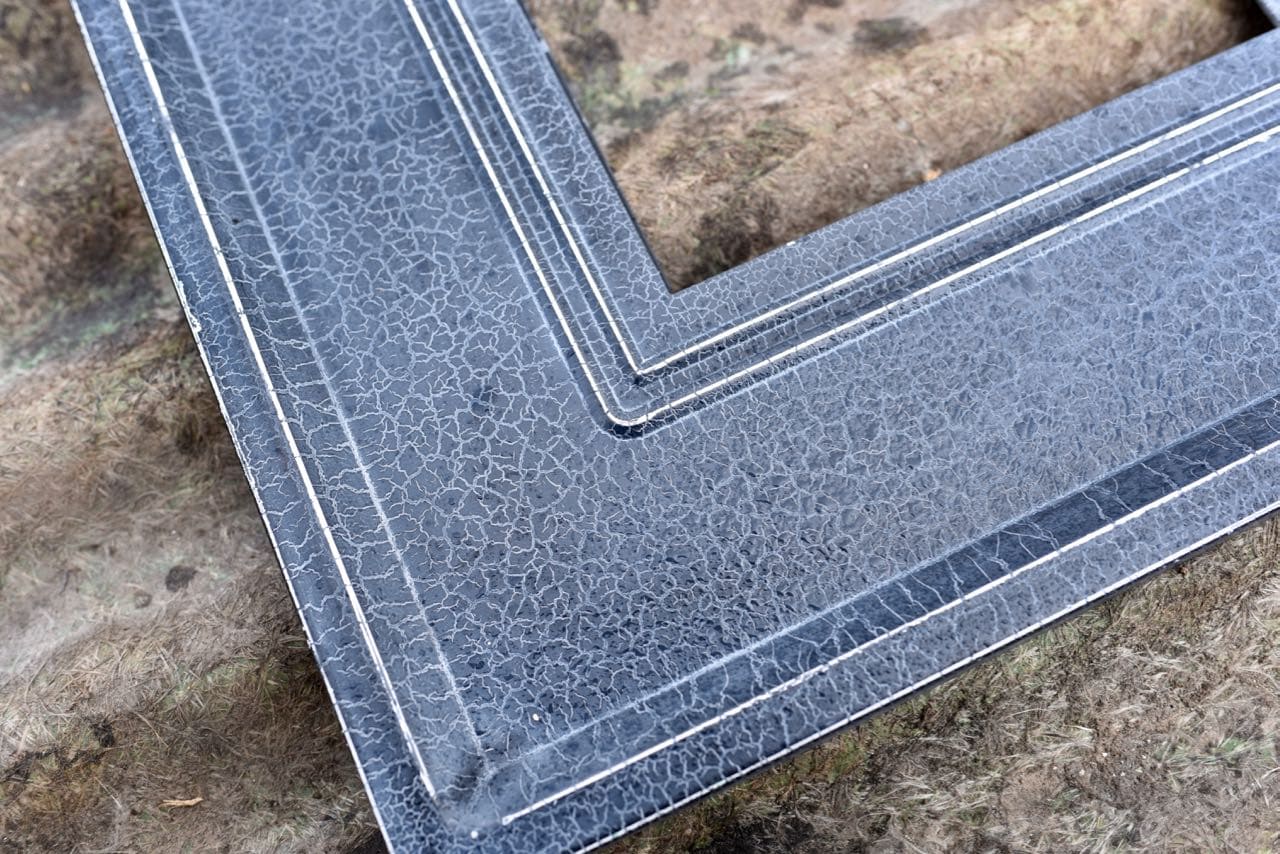
On my first mercury glass frame I did about 4 thin layers of paint and kept repeating the process I used above, but it was too much. On the second frame I only did two layers, which I think was perfect. I didn’t want the frame to look like it was simply spray painted. I wanted it to have the gorgeous mercury glass details, and doing just two light layers and lots of water drops did that for me.

I used the exact same process on the old brass candle sticks I found too. I love their transformation!
I highly encourage you to try this mercury glass frame technique on metal or glass. You can find amazing deals on objects to try this technique on at Deseret Industries. I donate ALL of our used toys, books, clothes, and more there every few months- in fact we just dropped off about 10 huge boxes of things we no longer needed!
I love that when I donate there I’m helping others, since all store associates are given skills training, career counseling, and assistance to move into a permanent career and a life of self-reliance. Plus, all donations are tax deductible, so if you donate by December 31st you can get that deduction on your taxes for the year.
I love treasure hunting there for some awesome finds because donations go the sales floor very quickly. Thousands of items are put out every single day, so it’s a great place to score something that you’ll love. If you’re on a tight budget this holiday season you can stretch your shopping dollars by finding gently used holiday decorations, as well as gifts for others like toys, books, snowboards and skis, winter coats, and more.
Happy shopping!
![]()
Leave a Reply