This shop has been compensated by Collective Bias, Inc. and its advertiser. All opinions are mine alone. #CelebrateAmazing BDays #CollectiveBias
Birthday parties are a huge deal at my house, and today I’ve got an awesome ombre tissue paper backdrop tutorial to share with you to help make those summer birthdays even more special!
Our family celebrates each member’s birthday for about a week. My favorite part of celebrating is creating a birthday party. I like to go all out to make the birthday boy or girl feel special, and I spend lots of time planning and thinking about every little detail of the party, including the backdrop. It’s all of those little details that make the party amazing!

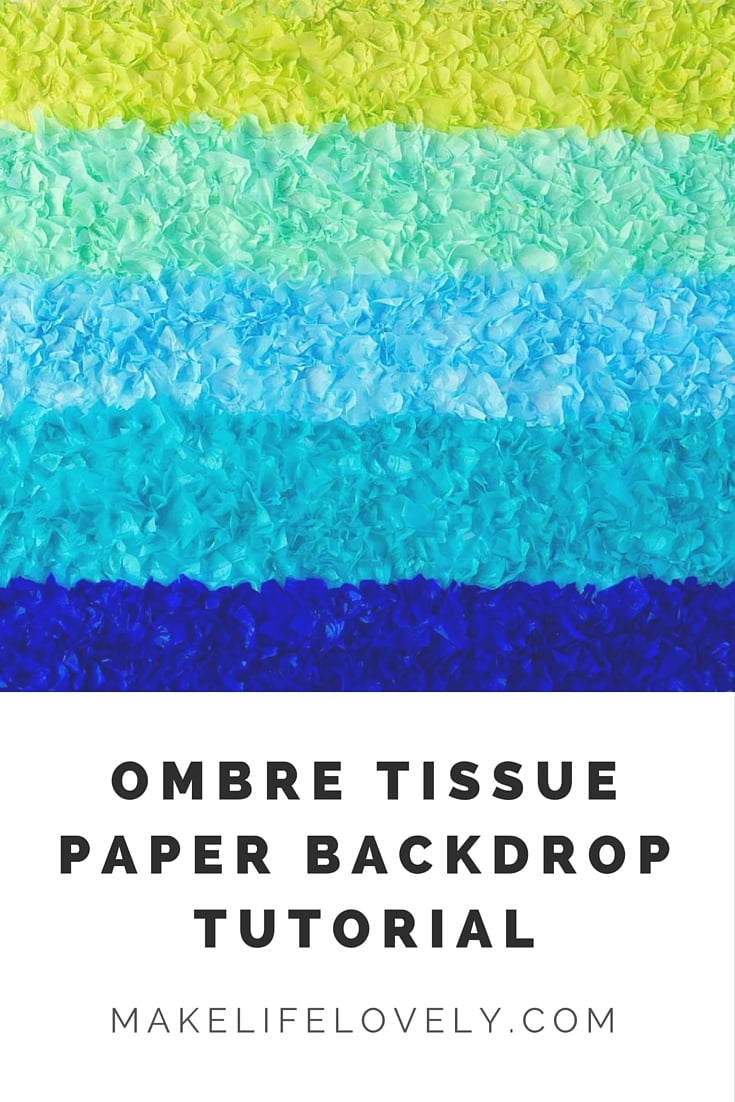
The tissue paper backdrop I made is the perfect background for a party table, a dessert table, or a drink station. Because it’s summer and I’m currently planning a shark party and a mermaid party for my son and daughter’s summer birthdays, I chose to use greens and blues to go with their ocean themes.
Not only does this ombre tissue paper backdrop look amazing, it’s inexpensive to make too! Forget about the expensive fabric and use tissue paper instead!
I went shopping at Walmart to pick up some American Greetings supplies for the tissue paper backdrop DIY and our upcoming summer family birthdays. They’ve got a big section full of everything you need to celebrate all the big events like birthdays, anniversaries, weddings, babies, etc.

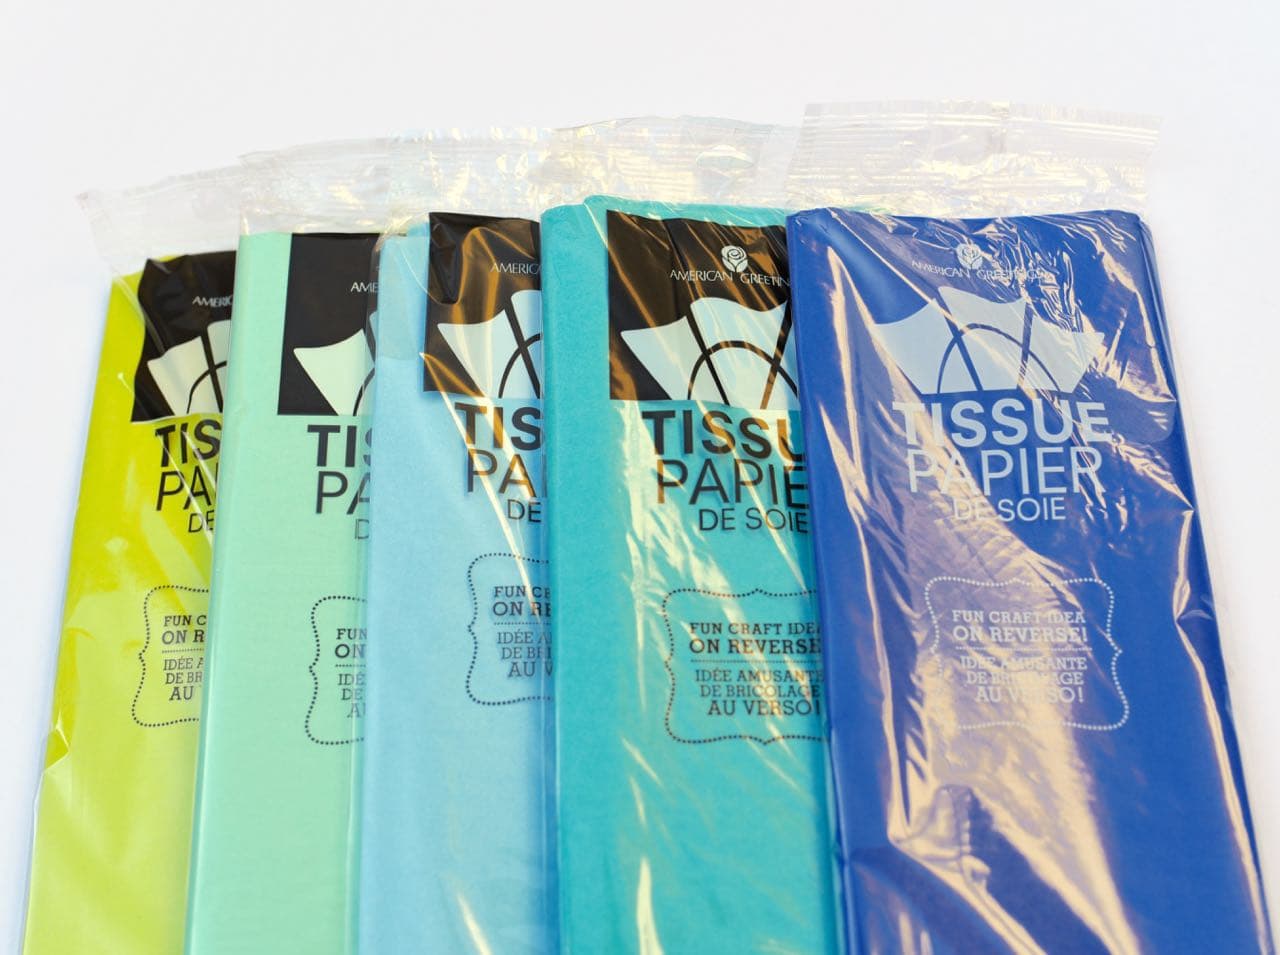
I ended up buying five different colors of American Greetings tissue paper, birthday cards for my son and daughter, and a pretty turquoise gift bag.

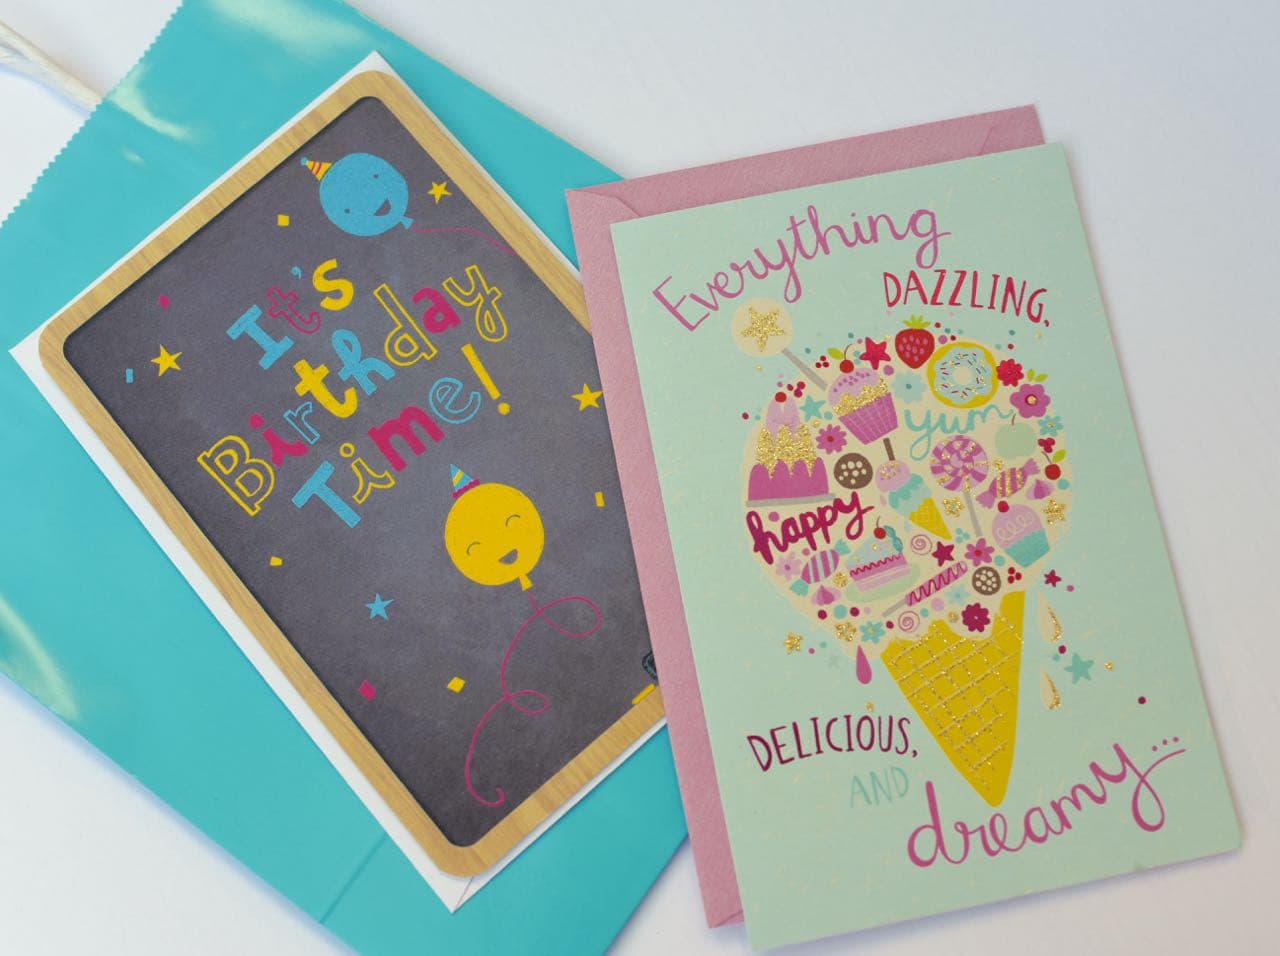
I know that everything digital is the rage right now, but I still have all my birthday cards that my parents wrote in for me for each birthday, and I believe that it’s so important to write in cards for those you love and to keep and document those special moments and feelings that we have for each other!

Ombre Tissue Paper Backdrop Tutorial
Supplies:
- American Greetings tissue paper (in five different colors that go well with each other)
- Foam board (as large as you’d like your backdrop- you can also tape pieces together with strong tape to make a bigger backdrop)
- Scissors
- Tacky glue (or other strong adhesive)
Directions:
Step 1. Tape your foam backdrops together on the back if you’re using more than one (to make the backdrop bigger). Unfold the folded tissue paper one time, then cut the folded tissue paper into approximate two-inch squares.
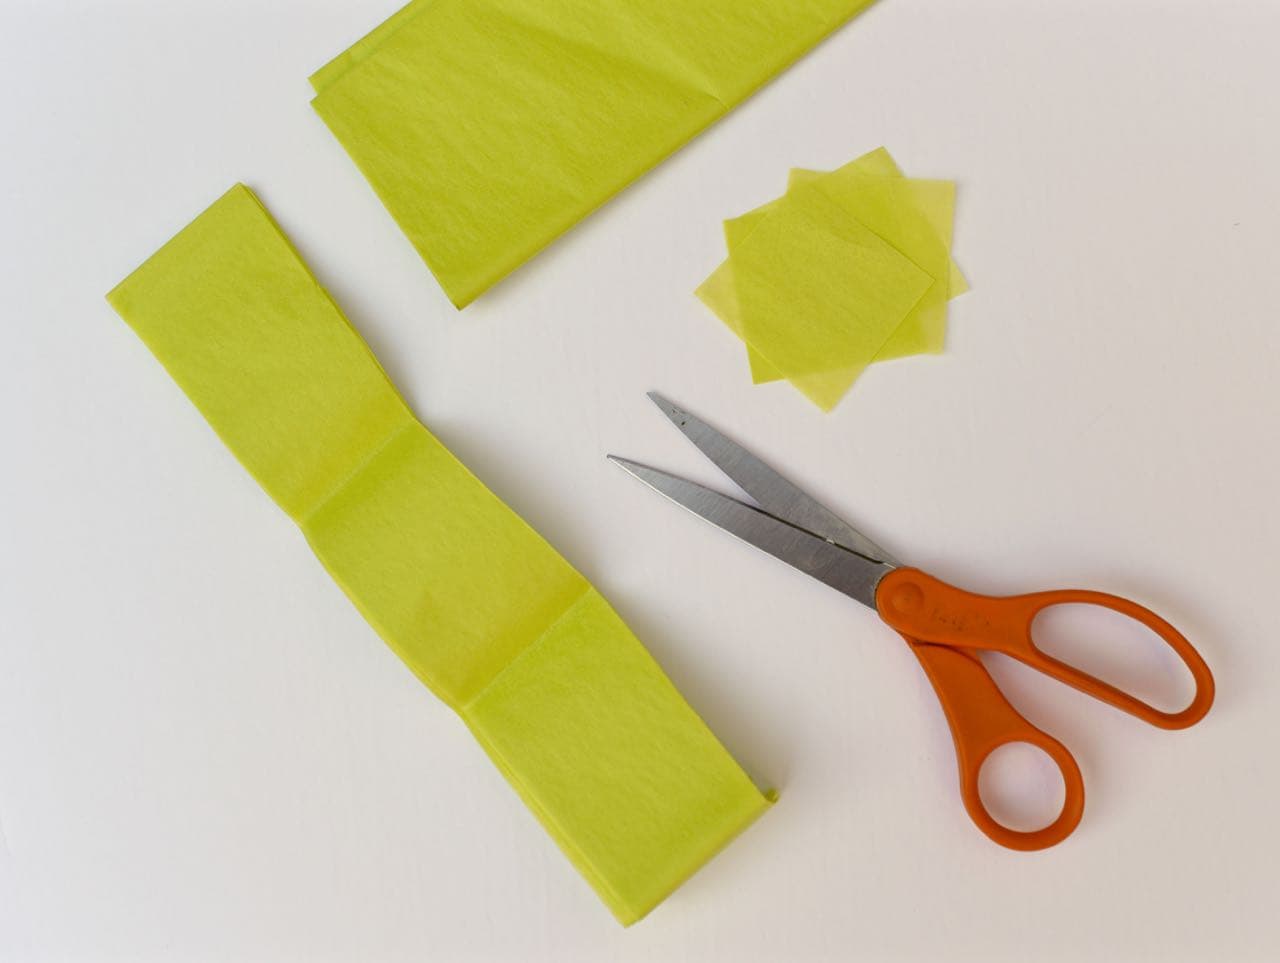
Don’t stress about making each piece the exact same size! You won’t be able to tell a difference, as long as they’re each close to the same size.
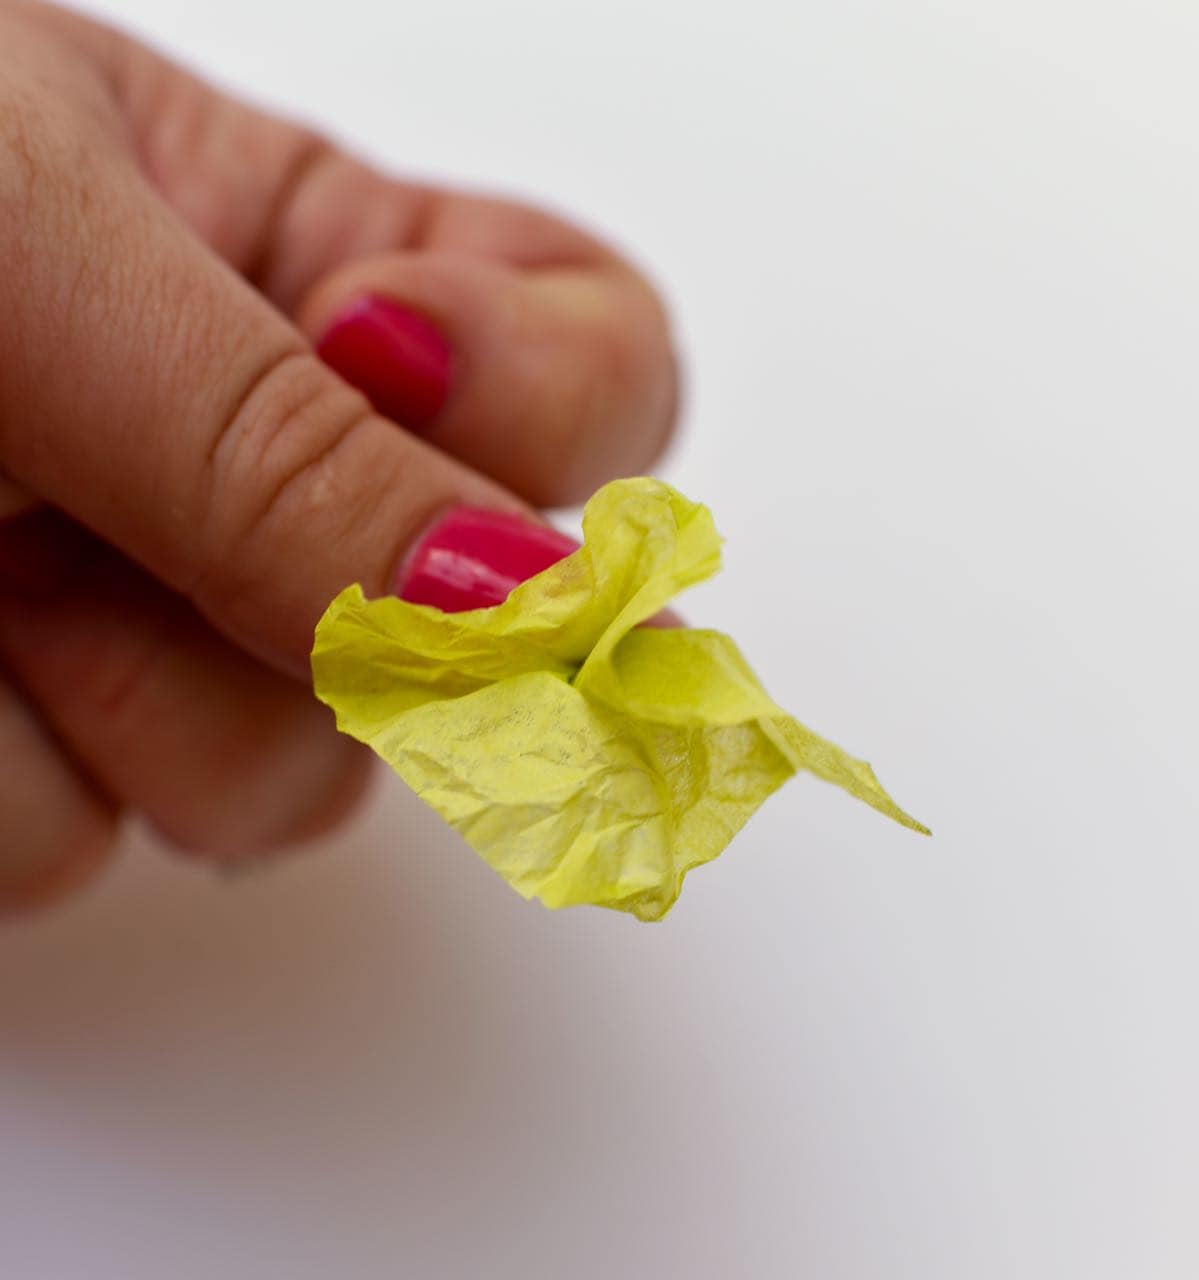
Step 2. Place a long line of tacky glue on the top of the foam board. Slightly crumple the lightest colored square, then stick it down on the glue in the middle, so that the sides stick up from the foam board.
Repeat with all of the lightest colors that you want at the top of your backdrop. I did five rows for each color and that worked well for my two foam boards that I taped together, but you’ll need to determine how big each color section needs to be for the size of board that you have.

Step 3. Once the first light color section is done, start working on the next darker colored section, making it the same size as the first color.
Keep doing this until the board is all filled in and you have a beautiful ombre tissue paper backdrop!
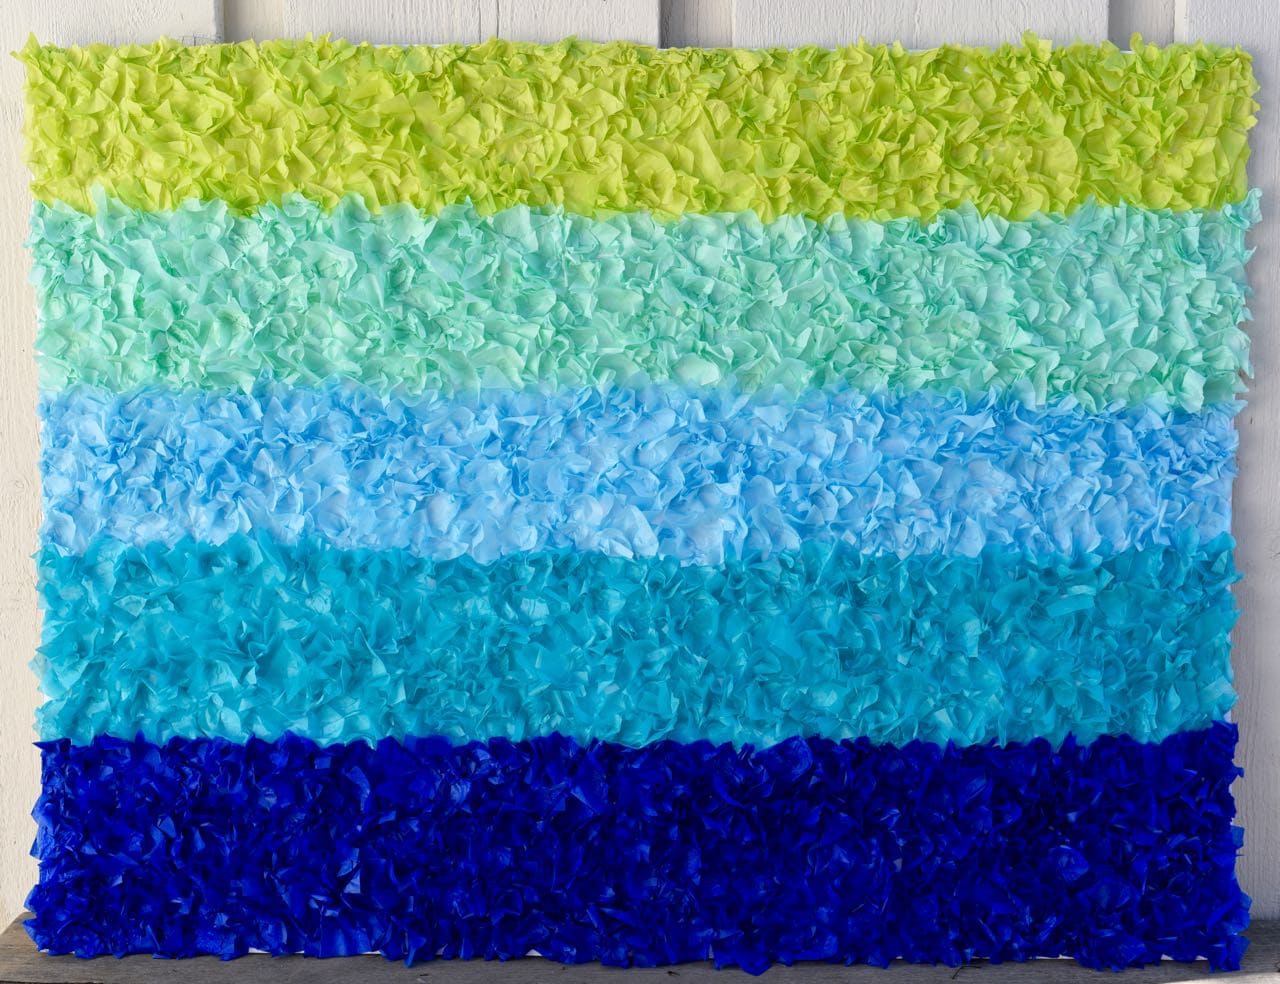
I love how all of the different colors blend together, and the interesting texture that the tissue paper makes. I also love that this backdrop is so simple and just costs a few dollars to make!
The tissue paper backdrop does take some time, but if you turn on a movie or watch Shark Week like I did while doing it, the time will go by pretty quickly!
Happy crafting!
![]()
Leave a Reply