I love the versatility of this decoration I am about to show you!
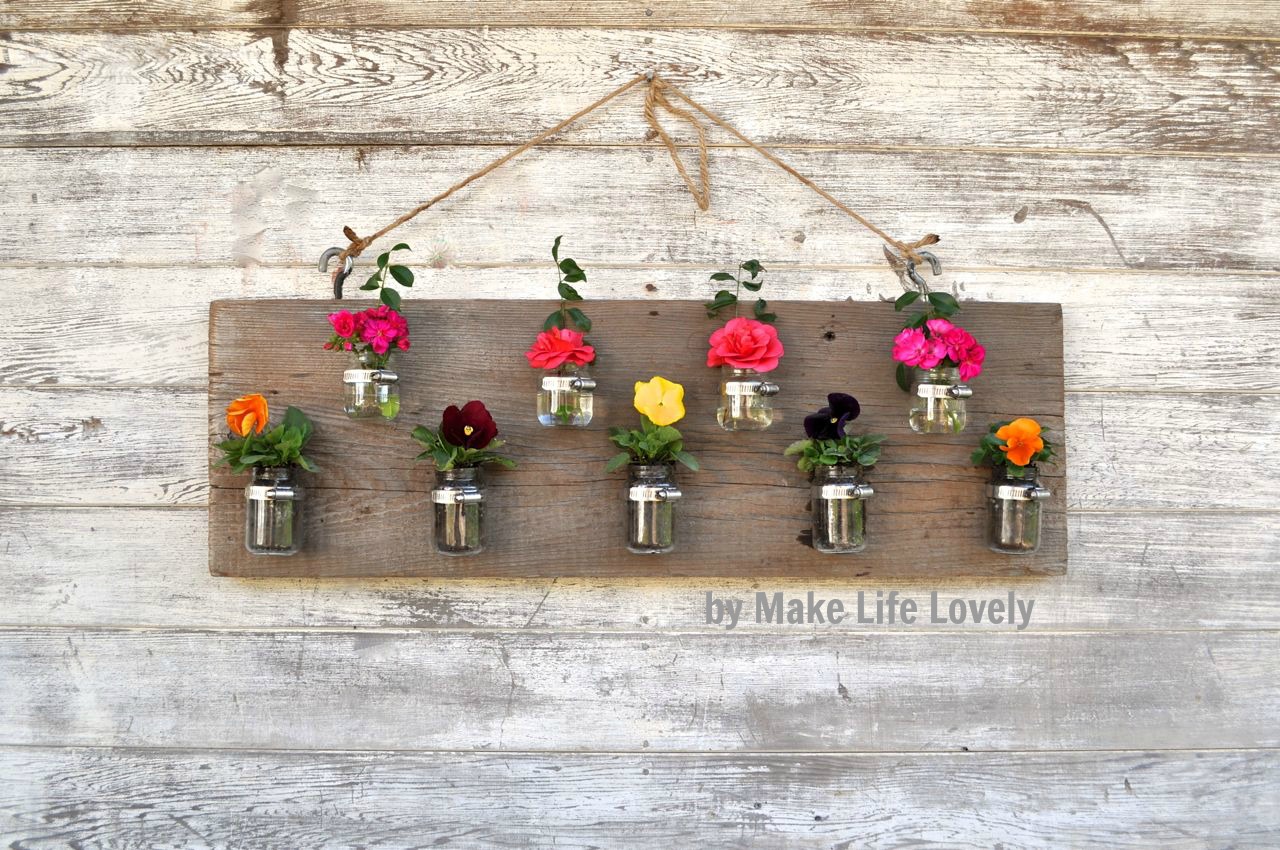
It can be a vase, planter, candle holder, or a combination of these! It is totally up to you. You can hang it inside, outside, and change up the size according to your preference. It is so easy to personalize to fit your needs and space limitations…
Have I got you curious yet?!
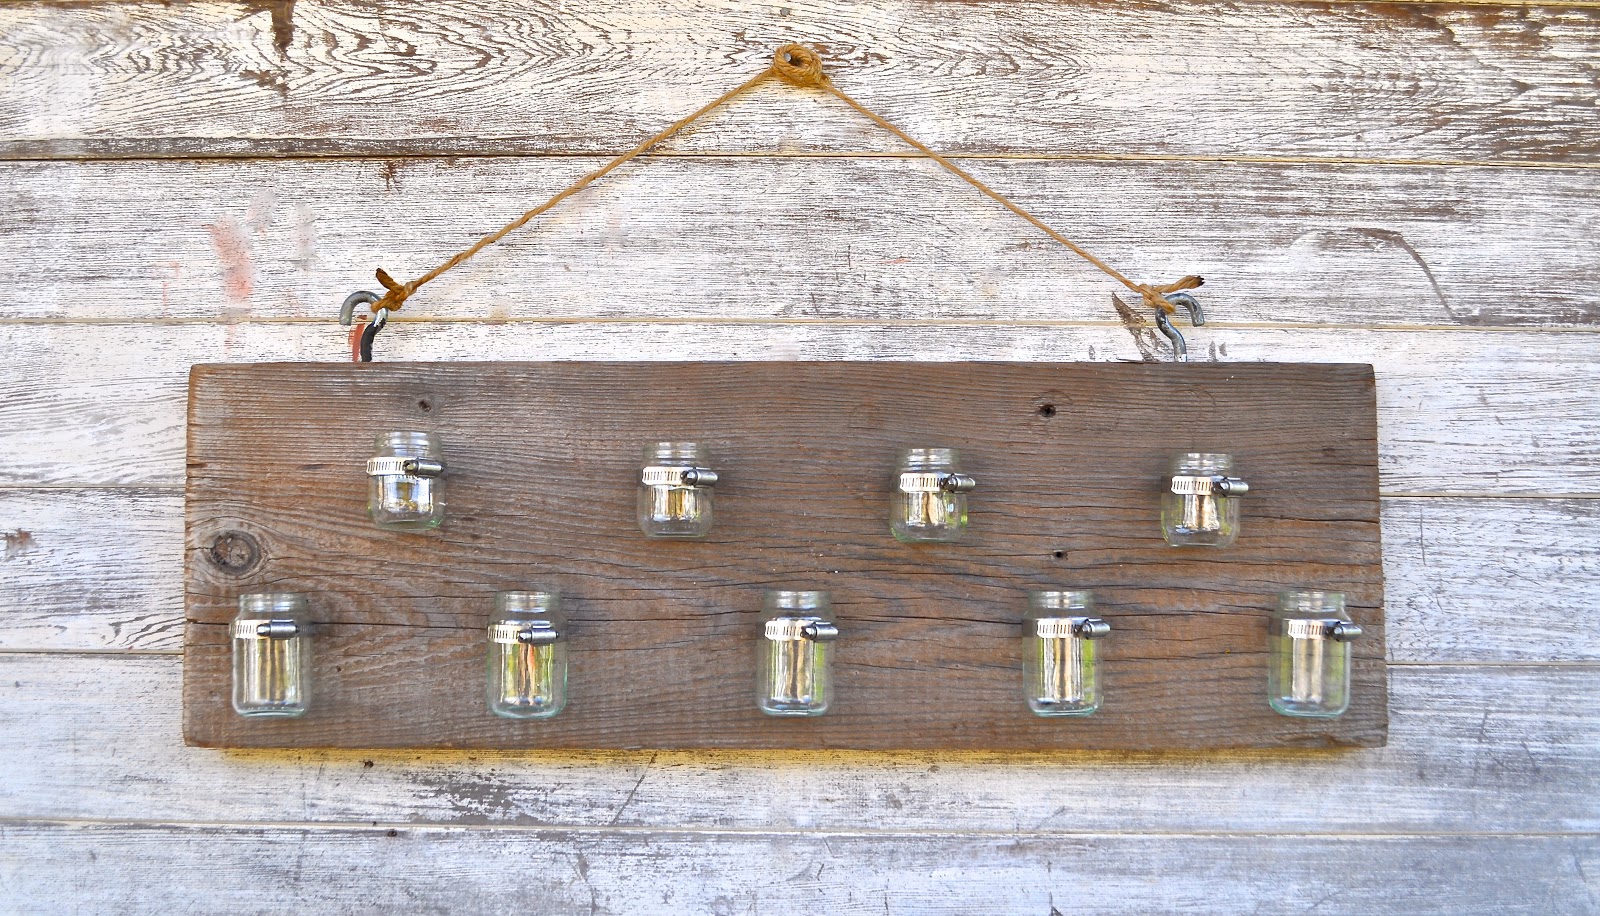
My husband and I used an old piece of distressed wood we already had, and attached nine baby food jars to the wood with clamps, then added two hooks to the top to hang it on our shed.
And I LOVE it!!
It is such a unique look, and I love that I am reusing an old piece of wood and baby food jars that would have gone into the trash!
The flowers give such a pretty pop of color to our shed, and the flowers can easily be changed out to include new cut flowers, planted flowers, soil and seeds, candles, etc. I’ll show you some of these varieties later in the post. Endless possibilities!!
Wanna’ make your own? Here are the easy directions…
- Baby food jars (any size and amount that you want- I used five large and four medium jars)
- Clamps (one per jar- I bought a bag of 10 at Home Depot in the plumbing section for around $10)
- Screws
- Drill
- Hammer
- Metal punch (or screwdriver)
- 2 Hooks (optional)
- Jute, twine, etc. (optional- to hang the wood)
Potted Plants Growing on Bottom
The petunias we planted on the bottom fit in the larger baby food jars, but just barely. The jars with soil in them are perfect for growing plants from seeds, or little seedlings. Again, once they outgrow their containers, you just transfer them over into a bigger container.
I love the look of these tea lights in the jars, especially at night. Make sure that you do not leave the candles lit unattended, and keep them out of the reach of children!!
I also filled all of the jars with tea lights, and the effect was so pretty! This would be a great decoration for a backyard barbecue or evening fire, or even for a little ambiance in your home.
Here are some other creative ideas I came up with for reusing baby food jars…
If you liked this project, please follow me on Facebook, Twitter, Pinterest, Bloglovin’, and Instagram.
angel gonzales says
That is totally a great idea. I havent thought about that, i’m glad to have stumbled upon this post. Now, there’s something for me to work on this weekend! Thanks!
Laura @ Make Life Lovely says
You’re welcome, Angel, so glad you found my blog! Come back and let me know how it goes making this!
Theresa says
I LOVE it! I have so many baby food jars. I actually got rid of a lot of them, but kept quite a few because I knew there would be a use for them. Thank you for sharing, pinning to my baby food jar, then checking out the rest of your ideas.
Laura @ Make Life Lovely says
Awesome, thanks Theresa!! These jars are so fun to reuse!
Emily Thompson says
SOOOO cute!!! wow! I’m trying to figure out if I can make this for my mom for mothers day, she would LOVE it… Pinning! I came over from TT & J. WOuld love for you to come and check out my blog. I host a tuesday link party that I would LOVE for you to join :o)
emily @ http://www.nap-timecreations.com
Laura @ Make Life Lovely says
You could definitely make this for your mom, I’m sure she’d love love it! Going to check out your blog now, and I’ll be sure to link up on Tuesday. Thanks for the invitation!
Ruthie Armstrong says
Adorable!! I’d love to have you come and share at Super Saturday Show & Tell!! https://www.whatscookingwithruthie.com xoxo~ Ruthie
Laura @ Make Life Lovely says
Thanks Ruthie, I just visited and shared at your party, thanks for the invitation!
Megan Tripaldi says
Love this idea, I will definitely be trying it. Posted a link to this on my brand new blog Geek-A-Roo.
Thanks for sharing!
Laura @ Make Life Lovely says
Glad you’ll be making this, be sure to come back and let me know how it goes!
Michelle@Somedaycrafts says
LOVE this! I am featuring this at somedaycrafts.blogspot.com.
Laura @ Make Life Lovely says
Thanks for featuring my project! Cute blog!!
Stephanie says
This is stunning! You are very talented and creative 🙂 Thanks for sharing and have a lovely day.
Hugs,
Stephanie
Laura @ Make Life Lovely says
Thank you Stephanie! I appreciate your nice comment 🙂
Nessa the Procrastinator says
Very cute project! You could even go a bit further and give the jars a coat of color. 🙂 This is a great “use up the stash” project.
Laura @ Make Life Lovely says
Yes, a coat of color would look great! Thanks for the wonderful idea.
Melanie LaDue says
Found you over at Tip Junkie! I LOVE these jars! I’d love for you to come link this up at my Tuesday Time Out!
Melanie Reasons To Skip The Housework
Laura @ Make Life Lovely says
Thanks Melanie! Sure, I’ll go join your link party now 🙂 Thanks for the invitation.
{amy k.} says
i’m not certain how i linked over, but i’m so glad i did. i absolutely love this idea! pinned it so i can make it with my hubby!
Laura @ Make Life Lovely says
Awesome, well I’m glad you found my project! Happy to hear that you’re making this, be sure to come back and let me know how it goes!
Bridgett Shepherd says
Laura! LOVE, love this! So glad I came across your fabulous space! Would love for you to share at the party! xo bridgett
https://www.osiemoats.com/2013/02/link-up-party-4.html
Laura @ Make Life Lovely says
Thank you Bridgett! I appreciate it. I shared at your link party. What an adorable blog you have!!
Alex @ northstory says
Visiting from the Osie Moats Link up – I am a huge fan of gardening (and a relatively rookie gardner) and this summer I definitely want to tackle a project like this b.c I did one with tins last year and what a mess that was. Glass is how do I put it, less “rustic”. This turned out really great!
Laura @ Make Life Lovely says
I’m a rookie gardner, too, and this was really really easy and do-able. You should definitely give it a try! Thanks for stopping by!
Sausage says
Thank you sharing such a nice stuff. i am really impressed with the tricks used to hold these food jars. Marguez Sausage
Laura @ Make Life Lovely says
Thank you Marguez! I had a lot of fun coming up with these projects 🙂
Anonymous says
It’s a pity you don’t have a donate button! I’d without a doubt donate to this fantastic blog! I suppose for now i’ll settle for bookmarking and adding your RSS feed
to my Google account. I look forward to fresh updates and
will talk about this site with my Facebook
group. Talk soon!
Ernesto Castanha says
Hello
His work is excellent
Ernest
Wanessa Moore says
this post was feayuted on truecharismacrafts.blogspot.com
Check it out!
Laura @ Make Life Lovely says
Awesome, thanks Wanessa!!
Cosatto says
These are some attractive decoration ideas. Love the tea light jar idea.
Laura @ Make Life Lovely says
Thanks Cosatto. I love how versatile this decoration is- you could put practically anything in the jars!!
Ana Lopes says
Wow! This is a lovely project, Laura! Thanks so much for sharing the great tutorial! Would love to have you visit me sometime.
Have a fabulous week!
Hugs from Portugal,
Ana Love Craft
http://www.lovecraft2012.blogspot.com
Calista says
Hi Laura! My daughter and I used your tutorial to make this project and are enjoying the fruit of our craftiness. Thanks for the easy instructions and the idea! I posted about our project on my blog and linked back to your tutorial. Just wanted you to know. 🙂
https://www.ahouseandyard.com/2013/07/make-bud-vase-votive-holder.html
K says
Hey! I absolutely love this! I was looking for something to add to the awkward GIANT backsplash behind our kitchen sink. Since I rent, we can’t change the backsplash in any way. I was looking for some sort of hanging decoration since there is a tiny area of drywall I could affix a picture hanger to.
This tutorial was the perfect inspiration for me to create my own hanging succulent garden! Here are a few photos on my blog – https://katielorancollins.wordpress.com/2015/01/19/diy-hanging-succulent-garden/
Carissa Bonham says
I love this project! I just wanted to let you know I featured you this morning on Creative Green Living.