
Make a beautiful photo transfer to wood with this fun and simple tutorial! These wood photographs make the perfect sentimental gift for anyone.
Looking for an easy, inexpensive gift idea or decoration for your home?
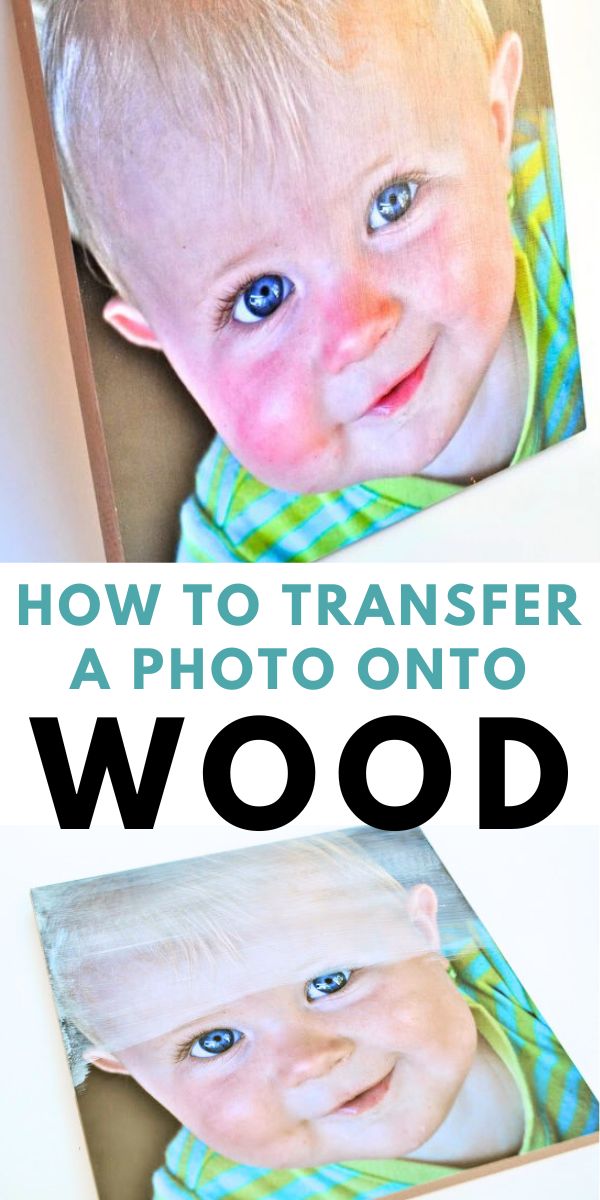
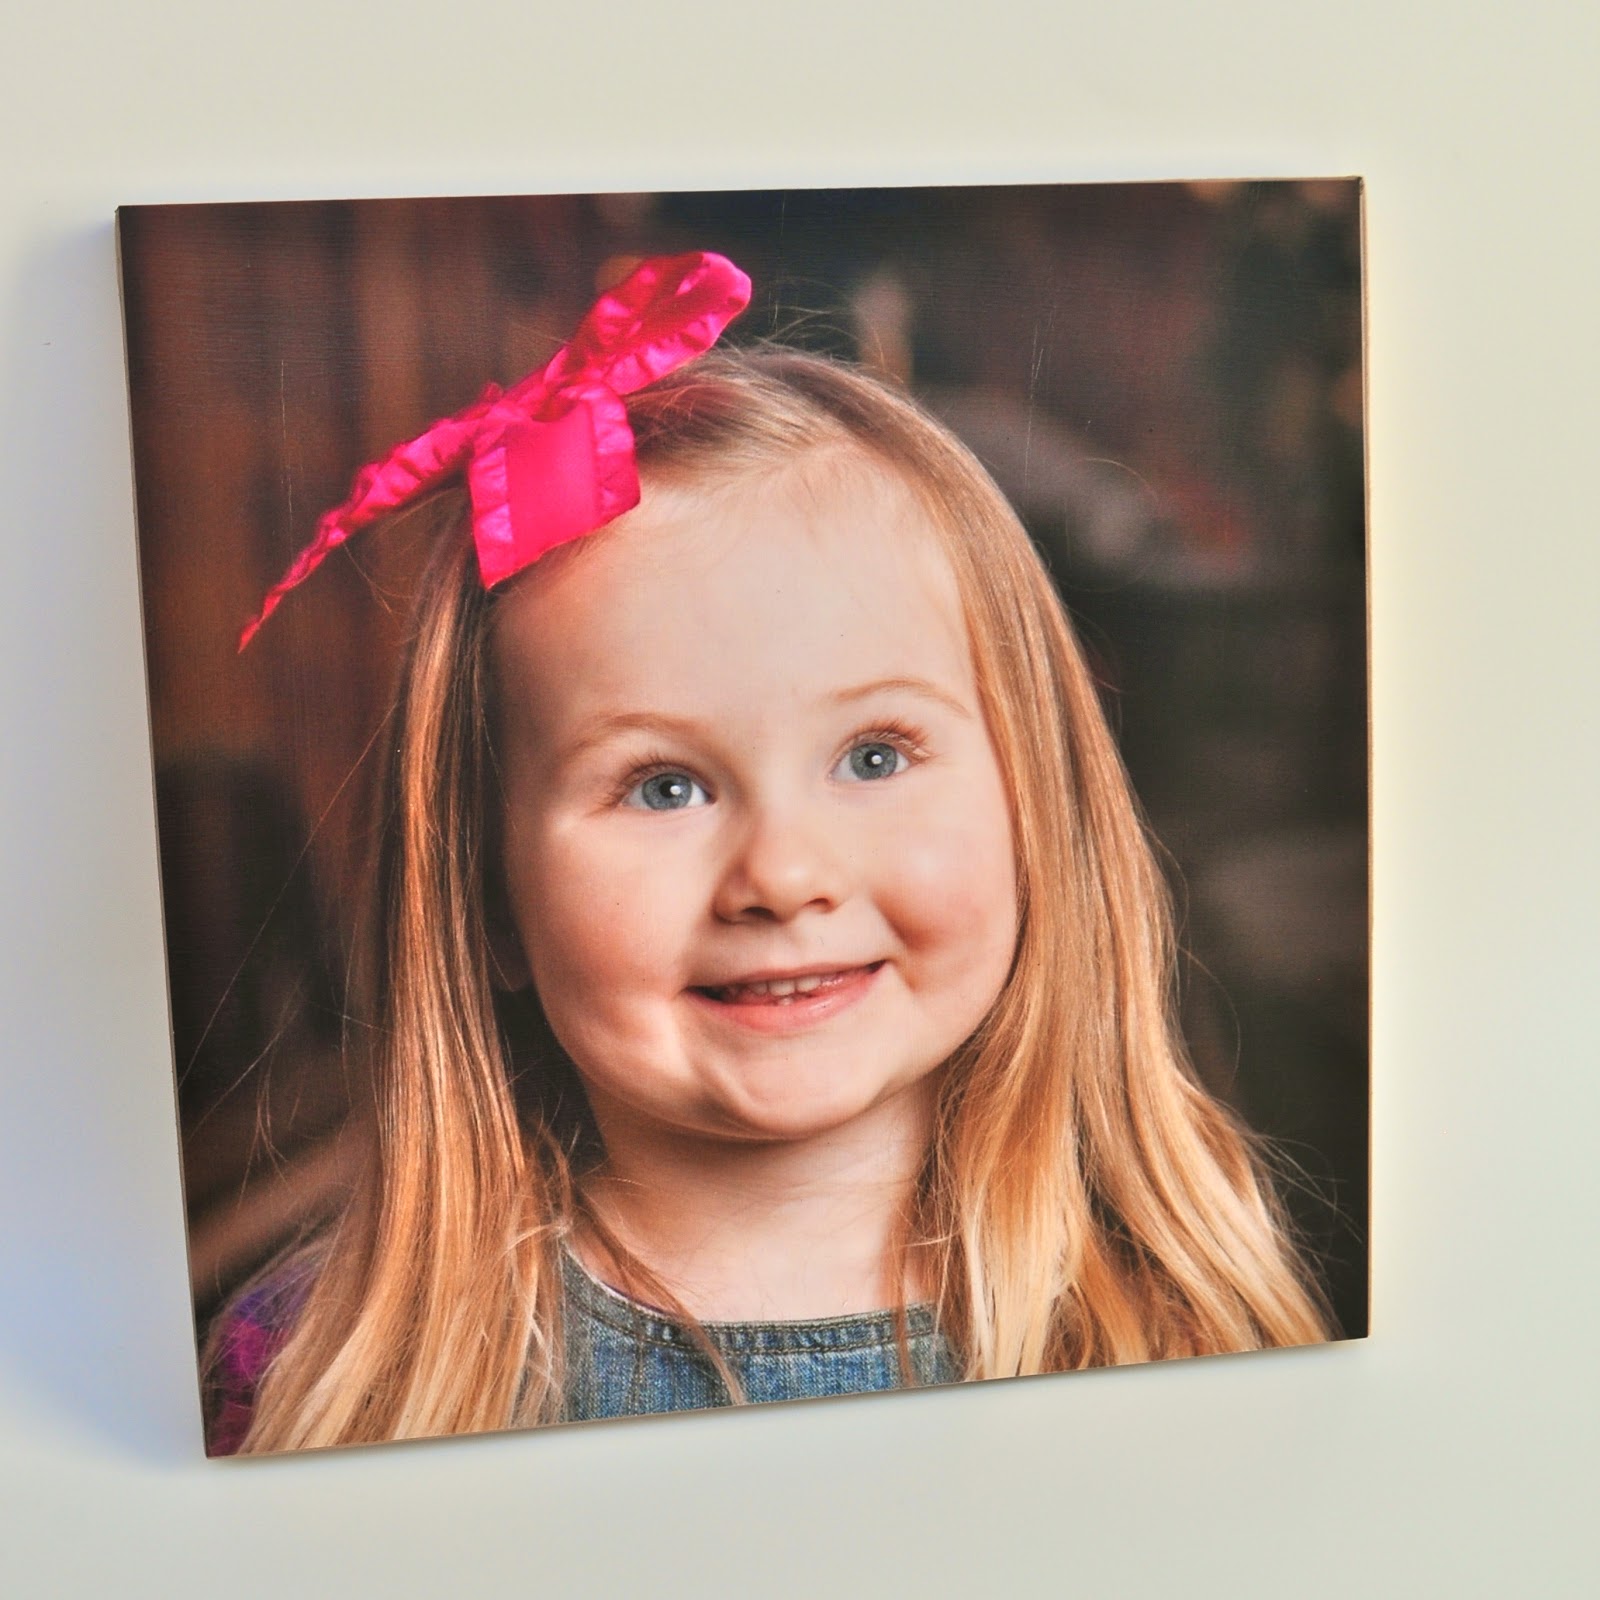
Photo on Wood

DIY Photo Transfer to Wood
I recently made one of these wood mounted photographs for my mom’s birthday with our family photo on it.
She couldn’t believe that I made it!
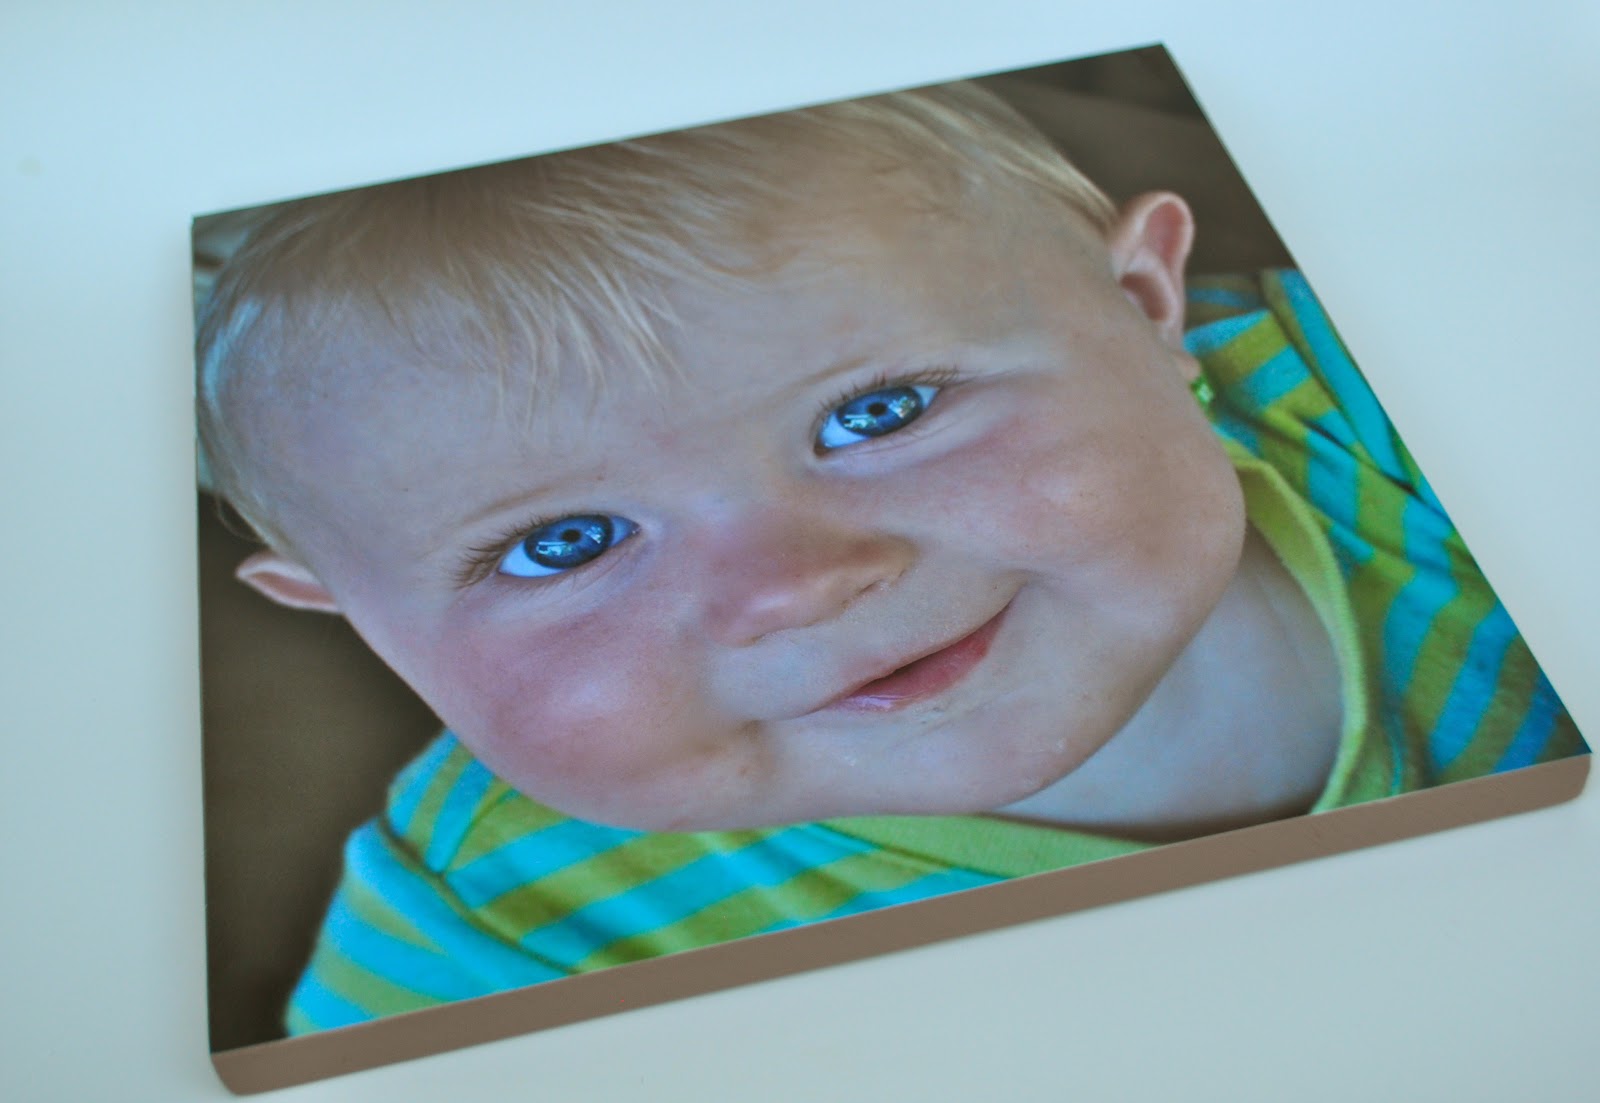
This photo on wood is truly one of my favorite projects.
The finished surface of the photograph ends up looking almost like a canvas.
The results look very high end!
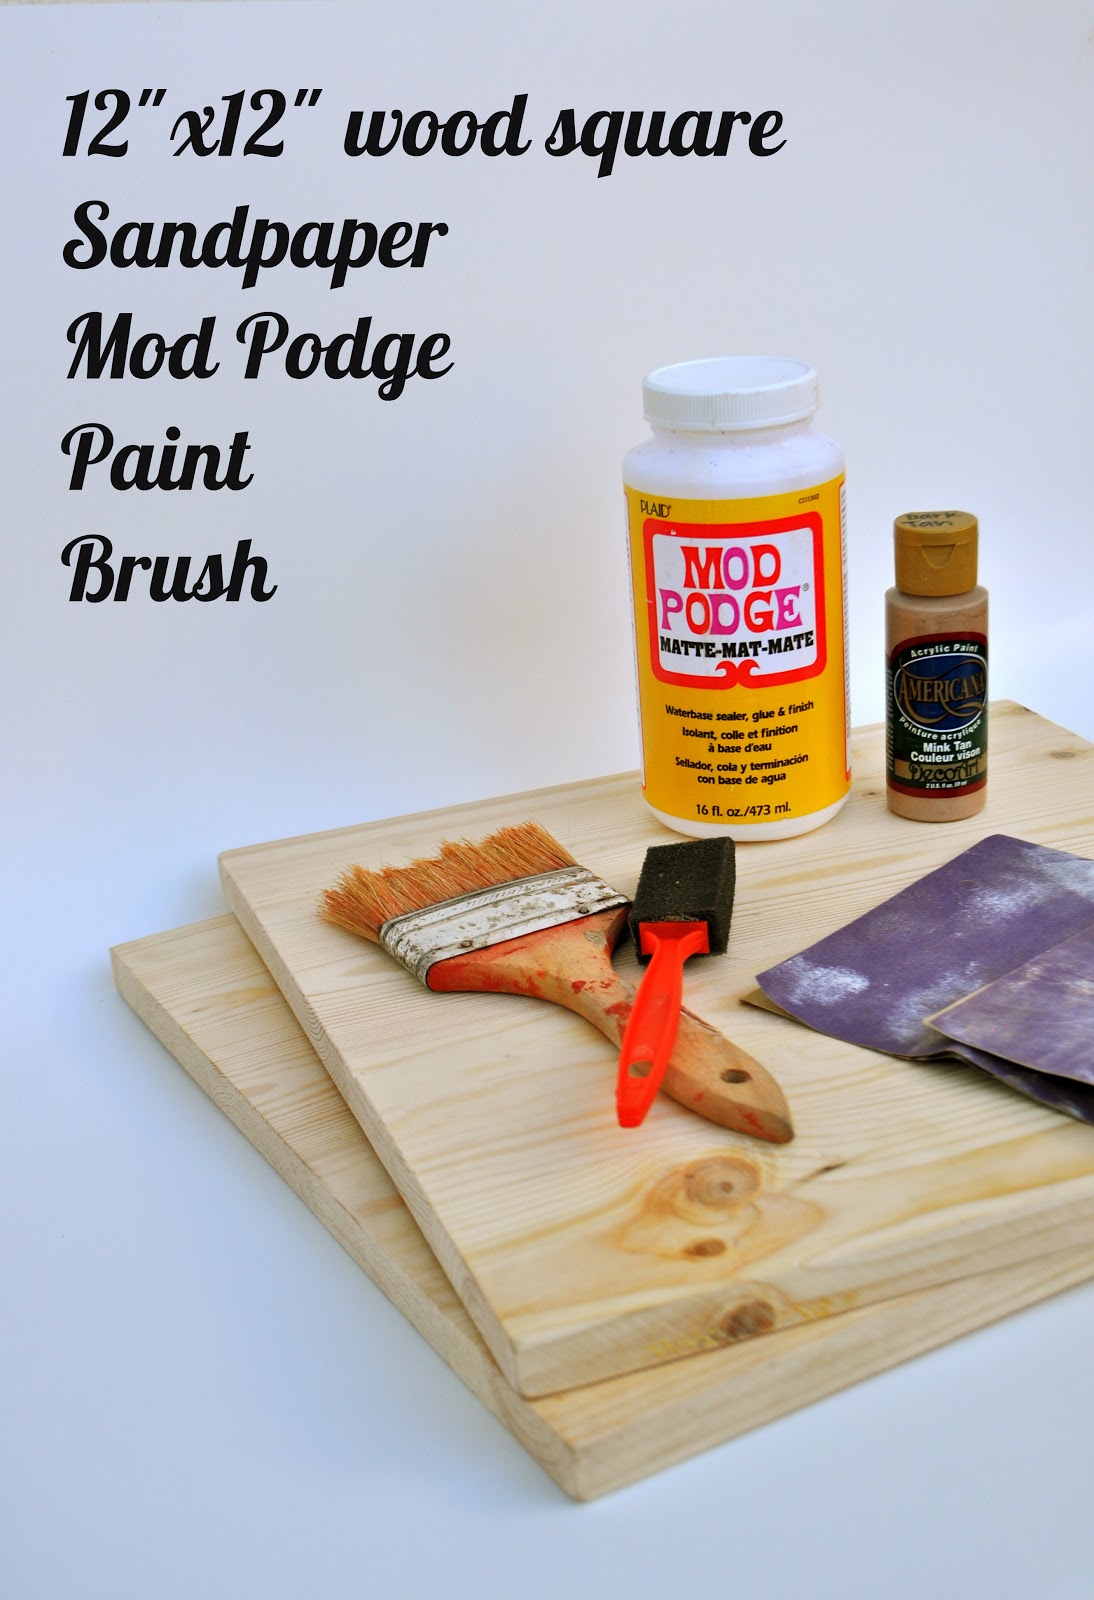
Supplies Needed
- 12″ x 12″ photo (or any other size you’d like to make)
- 12″ x 12″ wood square
- Sandpaper
- Matte Mod Podge
- Paint
- Paintbrush
Print Your Photos
First, choose the photos you would like to mount onto wood.
Next, decide what size you would like your final product to be.

I had these 12″x12″ photos printed at Costco for only $2.99 each.
Costco has since closed their photo printing service in their stores, but you can always get photos printed in Target, Walmart, Walgreens, online, and many more places!
Cut Your Wood
I bought a wood board that was 12″x 60″at Lowe’s that only cost $7.77.
A worker at the store cut the board for me into five equal pieces, so I didn’t have to worry about any cutting!
That gave me five boards for five different photos on wood.
It ended up costing me less than $5 per photo board, which is a great price!
Pick Your Paint
Prep the Wood Sides
Sand the edges of the wood board so they are nice and smooth.
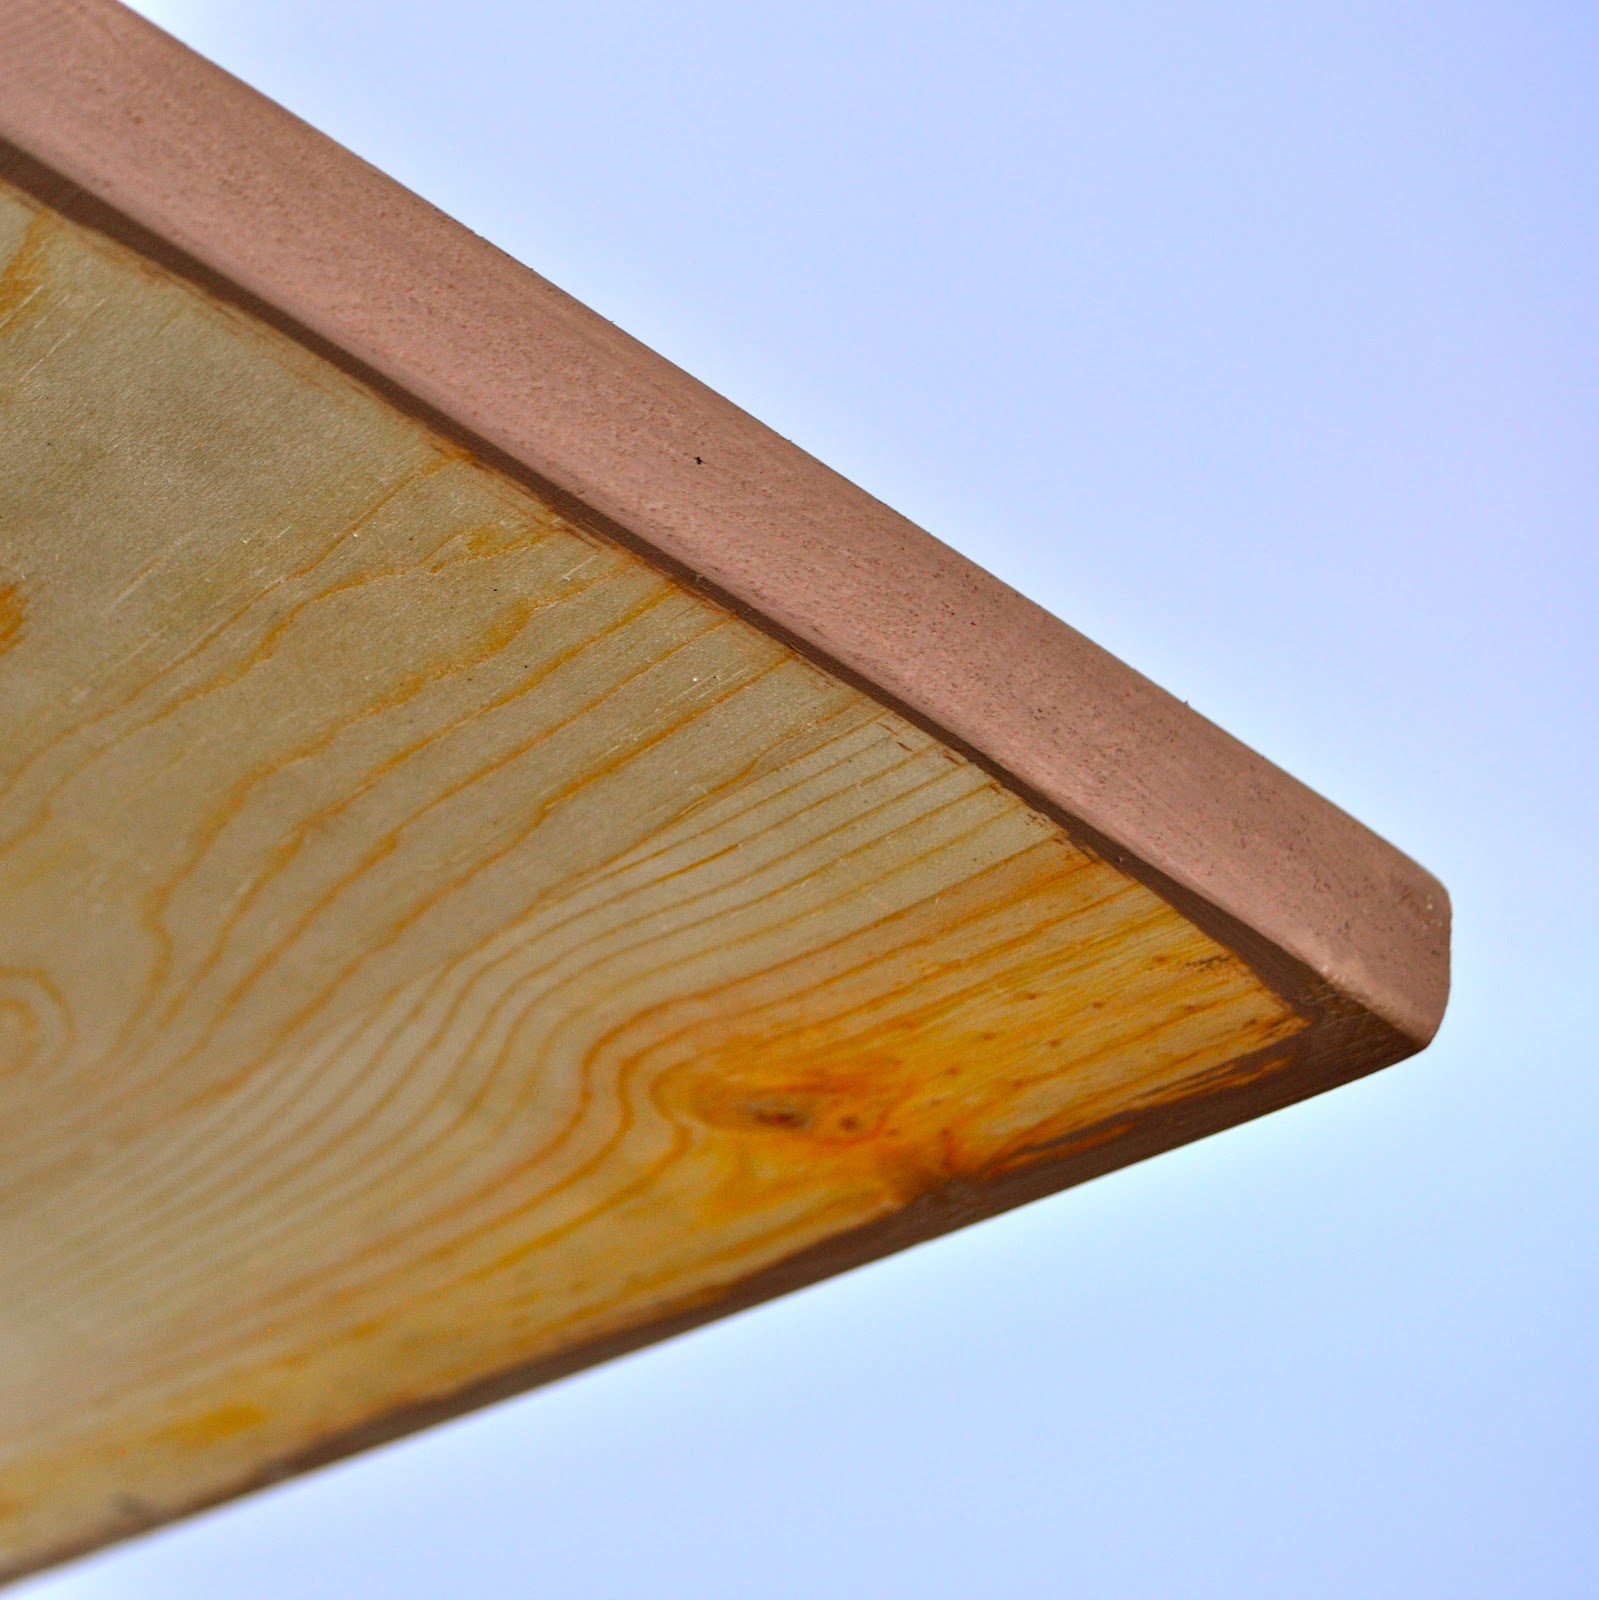
Next, paint the sides of your board in your desired color.
I painted two coats of paint, to make sure that I had a nice, even coverage of color.
If you are giving this photo transfer to wood as a gift, I highly recommend painting the back too, so it has a more finished look.
If you are keeping the wood photo for yourself, then you can paint the back or leave it unpainted, where it won’t be seen.
Transfer Photo on to Wood
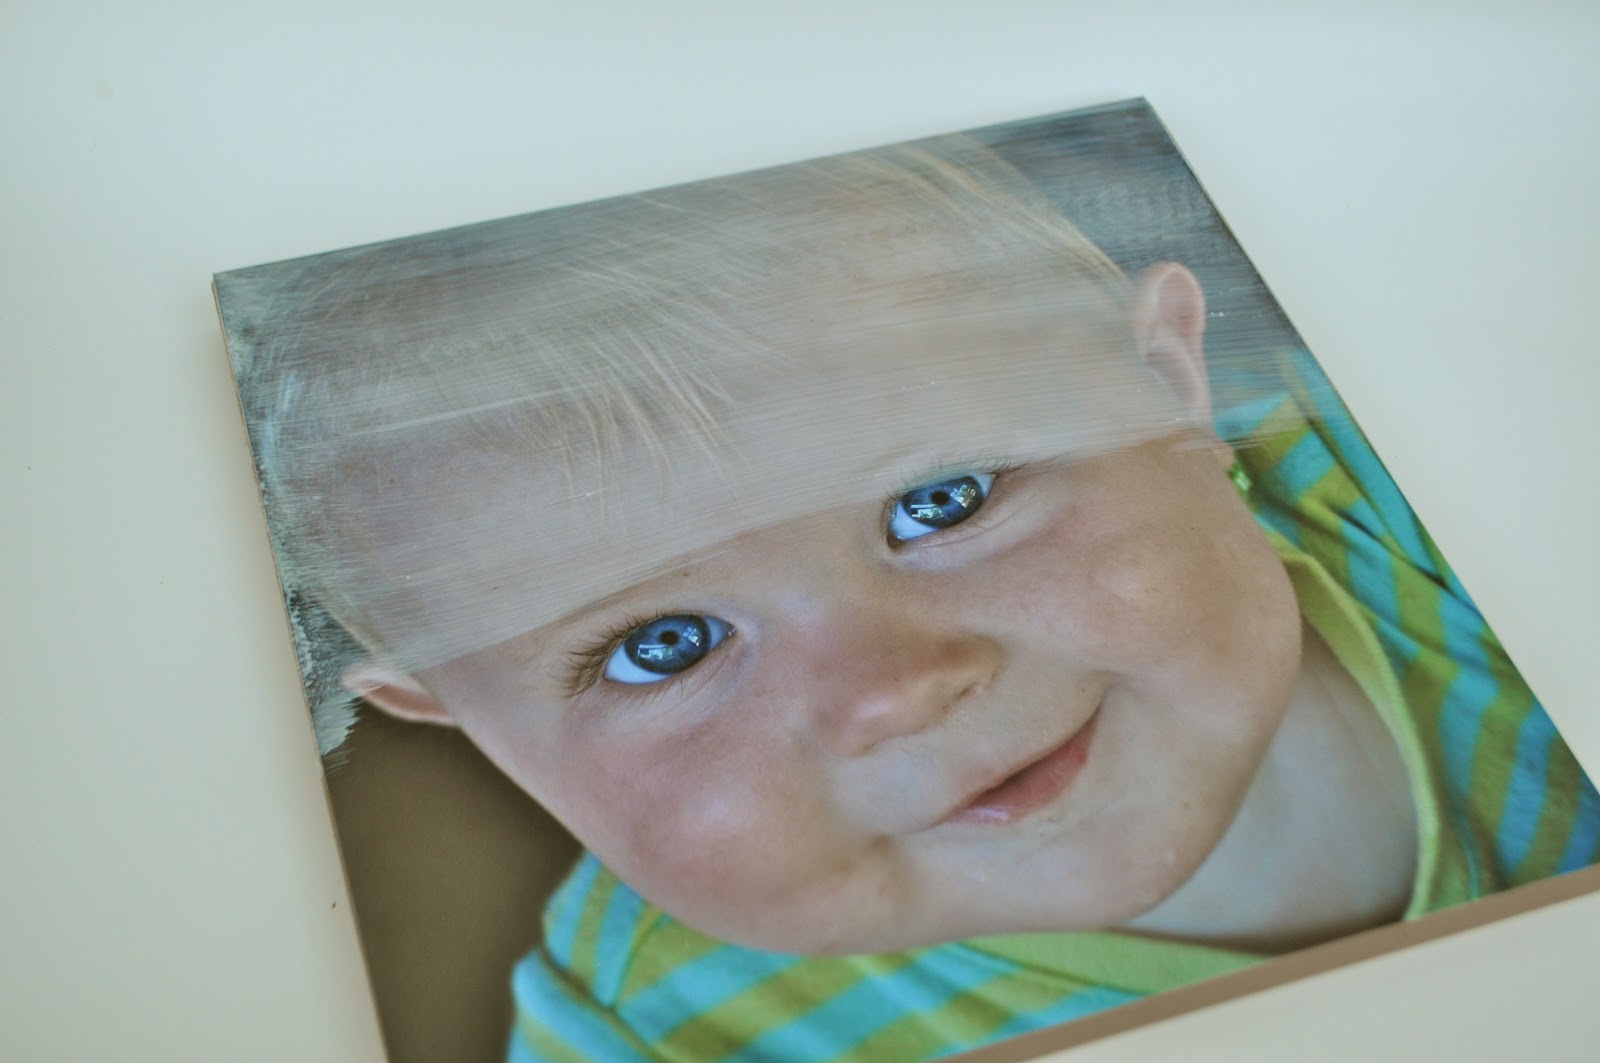
Add Texture to the Photo
Next comes the scary part!
Brush a layer of Mod Podge over the top of your photo.
It will look like you ruined your wood photograph, and you’ll be wondering if you messed it up.
Don’t panic, it will all be okay!
The Mod Podge dries totally clear, and it will look just fine after a few minutes once it’s dry.
I used horizontal brush strokes for the first layer.
Once the first layer dried, I brushed on a second layer using vertical brush strokes.
This gave the photo a beautiful canvas-y look that I just love!
Helpful tip: Make sure to use full brush strokes straight across, to make it smooth.
Once the top dries, brush the sides with Mod Podge too.


Here are my finished photos on wood.
Aren’t they just beautiful?!
It really isn’t hard to make a photo transfer on to wood, and I’m so happy I made these.
They cost practically nothing too, like our wood lemonade stand we made from wood pallets!
If you make one, be sure to leave a comment below and let me know how it goes!