Make a gorgeous DIY notebook cover in just 10 minutes! You’ll love these notebook cover ideas that are easy to make with your Cricut machine.
I’m a bit of a notebook hoarder. When I see a notebook with a cute or unique cover, I just HAVE to have it.

I recently made my own DIY notebook cover and I LOVE the way it turned out!
So naturally I made more. 😉
Today I’m sharing some gorgeous notebook cover ideas with you, because friends don’t let friends use plain notebooks.
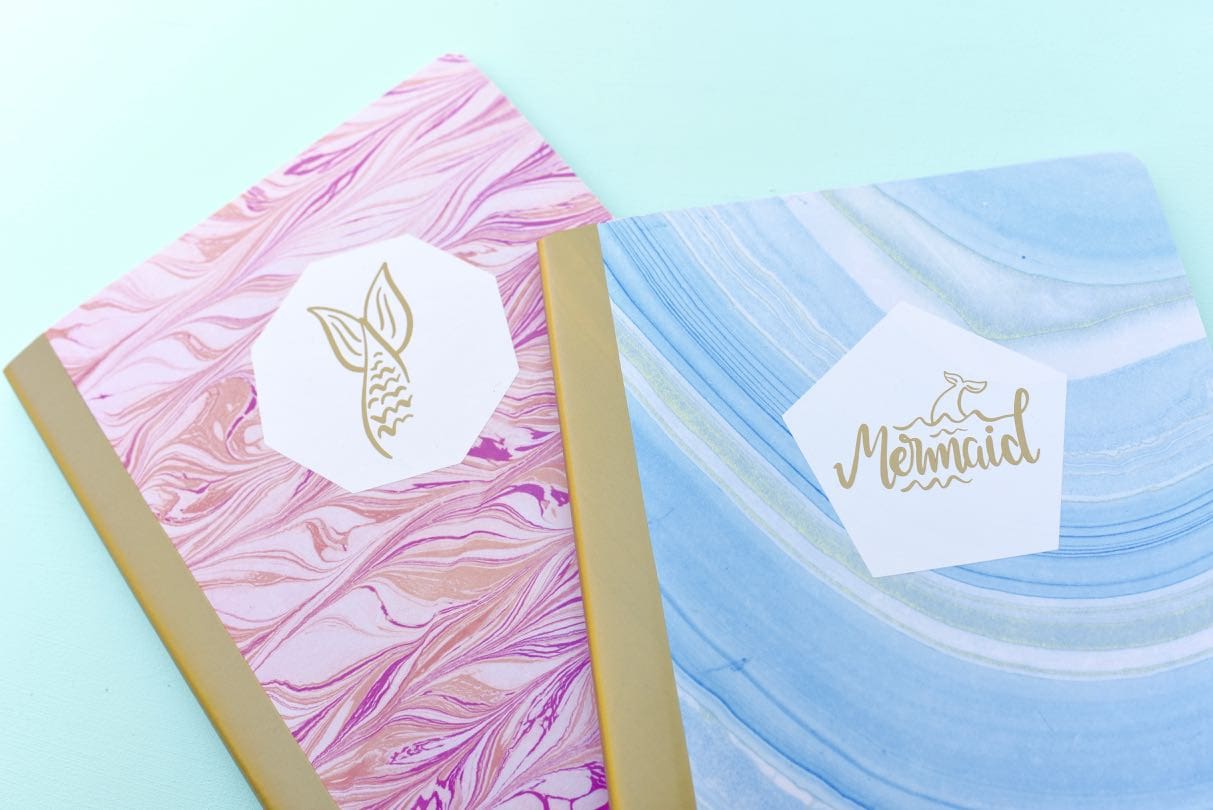
These notebook decoration ideas are even cooler because they LOOK like they’re hand marbled. But I’ll let you in on a little secret. It’s vinyl. Can you believe it?
This design is one of the many new Cricut Martha Stewart Premium Vinyl. It’s removable without residue for up to 2 years, has a matte finish, is easy to weed, and can be used with all Cricut machines.

Cute Notebook Cover Ideas
I live in San Diego and have always been obsessed with the ocean, so each DIY notebook cover I made has a mermaid and ocean theme to it.
Mermaids are big right now, so I’m sure that any girl would love getting one of these cute notebooks.
My tween daughter has already called dibs on a few of mine. 😉
We’re going to be making another batch because I’ve already got big plans for these. They’re so easy and fun, so why not?
How to Decorate a DIY Notebook Cover
Supplies You’ll Need:
- Composition book
- Cricut Martha Stewart Premium Vinyl in Marble Collection, Boardwalk Collection, and Gold
- Cricut Transfer Tape
- Cricut® Explore Air™ 2 Special Edition, Martha Stewart Machine Bundle
- Scissors


How to Make a Notebook Cover
First we are going to add the marble cover to our composition book.
Place your book cover side down over the back of the marbled vinyl.
Trace the front cover with a pen or pencil, then repeat for the back.

I found this worked much better for our DIY notebook cover than tracing the whole cover in one piece.
Two pieces were much more accurate and easier to put on the book.
Use scissors to cut on the lines you traced to cut our the front and back covers.
Carefully peel up the backing on the vinyl on side with the rounded corners.
You want to match those up first so that they line up perfectly with the notebook.
Gently place the sticky back of the vinyl onto the cover of the notebook, peeling off the backing a section at a time as you go.

Once the front cover is on, rub the Cricut scraper tool or a credit card over the top to remove any air bubbles.
Repeat for the back cover.
Adding the Gold Spine
To add some extra color and to cover up the marbled vinyl lines, I added a gold spine to each of my DIY notebook covers.
To do this, just cut a piece of gold vinyl that is as long as your book and exactly four squares wide.

Turn the vinyl over and you’ll see that there is a grid on the back for easy cutting.
Four squares wide was the perfect width for a gold spine notebook decoration.
Making the Mermaid Cover Notebook Decorations
Now that we have the marbled cover and gold spine finished, it’s time to add some mermaid details!
I designed each DIY notebook cover in Cricut Design Space. I’m sharing the cut file for each of the notebook covers.
Just press HERE for the cut files!

Press the green “MAKE IT” button, then follow the prompts to cut the designs with your Cricut machine.

I used my Cricut Martha machine because it’s just INCREDIBLE.
It’s such a gorgeous machine that’s shiny pearl with gold accents. Even the Cricut tools that come in the bundle have gold on them.
The Cricut Martha machine can cut over 100 different materials, from cardstock to vinyl to foil and even faux leather.
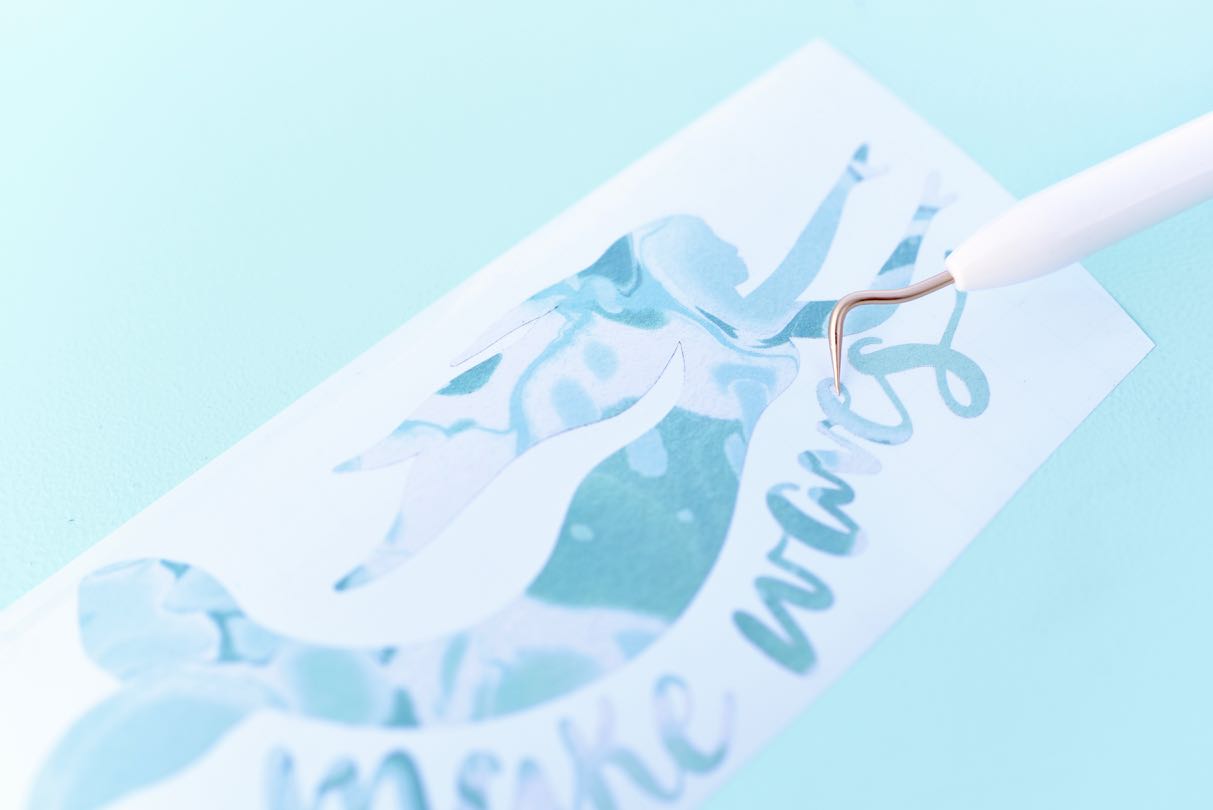
Once you’ve cut out the different cover designs, then use your weeding tool to remove the extra vinyl.

Adding the Mermaid Details to the Cute Notebook Covers
Center the white shape on the front of the notebook.
Remove the paper back from a piece of transfer tape.
Press the transfer tape over the top of one of the mermaid or anchor designs and use the scraper tool to press over the top.
Slowly peel up the transfer paper, making sure that the vinyl is sticking to it.
Place the vinyl design on the transfer tape where you would like it, and press down.
Remove the transfer tape.

Now you have a gorgeous nautical marbled notebook! I made four different books and plan on making many more.

My daughter has one at school and she told me that her friends all want one.
One of the boys in her class even asked if the Cricut machine can cut real fishing hooks. 🙂

Be sure to leave a comment if you try dressing up a plain old notebook with a DIY notebook cover!
Other Favorite Cricut Projects-
Happy crafting!
![]()
Leave a Reply