
Learn how to make beautiful marbled eggs for Easter in just a few steps! These eggs will last for many years and make stunning decorations.
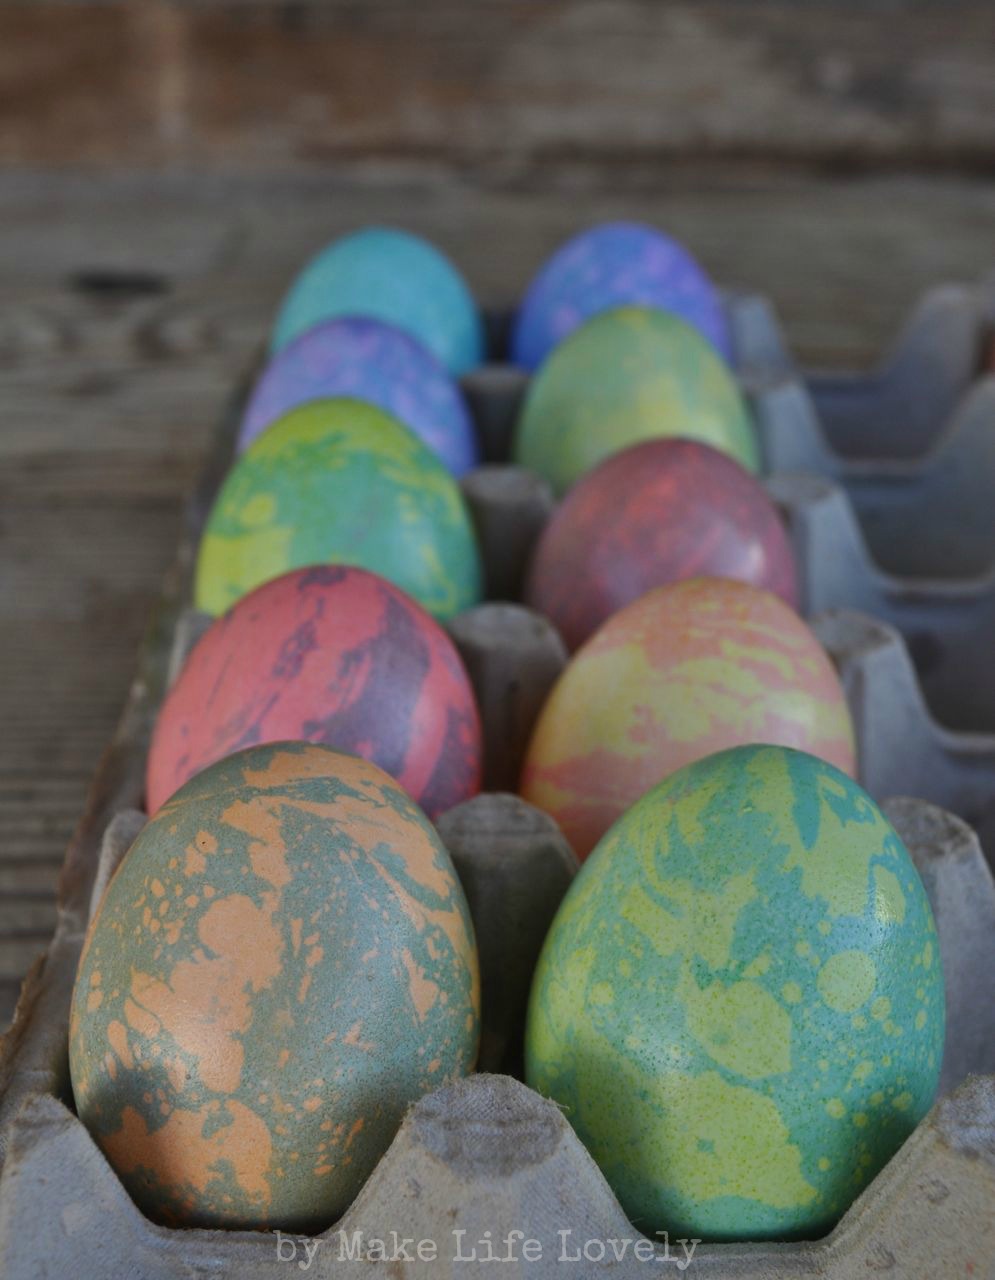
I’ve always loved the look of a marble egg- the pretty swirls of color that are so delicate and unique.

No two eggs ever look alike!

Each egg has its’ own unique marbled pattern and mixture of colors.
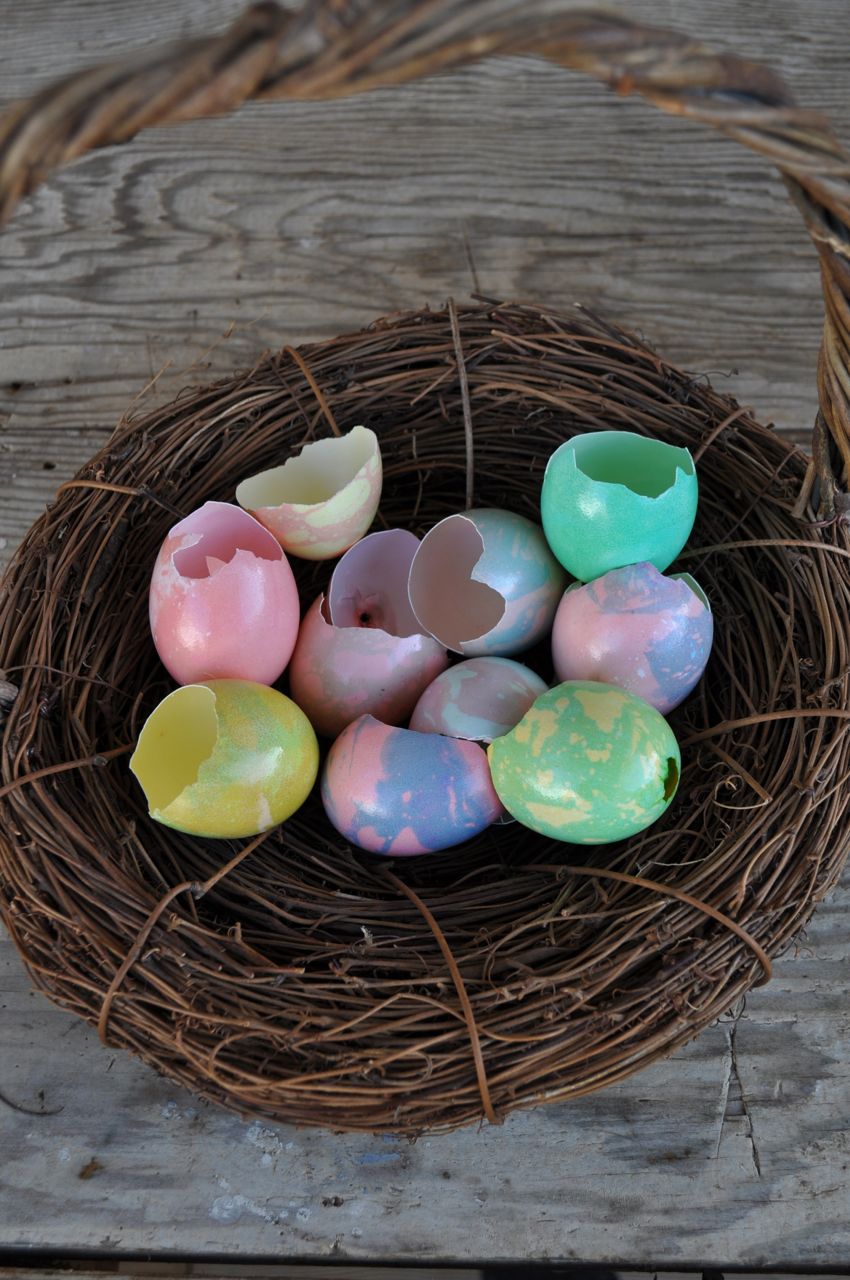
I even made egg candles out of some of mine!
When I saw Martha’s marbled eggs in her magazine years ago, it was instant love.

I quickly got to work and made a ton of my own marble eggs!
My little marble Easter eggs have made an appearance every spring since then, even in our favorite braided Easter bread!
Marbled Eggs DIY
You won’t believe how easy it is to create your own set of pretty marbled eggs that you can display from year to year.
Although these beauties look difficult, they’re actually quite easy to make.
It’s just one quick step beyond the usual method of dying Easter eggs!
Dying eggs in cabbage and pretty gold leaf Easter eggs are two more of our favorite ways to decorate eggs.
Supplies to Make Marble Eggs
Eggs
You can use whole or blown out eggs. I prefer blown eggs so they can be kept and reused from year to year.
Coloring
You can use for coloring or egg die tablets from egg dying kits.
White Vinegar
You’ll just need basic white vinegar that you probably have at home.
Oil
I used olive oil, but another type of oil would probably work too.
Blowing Out the Eggs
I blew out the inside of my eggs because I wanted to keep my marble eggs for many years.
If you don’t want care about keeping the eggs long term (or don’t want to hassle with this step), then move on to the next step!

Use something thin and sharp to poke a hole in the top and bottom of each egg.
Make sure that the hole in the bottom of the egg is a little bit bigger.
This will ensure that so that the yolk can fit through the hole.
A small scrapbooking tool worked perfectly for me, but a small knife or scissors would also work.
Wiggle a long skinny tool inside the egg to break up the yolk.
You can use anything skinny and long, like a paperclip that is pulled straight.
I used a baby aspirator to push the yolks and whites out the bottom of each egg.
Be sure not to squeeze too hard, or the pressure can crack the whole egg.
Don’t ask me how I know this…
Also, don’t cut the egg like in the last photo- that was for our eggshell geodes we made!
Dying the Base Color of the Eggs
First, you will dye your eggs just like you normally would.
Use any colors that you like, but lighter pastel colors look best for the base coat.
To make the dye, add 3 Tbsp. white vinegar to 1 cup of water.
Next, add about 20 drops of food coloring (or one egg dye tablet), then stir.
I dyed my eggs inside of mugs, one mug for each color.
Because my eggs were hollow, they wanted to float.
I used a spoon to hold them down in the dye for the short time it took to color them.
Remove eggs when they are your desired color, and let dry.
Creating the Marble Bath
Now it’s time to make up another dye bath, but this one needs to be in a larger, shallow pan.
An 8″ x 8″ baking dish (or similar dish) works perfectly!
Add 3 cups warm water, 1 Tbsp. of white vinegar, and 20 drops of food coloring to the dish, then stir.
Add 1 Tbsp. of oil to the mixture, then mix it around with a fork.
The goal is to bread up the oil and separate it into long stripes and dots on the surface.
How to Make the Marbled Eggs
Place a colored egg into the mixture, then quickly roll it all around using a fork.
Take the egg out when you like the marbled design.
Some of the eggs didn’tt turn well with the fork, so I used my fingers.
Fingers worked great, but left me with dyed fingernails that were not pretty!
Gloves would be smart to wear for this part. 😉
Carefully dry with a paper towel, then let dry thoroughly.

Aren’t they gorgous?!
Can you believe how easy these marble Easter eggs are to make?
Finishing the Marble Easter Eggs
If you want your eggs to have a high gloss shine and more durability, then spray them with Krylon Triple-Thick Crystal Clear Glaze.
I did this with my first set of eggs, but ran out of time to do it with my second set.

I hope you give these gorgeous marbled eggs a try!
They are so beautiful, and look so fancy and much harder too make than they really are!

You an also use some of the eggs you bought to make grow crystals and grow a geode in an egg!
Happy marbling!
![]()
This article was updated in March 2025 and was originally posted in March 2013.
Anonymous says
Cute…but die…is spelled ‘dye’ lets hope you aren’t killing your eggs with dye!
Laura @ Make Life Lovely says
Corrected the two times I misspelled it 🙂
abby hamilton says
i always spell it that way to die instead of dye lol everybody corrects me too
I love this tutorial nice job thanks for sharing love your posts and the site.
Laura @ Make Life Lovely says
Thank you so much, Abby! We all make mistakes here and there, right?! 😉 Thanks for your kind words!
Kelley Clarke says
If you boil your legs first, then dye them, can you still eat the boiled egg?