
Make gorgeous chocolate Easter eggs that are surprisingly simple to make. Customize these pretty egg-shaped chocolates in different colors to match your Easter celebration!
With just a few simple ingredients and a few minutes, you can make pretty Easter chocolate eggs that will impress everyone!

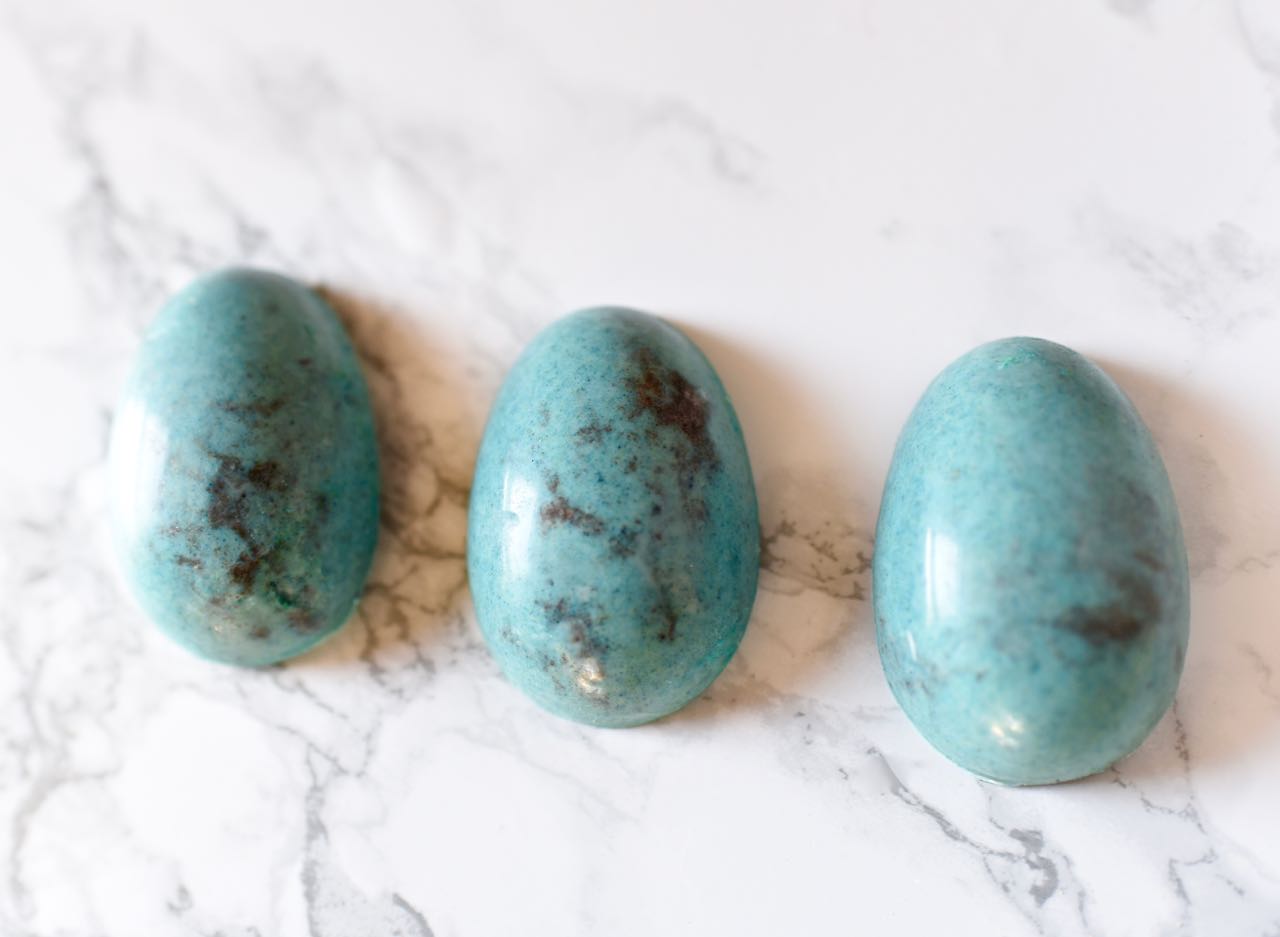
I customized my edible eggs a beautiful robin egg blue color with brown flecks in it.
Next I added edible gold, which took these once humble eggs over the top!

This post contains Amazon affiliate links for your convenience. I make a very small percentage if you make a purchase at no extra cost to you. Thank you!
How to Make Chocolate Easter Eggs
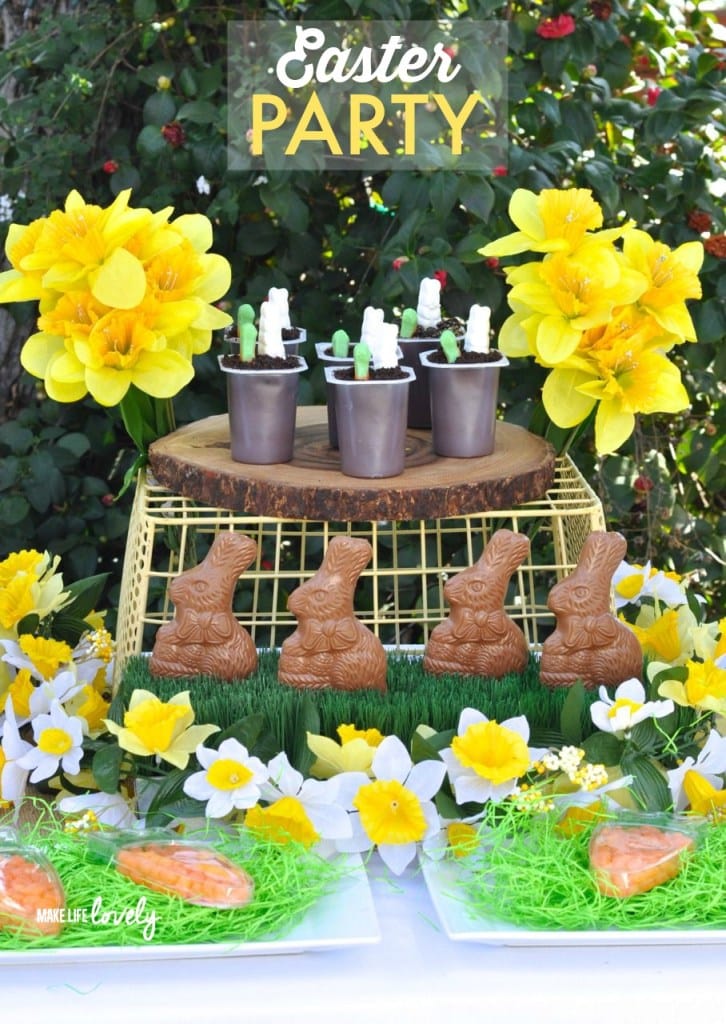
These eggs will be the shining star of your Easter candy table and Easter celebrations!
Supplies
- White almond bark
 or white chocolate
 - Gel food coloring (I used blue and yellow to create my robin egg blue color)
- Oreo Cookies
- Easter egg chocolate candy mold (I buy my Easter egg molds on Amazon)
- Gold luster dust (optional)
- Lemon extract or vodka (optional)
- Chocolate melting pot (optional)
Crumble the Cookies
Crumble up some Oreo cookies in a Ziploc bag, then place a small handful in each egg mold.
Feel free to use your hands or a rolling pin to crumble the cookies inside the bag.
Melt the Chocolate
Melt the white chocolate almond bark or white chocolate according to the package directions.
I always use my electric Wilton Chocolate melting pot![]() because it keeps the chocolate at a consistent warm temperature.
because it keeps the chocolate at a consistent warm temperature.
The melter keeps the chocolate nice and warm, which means I can work with it for long periods of time.
My melting pot has been worth every penny!
PS It’s also perfect for making chocolate-covered strawberries!
Add Some Color
Decide which color you would like your Easter egg chocolate to be.
Add some gel food coloring to create that color.
Tip: DO NOT use liquid food coloring. It will make the chocolate seize up and your chocolate won’t be usable.
I used blue coloring, then added a small amount of yellow to get my color.
Don’t be afraid to experiment and create your own custom color!

Mold the Chocolate
Use a spoon to add the melted chocolate to each egg mold.
Use a toothpick or utensil to move the Oreo cookies around so that they look even on the outside of the egg so you can see them.
To check how the top of each egg will look, simply lift up the clear egg mold and look at the base.
If you need to add more Oreos, just add more.
If you have too many Oreos in one spot, then move them around with the toothpick until your chocolate Easter egg candy looks just right.

Once you like them, tap the chocolate egg mold onto the counter a few times to release any air bubbles and smooth out the tops of the eggs.
Put the chocolate Easter eggs in the freezer.
Make sure they are flat, then leave them for a few minutes until they are cooled and no longer liquid.
Remove from the freezer.
Assemble Each Chocolate Easter Egg
You can use just the egg halves if you like, but these eggs look much better when you put them together to create a whole round egg.
To make one whole Easter chocolate egg, make sure the top of the hollow portion of each egg half is smooth.
If it’s not smooth and even, run a knife along the flat top to smooth it out.
Place a little bit of melted chocolate along the flat top of one egg half, then press the other egg half on top of it firmly.
Hold in place for a few seconds to let the chocolate cool.
If melted chocolate comes out the side, no worries!
Just rub a finger along it to smooth it out to make it nice and even.
Admire Your Eggs
Your chocolate Easter egg should be all speckled and beautiful!
If you want your egg to look natural, then you can stop here.
If you want to take your chocolate eggs over the top, then keep reading to see how to add some gold!

How to Add Gold to Your Chocolate Easter Eggs
Now that we’ve made the eggs, let’s put on the finishing touches.
You’ll need a food paintbrush or a brand new unused paintbrush to create the shiny gold flecks on your Easter chocolate eggs.
Mix up the Gold
Sprinkle some gold luster dust in a small bowl, then add a small amount of lemon extract or vodka to the gold and mix.
I personally use lemon extract, since I don’t drink alcohol.
Your gold mixture should have a nice liquid consistency.
If it doesn’t, then add more lust dust or more extract.

Swish and Flick
Place a chocolate egg on some foil or wax paper to protect your work surface.
Dip the paintbrush in the gold mixture, then tap the paintbrush with your other hand to get gold speckles on your chocolate egg.
Repeat until your egg looks how you want it, then let dry.
Now repeat this step for bottom half.
Be careful touching the gold since it can smear a bit.

Aren’t these Easter and chocolate eggs AMAZING?!
They are so smooth and perfect.
The chocolate Easter egg mold does most of the work for you!

How to Use These Pretty Chocolate Easter Eggs-
- Place them on the Easter table in an edible nest
- Add to the top of a cake or dessert
- Use as a pretty edible place setting
- Wrap them up as party favors
- Enjoy them after your Easter egg hunt
- Leave them out as a decoration

Now that you know how to make chocolate Easter eggs, what colors will you try?

Christ Centered Easter Printables


Easter Nest Place Setting and Favor DIY
![]()
This article was updated in March 2025 and was originally posted in March 2018.
Leave a Reply