
I’ve been keeping a big secret from you and today is the day I can FINALLY share! Cricut flew me out to their headquarters in Utah last month to be one of the first to learn all about their revolutionary new product… Infusible Ink!!
I haven’t been allowed to tell a soul about this until today, so you can imagine how excited I am to finally get to talk about it!
Cricut Infusible Ink is a serious game changer. Get ready to be blown away!!

This is a sponsored conversation written by me on behalf of Cricut. The opinions and text are all mine.
Everything You NEED to Know About Cricut Infusible Ink
Today I’m going to share everything you NEED to know about Cricut Infusible Ink and exactly how to use it.
I’ll share how to make two different Infusible Ink projects with step-by-step photos and instructions.
By the end of this post you’ll be ready to create your own amazing projects with this fabulous product!
This post contains affiliate links, which means I make a small percentage of purchases made at no extra cost to you.

What is Infusible Ink?
Cricut Infusible Ink is a revolutionary new line of DIY products that allow you to create professional personalized transfers onto t-shirts, tote bags, coasters, and more!
Although this might sound like vinyl, heat transfer, htv, or iron-on, Infusible Ink is VERY different.
Instead of the artwork sitting on top of a product, like with vinyl or iron-on, with Infusible Ink the artwork becomes one with the product. Trust me, this makes a big difference!
This means you get vibrant colors that don’t peel, flake, wrinkle, or crack. The vibrant colors last wash after wash without fading!
You can pull on a shirt with Infusible Ink and it stretches along with the fabric because it has infused into the fabric.
It’s absolutely amazing and gives you professional results that you can make yourself!
What do I need to get started with Infusible Ink?
To create with Cricut Infusible Ink, you’ll need a few supplies:

Cricut Infusible Ink Transfer Sheets
These Transfer Sheets look similar to Cricut vinyl or iron-on. The pre-inked sheets come in a roll and are available in solid colors or different patterned designs.
Although they might look similar, you’ll notice that the Infusible Ink Transfer Sheets feel like more like a thick paper.
The patterns and colors on the Transfer Sheets look light and not very bright- that’s normal!
Once heated with an EasyPress 2, the colors come to life and become vibrant and rich on your project, just like magic!
Cricut Infusible Ink Markers and Pens
You can also use Infusible Ink Markers and Pens to draw with your Cricut machine OR by hand.
Just put the markers in your machine to draw an image from Design Space, upload your own image to have your machine draw it, or even draw your own design by hand!
Draw on laser copy paper and you can transfer your design onto a compatible Infusible Ink blank with a Cricut EasyPress 2 or heat press. I love this versatile product!
Cricut Infusible Ink Compatible Blanks
To use Infusible Ink, you will need a blank to put your design on. Cricut has come out with a brand new line of blanks that work perfectly with the new products.
Just look for the Infusible Ink logo on compatible products.
- Men’s T-Shirt Blank
- Women’s T-Shirt Blank
- Baby Bodysuit Blank
- Tote Bag Blank
- Coaster Blanks (square cork coasters and ceramic round coasters)
Cricut told us that there will be more base material choices to choose from in the future too. Yay!
I’ve already got a list of blanks I’m hoping for. 😉
 Cricut Maker
You’ll need a Cricut machine to cut the Infusible Ink Transfer Sheets and to draw using the Infusible Ink Markers and Pens.
I use my Cricut Maker because it’s such an incredibly versatile machine and can cut and score SO many different materials. You can also use a Cricut Explore machine.
The Maker can beautifully cut through fabric, leather, paper, and even balsa and basswood!
Find out the 7 Reasons You Need a Cricut Maker In Your Life and learn more about some of the machine’s fabulous features.

Cricut EasyPress 2
While you can use a heat press, it’s highly recommended that you use an EasyPress 2 with Cricut’s Infusible Ink. An EasyPress 2 has an even heat plate, goes up to 400 degrees, and is even portable. These features make it the perfect accompaniment!
I have one in all three sizes that I use every week and LOVE. They are very simple and straightforward to use and they all fit perfectly on one of my shelves.
How do I use Cricut Infusible Ink?
Glad you asked! Here are two fabulous projects I created using Infusible Ink Transfer Sheets and two different blanks- a t-shirt and square coasters.

Infusible Ink T-shirt Tutorial
Learn how to personalize a t-shirt that’s perfect for summer!

Supplies:
- Cricut Maker or Cricut Explore cutting machine
- Standard Grip Mat
- Cricut EasyPress 2 or Cricut EasyPress
- Cricut EasyPress Mat
- Cricut t-shirt blank
- Infusible Ink Transfer Sheet
- 2 Sheets of butcher paper
- White cardstock (80 lb)
- Lint roller
- Scissors
Directions:

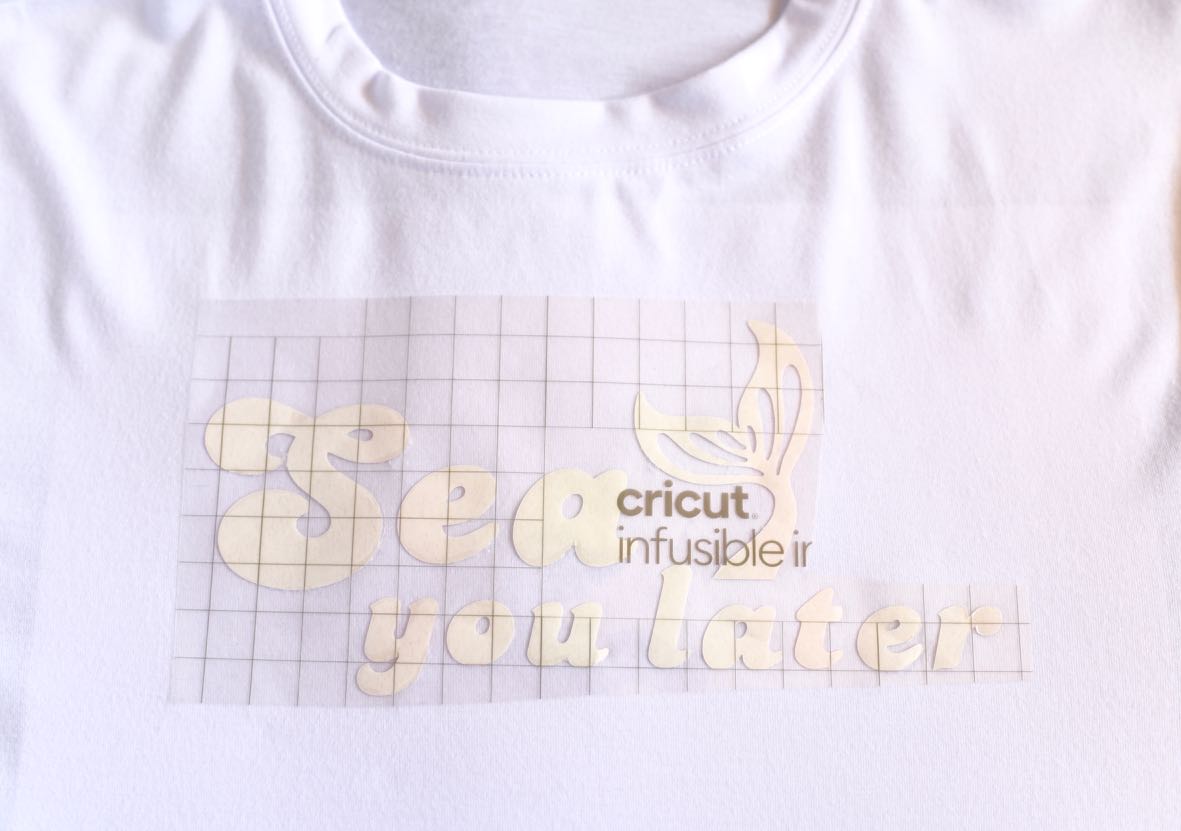
Step 1. Place an Infusible Ink Transfer Sheet onto a green Standard Grip mat with the colored side up and the liner side down.

Step 2. Head over to Cricut Design Space to get the free cut file I created. It says “Sea you later” with a mermaid tail, perfect for summer and lazy beach days.
Resize the design if needed, then follow the prompts to cut. Be sure to mirror the design!
Select “Browse all materials,” then “Infusible Ink Transfer Sheet.” If using a Cricut Explore machine, turn the dial to “Custom” first.

Load the mat and blade into the machine, then press the flashing “Go” button to cut.

Step 3. Remove the cut Infusible Ink Transfer Sheet from the mat. Use scissors to cut around the cut design and save the rest of the transfer sheet for another project.
Make sure that there is no moisture on your hands when handling Infusible Ink Transfer Sheets. This can cause problems with the ink.
Gently roll the cut design so the cut pieces are easier to see and they start to separate. Remove the negative pieces from around your design with your fingers, so that just the design is left on the liner.
You’ll love that it’s much easier to weed Infusible Ink Transfer Sheets than it is to weed vinyl and iron-on. The transfer sheets are much thicker and peel up very easily!
If you need to, trim the liner so that it isn’t wider than the EasyPress heat plate.

Step 4. Important- Use a lint roller to remove tiny debris and fibers from the shirt. This may seem unnecessary, but don’t skip this! Even very small debris can create imperfections in the transfer, and we definitely don’t want that.

Cover the shirt with butcher paper (that’s larger than the EasyPress heat plate). Butcher paper comes in each package of Infusible Ink Transfer Sheets.

Step 5. Important- Preheat the area where the transfer will be going to remove excess moisture and wrinkles. Press at 385 degrees for 15 seconds for this project.
Remove the butcher paper and let the shirt cool completely.
Step 6. Place the cut ink transfer design sheet on the shirt with the design facing down and the clear liner on top.
Cover with butcher paper that is larger than the EasyPress heat plate. Set the EasyPress 2 for 40 seconds, then place the EasyPress over the design for the 40 seconds at 385 degrees.
Don’t move your hands during this time! You want everything to be nice and still so the transfer doesn’t move at all. When the EasyPress beeps, slowly lift the EasyPress 2 up without moving the stack or the butcher paper.

Let the project cool completely. Once cool, you can slowly remove the butcher paper then the liner with the design.
Usually the design will come right up, but if it doesn’t, be sure to remove it with tweezers and not your fingers. You don’t want to ruin your shirt!

Lifting the liner up is definitely the most satisfying part! If you’re anything like me, you’ll be amazed at your finished shirt and completely shocked that you made it yourself at home.

My shirt looks like I had it printed by a pro or like I bought it. Seriously, no one will guess that you made it yourself!
See how perfectly the ink blends into the t-shirt? It doesn’t sit on top like it does with iron-on.
The ink infuses into the shirt to create a completely smooth surface. I’m so impressed with it!
My daughter has already claimed this shirt, so I guess I’m making another one for me. I’ll call that a win!
This would look really cute on baby or toddler onesies too.

T-Shirt Care. Machine wash inside out with cold water and mild detergent. Tumble dry low or line dry.
Don’t use fabric softener, dryer sheets, or bleach.

Infusible Ink Coaster Tutorial
Protect your furniture while sipping in style this summer with these sweet square coasters made with Infusible Ink.
Supplies:
- Cricut Maker or Cricut Explore cutting machine
- Standard Grip Mat
- Cricut EasyPress 2 or Cricut EasyPress
- Cricut EasyPress Mat
- Cricut Square Coaster Blank
- Infusible Ink Transfer Sheet
- Butcher paper
- White cardstock (80 lb)
- Lint-free cloth
- Heat Resistant Tape
- Scissors
Step 1. Place an Infusible Ink Transfer Sheet onto a green Standard Grip mat with the colored side up and the liner side down.

Step 2. Head over to Design Space to get the free cut file I created. There are four different ocean and nautical themed designs I made for you. You can also design your own if you’d like!
Resize the design if needed, then follow the prompts to cut. Be sure to mirror the design!

Select “Browse all materials,” then “Infusible Ink Transfer Sheet.” If using a Cricut Explore machine, turn the dial to “Custom” first.
Load the mat and blade into the machine, then press the flashing “Go” button to cut.

Step 3. Remove the cut Transfer Sheet from the mat. Use scissors to cut around the cut design and save the rest of the transfer sheet for another project.
Gently roll the cut design so the cut pieces are easier to see and they start to separate. Remove the negative pieces from around your design with your fingers, so that just the design is left on the liner.
If you need to, trim the liner so that it isn’t wider than the EasyPress heat plate.

Step 4. Set your EasyPress 2 to 400 degrees and 60 seconds. Use a lint-free cloth to remove any tiny debris from the coaster.

Cover the EasyPress Mat with white cardstock to protect it. Place your design face down on the coaster with the liner side up. I like to use heat resistant tape to tape my design down so it stays in place. Place the coaster on the cardstock and mat.
Cover the coaster with butcher paper (that is included in each Infusible Ink Transfer Sheets box).
Step 5. Press at 400 degrees for 60 seconds with no pressure with the EasyPress 2. When the machine beeps, slowly lift it off the coaster. Try not to move the butcher paper or anything else underneath it.
Warning- The coaster will be very hot! Resist the urge to touch and let it cool completely before touching. Once cool, slowly remove the butcher paper, tape, and design from the coaster.

Voila! Instant coaster cuteness!

Don’t you just love how the ink infused right into the coaster, making it look like it was professionally printed on there? The results are absolutely incredible and very high quality!
Coaster Care. Wash coasters with warm water and glass cleaner when necessary. Don’t use scrubbing pads, steel wool, or colored cleaner on them.
So what do you think? Are you ready to make your own project with Infusible Ink?
I’m already brainstorming LOTS of new project ideas and I’m so excited about all of the possibilities with these new products!
You can find the new Infusible Ink products at Michaels, Jo-Ann, and on Amazon.
Be sure to pin for later!

How to Make Stickers Using Cricut Print Then Cut

How to Make Giant Crayons with a Cricut Machine
 7 Reasons You Need a Cricut Maker in Your Life

The Foolproof Way to Make DIY Wood Signs with Cricut


I’m off to play with the Infusible Ink Markers now.
I’ll be posting a tutorial for how to use them soon so stay tuned!
![]()
This article was updated in May 2020 and was originally posted in June 2019.