Make AMAZING fake ice cream that looks SO real and that lasts for years! You won’t believe how simple it is to make fake ice cream sundaes, milkshakes, and more.
Are you looking for the perfect ice cream that looks real, never melts or drips, and can be reused year after year?

Then you are going to LOVE today’s fun DIY- fake ice cream!
If you love ice cream, then you definitely need this tutorial in your life, especially when you see how easy it is.

I made 18 different faux ice creams for a 50’s sock hop party fundraiser for our church.
I also made this giant ice cream cone that’s almost 6 feet tall for under $20!
They were such a hit so I wanted to share how to make them with you!
Why Make Fake Ice Cream?
There are so many different ways to use this faux ice cream!
- Ice cream party decorations (wish I had these for our ice cream party!)
- 50’s party
- Sock hop (that’s what I made ours for)
- For display in a shop or restaurant
- Advertising
- Summertime displays
- April Fool’s Day trick
- Home or room decor
- Fun gift idea for anyone that loves desserts!
This post contains Amazon affiliate links, which means I make a small percentage of any purchase made at no extra cost to you.

Supplies You’ll Need:

Lightweight spackling
This is the main ingredient you’ll use to create the ice cream concoction.
I used Dap Patch N Paint Lightweight Spackling that I bought at Home Depot.
Make sure you buy the lightweight spackling, not the regular.
You don’t want the kind that is pink then turns white as it dries.
Flour
Just regular flour from the kitchen cupboard works perfectly.
Craft paint
You’ll need to have paint to match whatever ice cream colors you’d like to make, plus brown and black for the fake chocolate syrup.
I used yellow and white paint for the vanilla, brown and black for the chocolate, and a bright pink for the strawberry.
Ice cream dishes, bowls, cups
You can use whatever you’d like to hold the ice cream blend, but clear glass containers look the best.
Try to use dishes that you would really serve ice cream in to make it look more realistic.
I found most of my dishes from the thrift store for cheap, but I also found some boxed glass sets of dishes at Walmart for a good deal too!
Mod Podge (Gloss)
You’ll need Mod Podge to make the chocolate syrup, so be sure to get the glossy finish so it looks shiny like real chocolate syrup.
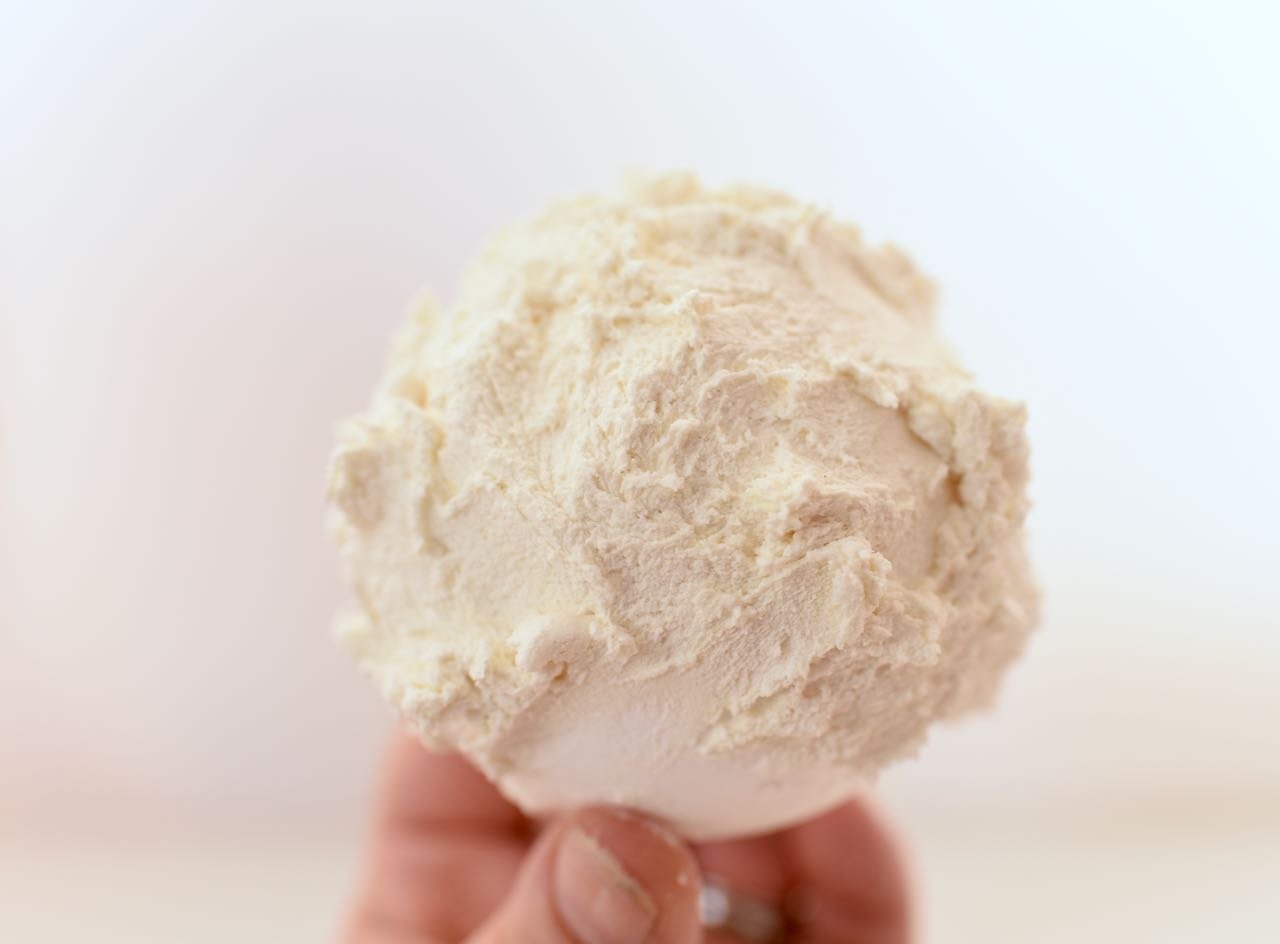
Ice cream scoop with trigger
To make the ice cream scoops look as real as possible, you’ll want to use an ice cream scoop with a trigger to release each scoop.
The mixture doesn’t come off of a regular scoop very easily, so a scoop with a trigger is essential.
As with the other dishes, make sure you don’t use the scoop for food after using it for this project.
Cheap large bowl
You’ll need a bowl to mix up the ingredients, and you definitely need one that is dedicated to crafting, not for food use.
I picked up a cheap plastic dollar store container that worked great.
Wood spoon or spatula
Just like with the bowl, you’ll need a wood spoon or spatula that won’t be used for food anymore- strictly for crafting!
Large frosting tip & piping bag (optional)
If you want to add fake whipped cream to the top of your ice cream, then you’ll need a large frosting tip and a piping bag.
I used a #1M open star tip and a disposable plastic piping bag.
You can find these on Amazon, at craft stores, and at any baking supply store.
Corn cob bedding (optional)
You don’t want to use real nuts to top your ice cream because it can attract unwanted pests.
Instead, use natural corn cob bedding (use for hamsters and other small animals).
You can find it on Amazon and at pet stores, and it looks JUST like chopped peanuts!
Fake sprinkles (optional)
Fake sprinkles are optional, but oh so fun!
They add a lot of color to your ice cream, and really, who doesn’t love them?
These ones are what I bought because they don’t attract ants or bugs like the real deal does.
Fake cherries (optional)
Fake cherries really are the cherry on top of a fake ice cream sundae!
After lots of hunting, I bought these cherries because they looked the most realistic.
Foam balls (optional)
I used some foam balls to fill up my tall glasses so I could use less spackle ice cream and save some money. 🙂
How to Make Fake Ice Cream VIDEO TUTORIALS
Be sure to watch the videos below that I made that show exactly how to make and display fake ice cream!
The videos go into a lot of detail so there are THREE step-by-step tutorials to watch.
Video Tutorial- Part 1
Video Tutorial- Part 2
Video Tutorial- Part 3
After you’ve watched the videos, read through the step-by-step instructions to get all the details.
Making the Ice Cream
Now it’s time to get started!
Adding the Ingredients
Use a wood spoon or spatula to add some lightweight spackle to your bowl.
How much spackle you use will be determined by how much fake ice cream you need to make.
If you are making just a few scoops, you won’t need as much.
Add some flour to the spackle, and stir, stir, stir.
The spackle by itself is too wet to look like real ice cream, so when we mix flour into it it becomes more substantial and gives it a better texture.
There is no specific amount or recipe for this- you want your fake ice cream to have the right consistency so that it looks real and has that ice cream texture.
If it looks too wet, add more flour.
If it’s too dry, add more spackle.
Adding the Paint
As you’re mixing, you can add in the paint color that you want your ice cream to be.

You can use one color per batch, or if you plan on using multiple colors you can split your mixture up into separate bowls for each scoop.
* The finished ice cream will look much paler than the color of paint you use, so go bolder with the paint color than you really need!
Once your paint is added, keep mixing until the color is completely blended into the ice cream blend.
Strawberry Ice Cream Color
For my strawberry ice cream color, I used a bright pink paint color.
Once it was mixed in, it was just the right shade of pink to look like strawberry ice cream.
Vanilla Ice Cream Color
For the vanilla ice cream, I added a little yellow and some white paint to make it look creamier than just the stark white color of the spackle.
Chocolate Ice Cream Color
For the chocolate ice cream, I used brown paint and a little black paint to darken it up a bit.
Filling the Ice Cream Dishes
Once you have your faux ice cream all mixed up with the color added, it’s time to dish!
I’ll share how I made each type of faux ice cream.
Fake Ice Cream Sundae (In a Glass)
I wanted my ice cream sundaes look as real and full as possible while using the least amount of the ice cream.
To do this, I came up with a few smart tricks!
First, I used a large popsicle stick (since my spatula was too big) to push the ice cream way down into the bottom of the glass.

Next, I smeared my ice cream mixture up the sides of the glass so that the whole thing was covered all the way up to the top.
I checked the outside of the glass to make sure I didn’t miss any spots and that everything looked nice and smooth.
To conserve my ice cream, I used the popsicle stick to smear the fake ice cream over 2/3 of a foam ball.

Then I plopped the ball right on top of the glass so that it looked like the perfect scoop of ice cream!
Yay for saving product and getting the perfect scoop shape!

Of course you could always just fill the whole thing with the ice cream blend (like I did at first).
I quickly realized, however, that I needed to be smart since I was making so many of these. 😉
Set it aside to dry for a bit before making and adding the chocolate syrup.
Fake Ice Cream Sundae (In Bowl)
To make this in a shallow glass dish, simply scoop the ice cream with the trigger ice cream scoop then place into the bowl.

You can keep the same colors or mix and match with different colors of scoops.
The choice is yours!
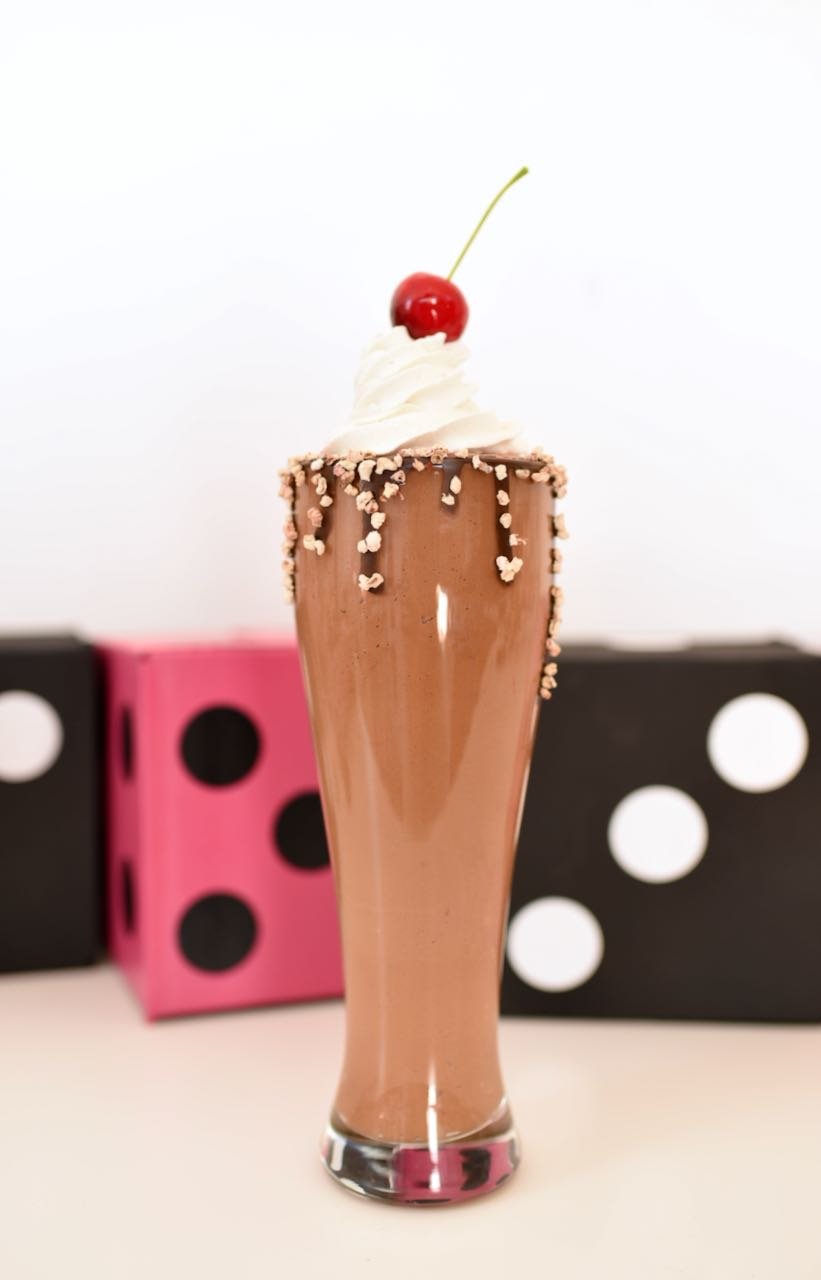
Fake Milkshake
To make the fake milkshakes, I used a large popsicle stick to press my ice cream mixture onto the bottom and sides of my glass milkshake cups.
This made them look nice and full without actually filling them up.

Next, I took some smaller foam balls that I had and placed them inside the glasses (below the rim), where they wouldn’t be seen.


Then I used my large popsicle stick to scoop more fake ice cream into the glass and create a smooth top.
I let mine dry for a while before adding the syrup, just to be safe.

Here are some of the ice cream bowls and glasses I made all filled up with the faux ice cream!
Keep reading to see how I added all the fun toppings to each one.
Making the Fake Chocolate Syrup
To make the syrup, I just mixed some gloss Mod Podge with brown and black paint until I got the dark brown color I wanted.

I used a plastic spoon to slowly drip my fake chocolate syrup/hot fudge over the top of the ice cream.
You can add as much or as little as you like.

I went with a medium amount, since I wanted enough for my toppings to “stick” to.
Feel free to let the fake syrup drip down the sides, or feel free to wipe the drips off the glass if you want a cleaner look.
I did both!
For my milkshakes, I used the plastic spoon to slowly drip little drops down the sides of my glass around the rim.

I love how this looked almost like a freakshake!
If you love freakshakes, you’l love our Star Wars freakshake, Finding Nemo freakshake, and Disney freakshake!
Let the fake chocolate drip down the sides and do it’s thing for a few minutes before sprinkling on the toppings.
Just don’t let it dry completely or the toppings won’t stick!
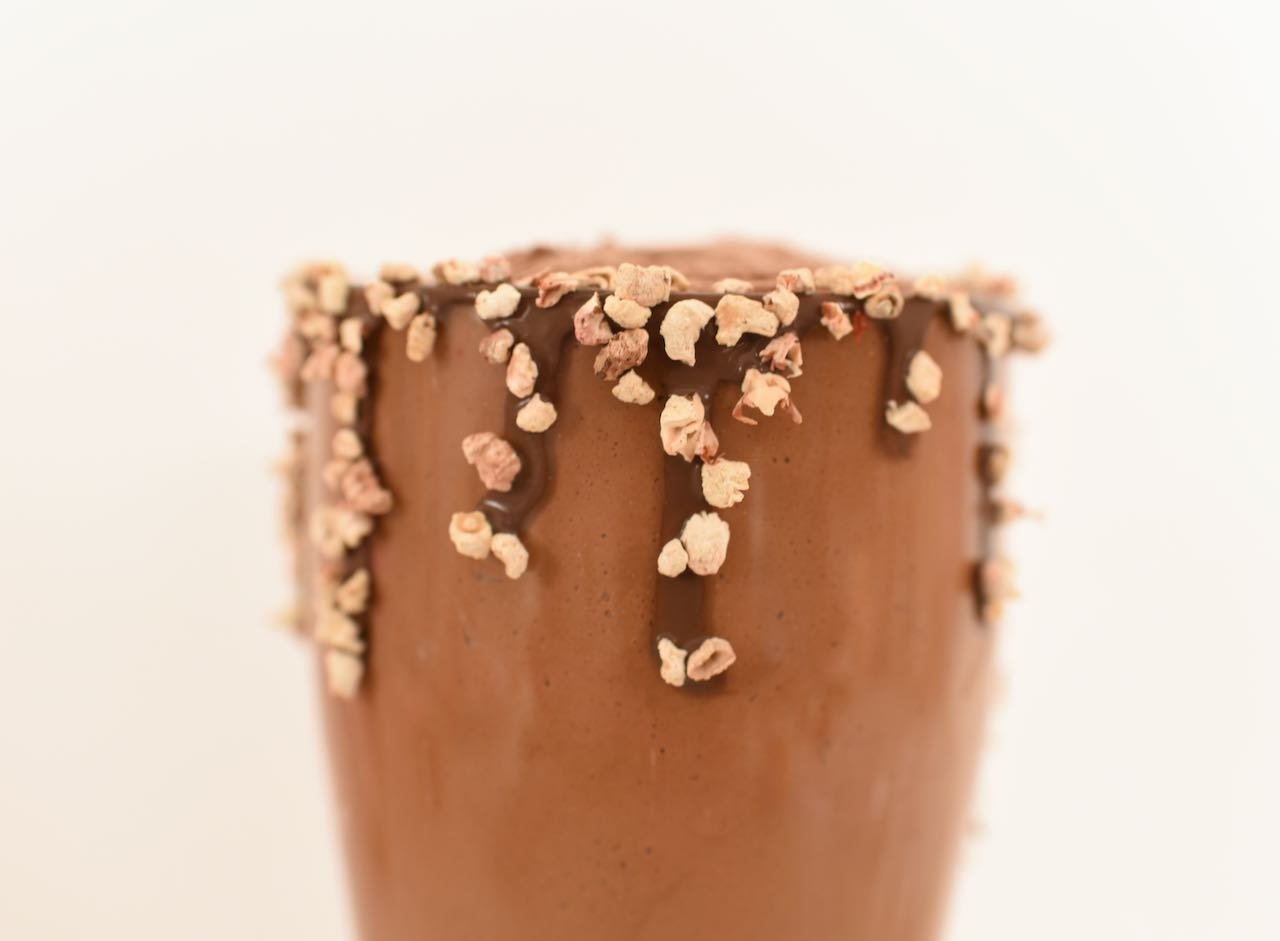
Adding the Toppings
Now for the fun part- adding the toppings!
This is where the ice cream really starts looking real!
I used my fingers to sprinkle fake nuts (corn cob bedding) and fake sprinkles over the fake chocolate sauce.
Because of the Mod Podge, the “nuts” and “sprinkles” stuck right to it!

I made sure to add the toppings all over the syrup to add more color and texture.
I let everything dry completely overnight before adding my faux whip cream.
How to Make Fake Whipped Cream
To take your ice cream to the next level, you’ll want to add some fake whipped cream to the top!
Surprisingly, this process isn’t very different than adding real whipped cream.
First, add more spackling to your bowl, then add some flour to thick it up, and stir until it’s the right consistency.
Cut a small slit into the point of a piping bag, then place a large open star frosting tip (I used #1M) down into the slit.
Fill the piping bag with the fake whipping cream, then close the top of the bag.

Pipe a swirl shape onto the top of your sundae or milkshake, just like you would if you were frosting a cupcake.

Once the whip cream looks like you want it, gently press a fake cherry into the top!
Once it dries, the cherry will be stuck in place.
Let everything dry completely until it is completely hard, which will take a day or two depending on the temperature.
How to Use Your Faux Ice Cream
There are so many different ways to use this fake ice cream!
These make wonderful decorations for almost any kind of party, but work especially well for an ice cream party of 50’s themed party.
It looks great in dessert displays or at an ice cream bar.
You can even display them in a room for fun home decor.
For more ice cream fun, you’ll love our easy donut ice cream sandwich, s’mores ice cream recipe, and Fruity Pebbles ice cream cone treats!
Enjoy!
![]()
Leave a Reply