Make a light up ghost wreath that looks just like the viral Pottery Barn ghost wreath with this easy and fun tutorial!
I’ve been obsessed with the Pottery Barn ghost wreath ever since I saw it on their website.
It features the cutest little cheesecloth ghosts that all light up and goes right along with the cheesecloth ghost trend.
Just like the mini light up ghosts I shared recently!
Pottery Barn Ghost Wreath
What’s not to love about this adorable wreath?
Nothing, except the $89.50 price tag!
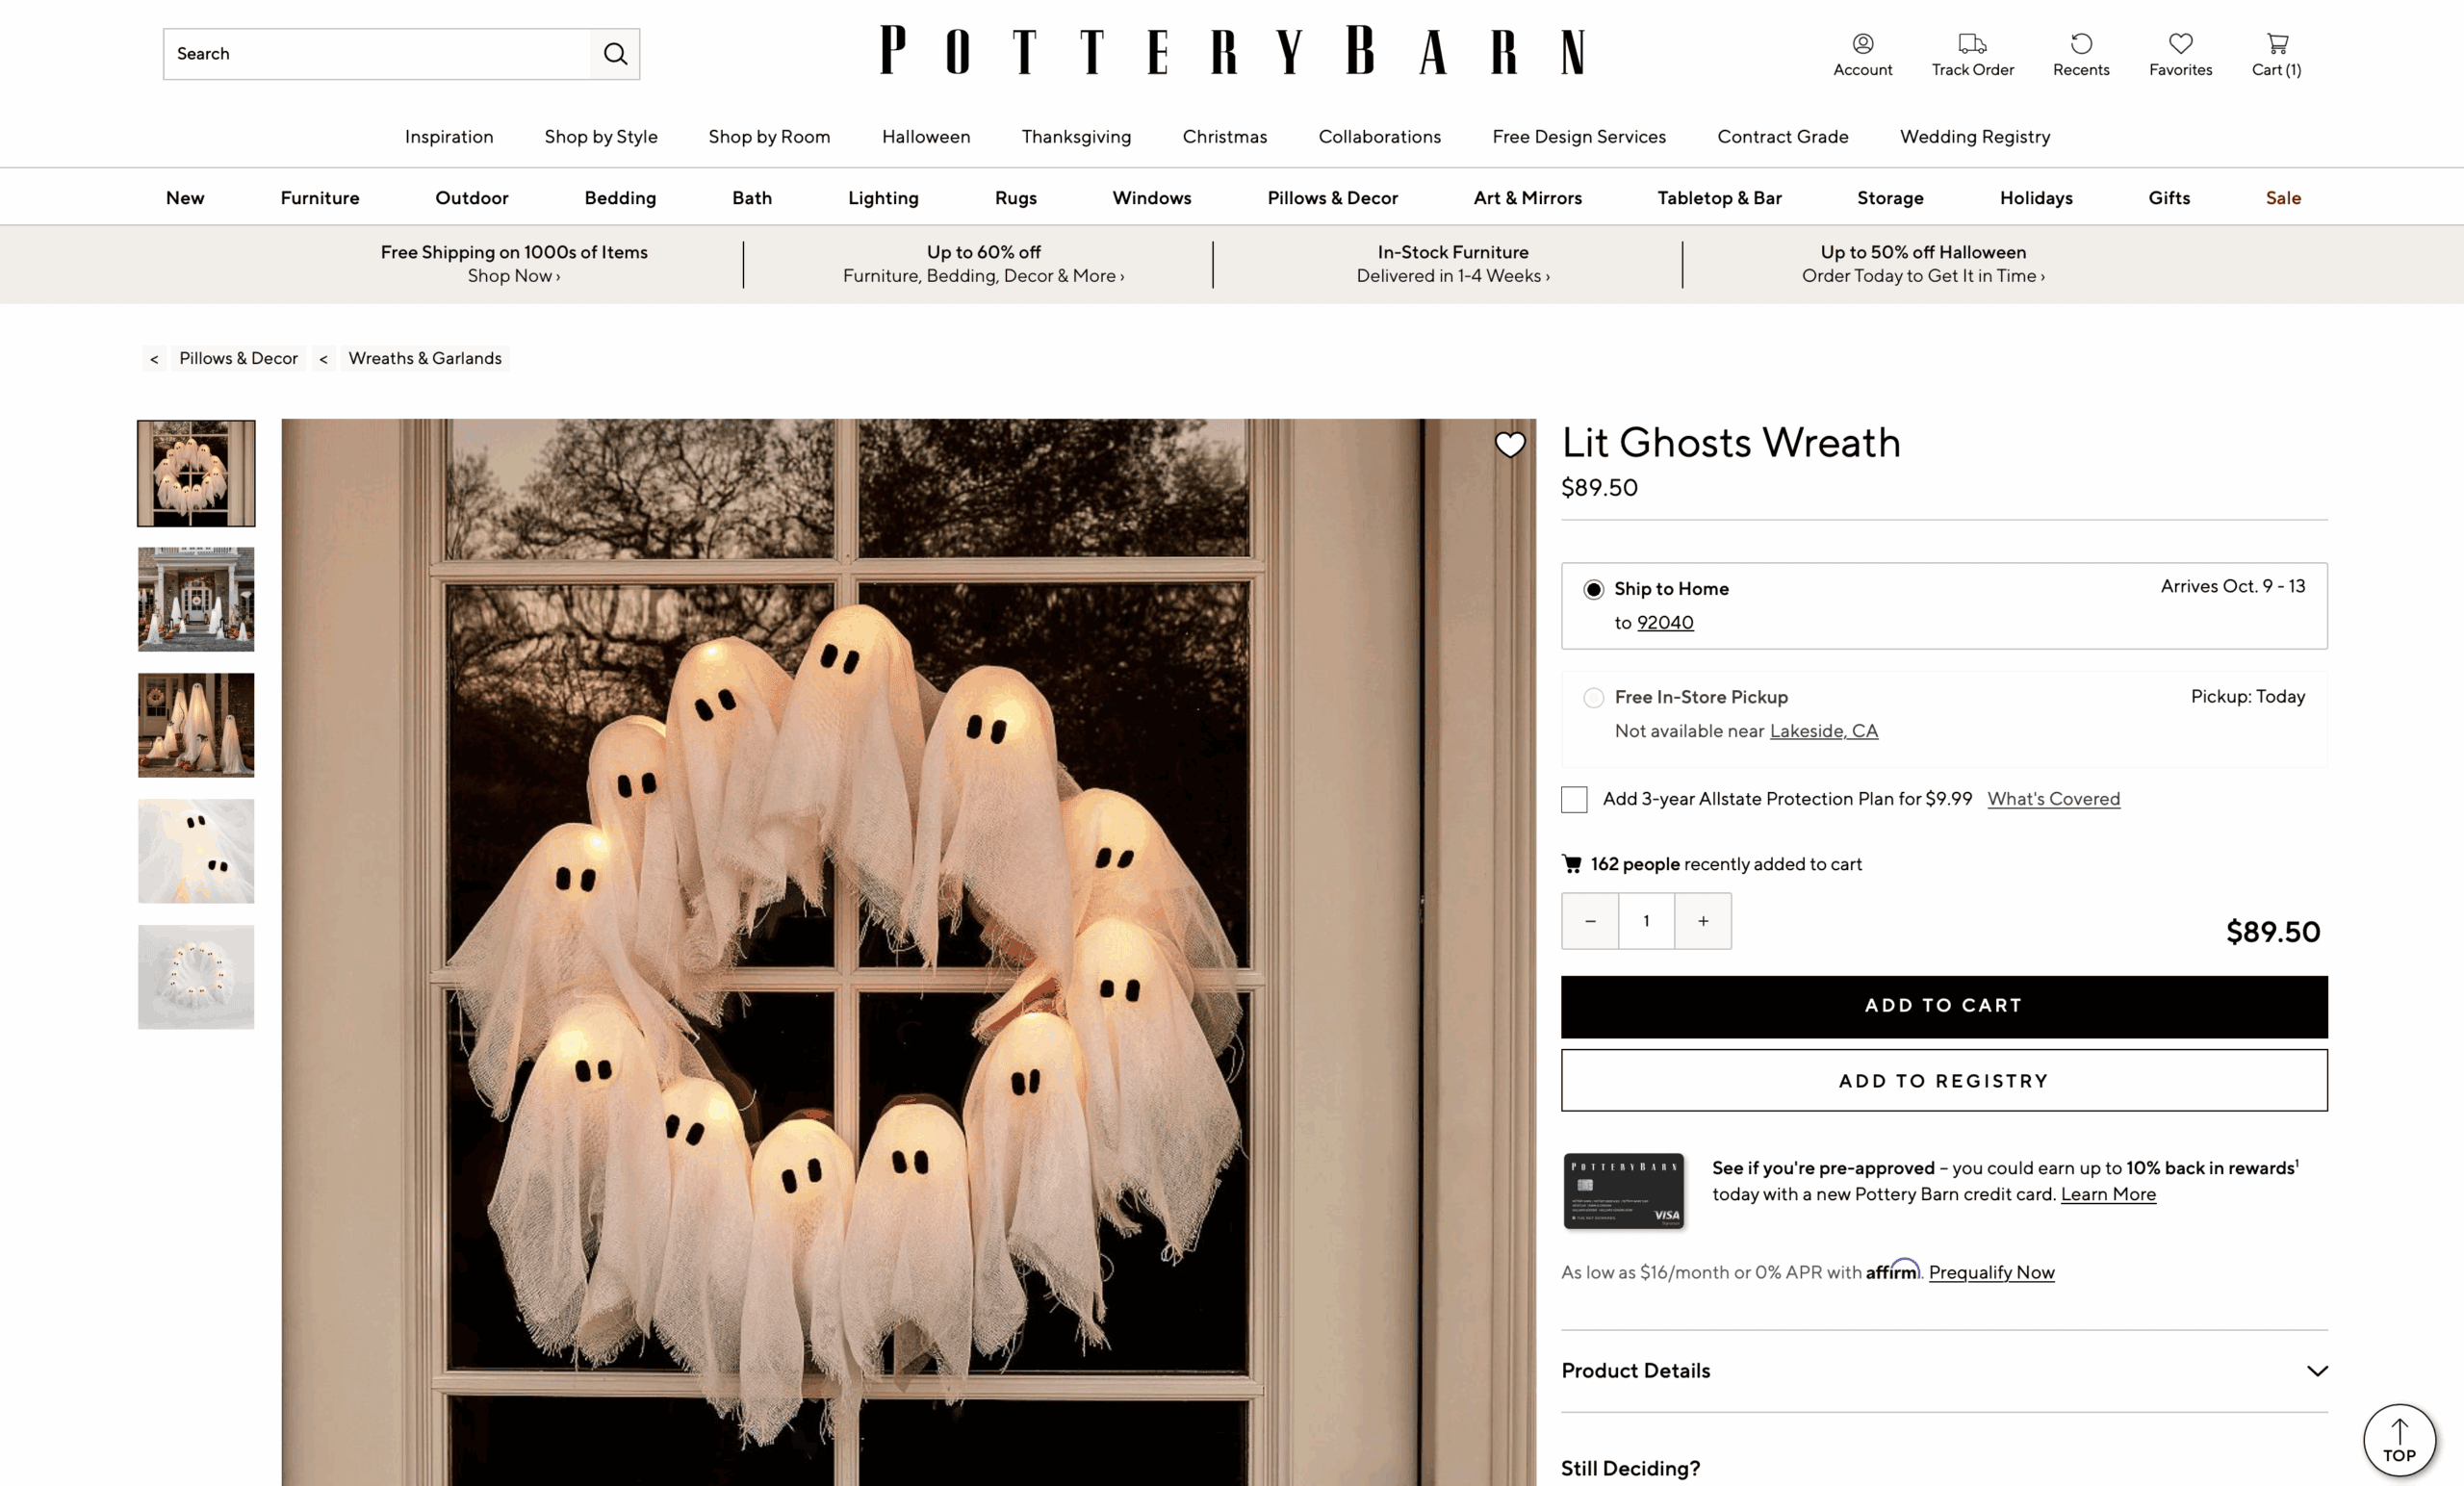
So of course I decided to make my own for much less.
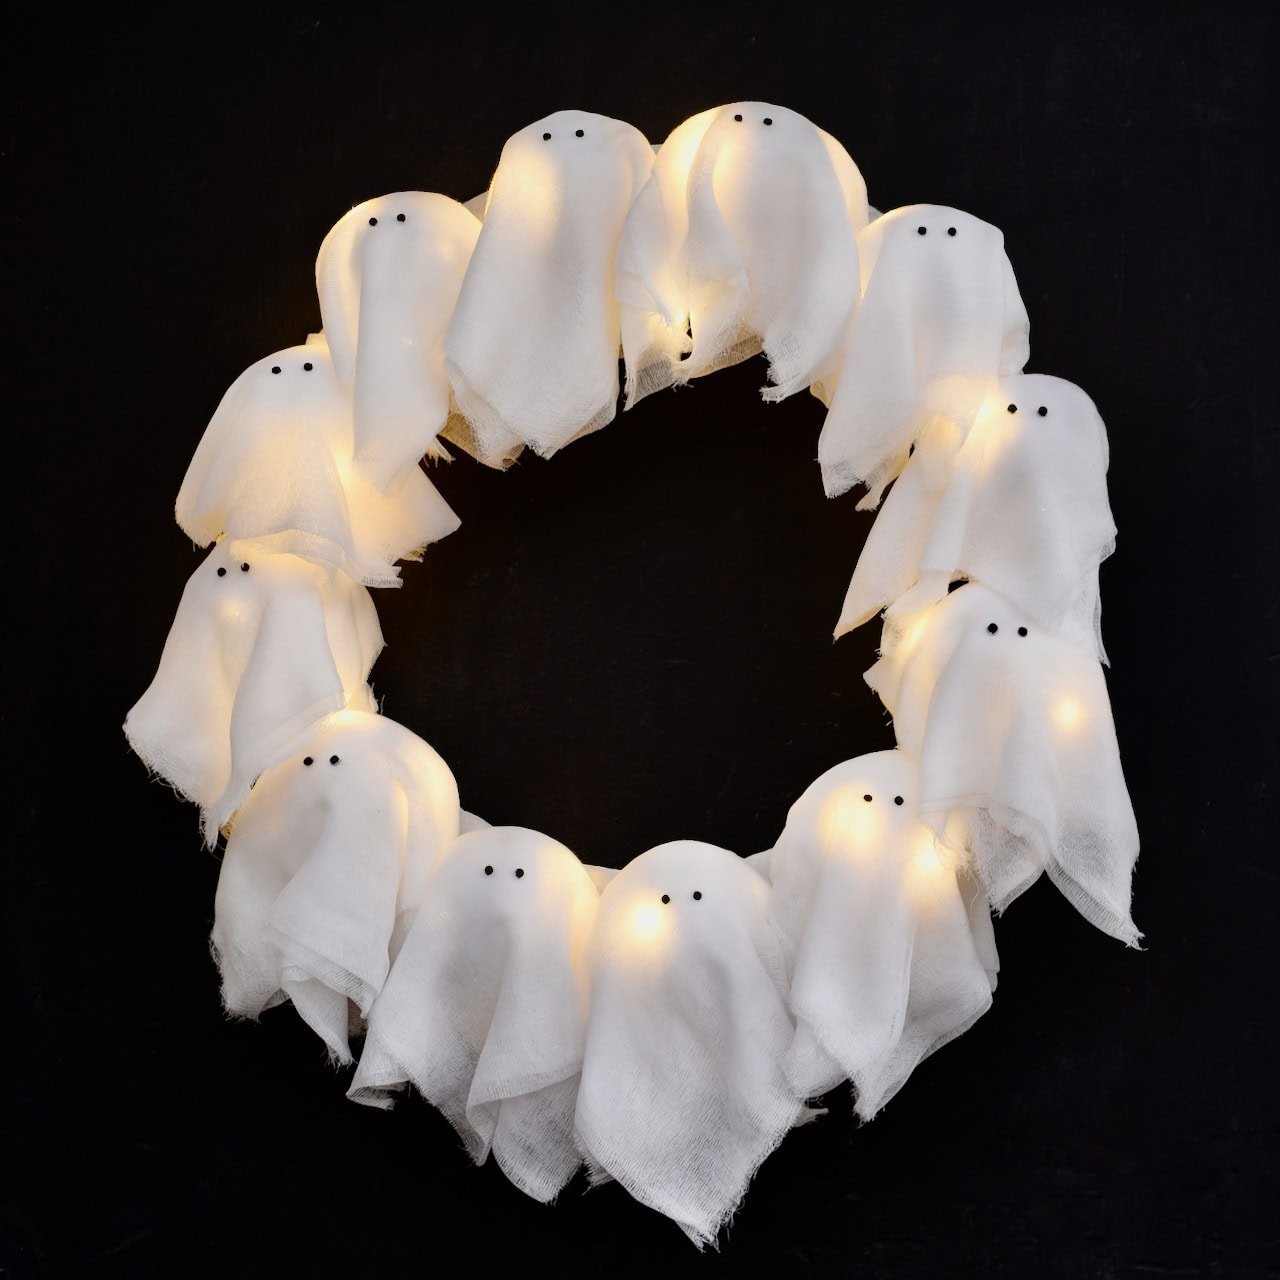
It turned out so cute!
The best part is that the fairy lights I used come with a remote control, so this sweet ghost wreath can be turned on and off with a simple click of a button!
If you love high end dupes, you’ll love our DIY Anthropologie floral moon wreath and our DIY hand Halloween tray Grandin Road dupe!
Ghost Wreath VIDEO
I highly recommend you watch the video below to see EXACTLY how I made this cute Halloween ghost wreath.
Then read below to get all the details and links to everything I used.
You can also watch the video with spoken instructions and music on my YouTube channel. I’d love for you to follow along and join me there!
This post contains Amazon affiliate links, which means I make a small percentage of any purchase made at no extra cost to you. Thank you!
Halloween Ghost Wreath Supplies
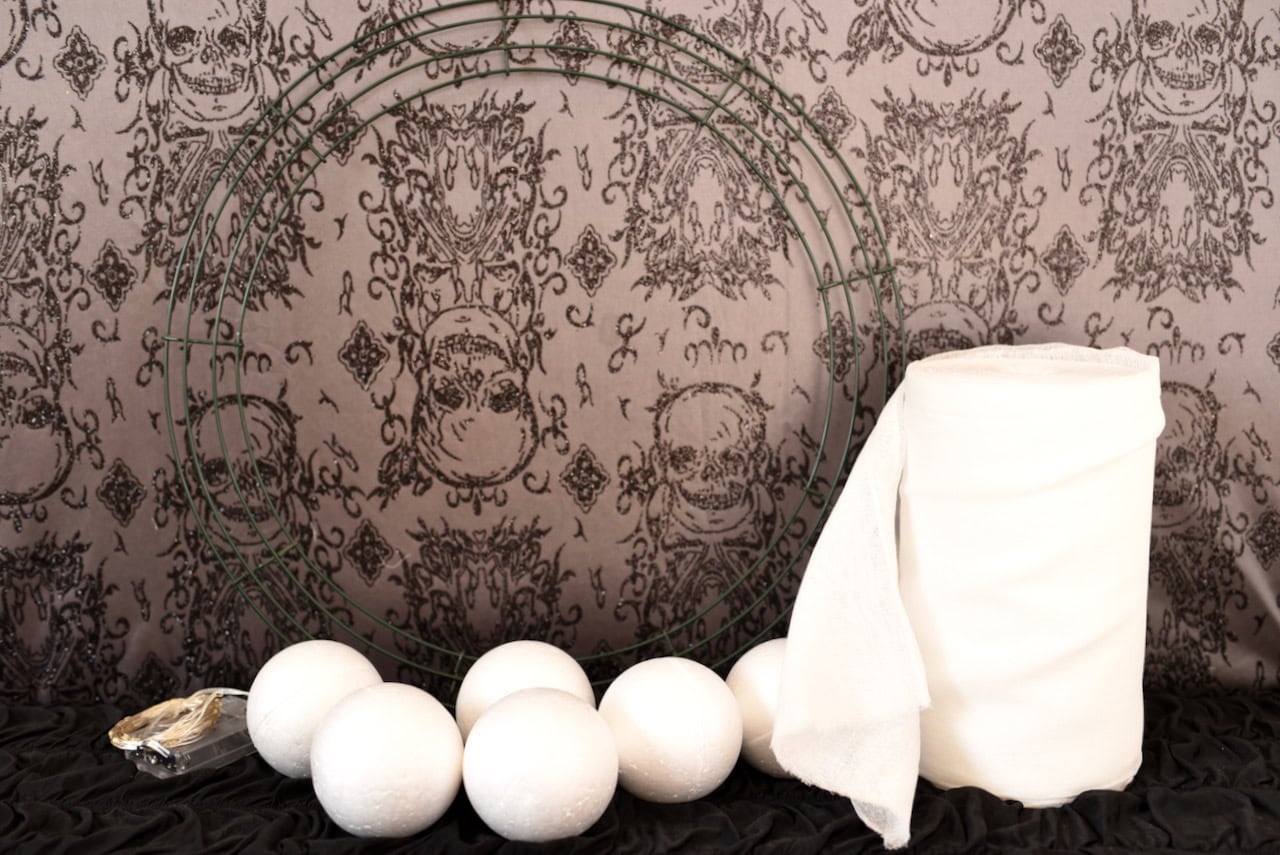
Here’s a list of the supplies you’ll need to make this sweet ghost wreath-
Wreath Form
I used a Dollar Tree metal wreath form that was 18″, but you can use any wreath form you like. You will just need to either spray paint it white or wrap cheesecloth around it.
Foam balls
You’ll need 12 foam balls that will be the base of the ghosts.
Cheesecloth
I have a roll of cheesecloth I bought from Amazon that is a great quality and has lasted me for many projects and will last me for MANY more! I highly recommend using this cheesecloth.
Fairy lights
You’ll need some fairy lights that are long and preferably have a remote control. I found the perfect ones on Amazon that I used.
These fairy lights are 78 feet long, have 8 different modes, and come in a 3-pack WITH a remote. They were just perfect!
Zip ties
You’ll need just two white medium length zip ties.
Hole punch
Any hole punch should work to cut out the eyes for the ghosts.
High heat glue gun
You’ll definitely want a high heat glue gun. This light pink one is my favorite – it comes in so many cute colors and works great!
Floral pins (greening pins)
These floral pins, or greening pins, are shaped like a tall “U” and are what you will need to attach the fairy lights to the foam balls.
Prep the Ghost Wreath
First we need to prep the wreath.
If you are using a metal Dollar Tree wreath form like I did, then we need to cover the wreath so you don’t see green behind it.
I chose to cover my wreath form in white cheesecloth.
First, I cut pieces of cheesecloth long enough to wrap around the wreath once.
Next, I glued the pieces, one at a time, until the entire wreath was wrapped in cheesecloth.
Now I had a nice base for my ghost wreath and I wasn’t worried about any green or metal showing through.
Glue on the Foam Balls
Now it’s time to glue on the 12 foam balls.
To do this, I started with four balls and placed them on the wreath like a clock, starting at the top, then the bottom, and then one at each side.
Then I filled in two more styrofoam balls in each section, so one ball where a number would be on a clock.
This helped me make sure that all the cheesecloth ghosts would be even placed around my Halloween ghost wreath.
I used a big dob of hot glue to attach each foam ball.
Add the Fairy Lights to the Ghost Wreath
Now it’s time to add the fairy lights.
Starting at the top of the wreath, slightly to the side, zip tie the fairy lights battery box around the wreath.
You want to put it to the side a little so that you can still easily hang your wreath from a wreath hanger or a nail.
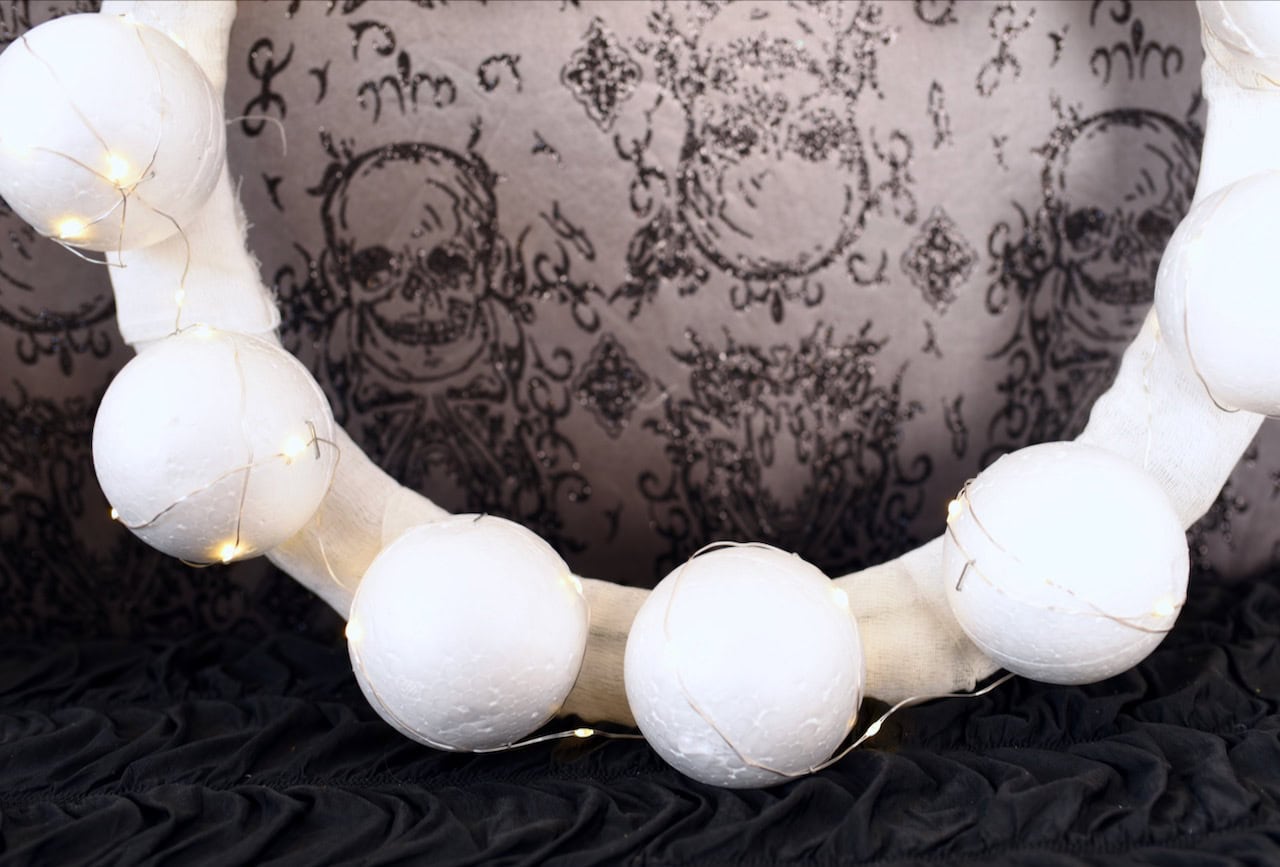
Once the battery pack is secure, then start wrapping the fairy lights around the wreath and the foam balls.
You want the lights to be as visible and secure as possible.
I had plenty of fairy lights length to wrap my fairy lights around teach ball at least twice.
It also helped to wrap the lights around while they were on so I could make sure the lights were evenly dispersed across the entire ghost wreath.
Use floral pins, or greening pins to attach the fairy lights to the balls.
These pins are nice and long and do a good job of holding the lights in place.
They slide right into the foam balls just perfectly!
Add the Cheesecloth
Use your cheesecloth to measure how long you would like each ghost to be.
I cut one piece to the length that I liked, then used that piece as a pattern to cut all the other pieces so they were all nice and even.
My cheesecloth came from a roll that was a couple layers thick, and I used two cut pieces per ghost.
I wanted my ghosts to be a bit thicker and not too see through, so that’s why I doubled up.
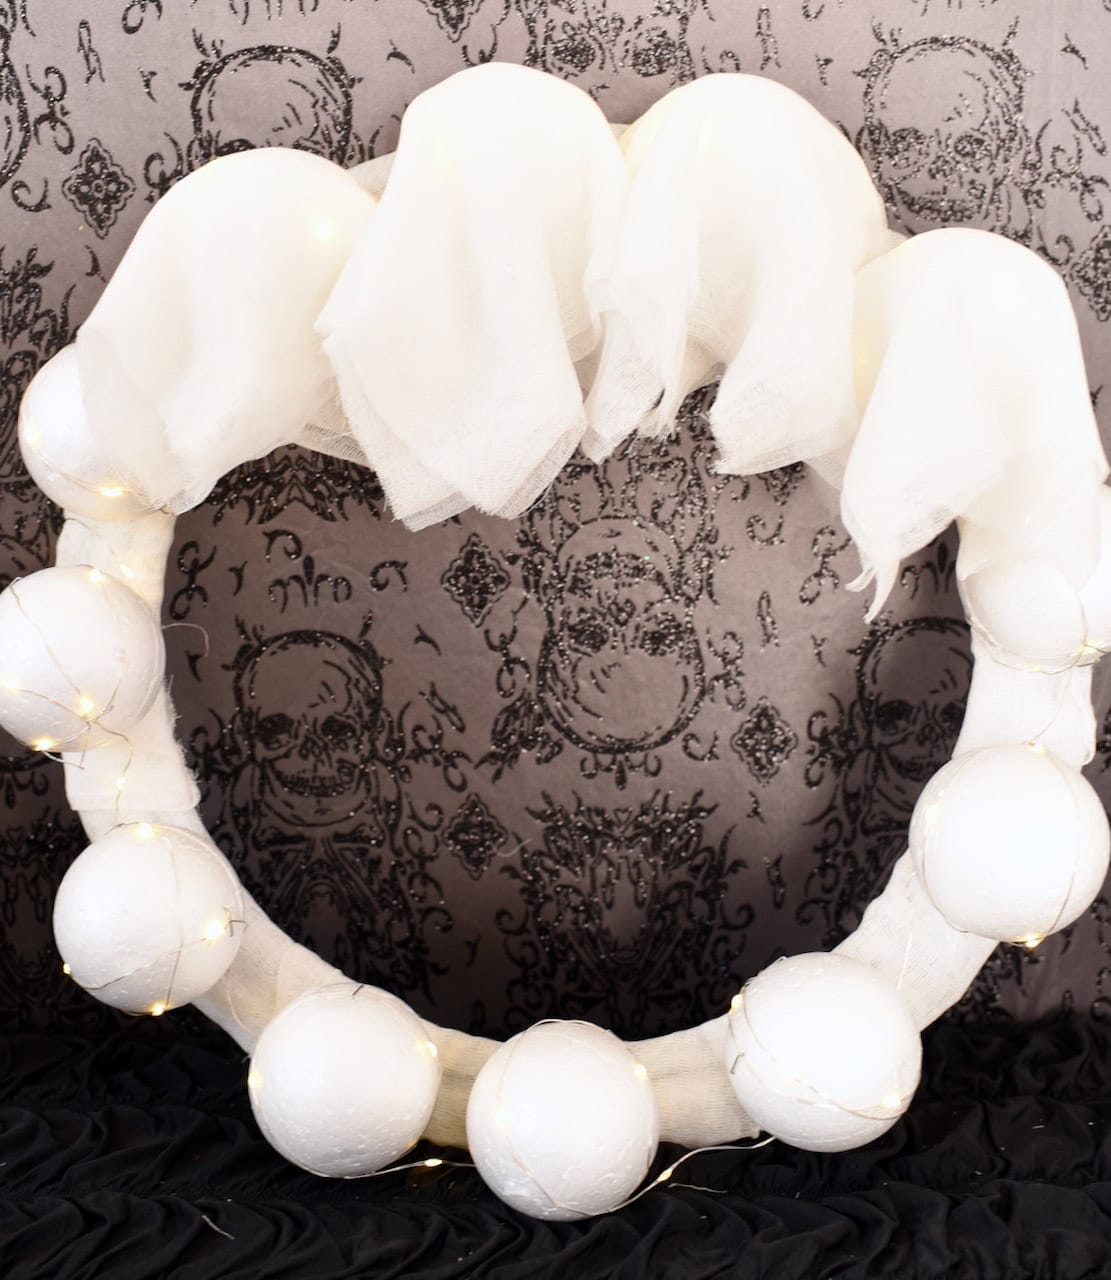
This method worked great and I loved how the little ghosts looked!
I arranged each piece of cheesecloth on the foam balls with the back folded under a little bit.
Then I used a little hot glue on the top back of each ghost to hold the cheesecloth in place.
Some of my little ghosts puffed out a little on the side, so I used a drop of hot glue to hold the sides down in place.
Finishing the Pottery Barn Ghost Wreath
Now all our little cheesecloth ghosts need are some eyes!
You have a few options for this.
I used a hole punch and some black craft foam to make the perfect little black eyes.
Then I used a tiny bit of hot glue to attach two eyes to the front of each ghost on my Halloween ghost wreath.
You can also use a hole punch with black paper, or you can even draw on the eyes with a black Sharpie.
All done!
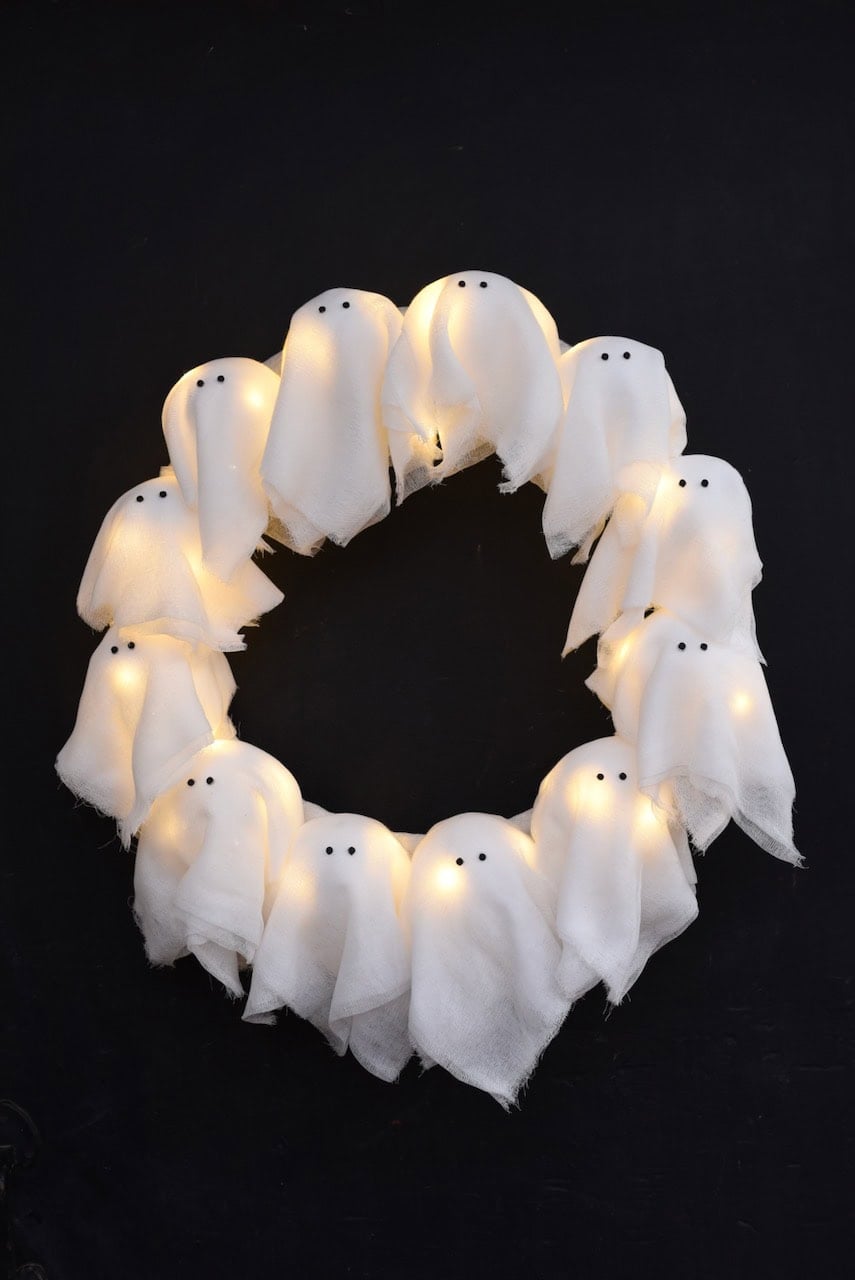
Isn’t this ghost wreath just the cutest?!?
I love that with one push of a button my wreath lights up.
I can keep the cheesecloth ghosts lit on a steady glow, make the lights twinkle, do strobe lights, and everything in between!
The above photo is what the wreath looks like during the day.
And here is what it looks like at night, all lit up…

It’s just sooo cute!!!
So what do you think? Are you going to try making your own?
Don’t miss our TEN stunning DIY potion bottles that are sooooo cool!
Happy Halloween!
![]()
Leave a Reply