Need a darling Valentines photo booth background? Make a Valentine’s Day photo booth in just minutes with this fun and easy tutorial!
There is just something magical about a baby’s firsts. First smile, first word, first tooth, and each and every first holiday. Pure magic.

My baby girl is about to have her very first Valentine’s day, and you know I couldn’t let this fun first go by without documenting it.
My sweet little cupid is so darn kissable, so I knew that I wanted to create a DIY photo booth backdrop filled with kissing lips in various sizes and shades of pinks and red.
I also knew that I didn’t want to cut all those lips out by hand. No thanks!
I turned to my trusty Cricut machine that never lets me down, and was able to make this Valentines photo booth very quickly, all with zero fussy cutting with scissors!

Don’t worry if you don’t have a Cricut machine- you can still make this DIY Valentine’s Day photo booth too.
Chances are that you know someone who has a Cricut machine and can cut this for you.
Just give them the vinyl and the lips cut file and I’m sure they’d be happy to help.
You could also cut all the lips out by hand…. but it would definitely take a while.
Seriously, ask friends on Facebook if anyone has a Cricut machine and save your sanity AND your time with the free cut file I’m sharing!
This post contains affiliate links, which means if you make a purchase at no extra cost to you I get a very small percentage to run my website.
Valentines Photo Booth Background
Supplies:
- Cricut Explore Air 2 or Cricut Maker (either one will work great)
- Removable vinyl (in your preferred lip colors- I used red and two different pinks)
- White wall, backdrop, or white panel (mine came from Home Depot)
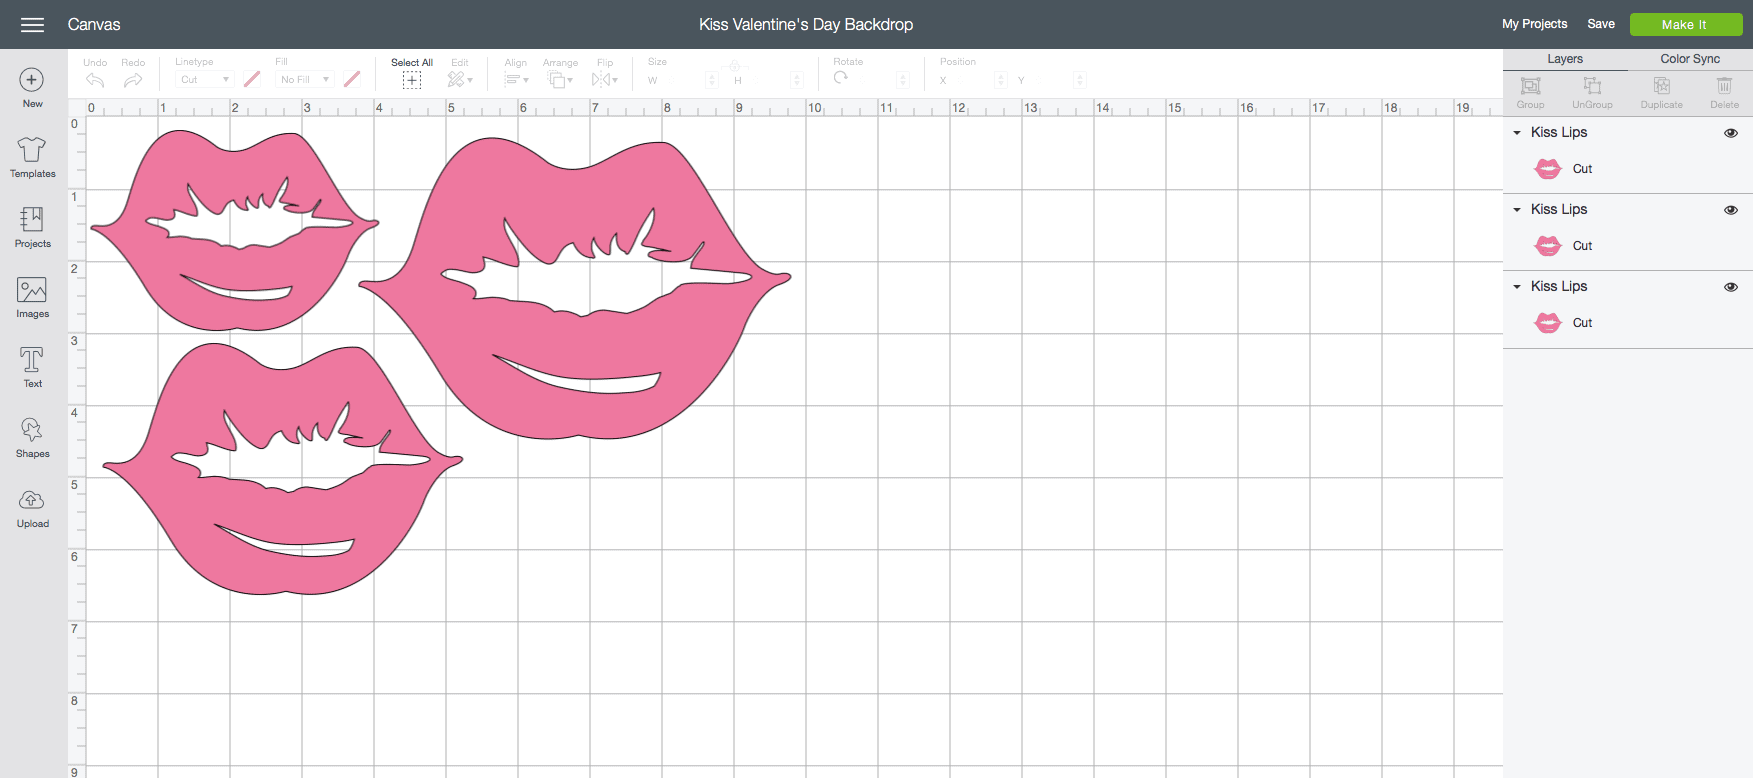
Step 1. Go to Cricut Design Space and get the free lip cut file.
Press “Make It” in the top right hand corner.
Step 2. Place a sheet of vinyl right side up onto your mat, and choose vinyl as the material that you’ll be cutting.

Change the “Project Copies” to 2 in the top left hand corner, then hit the apply button.
Now you’ll be cutting out two sets of lips onto one piece of 12 x 12 vinyl and will be more efficient with your vinyl.
Press “Continue” in the bottom right hand corner, then follow the prompts to cut.

Repeat this step for each color of vinyl you’ll be using.
I used two sheets of lips in three different colors for a total of 6 sheets.
This was plenty to mostly fill up a big white panel I bought from Home Depot.

Step 3. Remove the excess vinyl from around the lips.
Carefully peel up one lip at a time, then gently press down onto your background.
Be sure to smooth out any air bubbles or creases in the lips with your fingers.

Keep placing lips until it looks just how you want it.
I made sure to vary the different lip colors and sizes on my Valentines photo booth background for variety.
I also tilted the lips in different directions to make it look a bit more random.
Colored honeycomb balls and a furry soft blanket also added to the fun.
I LOVE how this Valentines photo booth background turned out soooo much!

It’s the perfect DIY photo booth backdrop for photographers, parents, teachers, party hosts, or anyone who wants to take some fun pictures for Valentine’s Day.

When your daughter is oh so kissable, this Valentines photo both makes the perfect backdrop!
I even whipped up a gold foil lip shirt for her to match the backdrop.
I’ll be sharing the tutorial for this one very soon, so stay tuned.
If you don’t own a Cricut machine, what are you waiting for?
I use mine multiple times each and every week for everything from t-shirt making to party favors and tags to decorative pillows (another one coming soon), and SO much more.
It’s hands-down my favorite crafting tool because the possibilities are endless!
Here’s some of my favorite Cricut projects: (I have two Explore Air 2 machines and a Cricut Maker)
- Vibrant Tropical Baby Shower
- How to Make Stickers Using Print the Cut
- How to Make Custom Aprons
- Cheery Mint and Yellow Birthday Party
- Ice Cream Party
- Hedwig Baby Owl Costume
- Cricut Iron On Onesie, Leggings, and Hair Bow DIY for Baby
Happy crafting!
![]()
Leave a Reply