Learn how to make personalized aprons with Cricut Iron On Vinyl! See how to use iron on vinyl & how to layer vinyl to make custom projects for any occasion.
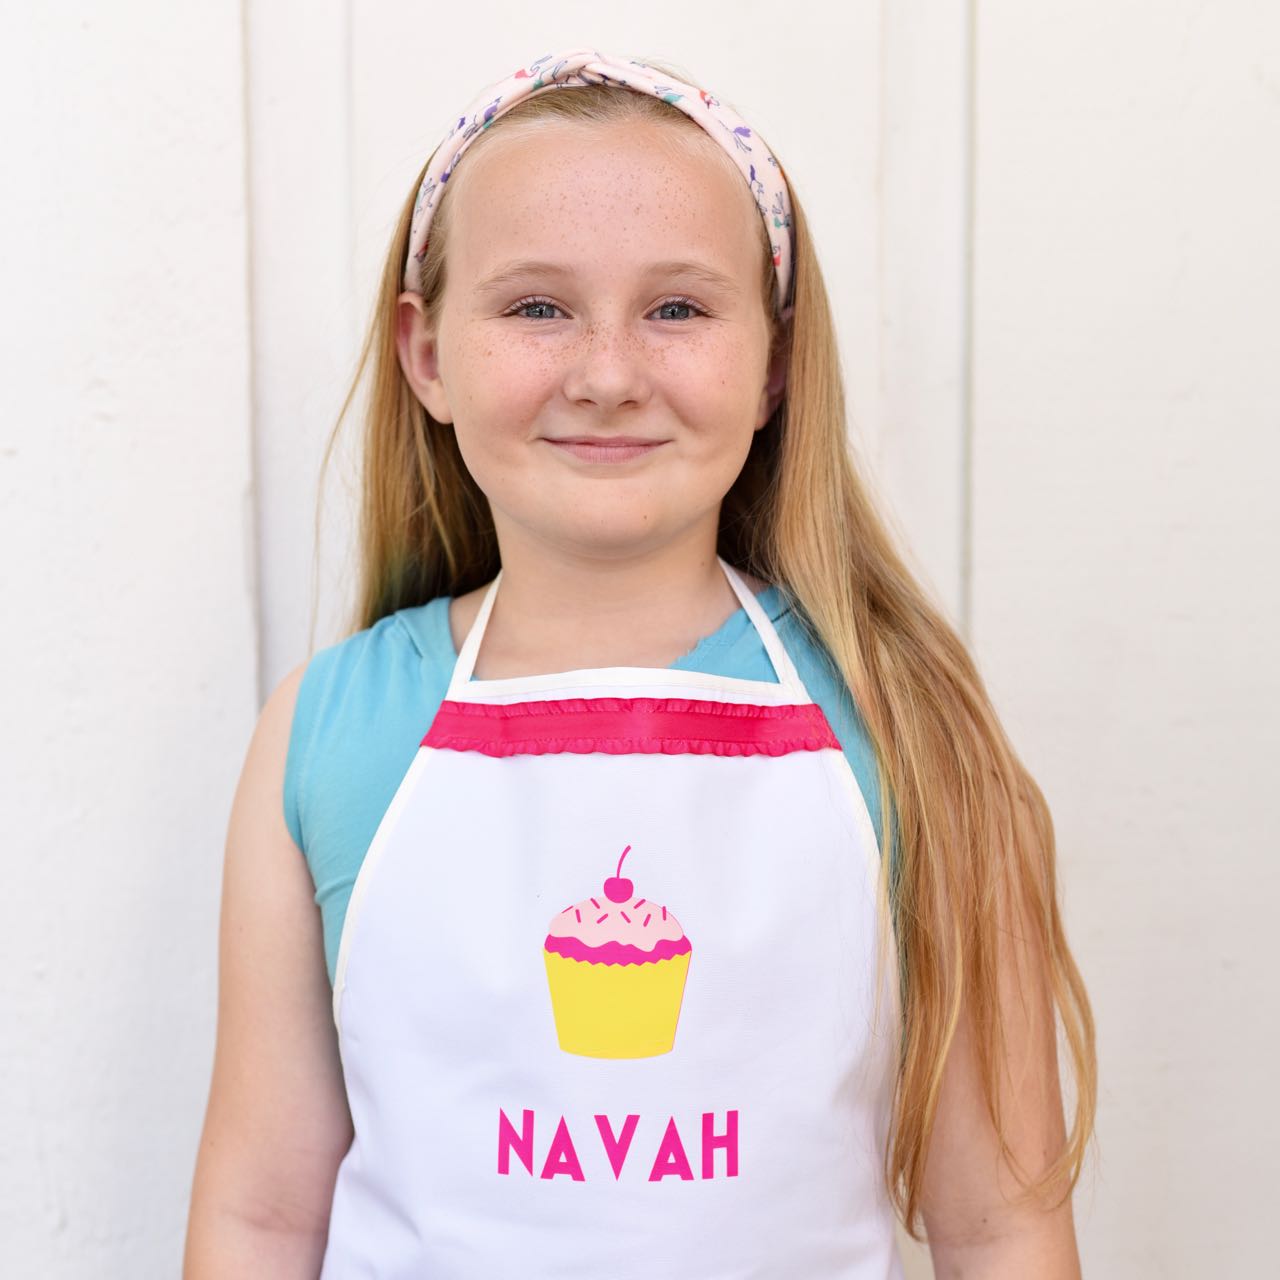
My daughter is obsessed with Cupcake Wars, so last week I threw her a big Cupcake Wars birthday party.

I knew the girls would make a gigantic fun mess, so I made custom aprons with Cricut Iron On Vinyl for each girl.
How to Make Custom Aprons with Cricut Iron On Vinyl
The kids Cupcake Wars aprons turned out SO cute that I just had to share how I made them!
I’ll also give you the cut file I used to personalize each apron, teach you how to cut Cricut iron on vinyl with a Cricut machine, how to attach the iron on vinyl to the apron using the Cricut Easy Press or an iron, then how to layer the iron on vinyl to create a multi-colored design.
Let’s do this!
Custom Apron Supplies
- Kids aprons
- Cricut Explore Air 2 (or other Cricut machine)
- Cricut Iron On Vinyl (in desired colors)
- Cricut EasyPress machine or an iron
- Cricut EasyPress Mat (optional)


Create the Design in Design Space
The first step is to create your design in Cricut Design Space. You can use any of their images and customize it or create your own custom design and upload it.
Since I was making Cupcake Wars aprons, I used a cupcake design I found in Design Space and changed it around a bit to fit the party colors.
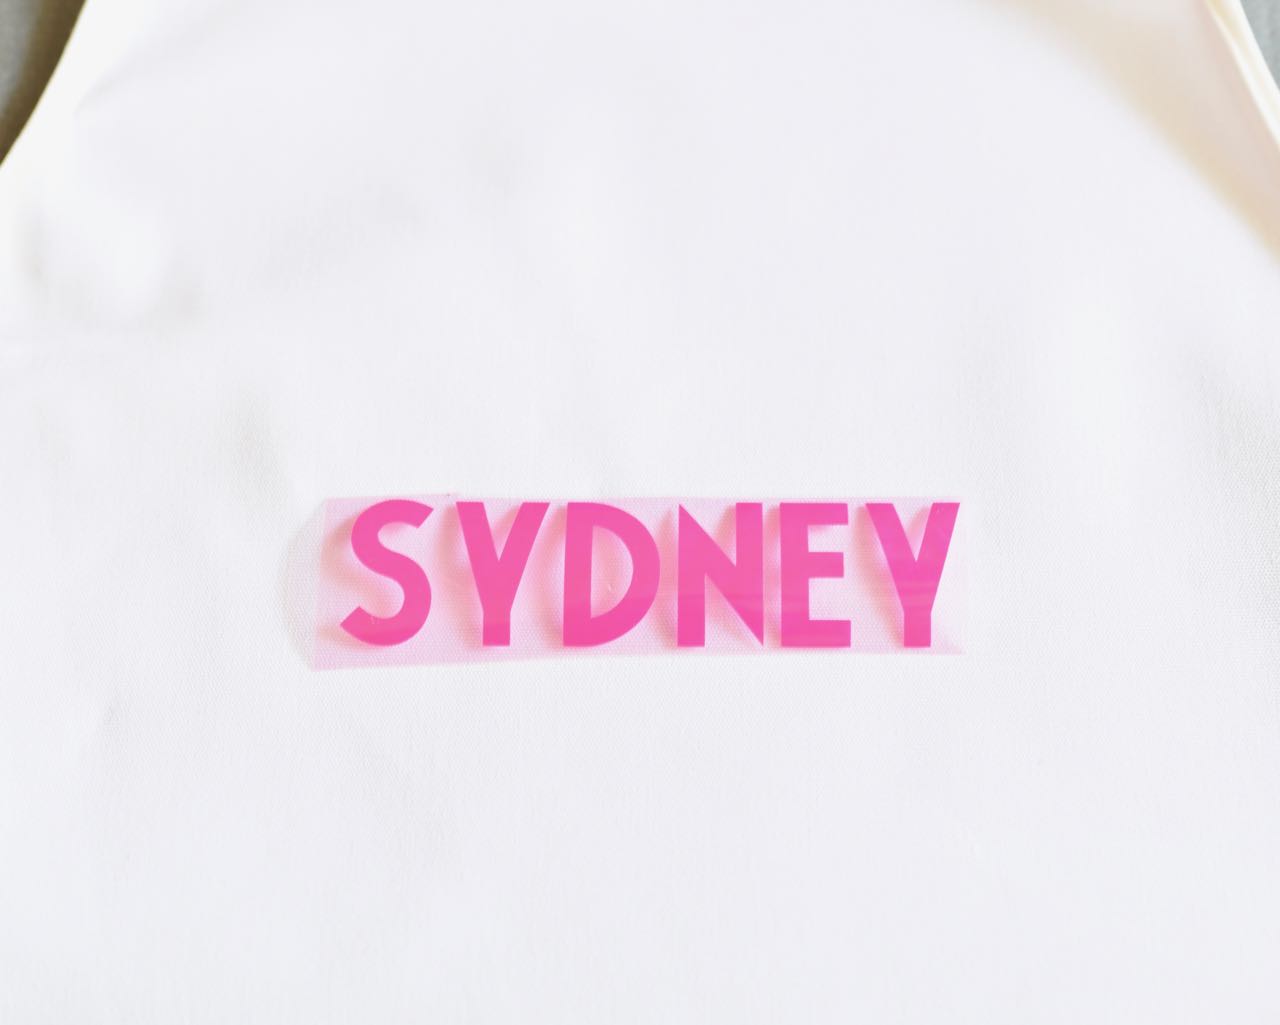
I also added each girl’s name under the cupcake design.
If you like my design, you can edit it HERE with your own names and colors!
Just edit the names to include the names you would like.
If you want something different, go ahead and create your own new project.
Make sure each part of your design is the same color as the vinyl you will be cutting it on.
How to Cut Iron On Vinyl
Now that we have our design ready to go, press the green “Make It” button at the top right hand side of the screen.

You should now see a few different colored mats on the left hand side of your screen with your designs on them.
Before cutting each sheet, be sure to choose the “Mirror” option so that your Cricut machine cuts the mirror image of your design and names, or they will be backwards when you go to iron them.

Press the correct color of Cricut iron on vinyl onto your mat, then press “Continue.”
Make sure your Cricut machine is turned on and turn the dial to the iron on setting.
Press the flashing arrow button on your Cricut machine to load the mat.
Now just press the flashing “C” button to cut, and wait patiently for your machine to cut out your design!
Repeat for each color of iron on vinyl you are using.
Weeding the Cricut Iron On Vinyl
Now that all of your designs are cut, it’s time to remove the extra iron on material that you don’t need.

To do this, you will need a weeding tool, which is a tool with a small hook on the end. Use the tool to remove all the extra Cricut iron on vinyl that isn’t part of your design.
When you’re finished, double check and make sure that you’ve removed any vinyl that isn’t part of your design.
How to Iron On Vinyl
Now it’s time to add the iron on vinyl to the apron. I used my Cricut EasyPress machine, which I absolutely LOVE.
It works much better than using an iron to attach the iron on vinyl, but either will work.
If you are just using one layer of Cricut Iron On Vinyl, like I did for each girl’s name on their custom aprons, then the directions are pretty straight forward.
How to Iron On Vinyl with Cricut EasyPress Machine
If you are attaching the Cricut Iron On with an EasyPress machine, then you can find the correct temperature and time for the material and specific type of iron on that you are using HERE.
Be sure to look at the correct chart based on if you are using the Cricut EasyPress Mat or a towel, because the settings are slightly different.
My apron was a cotton/polyester blend and I was using the Stand Lite Iron On, so the chart told me that I needed to preheat the apron for 5 seconds at 315 degrees.
I just set my EasyPress to 315 and 5 seconds, pressing down firmly until the machine beeps and the time is up.
Next I placed my iron on design exactly how and where I wanted it on my apron.
I set the time for 30 seconds, then pressed the EasyPress firmly in place for 30 seconds, then removed it.

Then I turned the apron over and ironed on the back for 15 seconds.
The settings chart told me that this is a warm peel, which means that I remove the clear plastic liner over my cupcake design when the design is warm to the touch, not hot.

How to Iron On Vinyl with an Iron
If you are attaching the Cricut Iron On with an iron, set your iron to the Cotton/Linen setting.
Make sure that the steam is turned off.
Preheat the area where your design will be with the iron for 10-15 seconds.
Place your design down with the clear plastic liner side up.
Press down with the iron using medium pressure for 25-30 seconds.
Flip the apron over and iron the back of the design for another 25-30 seconds.
Let cool for 1-2 minutes, then remove the clear plastic liner.
Now that the pink name is applied perfectly to the apron, it’s time to move on to the cupcake, which is slightly different since it involved a few different layers of vinyl.
How to Layer Vinyl
Following the chart I shared above, you will first preheat the space where the cupcake (or whatever your design is) will be.

Place the bottom layer of your image onto the apron, cover with the EasyPress, then apply firm pressure with two hands for 1-3 seconds.
Remove the EasyPress then peel off the plastic liner while it’s still hot.

Repeat this for the remaining layers EXCEPT for the top layer.
* Be sure that the entire design is covered with the clear plastic lining and that you aren’t heating the area with the name on it again.
For the top layer, apply firm pressure with the EasyPress for 15 seconds.
Flip the apron over and repeat for 10-15 seconds.

Peel off the clear plastic layer and marvel at your adorable customized apron with a darling cupcake and name on it!
The girls at my daughter’s Cupcake Wars party LOVED their aprons!
To dress them up even more, I added some pretty ruffled ribbon at the top of the apron and at the top of the pockets with hot glue.
The custom aprons turned out so cute!
You can check out the whole Cupcake Wars party and FREE party printables here.
More Cricut projects-
- Tropical Baby Shower
- Cheery Mint and Yellow Birthday Party
- DIY Monogram Ice Bucket
- How to Make Stickers Using Cricut Print the Cut
- 7 Reasons Why You Need a Cricut Maker In Your Life
- Cricut Iron On Onesie, Leggings, and Hair Bow for Baby
- Goonies Party
- Ice Cream Party
- Dinosaur Party + Dinosaur Dig
I have a bunch more Cricut projects I’ve shared too! Just enter “Cricut” in the search bar at the top right of my blog to see them all. 🙂
Happy crafting!
![]()
Leave a Reply