Make gorgeous wood slice ornaments that look beautiful and are simple to make with a Cricut machine.
I love crafts and DIYs that are made from common things that we see daily and often overlook.
We have a woodpile in the backyard that we use for our winter fires (check out our AirStone fireplace makeover), and there are so many interesting pieces of wood in there.

I picked out my favorite branch and used it to make the cutest wood slice ornaments!
These wood slice Christmas ornaments really are a cinch to make.
With just a few supplies, you can whip up LOTS of them.
Wood slice ornaments are perfect for hanging on your Christmas tree, attaching to gifts, or giving to friends and family.
These wood slice Christmas ornaments can even be customized with a name or date to make them extra special!

DIY Wood Slice Ornaments
Supplies:
- Cricut Explore Air 2
- Wood slices (you can cut these yourself or buy them pre-cut)
- Black craft paint + paintbrush
- Cricut® Martha Stewart Everyday Iron-On™ Collection, Metallics
- Cricut EasyPress 2 Martha Stewart Edition
- Thin jute, ribbon, or string
- Hot glue gun
- Free wood slice ornaments cut file in Design Space

Directions:
You can choose to buy or cut your wood slices. Since I had lots of wood in our wood pile, I chose to cut mine.
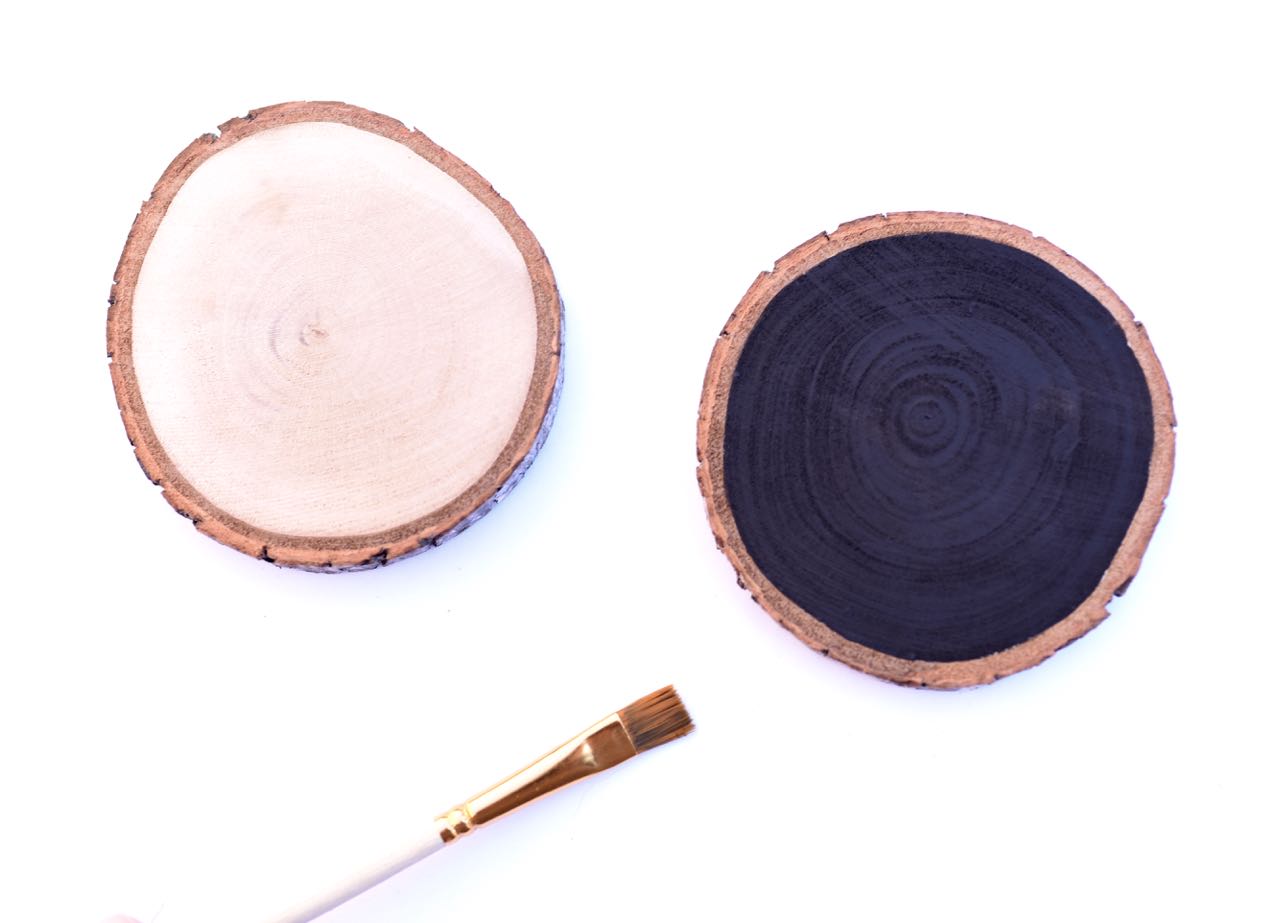
Paint the wood slices
Use a paintbrush to add black paint to the front of each wood slice.
Let dry.
Cut + weed the iron on designs
To cut the iron on for this wood slices DIY, place a gold piece of Martha Stewart Iron On onto a standard grip mat so that the shiny side is face down.
Cricut has a whole new line of Martha iron on at Michaels in stylish colors and patterns that will make your projects look amazing!
You can use the Martha Stewart iron on on all Cricut machines (I use mine with my Martha machine), and it can even be layered up to 3 colors.
 Go HERE to the wood slice Christmas ornaments cut file in Design Space.
Follow the prompts to cut the iron on.
Make sure to change the slider to “mirror” so that your design isn’t backwards.


Once the iron on is cut, remove from the mat and use scissors to cut out each icon.
Use a weeding tool to remove the excess vinyl from each image, so that just the picture is left.
Adding iron on with the EasyPress 2
I’m thrilled to share that there’s a new Martha EasyPress 2 that matches the Martha Cricut Explore Air 2 available at Michaels!
It has a lovely vanilla pearl finish with a gold accent and is such an incredible crafting tool.
The Martha EasyPress 2 works MUCH better than an iron to adhere almost any iron on material, giving you professional results in 60 seconds or less.
It’s also portable and very easy to store.
It comes with an insulated safety base to put the EasyPress 2 on when not in use, and has a handy auto-shutoff feature.
I LOVE this machine!
Heat up the EasyPress 2 to 300 degrees and set it to 40 seconds.
Once it’s reached 300 degrees, place an iron on picture over a painted wood slice.

Firmly place the EasyPress over the iron on and wood slice, then press the “C” button to start the 40 seconds.
Remove the EasyPress when it beeps.
Wait until the wood and plastic sheet are cooler, then carefully and slowly lift up the plastic.
If your design stays on the wood, you can remove the plastic all the way.
If some of the iron on lifts up when you lift the plastic, that’s okay!
Just press it all back down and place the EasyPress2 back on top of it for another 10 seconds before removing again.
Repeat if necessary until your deisgn is fully adhered to the wood.

I love how these DIY ornaments turned out!
The wood slices look like they’re hand painted or drawn in gold because they are so precise, thanks to my Cricut machine.

I’m always so impressed with how well the Cricut Explore Air 2 can cut.
It cut the small, intricate cuts like a champ!

How to hang your wood slice ornaments
Cut a thin piece of jute, string, or ribbon a few inches long.
Bring the two ends together to form a loop, then add a dab of hot glue.
Carefully press onto the back of the ornament.
Voila! Now you have beautiful ornaments that can be easily customized for your tree or for gifting to others.
Just add a name or date in Design Space if you’d like!

Aren’t they lovely?!
I couldn’t be happier with these pretty wood slice ornaments.
I love their modern, yet rustic and traditional look hanging on my Christmas tree.
This is just one of many wood slice crafts that I’ll be sharing.
I’m obsessed with all the things you can do with these sweet little slices!
More Cricut holiday craft ideas-
- Hot Cocoa Gift Basket Tutorial
- Rustic Christmas Buffalo Plaid Party
- How to Make a Stunning St. Lucia Crown
- How to Make Joyful DIY Christmas Cards
- How to Make Stickers Using Cricut Print then Cut
Merry Christmas!
![]()
Leave a Reply