
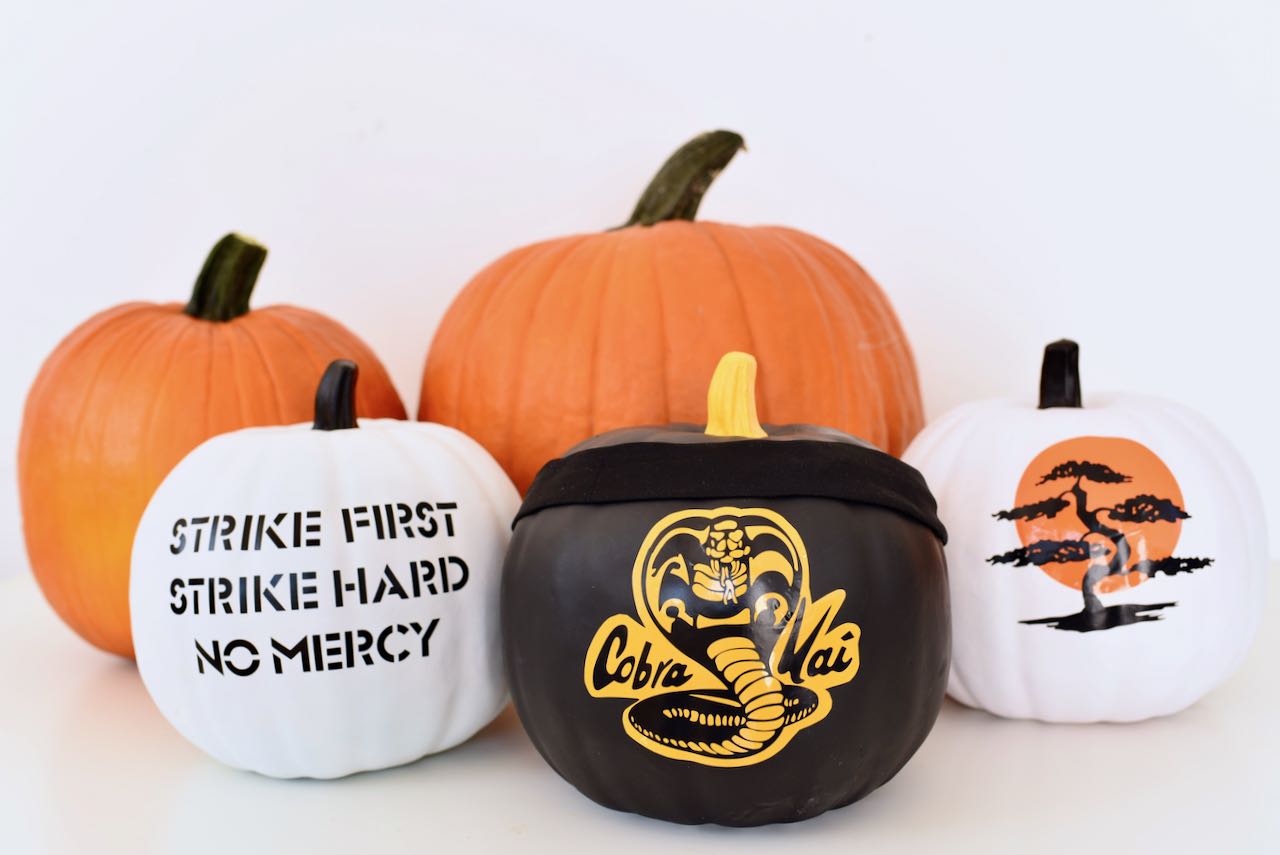
If you love Cobra Kai and all things Karate Kid, you’ll LOVE these Cobra Kai Halloween pumpkins! These 3 pumpkins are easily made with some paint, vinyl, and a Cricut machine.
Like many other children of the 80’s, my husband and I have been pretty obsessed with Cobra Kai. What’s not to love about Karate Kid rivals Johnny and Daniel continuing their rivalry into their 50’s?

To celebrate all things Cobra Kai and Miyagi Do, I made some pretty rad pumpkins. These are no carve pumpkins that are practically painless to make with a Cricut machine.
Because pain does not exist in this dojo, does it?
Sorry, I had to…
Cobra Kai Halloween Pumpkins
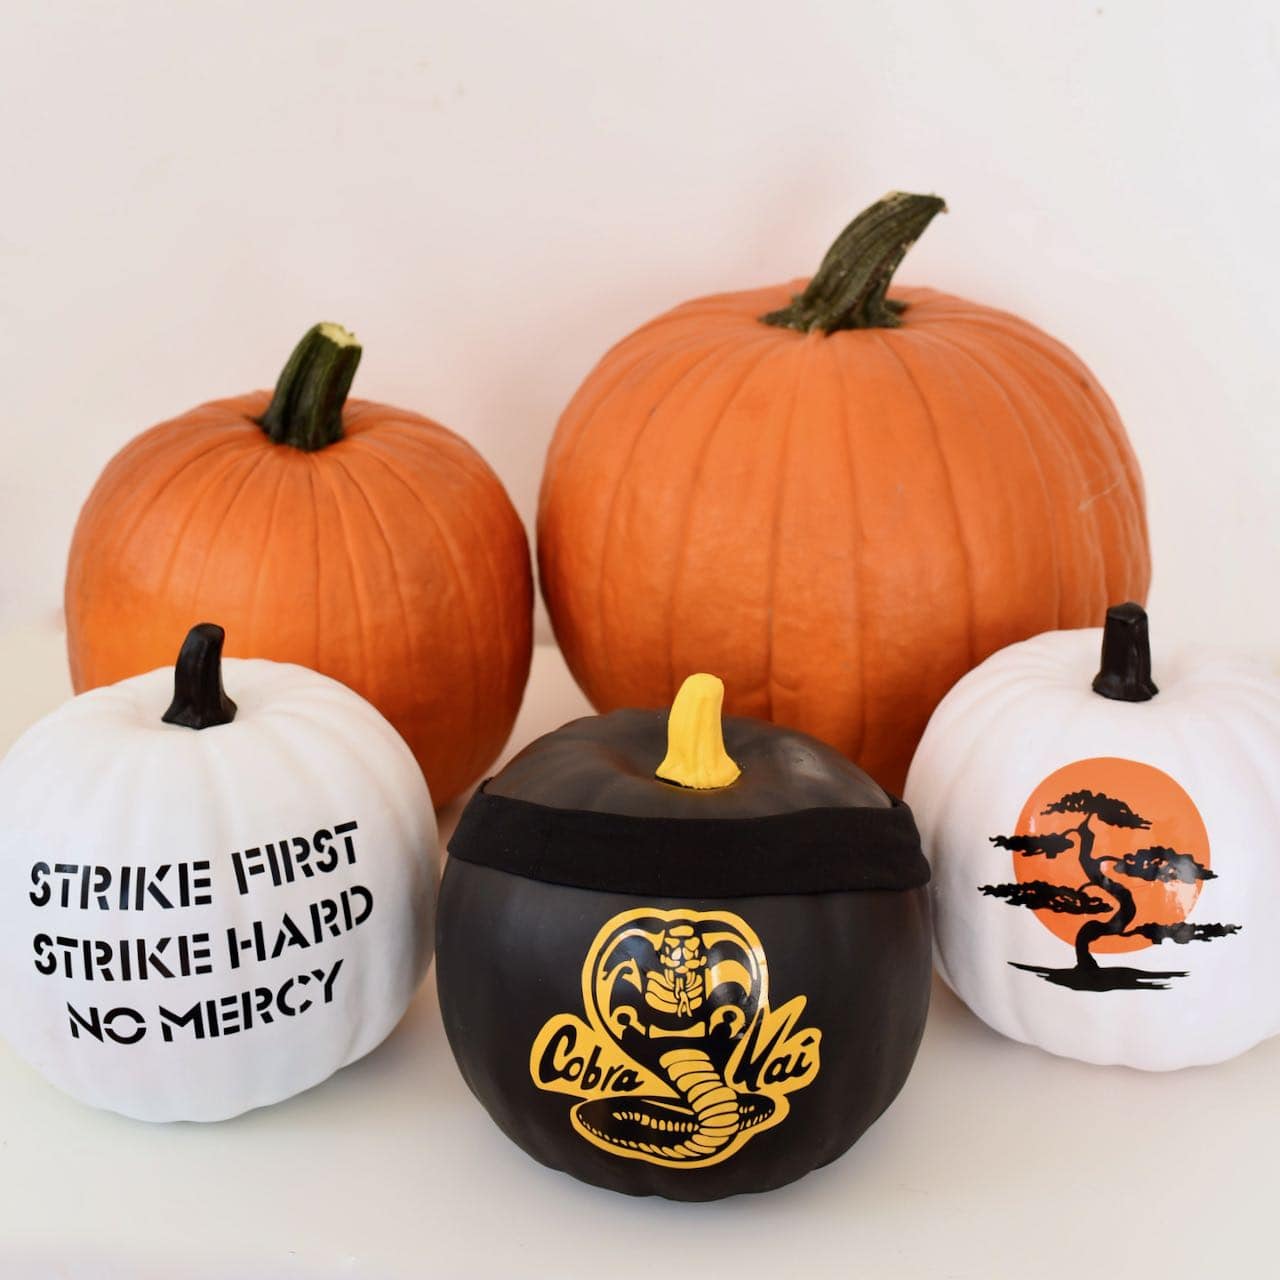
I went all out and made three different Cobra Kai pumpkins.
Two for Johnny and his Cobra Kai dojo (he is the main character after all), and one for Daniel san and Miyagi Do.
Gather up your vinyl, sweep the leg, and get your Cricut machine running. Let’s make some awesome pumpkins!

DIY Pumpkin Supplies
- Cricut Explore Air 2 or Cricut Maker machine
- 3 foam craft pumpkins
- Black matte spray paint (Chalkboard paint works best because it’s ultra flat) and white matte spray paint
- Yellow and black craft paint
- Small paintbrush
- Black and orange vinyl
- Piece of black fabric
- Scissors
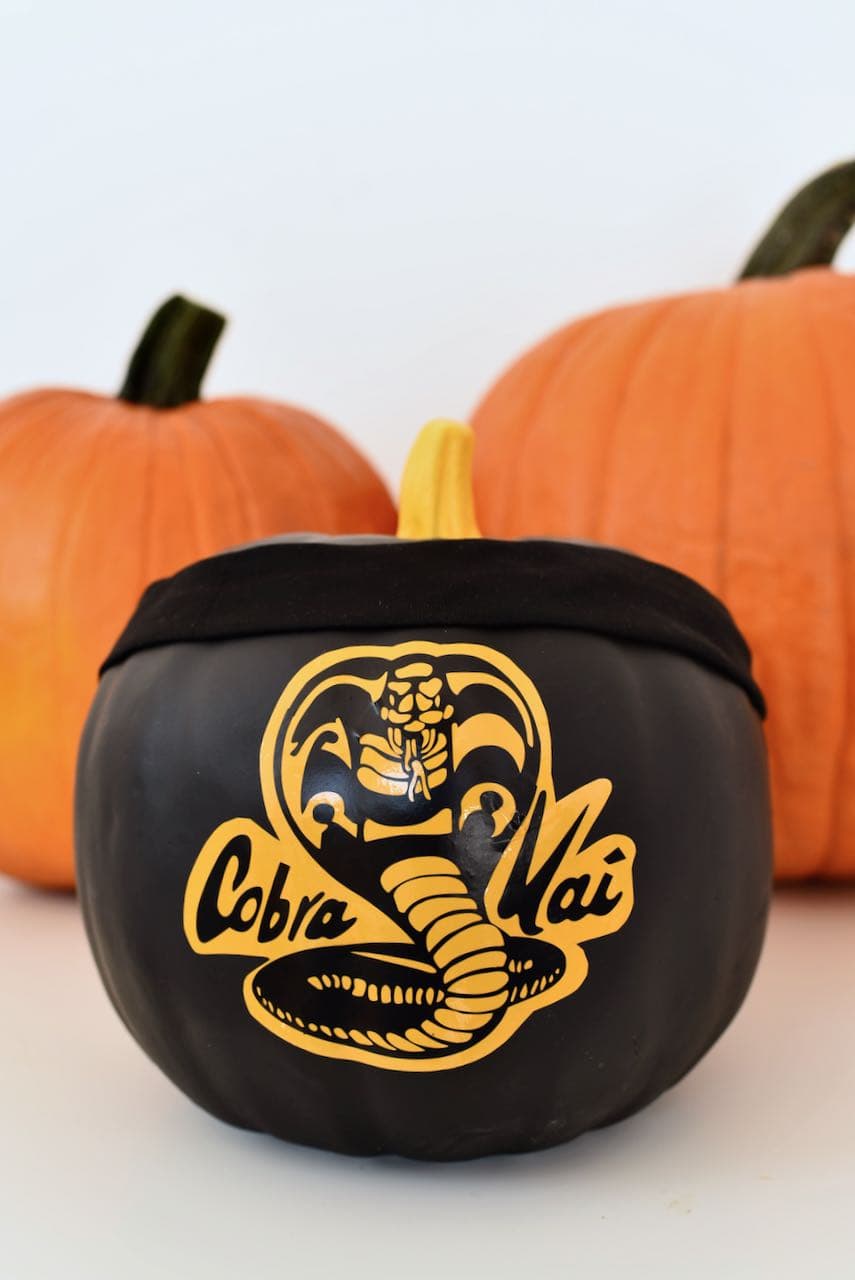
#1 Cobra Kai Logo Pumpkin
Gotta’ represent Cobra Kai with an awesome black and yellow pumpkin to match the cobra Kai logo.
The Cobra Kai cobra is front and center on this pumpkin and is made with black and yellow vinyl.
And really, would a Johnny pumpkin be complete without his black headband? Nope! So we added one.
Step 1. Spray paint your pumpkin black, using multiple light coats. Let the pumpkin dry between coats. Paint the pumpkin stem yellow.
Step 2. Grab the FREE Cobra Kai logo SVG file from SVGCrush. Upload the file into Cricut Design Space.
Step 3. Change the size of the logo to match the size you need for your pumpkin. Cut out the design onto black adhesive vinyl with your Cricut machine.
![]()
Step 4. Remove the excess vinyl by using a weeding tool to remove the negative pieces. Cut around the design and words, leaving a small white border around the edges.
![]()
Step 5. Place the design onto yellow vinyl and trace around the trimmed design. Cut out the yellow vinyl so that you have a nice outline for your design.
![]()
Step 6. Remove the paper backing from the yellow vinyl. Place it onto the center of your pumpkin. Then use Cricut Transfer Tape to adhere the Cobra Kai design onto the yellow background shape.
Step 7. Cut a long strip of black fabric, then fold it over. Use hot glue to attach it to the top of the pumpkin to look like Johnny’s headband.
And there you have it! Pretty cool, right?
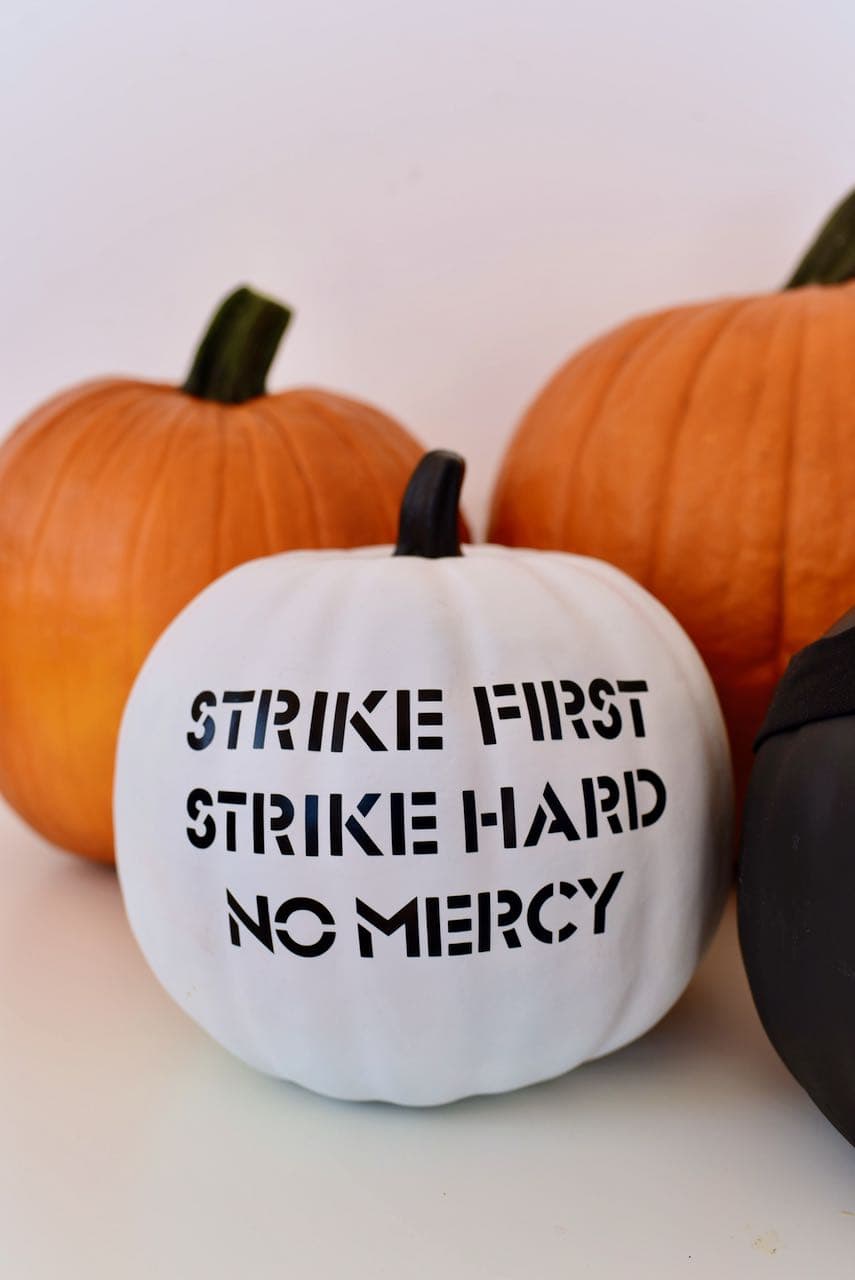
#2 Strike First Cobra Kai Wall Pumpkin
Johnny’s familiar dojo wall saying is an iconic phrase, and we just had to include it on our Cobra Kai pumpkins this year!
Can’t you just hear Krees and company yelling as you read it?
Step 1. Spray paint a pumpkin white to match the white Cobra Kai wall. Paint multiple light coats, letting the paint dry between each coat. Paint the top of the pumpkin black with black craft paint.
Step 2. Go to the Strike First Cut File I created. Resize if necessary, then cut the design with your Cricut machine onto black adhesive vinyl.

Step 3. Weed the design with a weeding tool so that just the black words are left.
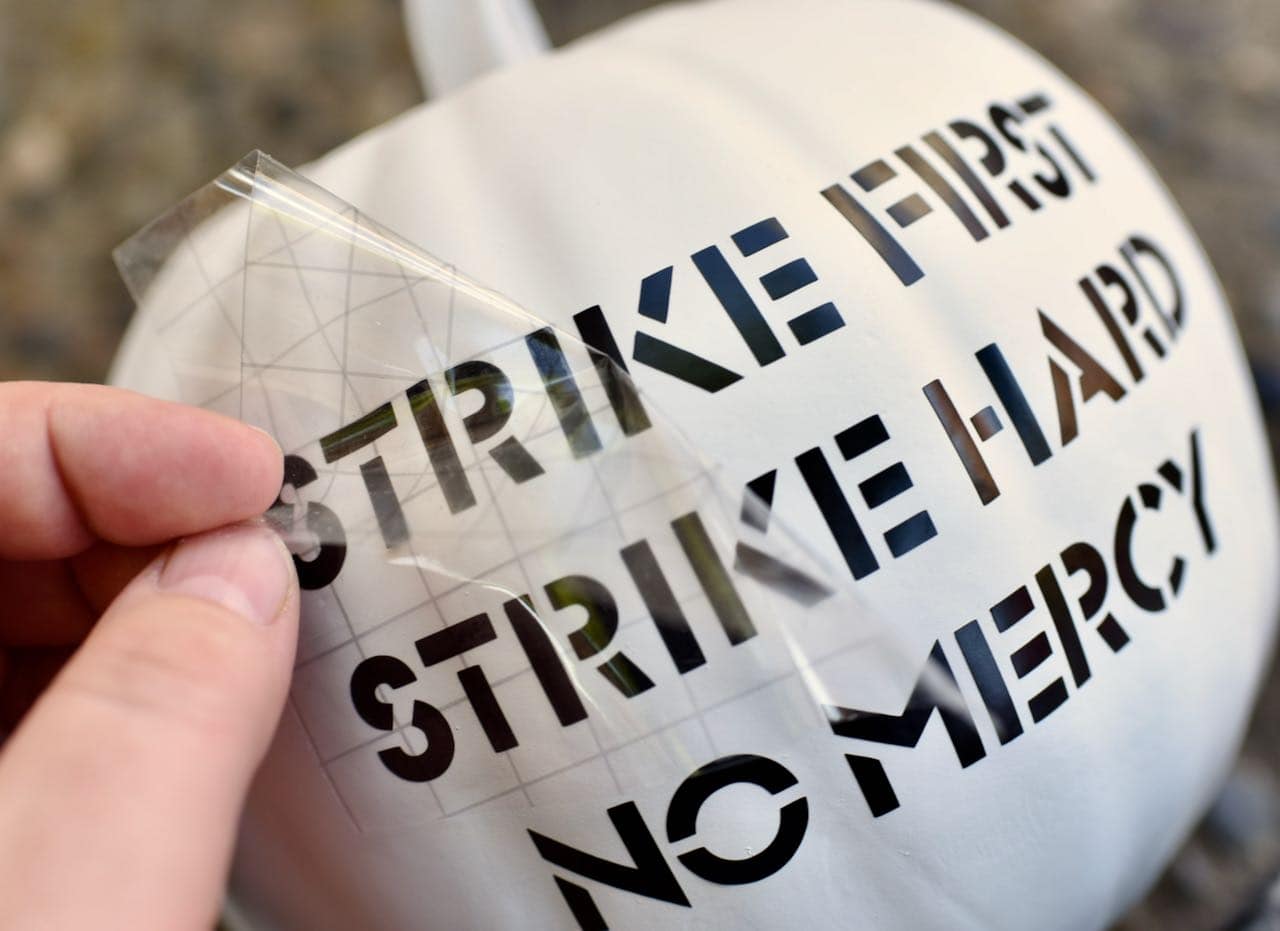
Step 4. User transfer tape to transfer the words to your pumpkin.
Sit back and admire your amazing pumpkin while yelling “Yes sensei!”
#3 Miyagi Do Logo Pumpkin
We just can’t leave out Daniel and Miyagi Do. This pumpkin features the Miyagi Do logo of a bonsai tree in front of a setting orange sun.

Step 1. Buy the cut file here on Etsy. It cost me $2.50, which was 100% worth it.
Step 2. Resize the Miyagi Do logo to fit your pumpkin. I resized mine to be 4.6″ wide and 4″ tall.
![]()
Step 3. Cut out the design using your Cricut Maker or Cricut Explore Air 2. Use the weeding tool to remove the excess vinyl from the design.
![]()
Step 4. Peel off the orange sun and place onto the pumpkin, starting in the middle.
Because the pumpkin is round, I had to cut a small piece out of the sun to try to get it to lay flat. It isn’t perfect when you get up close, but I don’t notice it when the pumpkins are sitting on my fireplace. You can also cover it up with the tree.
Now peel off the black tree and place it over the sun.
Wax on, wax off. Your pumpkin is now complete.
And there you have it! The coolest pumpkins this side of Reseda.
Anyone else on the edge of their seat waiting for Cobra Kai season 3 to be released on Netflix? I’m clearing my calendar for a binge session on January 8, 2021!
More Fun Halloween Ideas
- No-Sew Baby Owl Hedwig Costume
- DIY Nightmare Before Christmas Wreath
- Fortnite Bush Costume
- How to Make a Fake Fire Prop for Halloween
- Nightmare Before Christmas Halloween Party
- Goonies Halloween Party
- Free Printable Halloween Party Invitations
Fall Favorites
- Easy Fall Stove Top Potpourri Recipe
- How to Make a Natural Fall Wreath
- Starbucks Caramel Apple Spice Recipe
- Apple and Pear Picking in Julian, CA
- Fall Bucket List Printable Punch Card
- Day of the Dead Skeleton DIY
![]()
Leave a Reply