

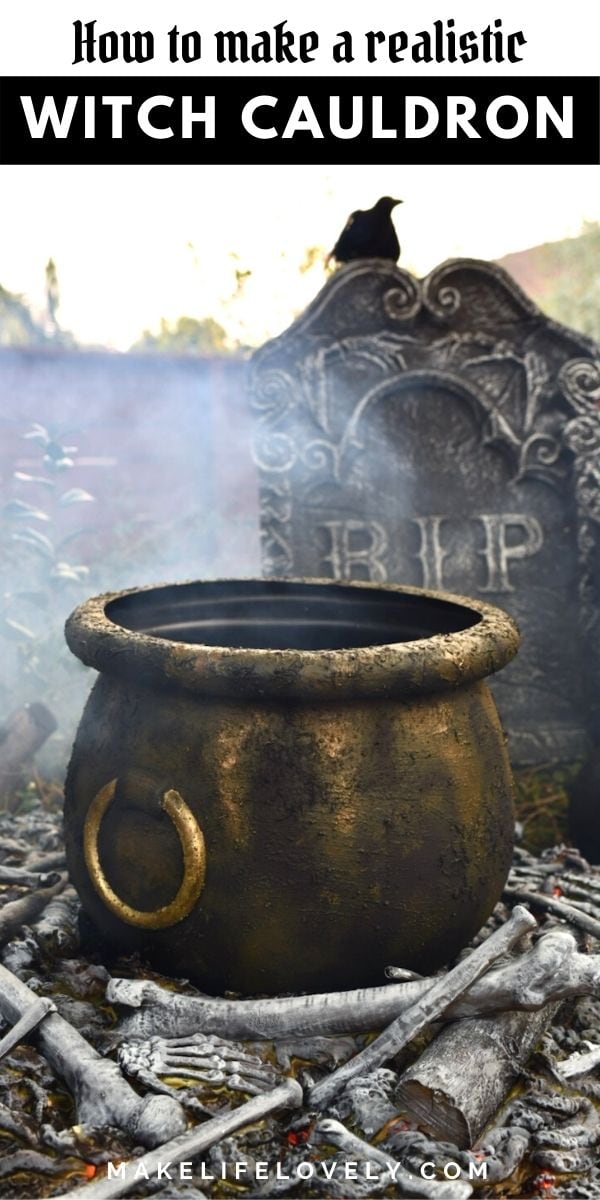
Learn how easy it is to transform a plain plastic Halloween cauldron into an old, worn witches cauldron that looks like old cast iron. It’s easy and the results are incredible!
Every Halloween I pull out my favorite large black cauldron and use it for Halloween decorating, or to add candy to for our church’s trunk or treat.
I love the shape and size of my cauldron, but I’m just not crazy about the shiny plastic look it has to it.
This year I wanted to add texture and depth to my witch cauldron with paint and two other things I’ll be sharing with you.
I just love the result!

DIY Witches Cauldron
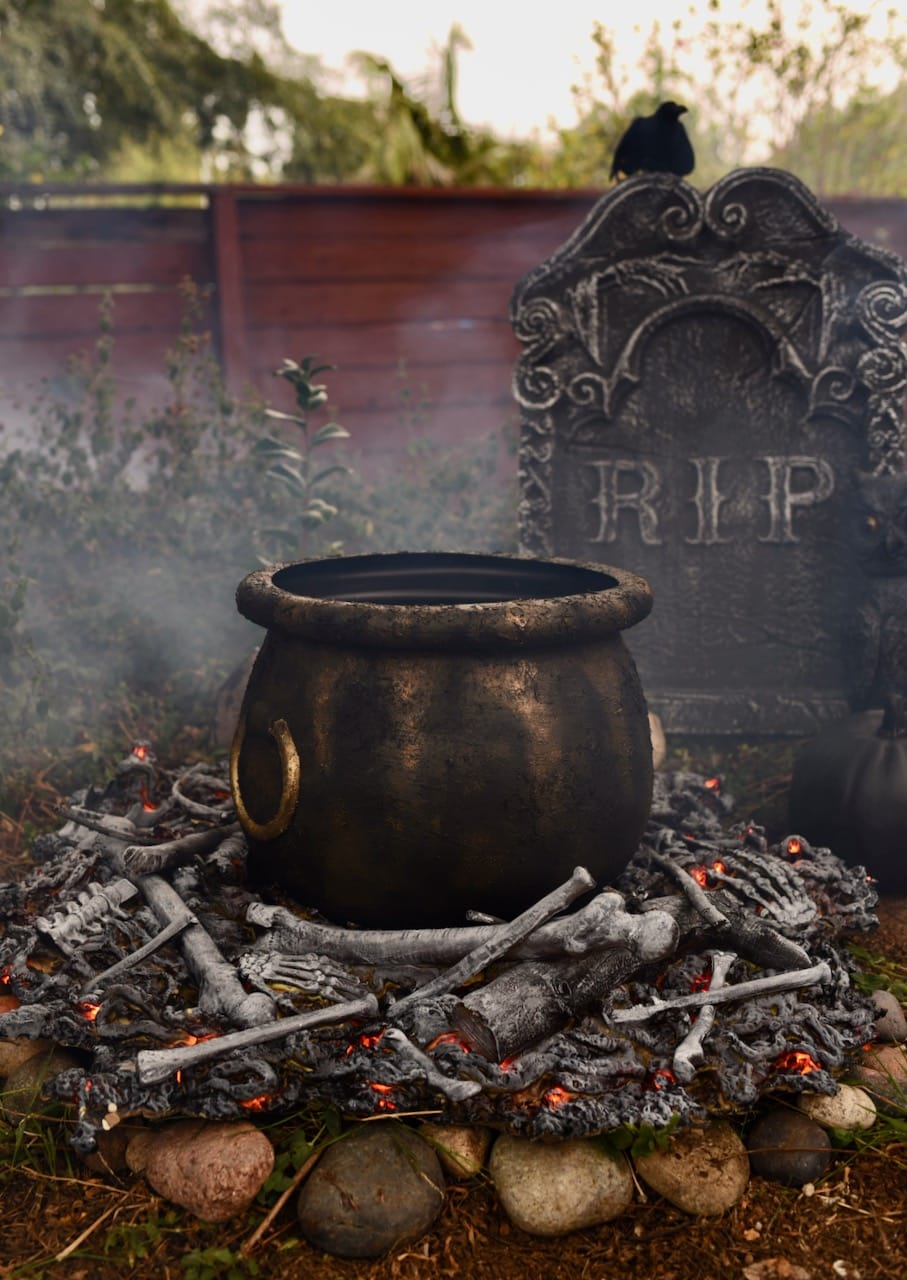
My witches cauldron is much more convincing and looks like it’s lasted through hundreds of years with bubbling toxic potion inside.
This would be perfect to use at a Halloween witch party, a gothic Halloween party, or a haunted forest Halloween party.
Keep reading to learn how to create your own realistic looking cast iron Halloween cauldron!
I placed mine over a very cool fake fire prop I create with just a few supplies.
You DON’T want to miss this fun tutorial that makes such a realistic fire out of spray foam!
Pair with our DIY Snow White poison apples or a DIY witch broom for even more creepiness.
VIDEO DIY + DEMONSTRATION
Want to see this cauldron and our fake fire prop in action?
Be sure to watch our video below and stick around until the end, where you can see how how these fun fire prop lights look during the day, evening, and at night!
This post contains affiliate links, which means I get paid a small percentage for any purchase made at no cost to you.
Realistic Halloween Cauldron Supplies
- Large cauldron (Mine came from Oriental Trading and came in a set of 3 different sizes. I used the large cauldron and it’s a great size!) This cauldron set from Amazon would work great too!
- Flat black spray paint (I used chalkboard paint because it’s the most matte spray paint)
- Brown paint
- Copper paint
- Matte Mod Podge
- Sand
- Spanish moss
- 2-3 foam brushes
How to Create the Perfect Witch Cauldron
Here’s what our cauldron looks like before- shiny and plastic-y, but with a great large shape and a handle on each side.

Add Texture to the Cauldron
To add some grit and years witch use to it, I mixed some sand with flat Mod Podge in a plastic cup.


The result was a gritty, goopy texture that I added all over the surface of my witch cauldron with a cheap foam brush.
Although the mixture looks white now, the Mod Podge dries clear.
This leaves behind the sandy texture on the cauldron.

Add More Texture
Now for even more texture!
I used this same technique again, but this time I cut up small pieces of Spanish moss with scissors.
Next I added them to Mod Podge and painted it on to create a thicker texture.
I added them around the top of the cauldron and in random places around the sides.
My goal was to make it look like years of chunky potion pieces that oozed and bubbled over in the pot and got crusty over the years.
Gross, right?!

I ended up pulling off any pieces that were a little too big that I didn’t cut as well with my scissors, then I let this dry completely before the next step.
Paint the Witches Cauldron Black
Next up was some flat black paint.
I first added a few coats of an ultra matte spray paint and I wasn’t impressed.
My cauldron still looked to shiny for my taste so I had to switch strategies.
I had half a can of chalkboard paint left over from a previous project so I tried adding a coat of that over the top.
It worked perfectly and gave me the total matte look I wanted.
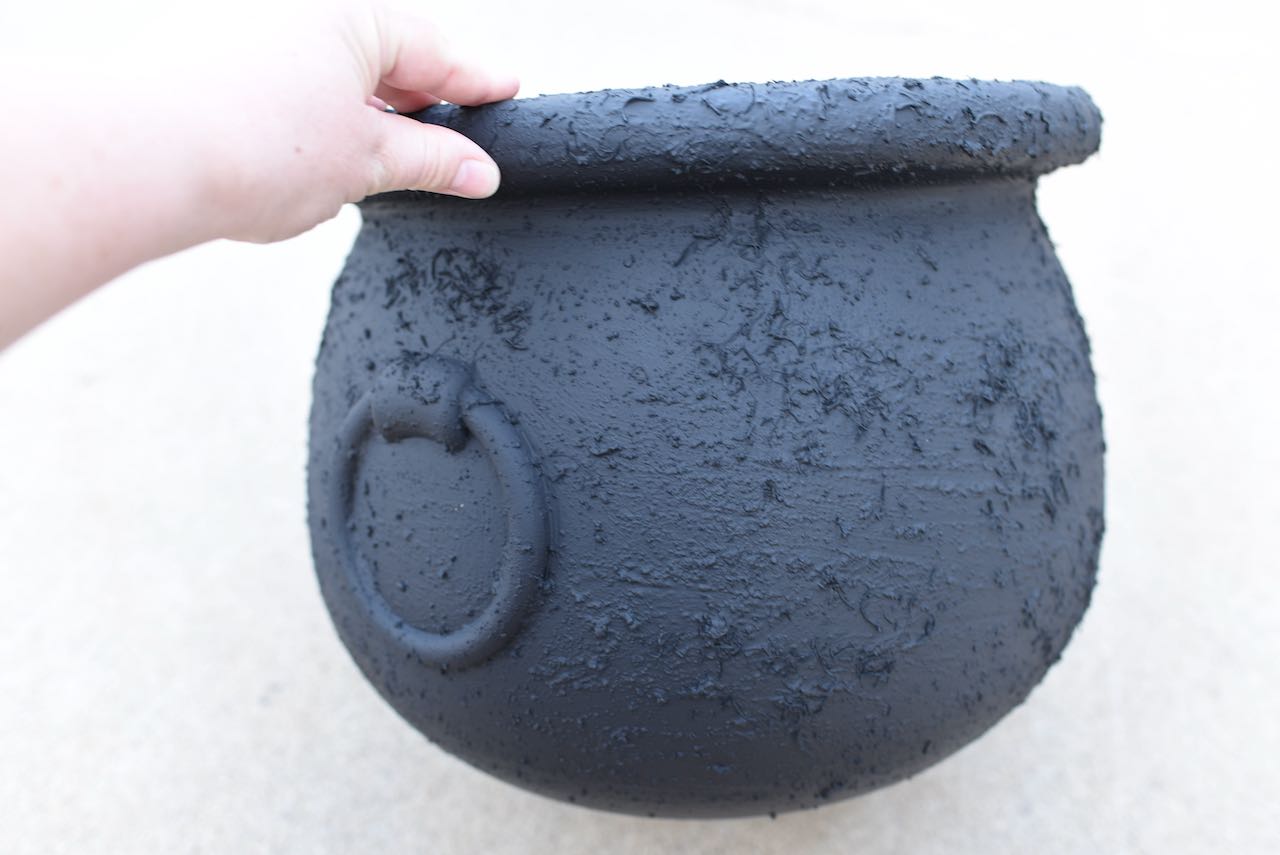
Be sure to use multiple light coats of spray paint instead of one coat with lots of paint.
This helps to get the best look with no paint drips on your cauldron.
Add Years of Cauldron Use with Paint
Now for the fun part!
I was loving the way my cauldron looked at this point with all of the texture I added, but it was a little too flat.
I knew paint would add some depth to my witch’s cauldron and make it look old and worn.
A dry foam brush was loaded with some brown paint and a little black paint added.
This made it look like rust and acidic potion caused discoloration over the years.
The key to this is using just a little paint at a time.
I would add a small amount of paint to my brush, then blot the brush on some cardboard to take off some of the excess paint.
I used this technique all over the cauldron, but added more towards the top and down the sides to look like witch’s brew bubbled over and dripped down the sides.
Sorry I don’t have a photo for this step.
I did this at night since I couldn’t wait until the next day because I was too excited!
The Finishing Touches
To finish off the cauldron, I added some gold metallic paint to the ring handles on the sides.
Next, I added a little more of the brown and black to take away some of the shine and make it look older.
I also added a tiny bit of copper to my brush to add a little bit of metallic to the cauldron.
I just LOVE how my witches cauldron turned out!
Can you believe the transformation?!

Place the Cauldron over a Faux Fire
To really take this project over the top, I created an incredible fake fire prop to go under the cauldron.
This faux fire complete with ashes and bones lights up and looks like real fire as it’s getting dark!

You won’t believe how easy it is to make this fire with spray foam, lights, fake bones, and paint.
Creepy, right?

It looks like the fire has been going for a while with ashes and burnt embers.
It’s the perfect accompaniment to your new cauldron!
Serve some witches fingers mozzarella sticks, Halloween spaghetti, Harry Potter pumpkin juice, or glow in the dark punch inside for a cool effect!
More Halloween and Fall Ideas
- Fall Stove Top Potpourri Recipe
- No-Sew Hedwig Baby Owl Costume
- DIY Fortnite Bush Costume
- Halloween Wood Sign with Cricut
- How to Make a Pumpkin Diorama
Halloween Party Ideas
- Free Printable Halloween Invitations
- Creative Ghostbusters Party
- Goonies Halloween Party
- Nightmare Before Christmas Halloween Party
Have you started getting ready for Halloween yet?
I’m pulling out my Halloween decorations this week.
So excited!
![]()
This tutorial was updated in October 2024 and was originally posted in September 2020.